
Tools & materials you'll need
Affiliate linksAs an Amazon Associate FixlyGuide earns from qualifying purchases — at no extra cost to you. Prices and availability are accurate as of publication and subject to change.
Quick Answer
When you've got a frustrating situation where one half of an electrical outlet is working perfectly, but the other half is completely dead, the most likely culprit is a loose wire connection within the outlet itself. This is especially true for outlets that were installed using the quick-connect 'backstab' method. The good news is that this is often a straightforward repair for the average homeowner, usually involving tightening a screw or re-terminating a wire. Before you panic and call an electrician, you can often diagnose and fix this issue in about 15-30 minutes with basic tools.
The Problem
You're trying to charge your phone, but one port works and the other doesn't. Or your lamp plugs into the top, and it's fine, but the vacuum cleaner won't run when plugged into the bottom. This isn't just an annoyance; it's a sign that something isn't right electrically. A half-dead outlet is distinct from an outlet that's completely dead (which often points to a tripped breaker or GFCI), or one that intermittently loses power (which could indicate a more serious wiring issue). The specific symptom of one working receptacle and one not strongly suggests a localized issue within the outlet's internal wiring or connections.
How It Works
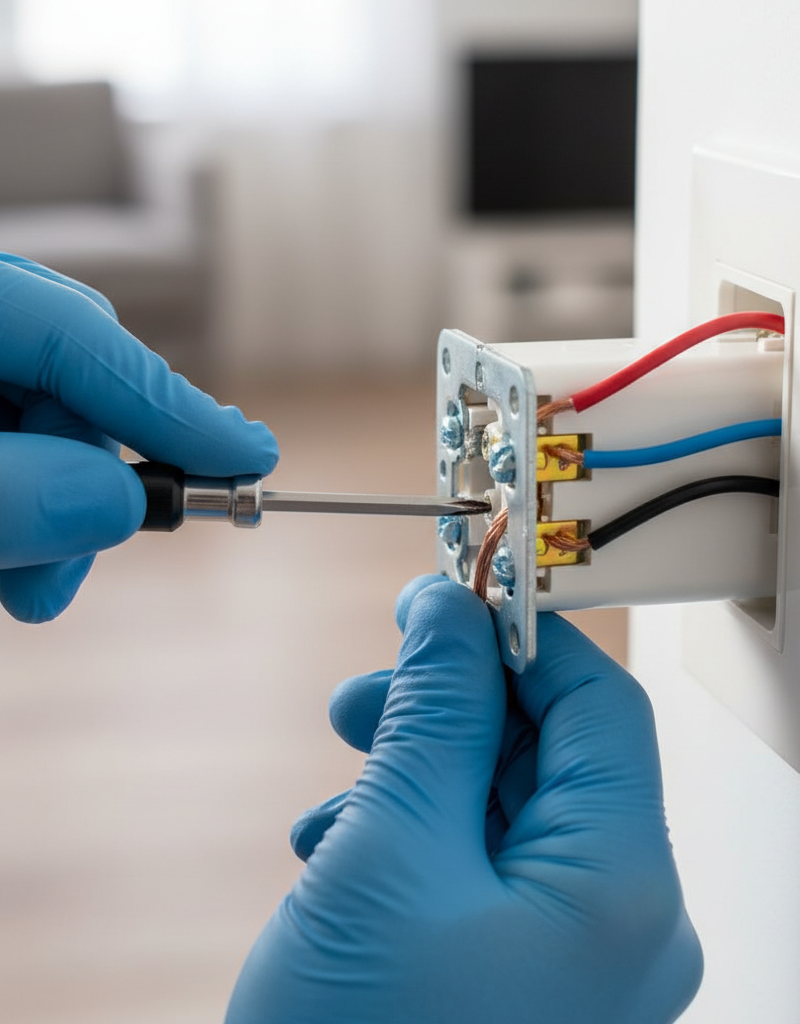
To understand why half an outlet might fail, it helps to know how a standard duplex receptacle is wired. Inside the plastic housing, each outlet has two separate receptacles (top and bottom), but they share common hot, neutral, and ground connections. Typically, the hot (black) wires connect to the brass-colored screws, the neutral (white) wires connect to the silver-colored screws, and the bare copper or green insulated wire connects to the green screw (ground). Most duplex outlets have two brass screws and two silver screws. These pairs of screws are often connected internally by a small metal tab. For standard installations, this tab is left intact, meaning both top and bottom receptacles receive power from the same hot and neutral feeds.
However, some outlets are designed with a removable tab on the hot (brass) side and sometimes the neutral (silver) side. This allows the outlet to be 'split' for specific uses, such as when one receptacle is controlled by a wall switch and the other is always hot. If this tab is broken or loose, or if a wire connected to only one screw terminal comes loose, it can result in only one of the two receptacles receiving power. The most common point of failure for single-receptacle issues tends to be the connections themselves, particularly if standard 14-gauge or 12-gauge solid copper wire was simply pushed into the 'backstab' holes rather than wrapped securely around the screw terminals. These backstab connections are notorious for loosening over time, especially with the expansion and contraction caused by heat cycles from electrical loads.
Step-by-Step Fix
Safety First! Always assume the wiring is live until you've verified it's off. Working with electricity can be dangerous. If at any point you feel uncomfortable or unsure, stop and call a licensed electrician.
1. Kill the Power — Locate your electrical panel and switch off the breaker controlling the affected outlet.
- Verify Zero Voltage: Use a non-contact voltage tester to confirm no power is flowing to the outlet. Plug in a small lamp or radio into the working half of the outlet; if it turns off when you flip the breaker, you've got the right one. Then test the dead half with the non-contact tester. Your goal is to see absolutely no indication of power.
2. Remove the Faceplate — Unscrew the single screw holding the plastic faceplate onto the outlet.
- Carefully set the screw and faceplate aside in a safe place where they won't get lost.
3. Pull Out the Outlet — Remove the two screws, usually top and bottom, that secure the outlet to the electrical box.
- Gently pull the outlet straight out of the electrical box. The wires will still be attached, so don't yank it. You'll likely have only a few inches of play.
- Inspect Wiring: Look for any loose or burnt wires. Pay close attention to any wires inserted into the small 'backstab' holes on the back of the outlet. These are common failure points.
4. Re-terminate Loose Wires (The Most Common Fix) — If you find any backstabbed wires or wires that seem loose on the screw terminals, re-secure them properly.
- For Backstabbed Wires: If a wire is in a backstab hole, twist it gently while pulling to remove it. You may need a tiny screwdriver to depress a release tab. Once out, strip about 3/4 inch of insulation, create a shepherd's hook bend with needle-nose pliers, and attach it firmly under the correct screw terminal (black to brass, white to silver, bare/green to green). Tighten the screw until snug, ensuring wire strands are fully captured.
- For Screw Terminal Wires: If a wire is already on a screw terminal but seems loose, remove it, visually inspect it for damage, re-bend if necessary, and re-attach it securely, tightening the screw firmly. Ensure all wire insulation is removed from under the screw, but no bare wire is exposed beyond the screw head.
5. Check the Break-Off Tabs — Inspect the small metal tabs connecting the two brass screws and the two silver screws.
- On the hot (brass) side, if this tab is broken or missing, only one receptacle will receive power. On rare occasions this can happen to the neutral (silver) side as well. If a tab is clearly broken, the outlet needs to be replaced.
6. Inspect for Damage — Look for any signs of arcing, melting, or discoloration on the outlet itself or the wires.
- If you see any damage, the outlet is likely faulty and should be replaced. Even minor signs of overheating warrant replacement.
7. Test for Power Again — Before re-installing, carefully turn the breaker back on and test both receptacles.
- Use a known-working device like a lamp or phone charger. If both now work, you’ve likely fixed the issue.
- Safety Note: Do not touch any bare wires while power is on. Keep your hands clear of the electrical box. If you have an outlet tester, use it now.
8. Turn Power Off (Again) and Re-install — Once verified, turn the breaker off and carefully push the outlet back into the box.
- Fold the wires neatly into the box to avoid pinching them when you push the outlet in. The ground wire (bare copper) should ideally be wrapped around the back of the device, creating a cushion.
- Secure the outlet with its mounting screws, then replace the faceplate.
9. Final Test — Restore power at the breaker and test both receptacles one last time.
Common Causes
- Loose 'Backstab' Connections: The most frequent culprit. Wires pushed into the quick-connect holes on the back of the outlet often lose their grip over time, especially with vibration or temperature changes.
- Loose Screw Terminal: Even wires wrapped around screw terminals can sometimes work themselves loose if not tightened adequately during installation.
- Broken Hot Tab (Split Receptacle): Less common, but sometimes the small metal tab connecting the two brass (hot) terminals can break, intentionally or accidentally. This prevents power from reaching one of the receptacles.
- Faulty Outlet: Internal damage or manufacturing defects can cause one half of an outlet to fail while the other continues to work.
- GFCI or AFCI Issue (Less Likely for Half Failure): While a tripped GFCI (Ground Fault Circuit Interrupter) or AFCI (Arc Fault Circuit Interrupter) will usually kill the entire outlet or even multiple outlets downstream, on rare occasions, internal faults within these specialized outlets or breakers themselves might manifest as partial failure.
Common Mistakes
- Not Shutting Off Power: The absolute most critical mistake. Always verify power is off with a non-contact voltage tester before touching any wires.
- Ignoring Backstab Connections: Dismissing these as a potential problem. Always re-terminate all backstabbed wires to the screw terminals for a more secure connection.
- Over-tightening Screws: Stripping the screw head or damaging the outlet. Tighten until snug, then give a quarter-turn more – typically around 12-14 inch-pounds of torque.
- Under-tightening Screws: Wires remain loose, leading to future problems or arcing. Ensure the wire is firmly captured and cannot be pulled out easily.
- Leaving Exposed Wire: Stripping too much insulation and leaving bare wire exposed creates a short-circuit hazard. Only the section under the screw head should be bare.
- Forgetting to Check Upstream GFCI/AFCI: While less likely for a half-dead outlet, if the fix above doesn't work, always check any GFCI or AFCI outlets or breakers that might be protecting the circuit, especially in bathrooms, kitchens, garages, or outdoor areas. However, these typically kill all power.
Cost & Time Breakdown
| Task | DIY Cost | Pro Cost | Time |
|---|---|---|---|
| Standard Outlet (if replacement needed) | $2–$5 | Included in service | 5–10 minutes |
| Outlet Tester (optional, but recommended) | $8–$15 | NA | NA |
| Diagnostic & Repair (DIY) | $0–$15 (if buying new tools) | $75–$200 (minimum service call) | 15–30 minutes |
| Professional Outlet Replacement | NA | $100–$250 | 30–60 minutes |
Tips & Prevention
- Use Screw Terminals: When installing or replacing outlets, always use the screw terminals for wire connections instead of the backstab holes. This provides a much more secure and reliable connection.
- Regular Inspections: Periodically (e.g., annually) check outlets, especially those with heavy usage or older installations. Look for loose plugs, discoloration, or warm faceplates – signs of potential issues.
- Avoid Overloading: Don't plug too many high-draw appliances into a single outlet. Use surge protectors for electronics, but ensure they don't draw more current than the circuit is designed for.
- Proper Wire Bending: When using screw terminals, bend the wire into a 'U' shape (clockwise) so it tightens under the screw heads effectively.
- Invest in a Voltage Tester: A non-contact voltage tester is an inexpensive and indispensable safety tool for any homeowner working with electricity.
When to Call a Professional
While fixing a half-dead outlet can often be a straightforward DIY task, there are clear instances when you should immediately stop and call a licensed electrician. If, after carefully following these steps, you still have no power to one or both receptacles, or if you observe any signs of electrical damage such as burning smells, smoke, melted plastic, or recurring tripped breakers, do not attempt further repair. If the wiring appears complex, like in a 3-way switch setup or a multi-wire branch circuit (where you see more than two hot or neutral wires), or if you're unsure about the type of wire or connections, it's safer to defer to a professional. Any issue involving aluminum wiring, which is common in some older homes and requires specific handling, should also be left to a qualified electrician to ensure safety and code compliance. Ignoring these signs or attempting repairs beyond your comfort level can lead to electrical fires, shocks, or further damage to your home's electrical system.
Related Articles
Keep troubleshooting with these hand-picked guides from FixlyGuide:
- The Secret Reason Half Your Wall Outlet Dies (And It's Not What You Think) — Discover why only half of your electrical outlet might be working and how to diagnose and fix the common culprit, saving you from a costly…
- The 7 Head-Scratching Reasons Your Outlet Died (Even With The Breaker On) — Discover the surprising reasons why an electrical outlet might stop working even when its circuit breaker is fully engaged, and how to safe…
- Why is Your Light Switch Hot? (The Hidden Danger Most Homeowners Miss) — A hot light switch isn't just uncomfortable; it's a critical warning sign of electrical issues that should never be ignored due to fire ris…
- Why Your Outlet Died (Even If the Breaker's On) — Discover the hidden reasons an electrical outlet stops working, even when the circuit breaker appears to be on, and learn simple diagnostic…
- The Hidden Reason Your Extension Cord Keeps Tripping the Breaker (and What to Do) — Discover why your extension cord might be tripping a circuit breaker and learn how to diagnose and fix common electrical issues safely.
- The #1 Reason Your AC Blows Warm Air (And It's Not What You Think) — A dirty air filter is often the overlooked culprit behind an air conditioner blowing warm air, hindering its ability to cool your home effi…
Frequently asked questions
Why does only one part of my electrical outlet work?+
The most common reason for a half-working outlet is a loose connection to one of the receptacles, particularly if the wires were connected using the 'backstab' method. The metal tab connecting the hot side of the two receptacles could also be broken.
Is a half-working outlet dangerous?+
Yes, a half-working outlet can be dangerous. Loose connections can generate heat, leading to arcing, fire hazards, or intermittent power delivery that can damage appliances. It's best to address the issue promptly.
Can I replace just half of an outlet?+
No, you cannot replace just half of an outlet. The two receptacles (top and bottom) are part of a single, integrated unit. If one half fails due to internal damage, the entire outlet device must be replaced.
What's the difference between backstab and screw terminal wiring?+
Backstab wiring involves pushing a stripped wire into a small hole on the back of the outlet for a quick connection. Screw terminal wiring involves looping a stripped wire around a screw and tightening it. Screw terminals are generally considered more secure and reliable than backstab connections.
Should I call an electrician for a half-dead outlet?+
You can often fix a half-dead outlet yourself by checking and re-securing loose wire connections. However, if you find any signs of burning, melted plastic, or are uncomfortable working with electricity, it's always best to call a licensed electrician.


Discussion
Loading comments…