
Tools & materials you'll need
Affiliate links- AmazonBright LED Flashlight1
- AmazonScrewdriver Set
- AmazonNon-Contact Voltage Tester
- AmazonMoisture MeterRecommended for detecting hidden leaks
- AmazonSturdy Stepladder
- AmazonBinocularsFor roof inspection from the ground
- AmazonNotebook and PenFor documenting findings
- AmazonCaulk Gun and Exterior Caulk1–2 tubes
As an Amazon Associate FixlyGuide earns from qualifying purchases — at no extra cost to you. Prices and availability are accurate as of publication and subject to change.
Quick Answer
Many homeowners overlook critical areas during their annual home inspection, focusing only on obvious problems. The most effective annual inspections involve a systematic, room-by-room and system-by-system review, checking for subtle signs of wear and tear, potential hazards, and efficiency losses. By following a structured checklist and understanding what to look for, you can catch minor issues before they escalate into expensive repairs.
The Problem
Homeowners often fall into one of two traps: either neglecting annual reviews entirely or conducting superficial walk-throughs that miss crucial signs of impending failure. This oversight can lead to unexpected and often expensive repairs, decreased energy efficiency, safety hazards, and a reduced lifespan for major home systems. For example, a clogged weep hole in a window frame might seem minor, but it can lead to hidden water damage and rot over time. Similarly, neglecting a small crack in a foundation can allow water intrusion, leading to mold or structural compromise. The core problem is a lack of structured, informed attention to the subtle indicators of deterioration that, if caught early, are easily and cheaply addressed.
How It Works
Your home is a complex, interconnected system of structural components, mechanical systems, and protective envelopes. Each part, from the roof shingles to the foundation, the plumbing P-traps to the electrical outlets, has a designed lifespan and specific points of vulnerability. An effective annual inspection isn't just about looking for obvious leaks or broken parts; it's about understanding how these systems should function and recognizing the early warning signs when they deviate from the norm.
For instance, the exterior envelope (roof, siding, windows) is designed to keep water out. If you see missing caulk, cracked mortar, or damaged shingles, you're observing a breakdown in that primary defense. Inside, your HVAC system relies on airflow; a dirty filter or blocked vent directly impacts its efficiency and longevity. Plumbing systems depend on proper drainage and sealed connections; a subtle stain on a ceiling or a musty smell in a cabinet can indicate a hidden leak. Electrical systems, while often out of sight, require secure connections and proper grounding; flickering lights or warm outlets are red flags. Understanding the basic function of each system allows you to interpret the "symptoms" you observe during an inspection and predict potential failures, enabling proactive fixes rather than reactive, emergency repairs. This proactive approach saves thousands of dollars and prevents major disruptions.
Step-by-Step Fix
1. Plan Your Attack – Create a comprehensive checklist before you start.
*   Mentally divide your home into distinct zones: Exterior, Roof (visible from ground), Attic, Kitchen, Bathrooms, Basement/Crawl Space, Living Areas, Utility Room. This systematic approach ensures no area is overlooked.
*   Gather your tools: flashlight, screwdriver set, non-contact voltage tester, moisture meter (optional but recommended), stepladder, pen and paper/tablet.
*   **Safety Note:** Never climb onto a roof if you are uncomfortable or if weather conditions are unfavorable. Use a reliable ladder and have a spotter if possible. For any electrical work, always ensure the power is off at the breaker.
2. Exterior Scrutiny – Examine your home's first line of defense.
*   **Foundation:** Walk around the entire perimeter. Look for horizontal cracks wider than 1/8 inch, vertical cracks that are settling, or any bowing. Check for proper soil grading away from the foundation (a minimum 6-inch drop over 10 feet is ideal).
*   **Siding/Brick:** Look for loose, cracked, or missing pieces. Note any areas of rot, especially around windows and doors. Check for peeling paint, which can indicate moisture issues.
*   **Windows & Doors:** Inspect caulk and weatherstripping for cracks, gaps, or deterioration. Open and close all windows and doors to ensure smooth operation and secure latches. Look for signs of moisture between double-paned glass.
*   **Gutters & Downspouts:** Ensure they are securely fastened and free of debris. Confirm downspouts extend at least 5-10 feet away from the foundation to prevent water accumulation.
*   **Landscaping:** Trim back shrubs and trees that touch the house, as they can conceal issues, trap moisture, and provide pest access.
3. Roof (Ground Level) & Chimney Check – Catch problems before they leak.
*   **Shingles:** Use binoculars. Look for missing, cracked, curled, or blistering shingles. Note any areas with excessive granule loss.
*   **Flashings:** Inspect around chimneys, vents, and valleys for lifted or corroded flashing. This is a common entry point for water.
*   **Chimney:** Check for loose or cracked mortar, especially at the crown. Ensure the cap is intact and clear of obstructions.
*   **If this doesn't work:** If you suspect extensive roof damage or can't get a clear view, consider hiring a drone inspection service or a professional roofer for a detailed report.
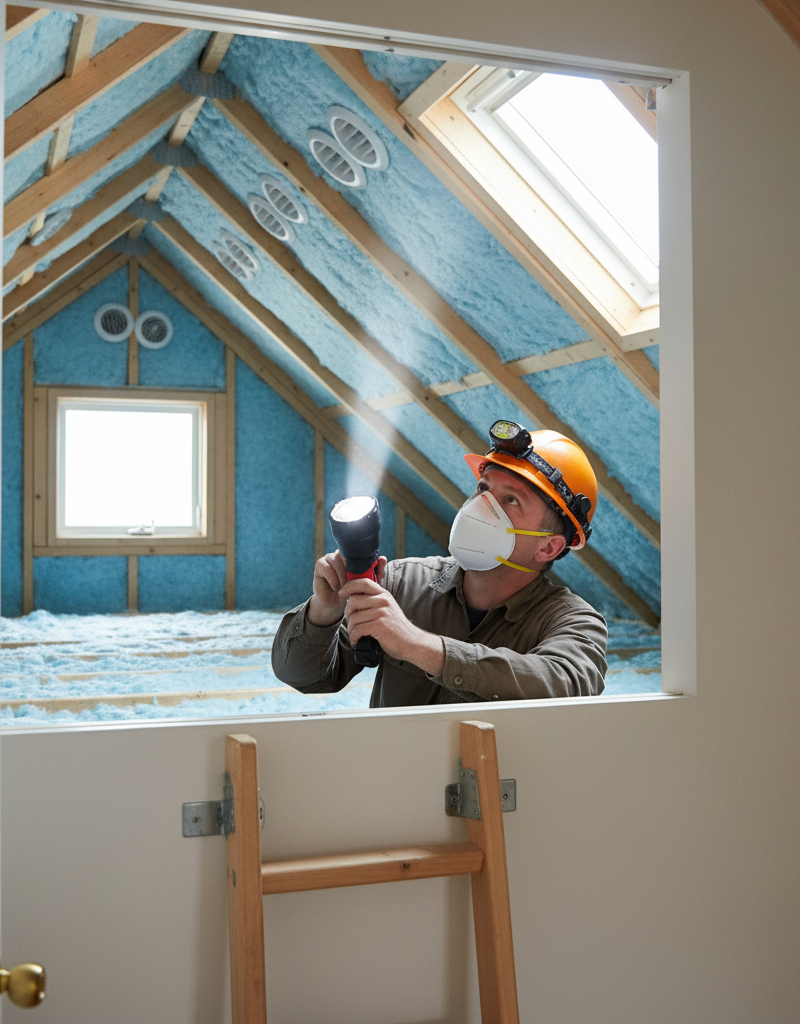
4. Attic Exploration – Uncover hidden insulation and ventilation issues.
*   **Insulation:** Verify insulation is evenly distributed and meets recommended R-values for your climate. Look for compressed or matted areas.
*   **Ventilation:** Ensure soffit and ridge vents are clear and unobstructed. Proper attic ventilation prevents moisture buildup and heat transfer.
*   **Moisture/Pests:** Look for water stains on the underside of the roof deck or rafters (indicating leaks), and signs of pest activity (droppings, nests, chewed wood).
*   **Wiring:** Check visible electrical wires for frayed insulation or exposed conductors. If you see this, turn off power and call an electrician.
*   **Safety Note:** Wear a mask, long sleeves, and gloves. Watch your step on joists; don't step between them. Bring a bright flashlight.
5. Kitchen & Bathrooms – The wet zones need close attention.
*   **Under Sinks:** Open cabinet doors. Look for active leaks, water stains, or musty odors. Wiggle faucet handles to check for looseness. Check P-traps for corrosion.
*   **Toilets:** Flush each toilet. Ensure it refills properly without constantly running. Look for wobbling and check for leaks at the base. Add a few drops of food coloring to the tank; if color appears in the bowl after 20 minutes, the flapper needs replacement.
*   **Showers/Tubs:** Inspect grout and caulk for cracks or mold. Turn on the shower and look for leaks around the faucet escutcheon and showerhead. Check the drain for slow drainage.
*   **Appliances (Kitchen):** Inspect refrigerator water lines (if applicable) for kinks or leaks. Check the dishwasher for leaks around the door gasket and connections. Clean exhaust fan filters.
6. Basement/Crawl Space / Utility Room – Key areas for structural and mechanical systems.
*   **Foundation Walls (Interior):** Look for efflorescence (white powdery deposits indicating moisture), bowing, or new cracks. Pay attention to corners and areas near utility penetrations.
*   **Pipes & Drains:** Check visible plumbing for leaks, corrosion, or sweating. Test floor drains by pouring a bucket of water down them to ensure they aren't clogged or dry (which allows sewer gases in).
*   **HVAC System:** Inspect the furnace/air handler for rust, unusual noises, or leaks. Change filters. Ensure exhaust vents are clear. Check condensate drain lines for blockages. **Pro Callout:** *Annual professional HVAC servicing is highly recommended.*
*   **Water Heater:** Check for rust at the bottom or on pipes. Test the temperature and pressure (T&P) relief valve by gently lifting the lever (have a bucket ready). *If no water comes out or it doesn't close properly, call a plumber.*
*   **Electrical Panel:** Ensure the panel cover is secured. *Do NOT open the electrical panel yourself unless you are a qualified electrician.* Look for tripped breakers.
*   **Safety Note:** Never attempt DIY repairs on gas lines or high-voltage electrical components. These require licensed professionals. In crawl spaces, wear protective gear and be aware of pests, sharp objects, and potential moisture.
7. Interior Living Spaces – Small details make a difference.
*   **Walls & Ceilings:** Look for water stains, cracks, or signs of settling (e.g., doors that no longer close properly).
*   **Flooring:** Check for loose or damaged tiles/boards. Note any soft spots or squeaks, which could indicate subfloor issues.
*   **Electrical Outlets & Switches:** Test GFCI outlets with their test/reset buttons. Ensure all outlets have covers and are securely fastened. Use a non-contact voltage tester to check for proper grounding.
*   **Smoke & Carbon Monoxide Detectors:** Test all detectors. Replace batteries annually, or the entire unit every 7-10 years (smoke) and 5-7 years (CO).
*   **Doors:** Check all interior doors for smooth operation, proper latching, and secure hardware.
Common Causes
- Lack of Regular Maintenance: Many components simply degrade over time and with use. Neglecting routine tasks like cleaning gutters or changing air filters accelerates this process.
- Environmental Exposure: Weather (sun, rain, snow, wind), temperature fluctuations, and humidity all contribute to wear and tear on exterior components and can cause moisture issues inside.
- Poor Installation or Previous Repairs: Sometimes issues stem from initial faulty construction or incorrect repairs done by previous owners or unqualified workers.
- Pest Infestations: Rodents and insects can cause significant damage to wiring, insulation, and wooden structures if not caught early.
- Material Lifespan: Every material has a finite lifespan. Roofing, caulk, sealants, appliance components, and even pipes eventually degrade and fail.
- Ground Movement/Settling: Houses can settle over time, leading to minor foundation cracks or shifts in framing that manifest as cracks in walls or misaligned doors.
Common Mistakes
- Ignoring Subtle Signs: Many homeowners wait for a major leak or breakdown instead of investigating small clues like a slight stain, a musty smell, or a flickering light.
- Skipping the Hard-to-Reach Areas: Attics, crawl spaces, and even under sinks often get overlooked because they're inconvenient to access, yet these are prime locations for hidden problems.
- Not Documenting Findings: Forgetting to write down what you find, where it is, and when you found it means you'll miss tracking recurring issues or knowing what needs attention next year.
- Using the Wrong Tools: Trying to inspect a dim attic without a bright flashlight, or not having a moisture meter when investigating a suspicious stain, can lead to missed diagnoses.
- Attempting Dangerous Repairs: Tackling electrical panel work, unidentifiable gas leaks, or significant structural issues without professional expertise puts your home and safety at extreme risk.
- Focusing Only on Aesthetics: Repairing a peeling paint spot without investigating why the paint is peeling (e.g., moisture intrusion) only addresses the symptom, not the root cause.
Cost & Time Breakdown
| Task | DIY Cost | Pro Cost | Time |
|---|---|---|---|
| Comprehensive Inspection | $0 (your time) | $300 – $600 | 2–4 hours |
| Gutter Cleaning | $0 – $20 | $75 – $200 | 30–60 minutes |
| Caulk/Weatherstripping Repair | $10 – $50 | $100 – $300 | 1–2 hours |
| Smoke/CO Detector Batteries | $10 – $30 | Included in service | 5–10 minutes |
| HVAC Filter Replacement | $15 – $40 | Included in service | 5 minutes |
| Toilet Flapper Replacement | $5 – $15 | $75 – $150 | 15–30 minutes |
Tips & Prevention
- Seasonal Spot Checks: Supplement an annual comprehensive inspection with quick seasonal checks. For example, clear gutters in fall, check for drafts in winter, and inspect AC condenser in spring.
- Keep a Maintenance Log: Create a simple spreadsheet or notebook to record all inspections, repairs, and appliance maintenance. Include dates, costs, and notes.
- Know Your Home's Age & History: Older homes may require more frequent attention to specific systems. Knowing when your roof, water heater, or HVAC system were installed helps predict upcoming major expenses.
- Invest in Basic Diagnostic Tools: A good flashlight, a multi-meter, and a moisture meter are invaluable for homeowner diagnostics.
- Address Issues Promptly: Small problems don't fix themselves; they almost always get worse and more expensive if ignored.
- Leverage Manufacturer Manuals: Keep manuals for all major appliances and systems. They often contain specific maintenance schedules and troubleshooting tips.
When to Call a Professional
While an annual home inspection is a vital DIY task, certain issues demand the expertise of a licensed professional. If you detect a gas smell, immediately evacuate and call your gas company. Any signs of active structural movement, significant foundation cracks (wider than 1/4 inch, stepped, or horizontal), or major water intrusion that you can't identify the source of, require a structural engineer or a qualified general contractor. For persistent electrical issues like frequent breaker trips, warm outlets, or flickering lights that aren't easily resolved by simple checks, contact a licensed electrician to prevent fire hazards. Plumbing problems involving the main water supply, sewer line backups, or persistent leaks after basic troubleshooting warrant a licensed plumber. Never attempt to repair or inspect anything that involves high-voltage electricity, gas lines, or could compromise your home's structural integrity if you lack the specific training and tools.
Related Articles
Keep troubleshooting with these hand-picked guides from FixlyGuide:
- The 7 Critical Home Inspection Checks Most Homeowners Miss (and How to Do Them Yourself) — Discover the essential annual home inspection checks many homeowners overlook and learn how to perform them yourself to prevent costly repa…
- The $30 Secret to Banishing Ice Dams From Your Roof (Before They Destroy It) — Learn safe and effective methods to remove ice dams from your roof and prevent costly damage to your home's structure and interior.
- Is Your Roofline Hiding a $10,000 Secret? 7 Warnings Your Soffit & Fascia Are Failing — Discover the critical signs of soffit and fascia damage that could indicate widespread problems and how to properly address them before the…
- The 3 Critical Mistakes Homeowners Make Inspecting Their Roof (From the Ground) — Learn how to spot damaging roof problems safely from the ground, avoiding common pitfalls and knowing exactly what to look for.
- The $20 Trick That Melts Ice Dams (and Saves Your Roof) — Discover a surprisingly simple, budget-friendly method to safely remove ice dams and prevent costly roof damage to your home.
- The #1 Mistake Homeowners Make When Protecting Pipes From Freezing — Preventing frozen pipes is crucial in winter; many homeowners make a common mistake that leaves their plumbing vulnerable.
Recommended for DIYers & woodworkers
Sponsored
The Top 20 Tools for Workshops of Any Budget
No stationary machines or power tools required — plus 3 fundamental tools that can't be bought at any price.
Get the free guide
Ted's Woodworking — The #1 Woodworking Resource
Detailed instructions, dimensioned drawings, materials & cutting lists, and 3D schematics for every skill level.
See the plansSponsored: links above are affiliate links. FixlyGuide may earn a commission on qualifying purchases — at no extra cost to you.
Frequently asked questions
How often should a homeowner inspect their home?+
While a professional inspection is recommended every 3-5 years, homeowners should conduct a thorough, systematic annual inspection themselves. Supplement this with quick seasonal checks throughout the year to catch issues early.
What are the most common overlooked areas in a home inspection?+
Homeowners often overlook attics, crawl spaces, the inside of electrical panels (should only be visually inspected or by a pro), around chimney flashings, and the proper grading around the foundation. These areas frequently hide significant problems.
Can I do a home inspection myself, or do I need a professional?+
You can and *should* perform an annual DIY home inspection for preventative maintenance. However, for a comprehensive overview before buying/selling or if you find serious issues (like significant foundation cracks, persistent electrical problems, or gas leaks), always call a licensed professional inspector or specialized contractor.
What tools do I need for a DIY home inspection?+
For a basic DIY home inspection, you'll need a bright flashlight, a screwdriver set, a non-contact voltage tester, a moisture meter (recommended), a sturdy stepladder, and binoculars for roof inspection from the ground. A notepad or tablet for documentation is also essential.
What are red flags that indicate I should call a professional immediately?+
Immediate professional help is needed for gas smells, significant structural cracks, major water intrusion with an unknown source, persistent electrical problems (tripping breakers, warm outlets), or any concerns about your main plumbing or HVAC systems that you cannot safely diagnose or fix.


Discussion
Loading comments…