
Tools & materials you'll need
Affiliate linksAs an Amazon Associate FixlyGuide earns from qualifying purchases — at no extra cost to you. Prices and availability are accurate as of publication and subject to change.
Quick Answer
Many common home issues arise from neglected spring maintenance tasks. Addressing overlooked areas like grading, dryer vents, and HVAC coils annually can prevent significant damage, extend appliance life, and improve home efficiency. Proactive attention to these items during spring can save thousands in future repair costs by catching small problems before they escalate.
The Problem
As the snow melts and temperatures rise, spring often brings a sense of renewal to our homes. We open windows, clean out gutters, and perhaps even power wash the siding. However, beneath the surface of these visible spring cleaning rituals lie a handful of critical maintenance tasks that are frequently overlooked. These aren't the glamorous jobs, but their neglect can lead to substantial financial headaches, structural damage, and diminished home efficiency. From subtle shifts in landscape grading around your foundation to the insidious buildup in your dryer vent, ignoring these seemingly minor details can result in anything from a flooded basement and mold growth to a house fire or premature HVAC system failure. The real problem isn't just the damage itself, but the homeowner's unawareness that these silent issues are slowly eroding their home's value and safety.
How It Works
Understanding the 'why' behind these overlooked tasks is crucial for appreciating their importance. Take landscape grading, for example. Your home's foundation is its bedrock, designed to keep water out. When the ground immediately surrounding your home slopes towards the foundation, even by a small degree (the ideal is a 6-inch drop over 10 feet), rainwater and snowmelt collect there instead of draining away. This constant moisture can penetrate foundation walls, leading to cracks, efflorescence (white mineral deposits), damp basements, and even structural instability over time. The hydrostatic pressure from saturated soil can be immense.
Next, consider the dryer vent. Every time you run your dryer, not all lint is caught by the lint trap. A significant amount escapes into the exhaust duct. This lint is highly flammable. As it accumulates in the vent hose and at the exterior vent cap, it reduces airflow. This forces the dryer to work harder, increasing drying times and operational costs. More critically, the reduced airflow causes the heating mechanism to overheat, creating a perfect storm for a lint fire. According to the U.S. Fire Administration, clothes dryers cause approximately 2,900 home fires annually, resulting in an estimated 5 deaths, 100 injuries, and $35 million in property loss each year.
Then there's your HVAC system's outdoor condenser coil. This coil is responsible for releasing heat from your home (in cooling mode) or absorbing it (in heating mode, for heat pumps). Composed of delicate fins, it's exposed to the elements, inevitably accumulating dirt, dust, leaves, grass clippings, and pollen. When these fins become caked with debris, the system can't efficiently exchange heat. This forces the compressor to work harder, consuming more electricity, reducing cooling capacity, and accelerating wear and tear on expensive components. A dirty coil can reduce efficiency by 5-15% and shorten the lifespan of your unit by several years.
Finally, the silent threat of window and door seal degradation. Over time, the caulk and weatherstripping around these openings can crack, shrink, or become brittle due to UV exposure and temperature fluctuations. These breaches create pathways for air infiltration, meaning your conditioned indoor air escapes and unconditioned outdoor air enters. This leads to drafts, uncomfortable temperature swings, and, most notably, a significant increase in your heating and cooling bills. A small gap can be as impactful as an open window in terms of energy loss. Similarly, siding inspection is often neglected. Small cracks, loose panels, or rotting areas in your home's exterior are not just cosmetic; they're entry points for water, pests, and air leaks, compromising your home's envelope and inviting serious structural rot and mold issues.
Step-by-Step Fix
1. Restore Proper Landscape Grading — Inspect and correct your home's immediate perimeter for negative slopes.
- Inspect the Slope: Walk around your entire foundation. Look for areas where the ground visibly slopes towards the house, or where water tends to pool after rain. A good rule of thumb is a minimum 6-inch drop over the first 10 feet away from the foundation.
- Add Soil: Purchase good quality topsoil or a soil/compost mix. Using a shovel or rake, gradually build up the soil nearest the foundation, tapering it down gradually for at least 6 to 10 feet out. Ensure the new soil level is at least 6-8 inches below your siding or brick line to prevent moisture wicking and wood rot.
- Consider Downspout Extensions: If downspouts are discharging water right next to the foundation, add extensions to direct water at least 5-10 feet away from the house.
2. Deep Clean Your Dryer Vent — Clear out flammable lint buildup from the entire vent line.
- Unplug and Disconnect: Pull your dryer away from the wall and unplug it. Carefully disconnect the vent hose from the back of the dryer and from the wall vent.
- Clean the Vent Hose: Use a specialty dryer vent brush (a long, flexible brush) to thoroughly clean the inside of the disconnected vent hose. Remove all lint. Replace any crushed or damaged flexible foil vent hoses with rigid metal ducting for better airflow and fire safety.
- Clean the Wall Duct: Insert the dryer vent brush into the wall duct opening and clean as far as you can reach. If you have an exterior vent on an upper floor, you may need a longer, extendable brush kit or hire a professional if you cannot safely access it.
- Inspect Exterior Vent: Go outside and clear any lint from the exterior vent hood. Ensure the flap opens and closes freely. Remove any bird nests or obstructions.
- Reconnect and Test: Reconnect the vent hose securely to both the dryer and the wall. Plug in the dryer and run it on an air-only cycle to check for proper airflow and ensure no leaks.
3. Power Wash and Clear HVAC Condenser Coils — Remove debris and improve heat exchange efficiency.
- Safety First: Turn off the power to your outdoor HVAC unit at the disconnector box (usually a small box mounted on the wall near the unit) or at your main electrical panel.
- Clear Large Debris: Carefully remove any large leaves, twigs, or grass clippings from around and inside the unit. You can use a shop vac for this.
- Gently Clean Fins: Using a garden hose with a spray nozzle (not a high-pressure washer, which can damage fins), spray the condenser fins from the inside out to push dirt away. Be gentle to avoid bending the delicate aluminum fins. If fins are heavily caked, use a specialized coil cleaner spray (available at home improvement stores) following product instructions.
- Straighten Bent Fins: Use a fin comb (a specific tool available at HVAC supply stores or online) to carefully straighten any bent fins. This improves airflow.
- Restore Power: Once completely dry, restore power to the unit.
4. Re-caulk and Weatherstrip Windows & Doors — Seal air leaks to improve energy efficiency and comfort.
- Inspect Existing Seals: Examine the caulk joints around window and door frames, both inside and out. Look for cracks, gaps, shrinking, or areas where the caulk has pulled away.
- Remove Old Caulk: Use a utility knife and a caulk removal tool to scrape away old, failing caulk. Clean the surface thoroughly with a wire brush and cleaner.
- Apply New Caulk: Using a caulk gun, apply a continuous, even bead of high-quality exterior-grade sealant (silicone or siliconized acrylic latex) around the frames. Smooth the bead with a wet finger or caulk tool immediately after application.
- Check Weatherstripping: Inspect the weatherstripping around the perimeter of your doors and operable windows. Look for compressed, torn, or missing sections.
- Replace Weatherstripping: Peel off old, damaged weatherstripping. Clean the surface. Apply new self-adhesive foam, rubber, or v-strip weatherstripping, ensuring a tight seal when the door/window is closed. A good test is to close the door/window on a piece of paper; if you can pull it out easily, the seal isn't tight enough.
5. Thorough Siding Inspection and Repair — Prevent water intrusion and maintain integrity.
- Walk-Around Inspection: Critically examine all exterior siding panels, paying close attention to areas around windows, doors, corners, and where different materials meet. Look for cracks, chips, warping, loose panels, holes, signs of rot (soft or spongy wood), blistering paint, or evidence of insect activity.
- Repair Small Cracks/Holes: For small cracks in vinyl or fiber cement siding, use an exterior-grade caulk to seal them. For small holes, special patching compounds are available.
- Re-secure Loose Panels: For loose vinyl siding, use a zip tool to unlock and re-lock panels. For wood or fiber cement, use exterior-grade nails or screws to re-secure loose sections.
- Address Rot: If you find significant rot, especially around windowsills or trim, it indicates a deeper moisture issue. Small areas can sometimes be cut out and patched with wood filler, but extensive rot requires replacing the affected siding section.
- Clean and Prepare: Pressure wash siding if needed (use appropriate pressure for your siding type) to remove grime before extensive repairs or painting. This also helps reveal hidden issues.
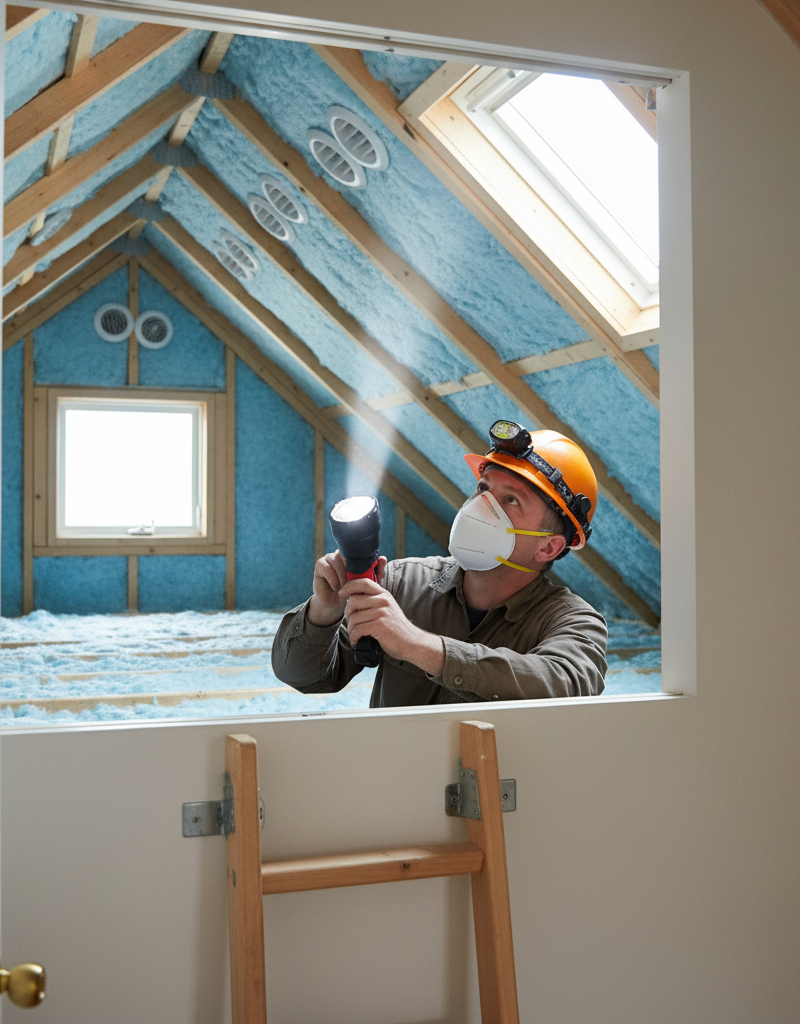
6. Inspect and Clean Attic Vents and Soffits — Ensure proper attic ventilation to prevent moisture and heat buildup.
- Visual Check: From the exterior, look at your attic ridge vents and soffit vents (under the eaves). Ensure they are clear of leaves, bird nests, or other obstructions.
- Interior Inspection: In the attic (wear a mask and use a flashlight), check that insulation isn't blocking the soffit vents. If it is, install rafter vents (baffles) to maintain a clear path for airflow.
- Clear Debris: Use a shop-vac or gloved hands to carefully remove any visible debris from vent openings. Proper attic ventilation prevents moisture buildup, which can lead to mold, rot, and higher cooling costs in summer.
7. Test and Document Sump Pump Operation — Confirm critical flood prevention is functional.
- Locate and Inspect: Find your sump pump pit, usually in the basement or crawl space. Ensure it's clear of debris.
- Manual Test: Slowly pour several gallons of water into the sump pit. The float switch should rise, activating the pump. The pump should then discharge the water and shut off automatically once the water level drops. Listen for unusual noises.
- Check Discharge Line: Go outside and ensure the discharge line is clear and directs water well away from your foundation, ideally at least 10 feet.
- Clean (If Needed): If the pump seems sluggish or makes unusual noises, unplug it, disconnect it, and clean any debris from the impeller and check valve. Consult the manufacturer's instructions for specific cleaning steps.
- Record Date: Make a note of the date you tested it. Regular testing (at least annually in spring, or before forecasted heavy rain) ensures it's always ready.
Common Causes
- Neglect and Lack of Knowledge: Many homeowners simply don't know about these critical maintenance items or underestimate their importance.
Related Articles
Keep troubleshooting with these hand-picked guides from FixlyGuide:
- The 7 Overlooked Spring Maintenance Tasks That Save You Hundreds — Learn the often-missed spring home maintenance tasks that can prevent costly damage and save you money in the long run.
- The 7 Critical Home Inspection Checks Most Homeowners Miss (and How to Do Them Yourself) — Discover the essential annual home inspection checks many homeowners overlook and learn how to perform them yourself to prevent costly repa…
- The 7 Critical Spring Home Tasks Most Homeowners Forget (And Why You Shouldn't) — Don’t just prune bushes; tackle these often-overlooked spring maintenance items to protect your home’s value and prevent costly repairs.
- The 7 Critical Spots Homeowners Miss in Their Annual Inspection — Discover the seven often-overlooked areas in your home's annual inspection that can prevent costly repairs and maintain your property's val…
- The 30-Second Sump Pump Test That Prevents Flooding (Most Homeowners Skip It) — Discover how a simple 30-second test can prevent catastrophic basement flooding by ensuring your sump pump is ready for the rainy season.
- The 9 Sneaky Filters Stealing Your Home's Efficiency (And How to Fix It) — Unseen or neglected filters throughout your home can secretly inflate utility bills, degrade air quality, and lead to expensive appliance b…
Recommended for DIYers & woodworkers
Sponsored
The Top 20 Tools for Workshops of Any Budget
No stationary machines or power tools required — plus 3 fundamental tools that can't be bought at any price.
Get the free guide
Ted's Woodworking — The #1 Woodworking Resource
Detailed instructions, dimensioned drawings, materials & cutting lists, and 3D schematics for every skill level.
See the plansSponsored: links above are affiliate links. FixlyGuide may earn a commission on qualifying purchases — at no extra cost to you.
Frequently asked questions
How often should I clean my dryer vent?+
The dryer vent should be cleaned at least once a year, or more frequently (every 6 months) if you use your dryer heavily, have pets, or notice clothes taking longer to dry.
What's the ideal slope for grading around my foundation?+
Ideally, the ground around your foundation should slope away from the house with a drop of at least 6 inches over the first 10 feet. This ensures proper water drainage and prevents foundation issues.
Can a dirty HVAC coil really increase my energy bills?+
Yes, a dirty outdoor HVAC condenser coil can significantly increase your energy bills. When the coil is caked with dirt and debris, the system has to work much harder to dissipate heat, leading to reduced efficiency and higher electricity consumption.


Discussion
Loading comments…