
Tools & materials you'll need
Affiliate linksAs an Amazon Associate FixlyGuide earns from qualifying purchases — at no extra cost to you. Prices and availability are accurate as of publication and subject to change.
Quick Answer
Low pressure in a kitchen sink sprayer is often a minor issue, usually stemming from mineral buildup in the spray head, a clogged diverter valve inside the faucet body, or a kink or blockage in the sprayer hose. You can usually diagnose and fix these problems in under an hour with basic tools or even just your hands, restoring your sprayer to full power without needing a plumber.
The Problem
Imagine trying to rinse stubborn food off dishes or clean the corners of your sink, only to be met with a pathetic dribble from your kitchen sink sprayer. This isn't just an annoyance; it's a breakdown in the functionality of a tool designed to make kitchen cleanup easier and more efficient. A weak sprayer stream can leave food particles behind, prolong rinsing times, and generally disrupt your kitchen routine. Often, homeowners jump to conclusions about major plumbing issues, but the reality is that low sprayer pressure almost always has a simple, localized cause within the faucet assembly itself.
How It Works
Understanding how your kitchen sink sprayer works helps pinpoint the problem. When you activate your sprayer, water is diverted from the main faucet spout through a hose to the spray head. This diversion is managed by a component called a diverter valve, typically located within the main body of your faucet. Think of the diverter as a tiny gatekeeper. When the main faucet is on, water flows primarily to the spout. When you press the sprayer trigger, the diverter shifts, closing off or restricting the flow to the spout and directing water into the sprayer hose instead.
Inside the sprayer head itself, there's usually an aerator or a series of small nozzles designed to shape the water flow into a strong, focused spray. These tiny openings are highly susceptible to mineral deposits, especially in homes with hard water. Over time, calcium, lime, and other dissolved solids precipitate out of the water and accumulate, constricting the flow path. Similarly, sediment or debris can get trapped in the diverter valve, preventing it from fully shifting and diverting water effectively. A kink or obstruction within the flexible hose connecting the diverter to the spray head can also restrict water flow, leading to low pressure at the nozzle. When any of these components become compromised, the result is a noticeably weaker spray.
Step-by-Step Fix
1. Clean the Sprayer Head — Start with the simplest and most common culprit: mineral buildup.
- Safety First: Turn off the water supply to your kitchen sink at the shut-off valves typically located under the sink. Turn on the main faucet to drain any residual water from the lines.
- Gather Tools: You'll likely need an adjustable wrench, needle-nose pliers, an old toothbrush, white vinegar, and a small container.
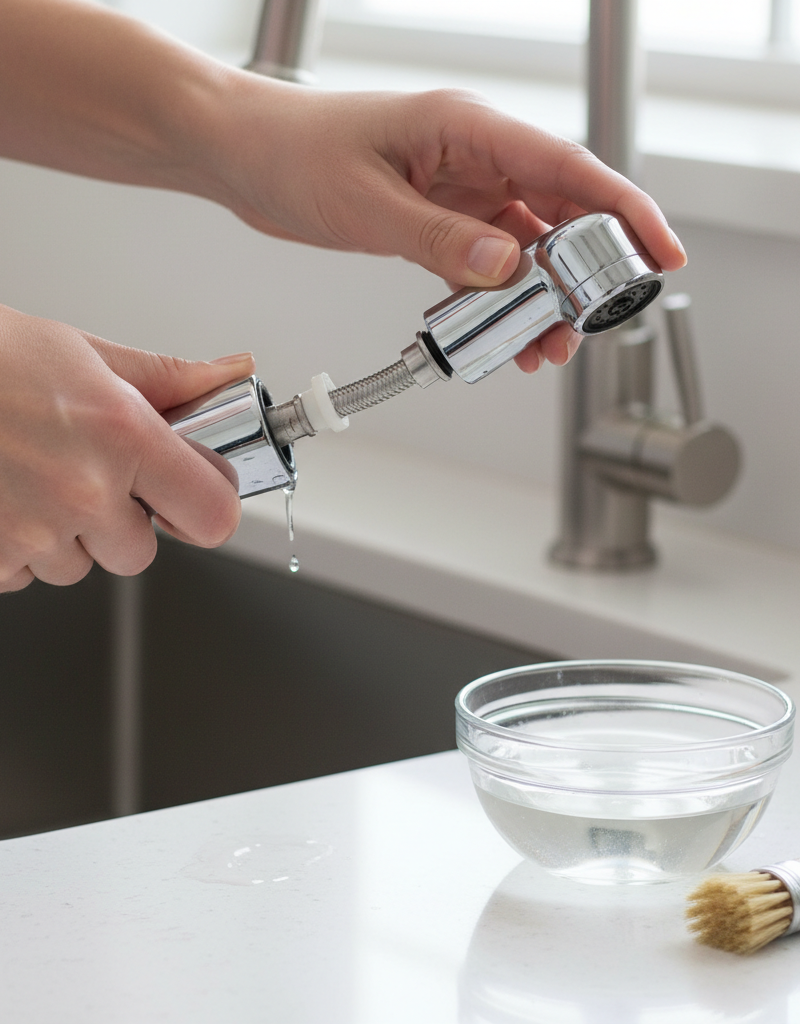
- Remove the Sprayer Head: Unscrew the spray head from the hose by hand if possible, or gently use an adjustable wrench if it's tight. Be careful not to damage the finish.
- Disassemble (if possible): Many sprayer heads have a removable aerator or faceplate. Use needle-nose pliers or a small screwdriver to carefully pry it off if designed to be removed. Note the order of any small parts, like rubber gaskets or screens.
- Soak and Scrub: Place the disassembled parts (or the entire head if it doesn't come apart) in a small bowl filled with white vinegar. Let it soak for 30 minutes to several hours, or even overnight for heavy buildup. The vinegar will dissolve mineral deposits. Use the toothbrush to scrub away any softened gunk.
- Rinse and Reassemble: Thoroughly rinse all parts under clean water. Check that all small holes are clear. Reassemble the sprayer head, making sure any gaskets or screens are properly seated. Reattach it to the hose.
- Test: Turn the water supply back on and test the sprayer. If the pressure is restored, you're done!
2. Check the Sprayer Hose for Kinks or Obstructions — A restricted hose can stop water flow before it even reaches the head.
- Under the Sink: Locate the sprayer hose extending from the faucet body to the sprayer head. It's usually a flexible, reinforced plastic or braided metal hose.
- Inspect Visually: Carefully examine the entire length of the hose for any visible kinks, tight bends, or folds, especially where it might get pinched against the garbage disposal, pipes, or other items under the sink. Straighten any kinks you find.
- Feel for Obstructions: Run your hand along the hose, feeling for any hard lumps or areas that feel blocked internally. While less common, debris can sometimes get lodged inside the hose.
- Disconnect and Inspect: If you suspect an internal blockage, you may need to disconnect the hose at both ends (faucet body and sprayer head). Hold each end over a bucket and flush water through it to see if obstructions are forced out. This usually requires turning the main water supply to the faucet back on (briefly) after disconnecting the hose from the faucet body, and then using a bucket.
- Replace if Necessary: If the hose is severely kinked, damaged, or you can't clear an internal obstruction, it's best to replace the entire sprayer hose. They are relatively inexpensive and can be found at any home improvement store.
3. Clean or Replace the Diverter Valve — If the head and hose are clear, the diverter is the next likely suspect.
- Safety First: Turn off the water supply to the kitchen sink again. Drain residual water.
- Access the Diverter: The diverter valve is typically located inside the main faucet body. Depending on your faucet model, you might need to remove the faucet handle, the main spout, or a cap on the top or side of the faucet. Consult your faucet's manual if you have it; otherwise, look for screws or small caps that might conceal access points. Often, the spout pulls straight up and off after removing a set screw.
- Locate the Valve: The diverter is usually a small, cylindrical plastic or brass piece with an O-ring or spring, often found where the sprayer hose connects internally or directly beneath the main spout. It might look like a small button or plunger.
- Remove and Inspect: Carefully pry out the diverter valve using needle-nose pliers or a flat-head screwdriver. Inspect it for obvious signs of mineral buildup, sediment, or corrosion. The O-rings might also be worn or damaged.
- Clean or Replace: Soak the diverter valve in white vinegar to dissolve mineral deposits. Use a small brush or toothpick to clear any tiny holes or passages. If the diverter looks severely worn, damaged, or corroded, it's best to replace it. Most faucet manufacturers sell replacement diverter kits, or you can often find generic replacements at plumbing supply stores.
- Reassemble and Test: Reinsert the clean or new diverter valve, ensuring it's seated correctly. Reassemble your faucet components in reverse order. Turn the water supply back on and check the sprayer pressure.
4. Verify Water Supply Pressure (Less Common) — Ensure the problem isn't broader than just the sprayer.
- Check Other Faucets: Turn on the hot and cold water in your main kitchen faucet spout, then test other nearby faucets (e.g., a bathroom sink, laundry tub). If all faucets in your house have low pressure, the issue is with your main water supply or pressure regulator, not just the sprayer.
- Check Shut-Off Valves: Ensure the hot and cold water shut-off valves under the kitchen sink are fully open. Sometimes they get partially closed accidentally.
- Main Water Shut-Off: Verify that your home's main water shut-off valve is fully open. If it's partially closed, it can affect overall household pressure.
Common Causes
- Mineral Buildup (Hard Water): The most frequent culprit. Calcium, lime, and other minerals in hard water accumulate in the small openings of the spray head or the diverter valve, constricting water flow over time.
- Clogged Diverter Valve: Sediment, rust particles, or mineral deposits can clog or seize the diverter valve within the faucet body, preventing it from properly rerouting water to the sprayer.
- Kinked or Obstructed Sprayer Hose: The flexible hose leading to the sprayer can become kinked, pinched, or develop an internal blockage from debris, restricting water flow.
- Worn or Damaged O-rings/Gaskets: Deteriorated O-rings or gaskets in the sprayer head or diverter valve can lead to leaks and a loss of pressure.
- Low Household Water Pressure: While less common for a sprayer-specific issue, overall low water pressure in your home can exacerbate a marginal sprayer problem and might indicate an issue with your main water supply or pressure regulator.
Common Mistakes
- Ignoring the Safeties: Failing to turn off the water supply before attempting repairs. This can lead to unexpected leaks, water damage, and a much bigger mess than you anticipated.
- Over-Tightening Components: Using excessive force when reassembling the sprayer head or other faucet parts. This can strip threads, crack plastic components, or damage gaskets, leading to leaks.
- Using Harsh Chemicals for Cleaning: Opting for strong chemical cleaners instead of white vinegar. Harsh chemicals can damage rubber O-rings, plastic parts, or the finish of your faucet.
- Not Checking the Hose: Focusing solely on the sprayer head and neglecting to inspect the hose for kinks or internal blockages, missing a simple solution.
- Assuming a Major Problem: Immediately thinking you need a new faucet or a plumber without performing basic, easy-to-do troubleshooting steps first. Many low-pressure issues are DIY fixes.
- Losing Small Parts: Not paying attention to the order of small washers, gaskets, or screens when disassembling the sprayer head or diverter valve. Take a picture with your phone before disassembling if you're unsure.
Cost & Time Breakdown
| Task | DIY cost | Pro cost | Time |
|---|---|---|---|
| Clean Sprayer Head | $0 - $5 | N/A | 15 - 60 min |
| Replace Sprayer Hose | $15 - $40 | N/A | 30 - 60 min |
| Clean/Replace Diverter Valve | $0 - $30 | N/A | 45 - 90 min |
| Diagnose Overall Low Pressure | $0 | $150 - $300* | 15 - 30 min |
| *Pro cost for diagnosis only; repair costs extra. |
Tips & Prevention
- Regular Cleaning: Periodically unscrew and clean your sprayer head (every 3-6 months, more often in hard water areas) to prevent mineral buildup. A quick soak in vinegar can save a lot of hassle.
- Water Softener: If you live in an area with very hard water, consider installing a whole-house water softener. This not only benefits your sprayer but also extends the life of all your plumbing fixtures and appliances.
- Gentle Hose Handling: Be mindful of the sprayer hose under the sink. Avoid storing items that can pinch or kink the hose. Periodically, reach under and ensure it's hanging freely without sharp bends.
- Know Your Faucet Model: Keep your faucet's make and model information handy, especially the manual. This makes finding replacement parts like diverter valves much easier if needed.
- Annual Inspection: As part of your annual home maintenance, spend a few minutes inspecting all accessible plumbing connections under sinks for leaks or potential issues.
When to Call a Professional
While most low-pressure sprayer issues are a straightforward DIY fix, there are times when calling a licensed plumber is the smartest course of action. If you've gone through all the troubleshooting steps—cleaning the spray head, checking the hose, and inspecting or replacing the diverter valve—and the pressure issue persists, it could indicate a more complex underlying problem within your main faucet body or your home's plumbing system. This might include significant corrosion within the faucet itself, issues with your home's main water pressure regulator, or supply line blockages that are beyond a simple homeowner repair. Additionally, if at any point you feel uncomfortable disassembling your faucet, encounter unexpected leaks during the process, or are dealing with a very old or intricate faucet design, a professional plumber has the expertise and specialized tools to diagnose and repair the issue without causing further damage. Don't hesitate to call if you're out of your depth or if the problem affects multiple fixtures, suggesting a broader plumbing concern.
Related Articles
Keep troubleshooting with these hand-picked guides from FixlyGuide:
- The 5-Minute Trick to Restore Your Kitchen Sink Sprayer's Lost Pressure — Restore your kitchen sink sprayer's low pressure with a quick, simple trick that often takes less than five minutes and requires no special…
- The 5-Minute Trick to Fix a Weak Kitchen Sink Sprayer (No Plumber Needed) — Restore full power to your kitchen sink sprayer with simple, DIY steps that tackle common culprits like clogs and diverter issues.
- The 5-Minute Trick to Fix Your Kitchen Sprayer's Weak Stream — Restore your kitchen sink sprayer's full power with a simple, quick fix tackling common pressure culprits.
- The Secret Reason Your Dishwasher Won't Drain (And How to Fix It in 20 Minutes) — Discover the hidden culprits behind a non-draining dishwasher and learn how to resolve common issues in under 30 minutes, saving you a cost…
- The Secret Culprit Behind Your Leaky Refrigerator (It’s Not Always a Hose) — Discover the hidden causes of your refrigerator leaking water and how to fix them with our comprehensive troubleshooting guide.
- Is One Drip Emitter Starving? The Secret Culprit (It's Not Clogging) — A single drip emitter refusing to hydrate your plants can be frustrating, but the fix is often simpler than you think and rarely a clog.
Frequently asked questions
Why is my kitchen sink sprayer suddenly weak?+
The most common reasons are mineral buildup clogging the tiny holes in the spray head, a kink or blockage in the sprayer hose, or a clogged or malfunctioning diverter valve inside your faucet's main body. Hard water is a major contributor to mineral buildup.
Can I fix a low-pressure sprayer without special tools?+
Often, yes! Many issues can be resolved with basic household items like white vinegar (for mineral buildup), an old toothbrush, and perhaps an adjustable wrench for stubborn connections. Checking for hose kinks requires no tools at all.
How do I clean the sprayer head for better pressure?+
First, turn off the water supply. Unscrew the sprayer head from the hose. If possible, disassemble the aerator or faceplate. Soak the parts (or the whole head) in a bowl of white vinegar for 30 minutes to overnight to dissolve mineral deposits, then scrub clean with a brush. Rinse thoroughly and reassemble.


Discussion
Loading comments…