- Tools: Lead test kit (EPA recognized), utility knife (for revealing layers).
- Note: Don’t test one random spot and call it a day. Hit the high-traffic areas, window sills, door frames—anywhere paint might chip or get rubbed.
- Plan Your Containment — This part matters. You want that work area boxed in tight.
- Materials: 6 mil plastic sheeting, painter’s tape (heavy-duty), caution signs.
- Gear Up with PPE — Don’t cheap out here. Your health isn’t worth it.
Published July 25, 2026Last updated August 17, 2026
Tools & materials you'll need
Affiliate linksAs an Amazon Associate FixlyGuide earns from qualifying purchases — at no extra cost to you. Prices and availability are accurate as of publication and subject to change.
Quick Answer
Look, here’s the deal: if your house went up before 1978, there’s a pretty darn good chance you’ve got lead paint hiding somewhere. And it’s not just the paint sitting there minding its own business. The real problem is the dust that gets stirred up when you start sanding, scraping, or tearing things out. That dust is the bad actor. It can cause serious health problems, especially for little ones. So before you fire up that sander, take a breath, test for lead, and set yourself up to work safe.
The Problem
I’ve been in this trade for over twenty-five years, and I’ve seen plenty of houses where folks just started knocking out walls or stripping trim without giving it a second thought. Then they find out the hard way they were dealing with lead paint. This ain’t some dusty old wives’ tale; it’s a real health hazard that can mess you up, especially kids. Lead poisoning can lead to developmental problems, learning disabilities, and a whole pile of other ugly stuff. It’s serious business, and if you’re a homeowner taking on DIY work, it’s your job to know what you’re up against and how to handle it safely. I remember a job out in Evergreen Park years back where a young couple was redoing their kitchen. They were pumped, had all the right demo tools, but never once thought about the paint on the old cabinets and trim. Turns out it was loaded with lead. They got lucky; their contractor— not me, thankfully, or I’d have been on it from day one—caught it before they made a real mess. Still cost them a pretty penny to bring in certified folks for cleanup.
How It Works
Alright, let’s talk about how this stuff actually works, because knowing what you’re dealing with goes a long way. Back in the day, lead got mixed into paint for a few reasons. It made the paint tougher, helped it dry faster, and gave it brighter, more vibrant colors. It was the wonder ingredient of its time. The trouble is, lead doesn’t break down. It just hangs around.
When old paint is intact and in decent shape, tucked under newer coats, it’s usually not a huge deal. It’s encapsulated. The trouble starts when you disturb it.
Think about it: every time you sand, scrape, saw, drill, or even get aggressive cleaning lead-painted surfaces, you’re making microscopic lead dust and chips. That dust is so fine you can’t always see it, but it floats around, settles on everything, and gets inhaled or swallowed. Kids are especially vulnerable because their bodies absorb lead more readily, and they’re always putting hands or toys in their mouths. Even a tiny amount—think a grain of sand—can be hazardous. Once lead gets into your system, it mimics other essential minerals and gets stored in your bones, blood, and soft tissues. It can mess with pretty much every system in your body, from your brain and nervous system to your kidneys and reproductive system. That’s why it’s so critical to understand the risks and manage them before you even think about starting demolition in an older home.
Step-by-Step Lead Paint Safety Fix
Assuming you’ve found lead paint or you’re working in a pre-1978 home, here’s how I’d handle the job to keep everybody safe.
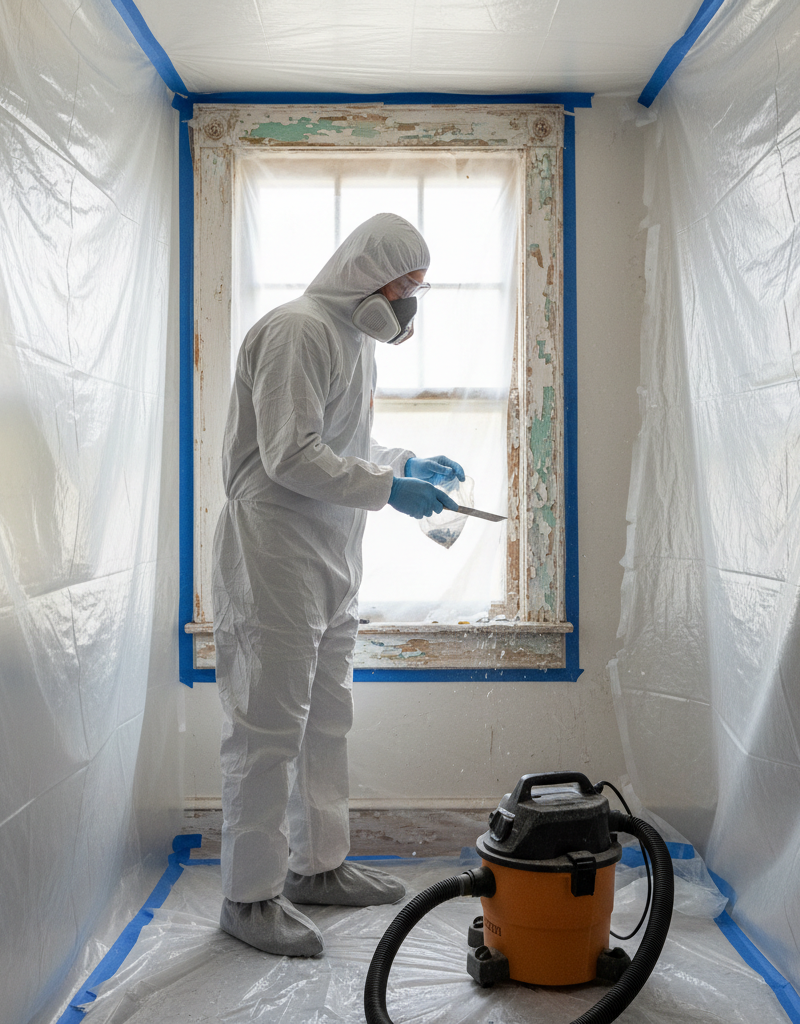
- Test for Lead — Before you touch anything, test it. You can pick up lead test kits at any home improvement store for about $15-$30. Follow the instructions exactly. You might need to lightly scratch through a few layers of paint to get a reliable result. If it comes back positive, or if you’re not sure, assume it’s lead and work like it is.
- Tools: Lead test kit (EPA recognized), utility knife (for revealing layers).
- Note: Don’t test one random spot and call it a day. Hit the high-traffic areas, window sills, door frames—anywhere paint might chip or get rubbed.
- Plan Your Containment — This part matters. You want that work area boxed in tight.
- Materials: 6 mil plastic sheeting, painter’s tape (heavy-duty), caution signs.
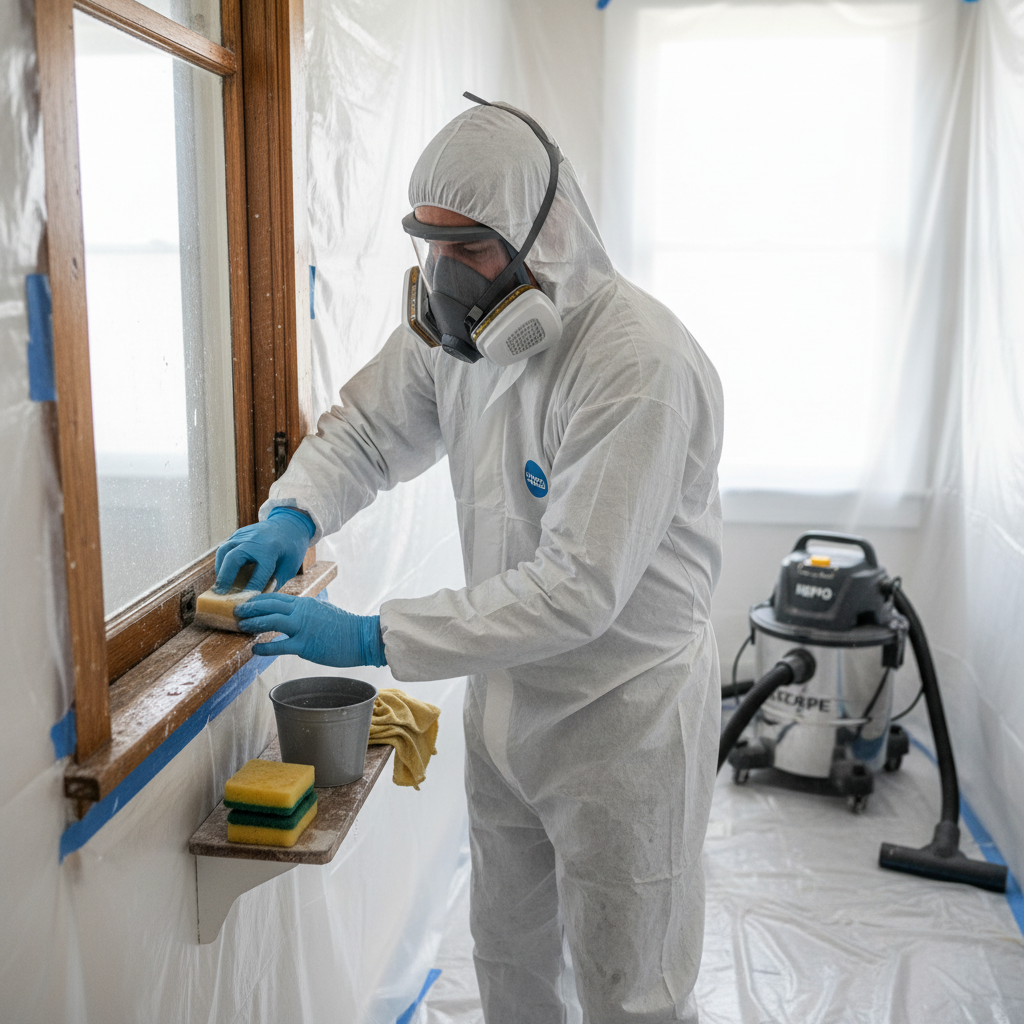
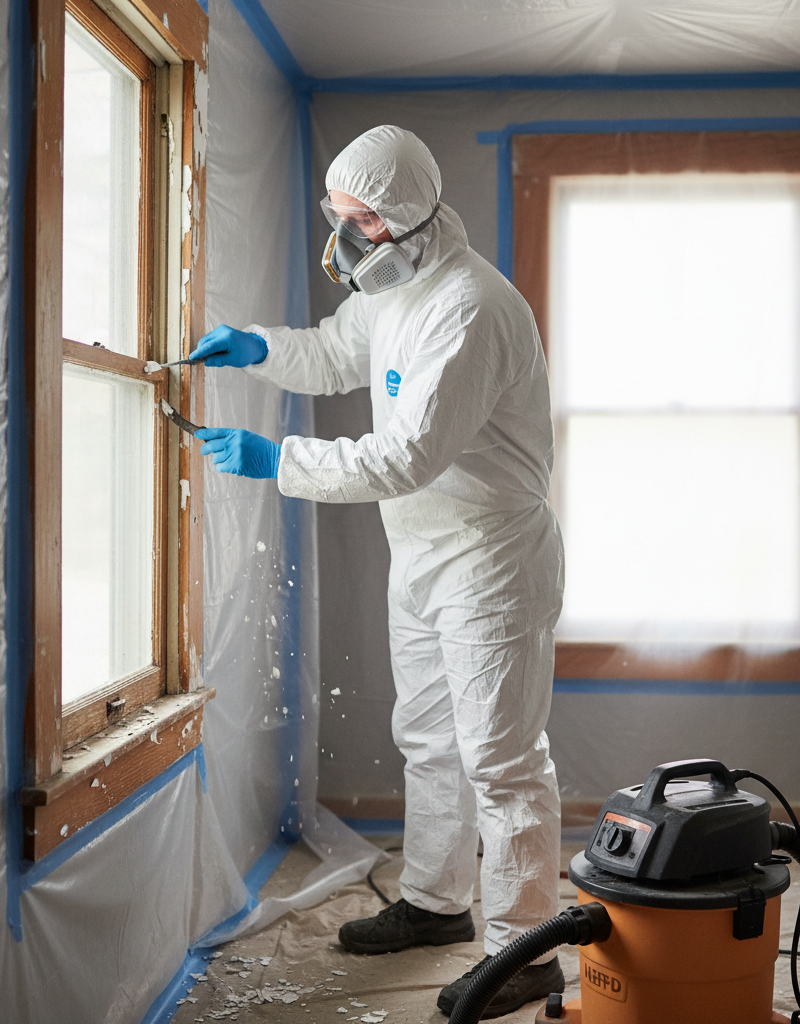
- Seal off the room: close and tape up all windows and doors with plastic. Shut off your HVAC so you’re not blowing dust around the house. Cover furniture, floors, and anything else you can’t move with doubled-up 6-mil plastic sheeting, and run it at least six feet beyond your work area.
- Gear Up with PPE — Don’t cheap out here. Your health isn’t worth it.
- Materials: Disposable coveralls, N-100 or P-100 respirator, rubber gloves, disposable shoe covers, safety glasses.
- Make sure your respirator fits right. A good seal is the whole ballgame. Change filters like the manufacturer says, usually after 8 hours of continuous use or if breathing gets tough. I’ve seen guys try to use paper masks; they’re no good against lead dust.
- Avoid Dry Methods — This is where a lot of DIYers go sideways. Dry sanding or scraping makes fine dust.
- Methods: Wet sanding, chemical strippers, heat guns (low temp only, under 1100°F).
- Never use power sanders, heat guns at high temperatures, or open flames on lead paint. Those methods vaporize lead or kick up a mountain of dust. When you wet sand, use a spray bottle to keep the surface damp. Dispose of all sanding residue and water carefully.
- Clean as You Go — Don’t wait until the end to clean up.
- Tools: HEPA vacuum, heavy-duty disposable wipes or wet mop with two buckets.
- Regular vacuums won’t cut it; they just spread the dust around. A HEPA-filtered vacuum is built to trap fine particles. Don’t sweep with a broom; that just sends dust back into the air. Use wet cleanup methods: damp-wipe all surfaces over and over. Change water and wipes often. The goal is to get every speck.
- Double Bag All Waste — Treat all debris like it’s contaminated.
- Materials: Heavy-duty 6 mil construction bags, duct tape.
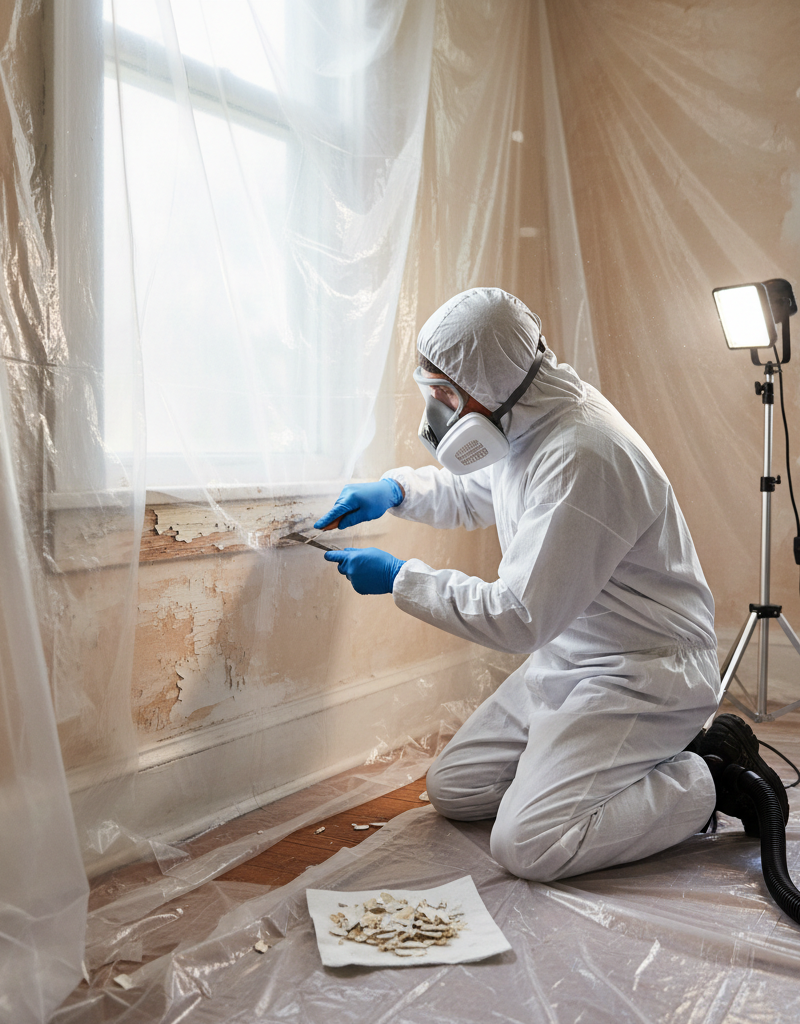
- Carefully gather all plastic sheeting, coveralls, wipes, and debris. Roll up plastic toward the center so you’re trapping the dust, not spreading it around. Put everything into heavy-duty construction bags, seal them tight with duct tape, and double bag them. Check with your local waste management for proper disposal of lead-contaminated waste.
- Decontaminate Yourself — Don’t track lead dust through your house.
- Before leaving the containment area, strip off disposable coveralls and shoe covers, turning them inside out as you peel them off. Toss them in the waste bags. Take off your respirator and gloves last. Wash your hands and face thoroughly as soon as you leave the work area. Shower as soon as you can.
- Post-Renovation Cleaning — You’re not done yet.
- Tools: HEPA vacuum, fresh disposable wipes, detergent solution.
- After the containment and waste are gone, do a full cleaning of the work area. HEPA vacuum every surface, then wet-wipe everything down with a detergent solution. Do it again at least once more. If you’ve got young children in the house or you’re just not comfortable rolling the dice, consider a professional lead dust clearance test.
Common Causes
It’s not rocket science, but knowing why you’re dealing with disturbed lead paint can help you keep it from happening again—or help you spot trouble spots before they get worse.
- Demolition or Renovation: This is the big one. Tearing out walls, ripping up trim, replacing windows – all that work creates dust and chips from old paint layers.
- Sanding and Scraping: Trying to prep a surface for new paint the “old-fashioned” way without proper precautions will aerosolize lead.
- Friction and Impact: Places where painted surfaces rub together, like old windows that get opened and closed all the time, or doors that stick, can make lead dust over time. Same deal with impact spots like door frames that keep getting dinged.
- Deterioration: Peeling, chipping, or chalking paint, especially outside, breaks down over time and can release lead dust into the soil around your home.
- Home Settling/Movement: Cracks showing up in older plaster walls or ceilings with lead paint as the house settles can expose or release lead dust from those hidden layers.
Common Mistakes
I’ve seen a lot of homeowners make these blunders, and every one of them turns a small issue into a bigger mess and a bigger risk.
- Skipping the Test: Assuming ‘it’s probably fine’ because the house looks newer or has been painted over. Always test if the house is pre-1978.
- Using Regular Vacuums: They’ll just blow the invisible lead dust into the air and spread it everywhere. You need a HEPA filter.
- Dry Sanding/Scraping: This is probably the most common and dangerous mistake. It’s quick, sure, but it sends lead particles into the air at hazardous levels. Don’t do it.
- No Personal Protective Equipment (PPE): Working without a proper respirator, gloves, and disposable coveralls. You wouldn’t mess around with asbestos unprotected, so don’t take chances with lead.
- Poor Containment: Not sealing off the work area and letting dust escape into other parts of the house. That spreads the problem far and wide.
- Ignoring Cleanup Protocols: Sweeping with a broom or only giving things a light dusting. Lead dust needs wet-wiping and HEPA vacuuming if you want it gone.
Cost & Time Breakdown
| Task | DIY Cost | Pro Cost | Time |
|---|---|---|---|
| Lead Test Kits | $15–$30 | Included in quote | 15–30 minutes |
| Containment Materials | $50–$150 | Included in quote | 1–2 hours |
| Personal Protective Gear | $40–$100 | Included in quote | N/A |
| HEPA Vacuum Rental (optional) | $40–$60 (daily) | Included in quote | N/A |
| Safe Paint Removal (DIY) | $0–$50 (strippers) | $500–$5,000+ (per room) | Varies, hours–days |
| Professional Lead Abatement | N/A | $2,000–$10,000+ (per area) | Days–weeks |
| Post-Renovation Cleaning | $10–$20 | $300–$800 | 1–3 hours |
Tips & Prevention
Keeping your home safe from lead paint hazards isn’t just about the big renovation; it’s about staying on top of things over time. Here are a few things I tell my homeowners:
- Keep it Intact: If lead paint is in good shape—not chipping, peeling, or chalking—the best move is usually to leave it alone and paint over it with two coats of good quality latex paint. That’s often called ‘encapsulation.’
- Routine Checks: Look over painted surfaces regularly, especially around windows and doors, for any signs of chipping, peeling, or paint dust. If you see it, deal with it right away using wet cleaning.
- Clean Carefully: Use wet methods (damp cloths, mops) to clean surfaces instead of dry dusting or sweeping, especially in older homes. And yeah, that goes for regular cleaning too, not just after a remodel.
- Window Maintenance: Friction from opening and closing old windows can create lead dust. Keep painted window sashes and frames in good shape and consider using window film to cover suspect paint. If you’re replacing windows, follow lead-safe practices during removal.
- Soil Testing: If you’ve got exterior lead paint that’s flaking, get your soil tested around the foundation. Lead can build up there and create a hazard for kids playing in the yard. Planting ground cover can help encapsulate it.
- Educate Others: Make sure anybody working in your home—friends helping with a project, another contractor—knows the risks and follows lead-safe work practices. It’s too important to assume they already know.
When to Call a Professional
Look, I’m all for DIY, but there are some lines you just don’t cross, and lead paint abatement is often one of them. If you’re looking at a major renovation, especially one involving multiple rooms, heavy demolition, or areas with badly deteriorated lead paint, you need to call a lead certified professional. Don’t mess around with extensive lead removal, especially if you’ve got children, pregnant women, or elderly folks in the house. A professional lead abatement contractor has the training, equipment—like negative air machines and full respirators—and licensing to safely contain, remove, and dispose of lead-contaminated materials. They can also do lead risk assessments and clearance testing to make sure the job is truly finished right. It’s not cheap, but neither is treating lead poisoning. I’ve pulled enough nasty surprises in old houses to know this is one of those jobs where peace of mind and your family’s safety are worth every penny.
Related Articles
Keep troubleshooting with these hand-picked guides from FixlyGuide:
- 7 Inspection Red Flags That Secretly Signal a $20,000 Bill — Don't let your dream home become a money pit. Many buyers and even some inspectors overlook subtle home inspection red flags that lead to f…
- The 12 Checks That Prevent 80% of Costly Home Repairs — Don't wait for a disaster. Our comprehensive monthly home maintenance checklist reveals the surprising, simple tasks that catch small issue…
- The 7 Critical Household Filters You're Forgetting (And What They Cost You) — Neglected household filters are quietly costing you money, diminishing air quality, and paving the way for expensive repairs. Discover the…
- 7 Hidden Equity Drains Costing You Thousands Annually — Your home is an asset, but silent problems like minor leaks, poor insulation, and deferred maintenance can drain its value. Discover the se…
- The Secret Power Tool Hiding in Your Garage for a Speedier Clean — Unlock the hidden potential of your cordless drill to tackle stubborn household grime, soap scum, and dirt with specialized cleaning attach…
- The 15-Minute Deadbolt Swap: Why Your Old Lock Is a Security Risk (And the Easy Fix) — Upgrade your home security in just 15 minutes by replacing an old or faulty deadbolt lock with a new, more secure model.
Should you do this yourself?
Answer five quick questions before you start. Safety outranks savings every time.
Your experience with work like this
How high do you have to work?
Does the job involve any of these?
Will it need a permit?
Specialty tools
Free and instant. Educational guidance only — not a quote, inspection, or professional diagnosis.
Estimate your own project cost
National averages are a starting point. Enter your details for a range that fits your house.
Interior paint estimator
- Paint$96
- Supplies (tape, rollers, drop cloth)$35
- Estimated total (DIY)$131
Hiring a pro? Add roughly $1.50–$4.00/sq ft for labor depending on prep work and trim detail.
Educational estimate only — always confirm with written local bids.
What should this project cost?
Enter your project details for a realistic cost range before you call anyone.
Cost depends heavily on which system turns out to be the source.
- Regional adjustment
- National average
- Labor share (typical)
- ~$1,620
- Quotes to collect
- 3 written estimates
Educational estimate based on national averages — not a binding quote. Always confirm with written local estimates.
Before you start
Check the difficulty, permits, and safety risk — then decide whether to call a pro.
Free, no signup required. Estimates are educational guidance, not a quote or an inspection.
Get the print-ready PDF of this guide
A clean, ad-free, printable version you can keep on your phone or pin to the workshop wall. Free with a FixlyGuide account.
- Print-optimized layout
- Tools, materials & every step included
- Saved to your account
This article was independently written by FixlyGuide based on the source topic.
Frequently asked questions
How do I know if my house has lead paint?+
The simplest way is to use an EPA-recognized lead test kit, available at most hardware stores. Scratch through the paint layers in a discreet spot and follow the kit's instructions. If your home was built before 1978, it's always best to assume lead paint is present and take precautions.
Is intact lead paint dangerous?+
Intact lead paint, especially if it's been painted over with modern paint, typically poses a low risk. The danger primarily arises when the paint chips, peels, or is disturbed during activities like sanding, scraping, or demolition, which create harmful lead dust.
What's the biggest risk of lead paint?+
The biggest risk comes from inhaling or ingesting lead-contaminated dust. This dust is easily generated when older painted surfaces are disturbed. Children are particularly vulnerable because their bodies absorb lead more readily, and they often put their hands in their mouths, ingesting dust from contaminated surfaces.
Can I sand lead paint if I wear a respirator?+
No, absolutely not. Dry sanding lead paint will create microscopic lead dust that even the best respirator can't completely filter out and will contaminate your entire home. Always use wet sanding or chemical strippers as safer alternatives to minimize airborne dust.
What kind of respirator do I need for lead paint work?+
You need a respirator rated N-100 or P-100 with HEPA filters. Basic paper dust masks are completely inadequate and will not protect you from lead dust. Ensure the respirator fits properly and forms a tight seal around your face.
How do I clean up lead dust?+
Never use a broom or regular vacuum cleaner. They will simply spread the lead dust. You must use a HEPA-filtered vacuum and wet-wiping methods with a detergent solution. Dispose of all cleaning materials, including wipes and mop water, as hazardous waste.
What should I do with lead paint debris and waste?+
All waste materials—plastic sheeting, disposable coveralls, paint chips, and cleaning wipes—should be carefully double-bagged in heavy-duty 6 mil plastic bags, sealed with duct tape. Contact your local waste management or health department for specific instructions on hazardous waste disposal in your area.
When should I call a professional for lead paint?+
If you're undertaking extensive renovations, dealing with heavily deteriorated lead paint, or have children or pregnant women in the household, it's always best to consult a lead-certified professional. They have the expertise, specialized equipment, and licensing to perform safe and thorough lead abatement.
Are there any areas where lead paint is more common?+
Yes, lead paint is frequently found on window sills and frames, door frames, baseboards, exterior siding, porches, and sometimes even railings. Areas that experience friction or impact are more likely to release lead dust.
Discussion
Loading comments…