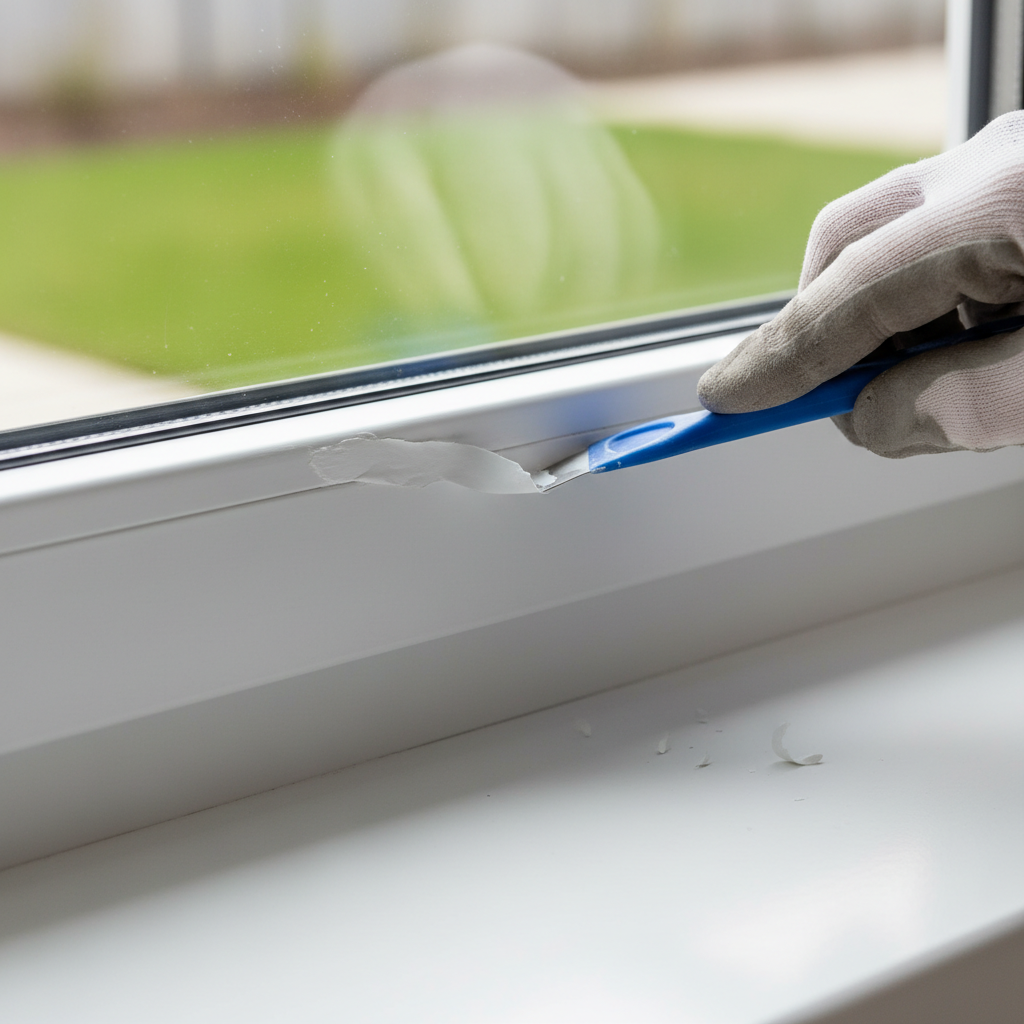
- Identify the Paint Type — Figure out if you’re dealing with latex or oil-based paint.
- If it’s fresh and still wet: Wipe it right away with a damp cloth. Latex will usually come off with water. Oil paint’ll smear and ask for a little mineral spirits on a rag. That’s the easy win.
- If it’s dry: Put a tiny bit of denatured alcohol on a hidden spot of the paint. If it softens or smears, it’s likely latex. If it just sits there and laughs at you, odds are it’s oil-based.
Published August 12, 2026Last updated August 17, 2026
Tools & materials you'll need
Affiliate linksAs an Amazon Associate FixlyGuide earns from qualifying purchases — at no extra cost to you. Prices and availability are accurate as of publication and subject to change.
Quick Answer
Look, we’ve all been there. You’re rolling along, feeling pretty good about the job, and then bam—a drip lands on that plastic outlet cover or vinyl window trim you didn’t mean to touch. Annoying? You bet. But don’t go straight for the scour pad and make it worse. Most of the time, you can get paint off plastic without turning the thing into a scratched-up, cloudy mess. The key is knowing what paint you’re fighting and what cleaner won’t chew up the plastic. Fresh latex? Usually pretty easy. Dried oil-based enamel? That’s a tougher nut to crack, but it’s still doable if you’ve got a little patience.
The Problem
Paint on plastic isn’t just a cosmetic headache; left alone, it can cause real trouble for the surface. Latex paint is usually less aggressive, but it can still bond tight and peel off in ugly flakes, leaving the plastic looking patchy. Oil-based paints, especially the ones loaded with strong solvents, can actually soften some plastics or bond to them in a way that makes cleanup a pain. Let it sit too long, and you can get to the point where removal means damage, plain and simple—especially if the plastic’s older or it’s been baked by UV for years. I’m talking light switches, outlet covers, window trim, door trim, patio furniture, all of it. One sloppy brush load or a windy afternoon, and now you’ve got paint where it doesn’t belong.
How It Works
Knowing how paint hangs onto plastic—and how to break that hold—is the whole game here. Paint, whether it’s latex (water-based) or oil-based (alkyd/solvent-based), forms a mechanical bond, and sometimes a chemical one too. Once it lands on plastic, the paint’s polymers dry, shrink, and grip the surface like they mean it. The plastic matters just as much. PVC, like you’ll see on a lot of window frames, holds up pretty well. Polystyrene, which shows up in cheaper outlet covers, or acrylic? Not nearly as forgiving around solvents.
Water-based latex dries as the water evaporates, leaving a flexible film behind. When it’s wet, it’s easy pickings because the binders haven’t fully locked up yet. Once it’s dry, though, that film gets a lot tougher. Solvents like denatured alcohol or rubbing alcohol work by softening those polymers back up so you can lift them off. They don’t dissolve the plastic right away, but leave them sitting too long and you can haze or soften sensitive plastic without much effort.
Oil-based paint is a different animal. It dries through oxidation and solvent evaporation, and it leaves a much harder film. To break that down, you usually need stronger solvents like mineral spirits or paint thinner. Problem is, those stronger solvents are also harder on plastic. They can haze it, soften it, or flat-out melt it if you get sloppy. That’s why I usually start with a mechanical approach—careful scraping or light abrasion—when I’m dealing with dried oil paint on plastic.
Think of it like this: you’re not just wiping paint away. You’re trying to break its grip on the plastic, either by softening the paint or by separating it physically without wrecking the surface underneath. That’s a thin line. You’ve got to pay attention.
Step-by-Step Fix
Here’s how I handle paint on plastic, starting mild and working up only if I’ve got no choice. Always test in a hidden spot first. Inside an outlet cover, back side of a trim piece, somewhere nobody’ll see if it goes sideways. You’ll be glad you did.
-
Identify the Paint Type — Figure out if you’re dealing with latex or oil-based paint.
- If it’s fresh and still wet: Wipe it right away with a damp cloth. Latex will usually come off with water. Oil paint’ll smear and ask for a little mineral spirits on a rag. That’s the easy win.
- If it’s dry: Put a tiny bit of denatured alcohol on a hidden spot of the paint. If it softens or smears, it’s likely latex. If it just sits there and laughs at you, odds are it’s oil-based.
-
Soapy Water Scrub (For Latex) — Best first move for dried latex.
- Tools: Warm water, dish soap, soft cloth, old toothbrush or plastic scraper.
- Mix a few drops of dish soap into warm water. Dampen the cloth and rub the paint gently. If it’s being stubborn, let that soapy water sit for 5-10 minutes to soften things up, then try again with an old toothbrush or plastic scraper. Don’t grab anything abrasive like steel wool—it’ll scratch the plastic in a hurry.
-
Rubbing Alcohol or Denatured Alcohol (For Dried Latex) — Next step up.
- Tools: Rubbing alcohol (isopropyl alcohol) or denatured alcohol, cotton balls or soft rags, plastic scraper.
- Dab a cotton ball with alcohol and work a small section of the dried latex paint. You should see some of it transfer to the cotton. Keep it in small bites. For thicker drips, hold a soaked cotton ball on the paint for about 30 seconds, then gently scrape with a plastic scraper. Don’t let the alcohol sit forever, especially on acrylics or some vinyls, or you can wind up with hazing.
- Safety: Work in a well-ventilated area. Denatured alcohol is flammable.
-
Mineral Spirits or Paint Thinner (For Oil-Based Paint) — Use with real caution on plastic.
- Tools: Mineral spirits or low-odor paint thinner, clean rags, plastic scraper.
- This is where it gets dicey. Mineral spirits can melt or haze some plastics. Test rigorously first! Lightly dampen a corner of a rag with mineral spirits and dab a small, hidden spot of the oil paint. Don’t rub hard, and don’t leave it sitting. You’re just trying to soften the paint enough to scrape it off. Once it’s off, wipe the residue away with a clean damp cloth right away. Move fast and stay in tiny sections. If you see any hazing or softening in the plastic, stop right there.
- Safety: Wear chemical-resistant gloves and eye protection. Make sure the space has good airflow. Keep away from ignition sources.
-
Heat Gun or Hair Dryer (Last Resort for Thick Drips) — Soften and scrape.
- Tools: Heat gun (low setting) or hair dryer, plastic scraper, gloves.
- This is a true last-ditch move, and it’s easy to warp or melt plastic if you get careless. Hold the heat gun on its lowest setting, usually around 250°F, or a hair dryer about 6-8 inches away from the paint. Keep it moving. You’re trying to soften the paint, not cook the plastic. After about 15-30 seconds, try gently scraping with a plastic scraper. If it’s still hanging on, give it a little more heat. If the plastic starts getting glossy or soft, pull back immediately. I once melted a perfectly good outlet cover in a house in Cranford, New Jersey, because I tried to rush that step. No kidding—I’ve remembered that one ever since. Patience matters here.
-
Specialty Paint Removers (If All Else Fails) — Chemical warfare.
- Tools: Plastic-safe paint stripper (e.g., Krud Kutter Graffiti Remover or a citrus-based stripper), plastic scraper, gloves, eye protection.
- There are products made to be “plastic-safe.” Read the label like it owes you money. These usually lean on gentler solvents. Put a little on a cotton swab and follow the directions on the bottle. Still test first, and expect some hazing risk. Rinse thoroughly after use. A lot of these need 5-10 minutes of dwell time before you scrape.
-
Light Abrasion (For Stubborn Stains) — Only if the plastic’s tough, and even then, be careful.
- Tools: Very fine-grit sandpaper (400-600 grit) or a Mr. Clean Magic Eraser (melamine foam).
- This one’s a high-risk, low-reward move. It will dull the surface some. Try a melamine foam eraser first, lightly, in a circular motion to lift surface staining. For specks that are really buried in hard plastics like PVC pipe, you might use 600-grit wet/dry sandpaper, wet, with almost no pressure. You’ll probably want plastic polish afterward to bring back some sheen, but don’t expect perfection. I only use this on hidden spots or if I’m painting over the plastic anyway.
-
Clean and Buff — Final cleanup.
- Tools: Clean soft cloth, plastic polish (optional).
- Once the paint’s off, wash the plastic with mild soap and water so you’re not leaving chemical residue behind. If the plastic looks dull or hazy, a plastic polish like Novus Plastic Polish can sometimes bring back some of the shine. Use a soft cloth and buff it gently.
Common Causes
- Rushing the Job: This is the big one. Trying to paint too fast, skipping masking, or forgetting to cover nearby surfaces. Yep, I’ve seen that plenty.
- Inadequate Masking: Using no tape, or cheap tape that doesn’t stick worth a darn. Press those edges down good, especially on textured surfaces.
- Overloading the Brush/Roller: Too much paint on the brush just means drips are waiting to happen. Load enough to cover, but not so much it runs.
- Wind/Drafts: Painting outside or near an open window can send mist and droplets where you didn’t plan on them going.
- Incorrect Technique: Working against gravity, like on ceiling edges, without a drip shield or a dry brush can make a mess. Same goes for not knocking off extra paint before the stroke.
- Distractions: Getting interrupted mid-stroke, or painting when you’re tired or stressed, is a recipe for sloppiness.
Common Mistakes
- Using Metal Scrapers or Abrasives: Grabbing a putty knife or steel wool is a fast way to scratch and ruin plastic surfaces. Stick with plastic-safe tools.
- Aggressive Rubbing with Solvents: Letting mineral spirits or even denatured alcohol sit too long, or scrubbing too hard, can haze, soften, or melt the plastic. Test first, and keep your strokes light and quick.
- Not Testing First: Skipping the hidden-spot test is asking for trouble. What works on one plastic can wreck another. You’ve got to know what you’re working on before you start attacking it.
- Ignoring the Paint Type: Trying to remove dried oil-based paint with soap and water alone is just wasting time. Knowing whether it’s latex or oil tells you which solvent and method make sense.
- Poor Ventilation: Using strong solvents without good airflow is a health hazard. Open windows, run fans, and wear a respirator if you need one. Don’t trade your lungs for a clean trim piece.
- Rushing Cleanup: Trying to blast through the last step usually leaves residue or causes more damage. Take your time, especially on delicate plastic.
Cost & Time Breakdown
Here
Related Articles
Keep troubleshooting with these hand-picked guides from FixlyGuide:
- 7 Inspection Red Flags That Secretly Signal a $20,000 Bill — Don't let your dream home become a money pit. Many buyers and even some inspectors overlook subtle home inspection red flags that lead to f…
- The 12 Checks That Prevent 80% of Costly Home Repairs — Don't wait for a disaster. Our comprehensive monthly home maintenance checklist reveals the surprising, simple tasks that catch small issue…
- The Secret Power Tool Hiding in Your Garage for a Speedier Clean — Unlock the hidden potential of your cordless drill to tackle stubborn household grime, soap scum, and dirt with specialized cleaning attach…
- The Hidden Reason Your GFCI Trips — And Why Most Homeowners Get It Wrong — A continuously tripping GFCI outlet is a safety warning, often indicating a problem like moisture, a faulty appliance, or a wiring issue th…
- The Single Cedar Board Secret to Attracting Bluebirds to Your Yard — Discover how to build an ideal bluebird house using just one cedar board, providing a perfect nesting site and attracting these vibrant bir…
- The Secret to a Flawless Drywall Patch Is In the Paper — Frustrated by drywall patches that always show through? That telltale bump or sanding mark can ruin a perfect wall. Discover the 'Californi…
Should you do this yourself?
Answer five quick questions before you start. Safety outranks savings every time.
Your experience with work like this
How high do you have to work?
Does the job involve any of these?
Will it need a permit?
Specialty tools
Free and instant. Educational guidance only — not a quote, inspection, or professional diagnosis.
Estimate your own project cost
National averages are a starting point. Enter your details for a range that fits your house.
Interior paint estimator
- Paint$96
- Supplies (tape, rollers, drop cloth)$35
- Estimated total (DIY)$131
Hiring a pro? Add roughly $1.50–$4.00/sq ft for labor depending on prep work and trim detail.
Educational estimate only — always confirm with written local bids.
What should this project cost?
Enter your project details for a realistic cost range before you call anyone.
Cost depends heavily on which system turns out to be the source.
- Regional adjustment
- National average
- Labor share (typical)
- ~$1,620
- Quotes to collect
- 3 written estimates
Educational estimate based on national averages — not a binding quote. Always confirm with written local estimates.
Before you start
Check the difficulty, permits, and safety risk — then decide whether to call a pro.
Free, no signup required. Estimates are educational guidance, not a quote or an inspection.
Get the print-ready PDF of this guide
A clean, ad-free, printable version you can keep on your phone or pin to the workshop wall. Free with a FixlyGuide account.
- Print-optimized layout
- Tools, materials & every step included
- Saved to your account
This article was independently written by FixlyGuide based on the source topic.
Frequently asked questions
Can I use nail polish remover to get paint off plastic?+
I wouldn't recommend it. Most nail polish removers contain acetone, which is extremely aggressive and will almost certainly melt or severely haze most types of plastic instantly. Stick to rubbing alcohol or denatured alcohol for latex, and specific plastic-safe removers if you must go stronger.
How do I remove paint from vinyl window frames?+
For vinyl frames, start with soapy water and a plastic scraper. If that doesn't work, try denatured alcohol on a hidden spot. Vinyl is fairly durable but can still be affected by strong solvents like mineral spirits, so use those with extreme caution and test thoroughly.
What if the plastic is already hazy after trying to remove paint?+
If you've got haze, you might be able to improve it with a specialized plastic polish, like those used for car headlights or boat windows. These products often have fine abrasives that can buff out minor hazing. It won't make it perfect, but it can definitely help.
Is there a trick to prevent paint from getting on plastic in the first place?+
Absolutely. Good masking tape (the green or blue kind), applied firmly and completely, is your best friend. Also, don't overload your brush or roller, and take your time. A little extra prep saves a lot of cleanup heartache.
Can I use paint stripper on plastic?+
Most traditional paint strippers are far too harsh for plastic and will melt or deform it. You need to look for strippers specifically labeled 'plastic-safe' or 'all-surface,' and even then, test them on an inconspicuous area first. Citrus-based removers are often a safer bet.
Will WD-40 remove paint from plastic?+
Sometimes. WD-40 can help soften some types of paint, especially fresh drips, and it often won't harm plastics. It's worth trying as a gentle, non-aggressive option, but don't expect miracles on deeply dried or oil-based paints.
How long can I leave paint on plastic before it's too hard to remove?+
The sooner, the better! Latex paint can often be removed pretty easily for a few days, even a week or two, with alcohol. Oil-based paint gets significantly harder to remove after 24-48 hours. After a month or more, you're looking at much more aggressive, and riskier, methods.
What kind of plastic scraper should I use?+
Any non-marring plastic scraper will do. You can find them at hardware stores or even use an old credit card or a plastic putty knife. The key is that it's softer than the plastic you're cleaning to avoid scratching.
Discussion
Loading comments…