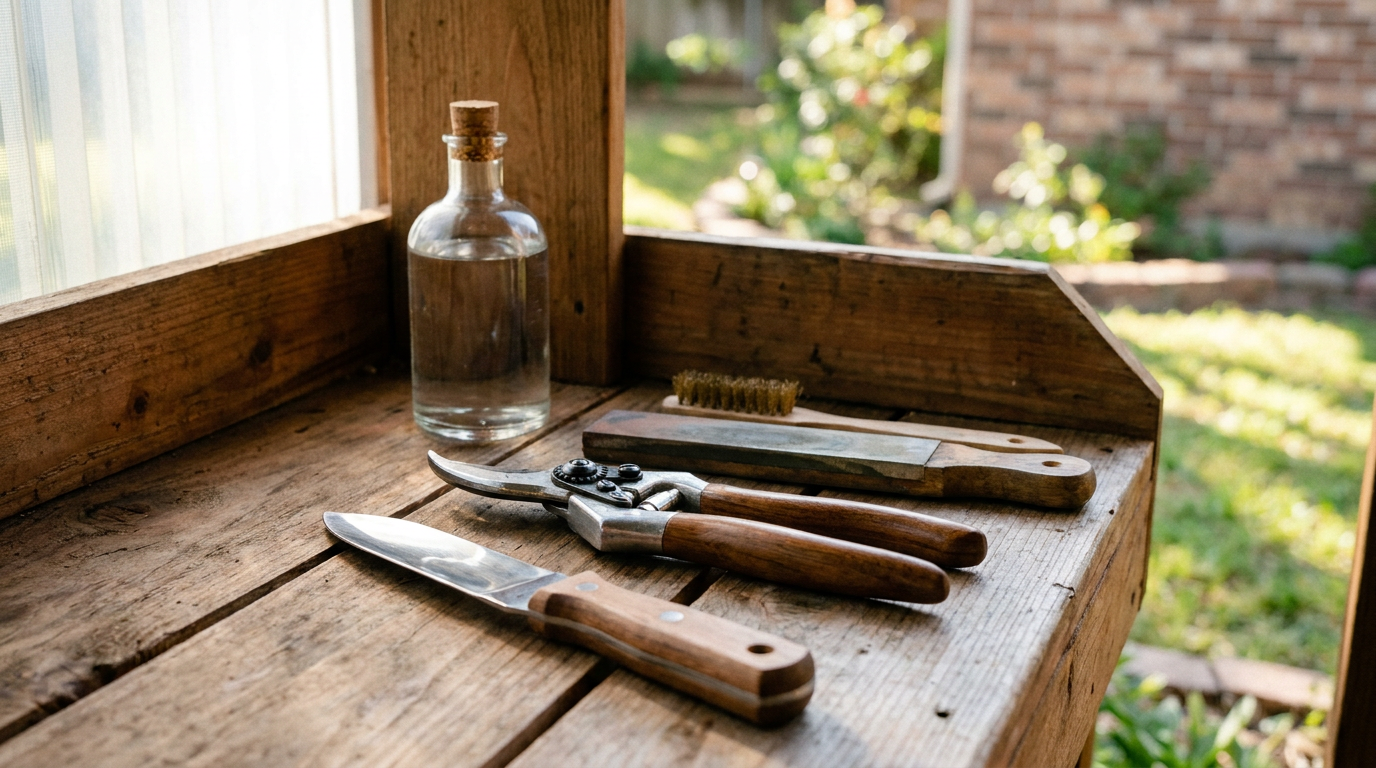
- Perform a Mechanical Inspection — Clear the junk off the bench and look at every moving part. Check bypass pruner pivot nuts, wheelbarrow axle bearings, and spade-to-handle rivets for slop.
- If you catch somebody using an anvil pruner on live stems, set it aside for dry kindling only; green branches need a bypass cutter.
- Rock the spade head back and forth on the shaft; more than 1/16-inch of play means the rivet’s stretched or the wood’s rotted inside.
Published November 13, 2026Last updated November 13, 2026
Tools & materials you'll need
Affiliate links- AmazonDiamond sharpening stone (400/1000 grit)1 stone · For establishing bevel and deburring
- AmazonFine brass wire brush1 · For rust and sap removal without scratching
- AmazonAdjustable crescent wrench1 · For pivot nut disassembly
- Amazon8-inch mill bastard file1 · For reprofiling shovel and spade cutting lips
- Amazon#0000 fine steel wool1 pack · To buff pivot points and blades
- AmazonBoiled linseed oil1 pint · For conditioning ash and hickory handles
- AmazonCamellia or light mineral oil1 bottle · For lubricating pivots and rust prevention
- Amazon120-grit sandpaper3 sheets · For smoothing splintered wooden shafts
As an Amazon Associate FixlyGuide earns from qualifying purchases — at no extra cost to you. Prices and availability are accurate as of publication and subject to change.
Quick Answer
A dull, rusty, or poorly fitted garden tool makes yard work feel like punishment, and it can spread plant disease through ragged stem cuts. I’ve seen it a hundred times. Upgrading or bringing back the good stuff—bypass pruners, a Japanese hori-hori knife, carbon steel bypass loppers, and an ergonomic wheelbarrow—means checking cutting tolerances, knocking off surface rust with wire wool, sharpening the bevels to a clean 20-degree angle, and feeding dry ash handles with raw linseed oil. For under $25 and an hour of work, you can get beat-up heirloom gear back to factory-sharp shape or tune high-performance tools to fit the gardener, not the other way around.
The Problem
Every home gardener runs into the same wall sooner or later: tools that fight back. You head out to prune crepe myrtles, chop at stubborn dandelion taproots, or move twenty bags of hardwood mulch, and twenty minutes later your forearms are burning, your palms are blistered, and the tool head’s wobbling loose on the shaft. Cheap stamped steel bends when it hits buried limestone. Anvil pruners smash delicate plant tissue instead of slicing it clean, leaving mangled wounds that invite fungal spores and bacterial blight into the beds.
After a few seasons, moisture in the shed rusts steel pivots, while summer heat dries the natural oils out of hickory and ash handles. Then you get cracked timber, sticky springs, and pitted blades that tear tender shoots instead of snipping them. Whether you’re setting up a loved one’s tool bench or rescuing neglected gear that’s been sitting in the garage since 2018, knowing how the tools actually work is what separates lifetime tools from throwaway hardware store junk.
How It Works
Garden tools lean on mechanical advantage, cutting geometry, and material hardness to multiply your force. Pruning tools work two ways: bypass or anvil. Bypass pruners are basically heavy-duty scissors, where a sharpened, convex blade slides right past an unsharpened counter-blade (the hook). That setup needs a sharp edge and a tight pivot clearance—usually between 0.002 and 0.005 inches. When it’s dialed in, the bypass action slices clean through the phloem and xylem in a stem without bruising the bark around it. Anvil pruners, on the other hand, drive a straight blade down onto a flat brass or plastic block; fine for dead, brittle wood, but they crush living green growth. No magic there.
Tillage tools like the Japanese hori-hori soil knife, trowels, and spade shovels depend on carbon steel or tempered stainless steel (typically rated between 50 and 56 on the Rockwell C hardness scale). High-carbon steel keeps a keen edge longer in abrasive sandy soil or dense North Texas clay, but it doesn’t have chromium, so if you put it away damp, rust moves in. The blade bevel—the sloped face leading to the edge—controls how it holds up. A steep 45-degree angle makes sense on a mattock for hard rock chopping, while pruners and soil knives do best with an acute 20-to-25-degree edge that cuts roots clean without chipping when you twist on it.
Step-by-Step Fix
Whether you’re checking out a possible gift for a gardener or rebuilding a pile of old tools, use this step-by-step process to restore, calibrate, and tune gear so it works like it should.
-
Perform a Mechanical Inspection — Clear the junk off the bench and look at every moving part. Check bypass pruner pivot nuts, wheelbarrow axle bearings, and spade-to-handle rivets for slop.
- If you catch somebody using an anvil pruner on live stems, set it aside for dry kindling only; green branches need a bypass cutter.
- Rock the spade head back and forth on the shaft; more than 1/16-inch of play means the rivet’s stretched or the wood’s rotted inside.
-
Strip Surface Rust and Sap — Soak rusted blades in a shallow bath of 50/50 household distilled white vinegar and warm tap water for roughly 30 to 45 minutes to loosen the rust scale.
- Tool: #0000 fine steel wool or a stiff brass wire brush.
- Spray stubborn, gummy pine sap and resin with mineral spirits or isopropyl alcohol; let it sit for two minutes, then wipe it off with a cotton shop rag.
- Safety note: Wear nitrile gloves and eye protection so loose rust flakes don't pop into your eyes while you’re brushing.
-
Disassemble the Pivot Assembly — Back off the retaining nut on bypass shears, loppers, or hedge trimmers with an adjustable crescent wrench or a 10mm socket.
- Lay the parts out in order: locking clip, bolt, washer, pivot blade, hook, and internal volute spring.
- Clean dried grit and packed potting soil out of the pivot area with a nylon detailing brush.
- If the spring’s lost its rebound or shows deep stress cracks, order a universal replacement volute spring instead of pitching the tool.
-
Flatten the Backside of the Cutting Blade — Take your diamond honing plate (around 400-grit coarse) and lay the completely flat back face of the cutting blade dead-level against the stone.
- Work the metal in broad circular strokes for 20 to 30 rotations with light, steady downward pressure.
- Only polish the flat side until clean steel shines; never bevel the flat back of a bypass pruner blade, or you’ll open up a gap between the blades that chews and jams on branch fibers.
-
Establish the Primary Cutting Bevel — Switch to the angled front bevel of the cutting blade. Match the factory angle—consistently between 20 and 23 degrees—using smooth, single-direction strokes from heel to tip.
- Tool: Medium-grit (600-grit) diamond stone or fine silicon carbide slipstone lubricated with a drop of light mineral oil.
- Keep the exact pitch across the full curve of the belly; lift the stone cleanly at the tip instead of rolling your wrist over the point.
- Repeat for 15 to 25 passes until a uniform microscopic burr (a tiny curl of displaced steel) forms along the flat back edge.
-
De-burr and Polish the Edge — Flip the blade over and stroke the flat back face once or twice completely flat against a 1000-grit fine stone to sweep away the burr.
- Test sharpness on standard printer paper: the blade should glide through the sheet with zero snagging or tearing.
- If it snags, go back to your 600-grit stone for five more controlled passes; dull steel wants patience, not brute force.
-
Reassemble and Set Pivot Tension — Line the cutting blade back up with the counter-hook, slide the pivot bolt through, and thread the retaining nut down until hand-tight.
- Tighten the nut with your wrench in tiny 1/8-turn increments while you test the movement.
- The blades should open and close smoothly without binding, yet show zero side-to-side wobble when you grip both handles and twist.
- Secure the retaining screw or locking plate so regular vibration can't loosen the pivot nut out in the field.
-
Sand and Condition Wooden Handles — Smooth rough ash or hickory tool handles with 120-grit sandpaper, following the grain to knock off splinters, weathered grey cellulose, and factory polyurethanes.
- Wipe off the sawdust with a damp rag, then rub boiled or raw linseed oil deep into the bare grain with a clean cotton rag.
- Apply three light coats over 24 hours, letting each soak in for 20 minutes before buffing off the extra residue.
- Never use thick varnishes or polyurethanes; they trap moisture in the wood, encourage subterranean rot, and make slick spots that blister bare hands.
-
Sharpen Ground-Engagement Edges — Clamp round-point shovels, trenching spades, or hori-hori knives in a bench vise with rubber jaw pads.
- Run an 8-inch mill bastard file at a 45-degree angle across the cutting lip of the spade, pushing strictly away from your body on the forward stroke.
- A shovel doesn’t need a razor edge; an acute angle will fold over the first time you slam into a limestone rock or buried paver.
- Aim for something like a butter knife—sharp enough to sever creeping bermudagrass runners and underground tree roots without beating your foot to death.
-
Apply Protective Corrosion Barriers — Coat all exposed metal with a thin layer of food-grade camellia oil, 3-In-One oil, or pure lanolin spray before you put it back in storage.
- For everyday convenience, set up a 5-gallon plastic bucket filled with coarse contractor sand soaked in 1 quart of clean mineral oil.
- Plunging spade heads and trowels into the oily sand mix after each gardening session knocks off moist soil and lays down an instant micro-coating of oil in four seconds flat.
Common Causes
Why do garden tools fail or leave your hands fried in the first place? It usually comes down to three basic culprits:
- Mismatched Sizing and Hand Ergonomics: A lot of gardeners end up fighting tools made for somebody else. Standard bypass pruners are built for larger hands (glove size 9 and up). Folks with smaller hands or early arthritis keep squeezing wide-opening handles and compressing their carpal tunnels over and over, which leads to chronic tendon strain.
- Corrosive Soil Chemistry: Soil’s got active microbes, humic acids, and moisture in it. If you store a spade with damp dirt caked to the socket, you’ve basically built a corrosion cell. In regions with alkaline, calcium-rich clay, wet soil scale can chew pitting cavities into raw carbon steel in a matter of days.
- Mechanical Over-Torquing: Pruners are made for straight shear cuts. When somebody tries to cut a branch that’s bigger than the tool’s limit (typically 3/4-inch for hand shears) and twists the handles sideways to snap the wood, the pivot bolt stretches. Once that bolt gives up, the cutting blade rides up onto the counter-hook and the cutting clearance is toast.
Common Mistakes
- Grinding with a High-Speed Bench Grinder: Never jam hand pruners or Japanese carbon steel knives against a dry high-speed grinding wheel. That friction cooks the steel past 400°F in seconds, turns it blue, and ruins the temper (hardness) for good. Stick with manual waterstones, diamond hones, or slow files.
- Using Petroleum Grease on Pivot Joints: Heavy axle grease grabs fine grit, silica sand, and dried topsoil like it’s got a magnet in it. That slurry turns into an abrasive lapping compound that eats away at the steel pivot hole. Use low-viscosity non-detergent machine oil or plant-based camellia oil instead.
- Storing Tools Resting on Damp Concrete Floors: Concrete slabs wick moisture up from below. Leaving shovel blades flat on the garage floor causes deep pitting right along the cutting edge. Hang tools on heavy-duty wall studs or tool hooks at least 12 inches off the deck.
- Soaking Wooden Handles in Water: When handles get loose, there’s an old myth that says to soak the tool head in a bucket of water so the wood swells. Sure, it works for two days—then the fibers crush inside the metal socket, dry out, and shrink back down twice as loose as before. Fix loose handles by driving steel or hardwood wedge shims into the eye, or replace the shaft altogether.
- Buying Anvil Shears for General Pruning: Anvil cutters have their place on dry brush, but buying them as an all-around gardening gift or daily user is a mistake. They smash live stems, peel the bark downward, and leave ragged wounds that take three times longer to compartmentalize.
Cost & Time Breakdown
| Task | DIY Cost | Pro Cost | Time |
|---|---|---|---|
| Complete Pruner Disassembly, Sharpening & Tune-Up | $5–$15 (diamond file & oil) | $25–$40 (cutlery shop) | 20–30 minutes |
| Shovel Edge Profiling & Sand Cleaning Bucket Setup | $15–$25 (sand, bucket & mineral oil) | $20–$35 (hardware store) | 15–20 minutes |
| Wood Handle Sanding & Triple Linseed Oil Treatment | $10–$18 (sandpaper & boiled linseed oil) | $45–$65 (tool restoration) | 45 minutes (plus dry time) |
| Complete Broken Ash Handle Replacement | $22–$35 (replacement handle & rivets) | $55–$85 (landscaping mechanic) | 40–60 minutes |
| Ergonomic Upgrades (Rubber grips, spring swap, holster) | $12–$30 (parts & accessories) | N/A (DIY only) | 15 minutes |
Tips & Prevention
- Match Tool Size to the Gardener: Look for hand pruners with interchangeable springs or modular handle sizes (like standard medium vs. compact small models) or revolving handles that rotate with your fingers to cut blistering hand friction by 30%.
- Establish a Five-Second Cleanup Routine: Keep a brass wire brush and a bottle of camellia oil hanging right above your tool rack. Knock the day's dirt off and wipe the blade down before your boots even leave the utility room.
- Disinfect Between Plants: If you’re pruning diseased boxwoods, roses with black spot, or blighted tomatoes, spray the blades with 70% isopropyl alcohol between every single plant. Clean oil keeps tools sharp, but alcohol keeps gardens pathogen-free.
- Annual Winter Teardown: Make it a habit every December or January to pull apart all your cutting gear. Strip the old oil, hone out deep nicks from hidden wire fencing, and re-treat all hardwood shafts so everything’s ready for early spring bud-break.
- Check Pivot Fasteners Monthly: Before you head into a heavy pruning session, verify the center lock nut on your loppers and shears. Catching a loose pivot bolt before it binds saves expensive bypass blades from bending out of true.
When to Call a Professional
Most tool repair fits squarely in the DIY lane, but some garden work goes past hand tools and needs licensed arborists or landscape contractors. Never try to use manual pole saws, loppers, or extension gear within 10 feet of overhead utility lines; live electrical arcing can jump through damp wooden or fiberglass poles without warning. Same story with tree limbs over 3 inches in diameter or ones with serious hollow spots—amateur pruning can turn into a bad hinge failure and real property damage in a hurry. Call a certified arborist with commercial general liability and workers' compensation insurance to handle canopy work, structural crown reductions, and deadwood clearing on mature oaks, pecans, and maples. Leave high-voltage line clearance to utility-certified tree crews.
Frequently Asked Questions
What is the single best tool upgrade for someone who has basic garden gear?
A real Japanese hori-hori knife is about the most versatile upgrade you can give or buy. It’s got a thick, dished carbon or stainless steel blade with one straight-honed edge and one serrated edge, and it replaces a hand trowel, root saw, weeding fork, and bulb planter in one holster-mounted tool.
What is the difference between bypass and anvil pruners?
Bypass pruners use two curved blades that sweep past each other like scissors, making a clean cut without crushing live plant tissue. Anvil pruners smack a single sharpened blade down onto an unsharpened soft metal block; they should only be used on brittle dead wood or dry garden kindling.
Why do wooden tool handles keep cracking or splintering?
Handles crack when their natural protective oils dry out from sun exposure and humidity swings. If they’re left alone, the wood takes on ambient moisture, swells, and then shrinks hard under hot afternoon sun. Rubbing handles with boiled linseed oil every autumn seals the grain and helps the wood stay flexible inside.
Can I sharpen serrated garden tools like folding saws?
Most modern folding pruning saws use impulse-hardened tri-edge teeth that are tempered to extreme hardness (around 65 HRC). They hold an edge three times longer than old-style steel, but standard triangular saw files won’t bite into them; when an impulse-hardened saw blade finally dulls, the right fix is a factory replacement blade.
What kind of oil should I use on my garden shears?
Pure camellia oil or light white mineral oil is best. Stay away from heavy motor oils and household vegetable cooking oils; vegetable oils eventually oxidize, get sticky, and go rancid, while used motor oil has toxic heavy metals and carcinogens you don't want on edible stems.
How do I stop blisters when doing heavy garden shovel work?
Blisters come from friction and a bad handle finish. Sand off thick, glassy factory varnish down to bare wood and put on linseed oil; bare, oiled wood lets your hands move naturally without catching. Pairing properly conditioned ash handles with snug goatskin gloves cuts down hot spots.
Is carbon steel better than stainless steel for hand tools?
Carbon steel sharpens easier and keeps a keener edge under constant soil contact, but it needs regular cleaning and light oiling to stop rust. Stainless steel fights corrosion when left out in the rain or stored damp, but its edge dulls faster and it’s harder to hone in the home shop.
How often should pruner blades be sharpened during the season?
For routine weekly gardening, touch up the cutting bevel with a pocket diamond hone every four to six hours of actual cutting time. Taking 60 seconds to make five light passes across the bevel keeps the edge razor-sharp and saves you from grinding out heavy damage later.
Related Articles
Keep troubleshooting with these hand-picked guides from FixlyGuide:
- Winter Storm Watch vs. Winter Storm Warning? 9 Steps to Protect Your Home — Know the exact operational difference between a Winter Storm Watch and Warning, and learn the step-by-step protocol to protect your home's…
- Heart Attack Snow? Why Wet Winter Slush Is Dangerous—and 9 Steps to Clear It Safely — "Heart attack snow" is heavy, water-logged slush that spikes cardiovascular strain. Learn the physics behind it, how to clear it safely, an…
- OTR on a Truck? What It Means and 8 Ways to Protect Your Driveway — Spotting OTR on a truck means an 80,000-lb long-haul freight rig is near. Learn what it means for residential deliveries, driveway protecti…
- The Secret to Lush Raised Beds? It's Not Just About How You Water — Smart irrigation for raised garden beds isn't just about automation; it's about delivering the right amount of water precisely when your pl…
- The 1978 Homeowner's Mistake: How to Safely Handle Lead Paint — Many homes built before 1978 contain lead-based paint, posing serious health risks if disturbed during DIY projects.
- Nutsedge Taking Over Your Lawn? 10 Steps to Kill It at the Root — Stop pulling nutsedge by hand. Learn how to identify yellow and purple sedge, select the right selective herbicide, and destroy tubers with…
Should you do this yourself?
Answer five quick questions before you start. Safety outranks savings every time.
Your experience with work like this
How high do you have to work?
Does the job involve any of these?
Will it need a permit?
Specialty tools
Free and instant. Educational guidance only — not a quote, inspection, or professional diagnosis.
What should this project cost?
Enter your project details for a realistic cost range before you call anyone.
Cost depends heavily on which system turns out to be the source.
- Regional adjustment
- National average
- Labor share (typical)
- ~$1,620
- Quotes to collect
- 3 written estimates
Educational estimate based on national averages — not a binding quote. Always confirm with written local estimates.
Before you start
Check the difficulty, permits, and safety risk — then decide whether to call a pro.
- Estimate this projectGet a cost range for your scope and ZIP before you call anyone.Open
- Get local estimatesSend one request and compare written estimates from vetted pros.Open
Free, no signup required. Estimates are educational guidance, not a quote or an inspection.
Get the print-ready PDF of this guide
A clean, ad-free, printable version you can keep on your phone or pin to the workshop wall. Free with a FixlyGuide account.
- Print-optimized layout
- Tools, materials & every step included
- Saved to your account
This article was independently written by FixlyGuide based on the source topic.
Frequently asked questions
What is the single best tool upgrade for someone who already has basic garden gear?+
A genuine Japanese hori-hori knife is the most versatile upgrade you can add to a garden setup. Featuring a dished carbon or stainless steel blade with one straight edge and one serrated root-cutting edge, it replaces a hand trowel, weeding fork, root saw, and bulb planter in a single indestructible tool.
What is the difference between bypass and anvil pruners?+
Bypass pruners have two curved blades that slide past each other like scissors to make surgical, clean slices through live plant tissue. Anvil pruners drive a single sharp blade straight down onto a flat metal block; while useful for brittle, dead wood, they crush live stems and damage plant vascular systems.
Why do wooden tool handles keep cracking or splintering?+
Tool handles crack when exposure to sun and moisture leaches out their natural oils, causing the grain to expand, contract, and dry out. Treating bare wood with raw or boiled linseed oil twice a year seals the pores, repels standing water, and preserves the natural flexibility of ash and hickory.
Can I sharpen serrated garden tools like folding saws?+
Most modern folding pruning saws use impulse-hardened teeth that are tempered beyond the hardness of standard hand files. Once an impulse-hardened blade dulls after several seasons of heavy branch work, replacing the blade with a factory insert is the standard, cost-effective fix.
What kind of oil should I use on my garden shears?+
Light mineral oil or traditional Japanese camellia oil is ideal for garden blades. Avoid vegetable cooking oils like canola or corn oil, which oxidize into a sticky, gummy varnish over time, and skip used motor oil, which deposits petroleum toxins directly into your garden soil.
How do I stop blisters when doing heavy garden shovel work?+
Blisters occur when slick factory polyurethane finishes cause hot spots and friction against bare palms. Sanding glossy varnish off down to bare wood and rubbing in penetrating oil creates a smooth, grippy surface that moves with your hands rather than tearing your skin.
Is carbon steel better than stainless steel for hand tools?+
Carbon steel takes and holds a significantly keener cutting edge through rocky, abrasive soil, but it requires regular cleaning and oiling to prevent rust. Stainless steel provides excellent corrosion resistance if gear is stored damp, but it is softer, dulls more quickly, and is harder to dress in the workshop.
How often should pruner blades be sharpened during the season?+
Give your blades a quick touch-up with a pocket diamond hone every four to six active hours of pruning. Taking one minute to run five to ten gentle passes down the primary bevel maintains an effortless slice and stops structural nicks from forming.

Discussion
Loading comments…