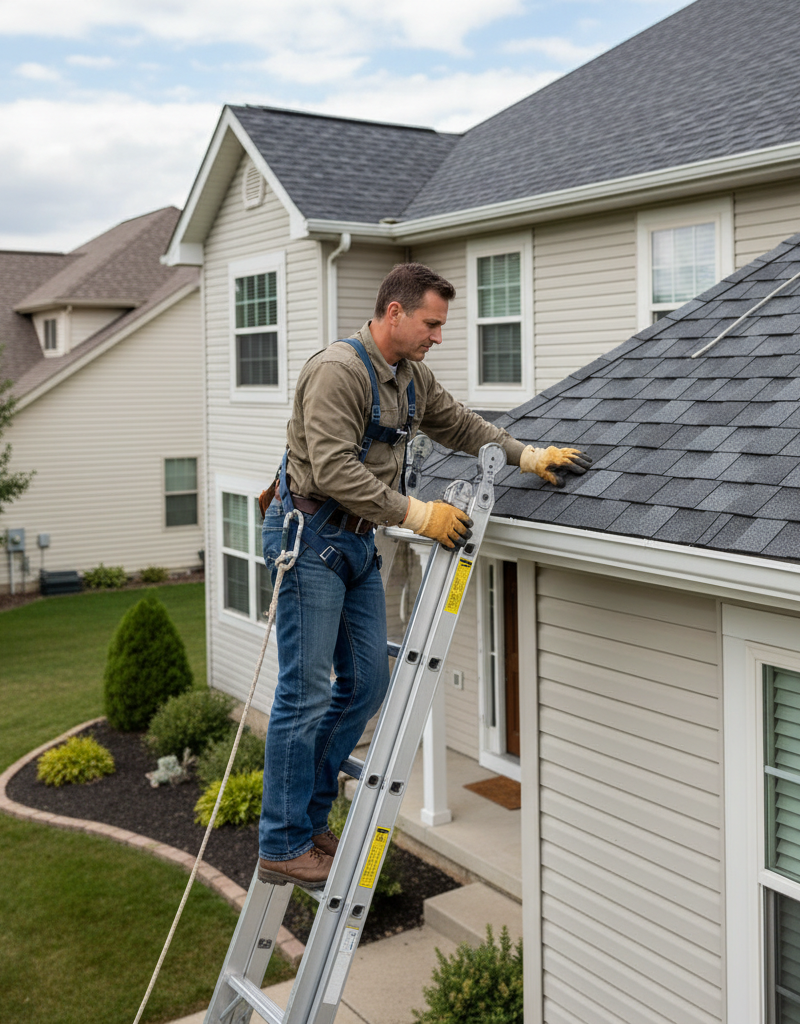
- Missing/cracked/curled: On the exterior, look for missing, cracked, curled, or buckling shingles. These create direct pathways for water.
- Granule loss: Areas with significant granule loss on asphalt shingles can indicate wear and reduced water shedding capability.
- Loose nails: Check for exposed or popped nails, especially at the edges of shingles, which can allow water to wick underneath.
Plumbing · Leak
| Project category | Plumbing |
|---|---|
| Problem type | Leak |
| Trade required | Plumbing |
| Urgency | Emergency — act now |
| Safety risk | High safety risk |
| DIY suitability | DIY for experienced homeowners |
| Cost category | Low cost |
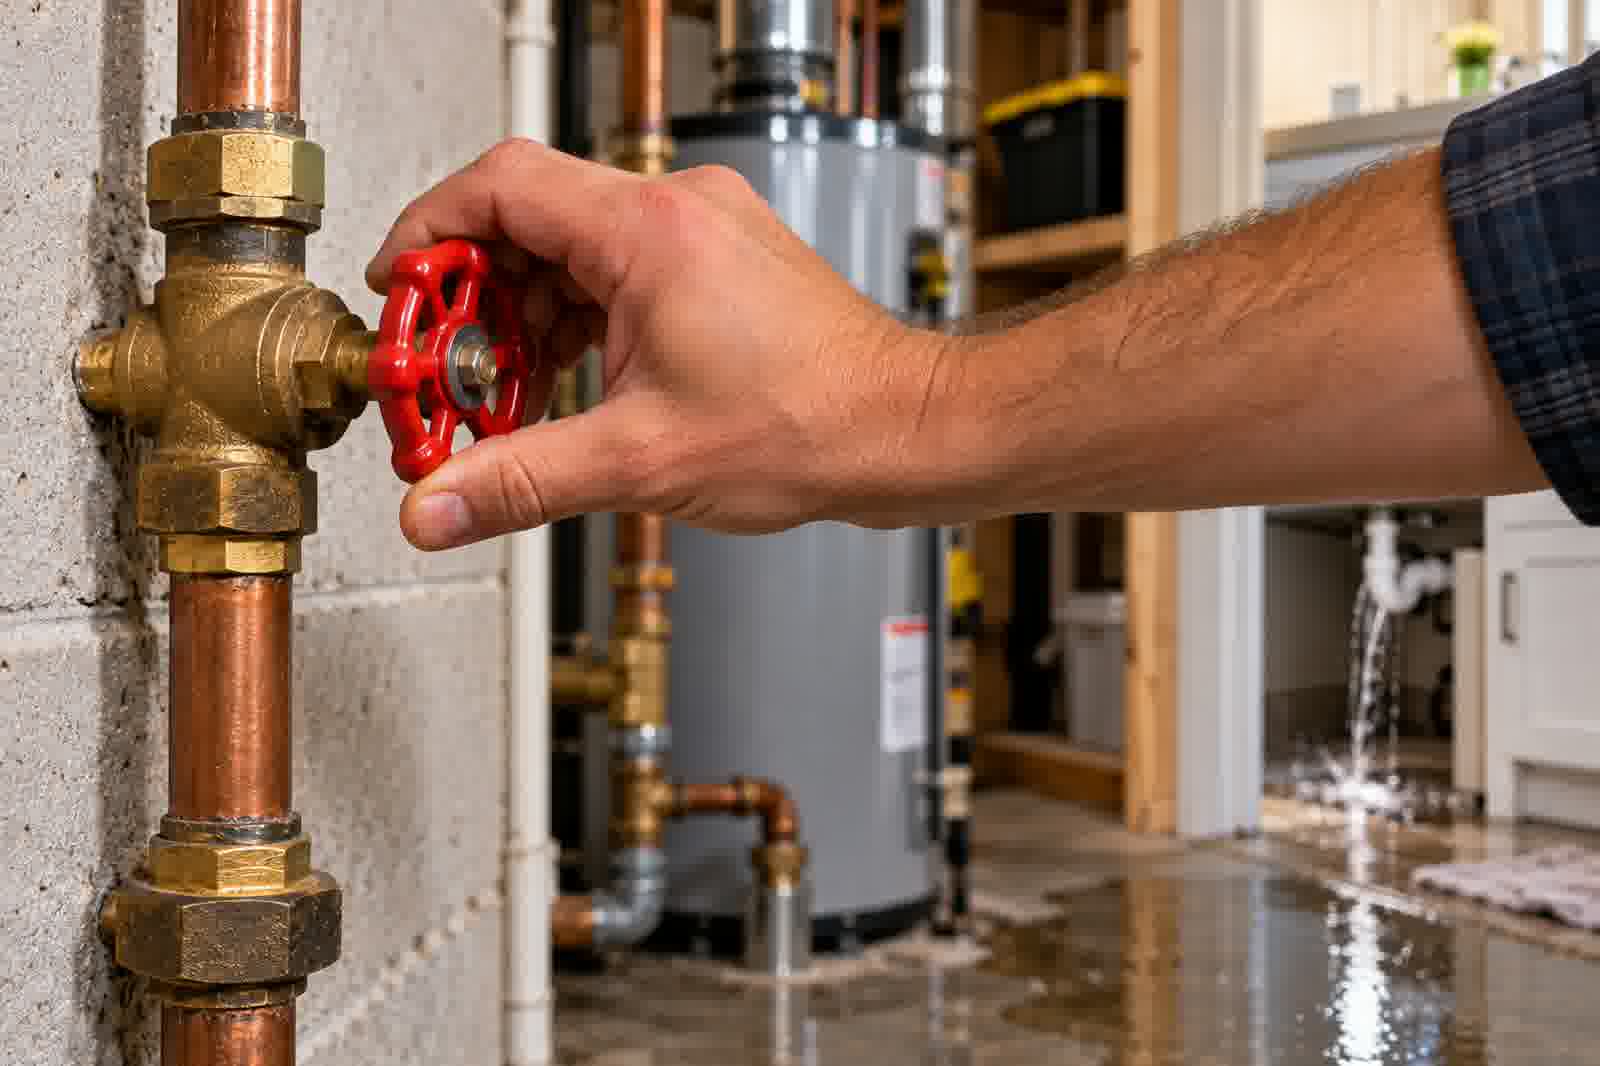
| Typical timeline | Shut water off now; repair usually same or next day |
| Contractor type | Licensed plumber |
Repair option
Isolate at the shutoff, replace the failed component, and dry the cavity fully.
Replacement option
Repipe the run or the branch when corrosion is widespread.
Common causes
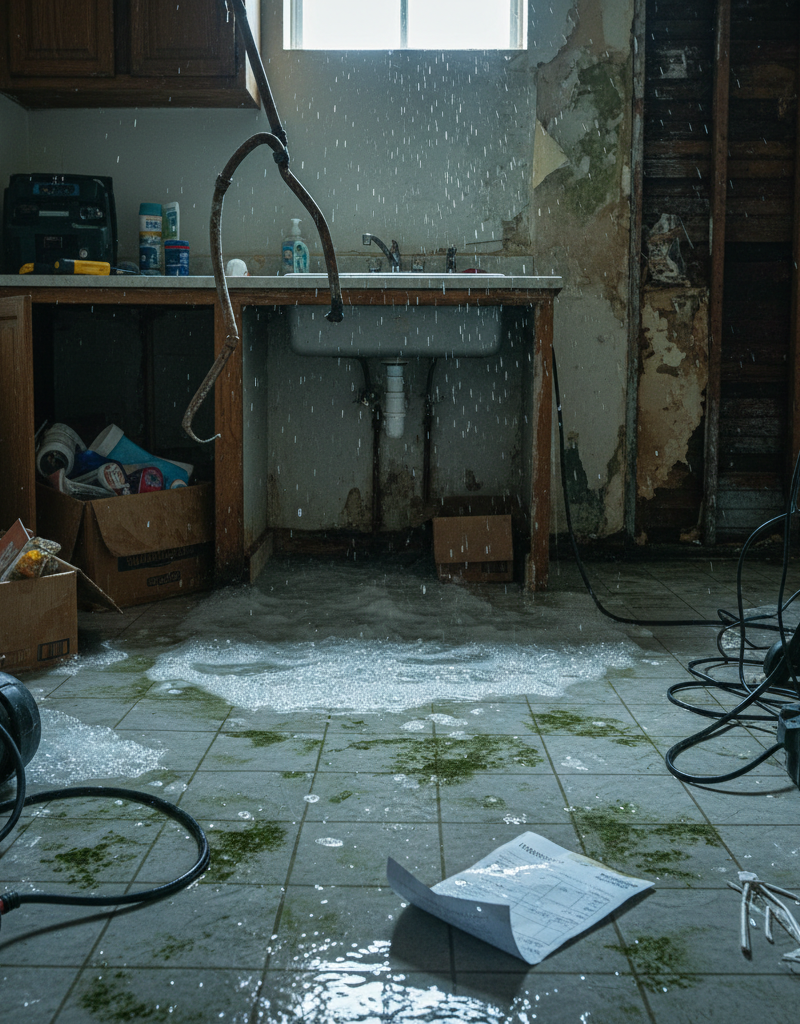
- Failed supply line or shutoff valve
- Worn washers, cartridges, or P-trap connections
- Pinhole corrosion in older copper
Relevant tools:emergency checklistdiy or hire a pro
Published July 9, 2026Last updated August 17, 2026
Tools & materials you'll need
Affiliate linksAs an Amazon Associate FixlyGuide earns from qualifying purchases — at no extra cost to you. Prices and availability are accurate as of publication and subject to change.
Quick Answer
Early detection of attic roof leaks involves regularly inspecting your attic for water stains, mold, or musty odors. Key signs include discoloration on ceilings, peeling paint, or damp insulation. A thorough investigation during or after rainfall can often pinpoint the exact entry point before significant damage occurs, saving you from extensive and costly repairs.
The Problem
An attic roof leak is a silent, insidious threat to your home. Unlike a burst pipe that makes an immediate, dramatic mess, a roof leak often starts as a trickle, slowly seeping into insulation, framing, and drywall. Homeowners frequently miss these early warnings until significant structural damage, mold growth, or widespread ceiling stains become undeniable. The problem isn't just the water itself, but the hidden damage it causes. Rotting wood compromises structural integrity, mold spores can spread throughout your home leading to health issues, and soaked insulation loses its effectiveness, driving up energy bills. The longer a leak goes undetected, the more expensive and invasive the repairs become, easily escalating from hundreds to thousands of dollars.
How It Works
Water intrusion from a roof leak typically follows the path of least resistance. When rain falls, it hits your roof and ideally sheds off into gutters. However, if there's a breach in the roofing material – a cracked shingle, a loose flashing, or a compromised seal around a vent pipe – water will penetrate the waterproof layer. Once past the shingles and underlayment, gravity pulls the water downwards. It often travels along the roof decking, rafters, or even electrical conduits before pooling in insulation or dripping onto the attic floor. Because attics are often hot, dry, and rarely visited, the water may evaporate before it ever forms a noticeable puddle, leaving behind only a faint stain or a subtle musty smell. This makes pinpointing the exact entry point above challenging, as the drip on your ceiling might be lateral to the actual breach by several feet. Understanding this 'travel path' is crucial for effective diagnosis, as you can't assume the leak source is directly above the observed damage.
Step-by-Step Fix
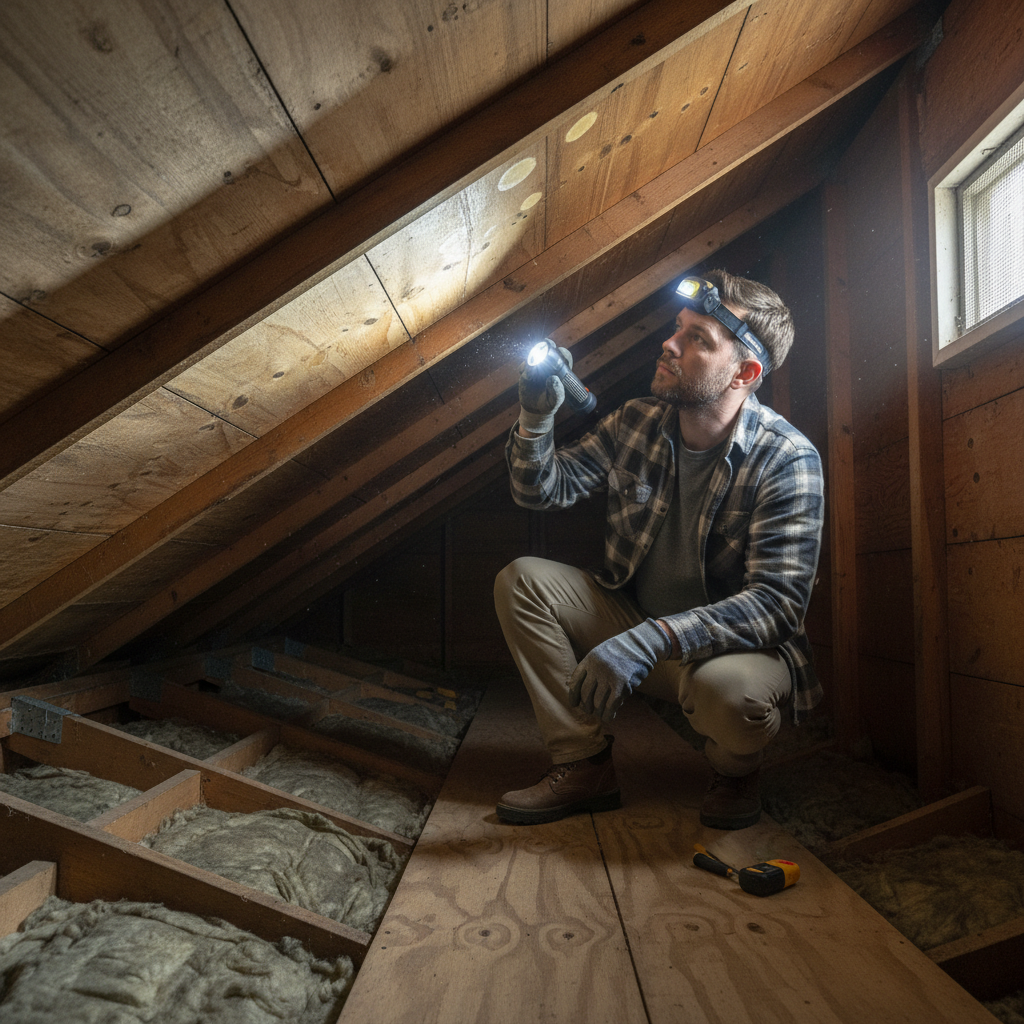
1. Gear Up for Safety — Ensure you have proper lighting, stable footing, and protective gear before entering the attic.
- Safety first: Always bring a flashlight or headlamp. Wear long sleeves, gloves, and a dust mask to protect against insulation fibers, dust, and potential mold. Use a sturdy ladder and never step directly onto ceiling drywall; always stay on joists or roof trusses.
2. Perform a Visual Inspection (Dry Conditions) — Look for telltale signs of water damage even when it's not raining.
- Focus on stains: Scan the underside of the roof deck, rafters, and insulation for any discoloration – water stains, dark spots, or unusual streaks. These may indicate past or active leaks. Pay close attention around chimneys, vent pipes, skylights, and valleys where different roof sections meet, as these are common leak points.
- Check insulation: Gently probe insulation for dampness or compaction. Wet or matted insulation is a clear sign of water ingress.
- Note odors: A musty or earthy smell often indicates mold or mildew growth, even if visual signs are minimal.
3. The Water Test (Two-Person Method) — Systematically apply water to the roof to simulate rain and identify the leak source.
- Team up: This step requires two people: one on the roof with a garden hose, the other in the attic watching for drips.
- Start low, go slow: Begin by soaking the lowest potential leak area on the roof (e.g., around a single shingle or flashing). The attic observer should wait patiently for 5-10 minutes. If no leak appears, move the water source slightly higher.
- Isolate sections: Work in small, manageable sections, isolating chimneys, vents, and valleys one at a time. This methodical approach helps pinpoint the exact breach. Communicate clearly between the roof and attic.
4. Examine Flashing and Sealants — These metal or rubber barriers are critical weakest links.
- Flashing: Inspect metal flashing around chimneys, skylights, and vent pipes for bends, cracks, rust, or loose connections. Even a tiny gap can let water through.
- Caulking/Sealant: Check the sealant around these penetrations. If it's cracked, dried out, or missing, it needs to be replaced.
5. Identify Damaged Shingles or Tiles — The most common culprit is often visible on the roof surface.
- Missing/cracked/curled: On the exterior, look for missing, cracked, curled, or buckling shingles. These create direct pathways for water.
- Granule loss: Areas with significant granule loss on asphalt shingles can indicate wear and reduced water shedding capability.
- Loose nails: Check for exposed or popped nails, especially at the edges of shingles, which can allow water to wick underneath.
6. Assess Vent Pipes and Boots — These often overlooked components frequently fail.
- Rubber boot: The rubber or neoprene flashing (boot) around plumbing vent pipes can crack, tear, or deteriorate with UV exposure. This is a very common leak source.
- Loose collars: Check if the metal or plastic collar at the base of the vent pipe is loose or cracked.
7. Inspect Valleys and Dormers — Where roof planes meet, proper sealing is paramount.
- Valleys: Look for tears, holes, or poor sealing in the valley flashing or underlayment. Water naturally funnels here, so even a small flaw is critical.
- Dormer corners: Corners where dormers meet the main roof are prime spots for flashing issues or improper shingle overlap.
8. Check for Condensation (If No Leak Found) — Sometimes, it's not a leak, but a ventilation issue.
- Cold surfaces: If you find moisture but no clear entry point after a thorough water test, check for condensation. Poor attic ventilation can lead to warm, moist air condensing on cold roof sheathing, mimicking a leak. You'll often see widespread dampness, dark stains, or mold on the underside of the roof deck, especially in winter. This usually requires improving attic ventilation rather than roof repair.
- Exhaust vents: Ensure bathroom and kitchen exhaust fans vent outside the house, not into the attic.
Common Causes
- Damaged/Missing Shingles: The most frequent cause. Shingles can be uplifted by wind, cracked by hail, or deteriorate over time due to UV exposure, leaving the underlayment exposed.
- Compromised Flashing: Metal flashing around chimneys, skylights, and vent pipes can bend, rust, or become loose, creating gaps for water entry. The sealant around these areas also degrades.
- Cracked Vent Pipe Boots: The rubber or neoprene seal around plumbing vent pipes degrades from sun exposure and temperature fluctuations, cracking and allowing water to enter the attic.
- Improper Nail Penetration: Nails that miss the rafter or are driven too far can create small holes in the roofing material, leading to slow leaks.
- Clogged Gutters/Ice Dams: While not a direct roof leak cause, clogged gutters can cause water to back up under shingles (especially in colder climates with ice dams), forcing water into the attic.
- Poor Attic Ventilation: This doesn't cause a leak but condensation, often mistaken for a leak. Warm, moist air from the house rises into a poorly vented attic and condenses on the cold underside of the roof deck, causing widespread moisture and mold.
Common Mistakes
- Assuming the Drip is Directly Above the Leak: Water travels. A stain on your ceiling or a drip in the attic could be many feet away horizontally from the actual entry point on the roof. Always trace up the water path.
- Patching Without Proper Diagnosis: Simply slapping caulk on a visible crack without understanding the underlying issue often leads to recurring leaks and wasted effort. A thorough diagnosis is essential.
- Ignoring Small Stains: A small yellow stain today can become a massive water-damaged ceiling next year. Every sign of water intrusion, no matter how minor, warrants investigation.
- Walking on Wet or Damaged Roofs: This is extremely dangerous and can cause further damage. Only work on a dry, stable roof, or call a professional.
- Using the Wrong Sealants or Repair Materials: Not all sealants are suitable for roofing. Use UV-resistant, waterproof roofing cement or flashing sealant designed for exterior use.
- Neglecting Attic Ventilation: Mistaking condensation for a leak is common. If you fix what you think is a leak and the problem persists, poor ventilation might be the true culprit.
Cost & Time Breakdown
| Task | DIY Cost | Pro Cost | Time |
|---|---|---|---|
| Basic Leak Detection | $0–$10 | $100–$300 | 30 min – 2 hrs |
| Replace 1-2 Shingles | $10–$30 | $150–$300 | 1–2 hours |
| Replace Vent Boot/Flashing | $20–$50 | $180–$400 | 1–3 hours |
| Seal Minor Flashing Gaps | $15–$40 | (Included) | 1 hour |
| Extensive Leak Repair | (N/A) | $500–$2,000+ | 4+ hours |
Tips & Prevention
- Routine Attic Checks: Conduct a visual inspection of your attic twice a year – once in spring, once in fall. Look for stains, smells, or dampness.
- Inspect Your Roof Annually: From the ground with binoculars, check for missing, cracked, or curling shingles, and inspect flashing around penetrations. After a major storm, do an immediate check.
- Keep Gutters Clean: Clogged gutters can cause water to back up under shingles, particularly in heavy rain or with ice dams. Clean them twice a year.
- Trim Overhanging Branches: Branches rubbing against the roof can damage shingles over time. Falling branches are also a hazard.
- Ensure Proper Attic Ventilation: Adequate soffit and ridge vents are crucial to prevent condensation buildup that can mimic or exacerbate leak damage. Consult an HVAC professional if you suspect poor ventilation.
- Address Issues Promptly: Don't delay minor repairs. A small crack in a shingle or flashing seal can quickly lead to significant internal damage.
When to Call a Professional
Call a licensed roofing professional if you cannot safely access your roof or attic, if you cannot definitively locate the leak source after a thorough investigation, or if the leak appears to be widespread. Any signs of structural damage like sagging rafters, extensive mold growth, or leaks around complex roof structures (e.g., gambrel roofs, multiple dormers) warrant expert intervention. Furthermore, if the water test suggests multiple leak points or if the issue seems to stem from general roof deterioration rather than an isolated problem, a professional assessment is crucial. Repairing significant roof damage or identifying subtle structural weaknesses requires specialized knowledge and equipment, making it a task best left to licensed and insured experts.
Related Articles
Keep troubleshooting with these hand-picked guides from FixlyGuide:
- The One Hidden Sign of a Roof Leak Most Homeowners Miss (And the $10 Fix) — Catching a roof leak early can save thousands in repairs. Learn the elusive signs and a simple, effective fix before minor issues become ma…
- The Silent Destroyer: 7 Hidden Signs Your Roof Has a Leak (Before You Need a New Ceiling) — Catching roof leaks early can save your home from extensive damage and costly repairs. Learn the subtle indicators that reveal hidden water…
- The Secret Culprit Behind Your Leaky Refrigerator (It’s Not Always a Hose) — Discover the hidden causes of your refrigerator leaking water and how to fix them with our comprehensive troubleshooting guide.
- The 4 Hidden Reasons Your Chimney Leaks in Rain (And the Smart Fixes) — A leaky chimney during rain can hint at several underlying issues, from a faulty chimney cap to damaged flashing, all of which require prom…
- The 3 Hidden Reasons Your Washing Machine Leaks from the Bottom (and the $5 Fix) — A washing machine leaking water from the bottom is often caused by a loose hose connection or a clogged drain pump filter, both easy DIY fi…
- The 3 Critical Mistakes Homeowners Make Inspecting Their Roof (From the Ground) — Learn how to spot damaging roof problems safely from the ground, avoiding common pitfalls and knowing exactly what to look for.
Should you do this yourself?
Answer five quick questions before you start. Safety outranks savings every time.
Your experience with work like this
How high do you have to work?
Does the job involve any of these?
Will it need a permit?
Specialty tools
Free and instant. Educational guidance only — not a quote, inspection, or professional diagnosis.
Questions to ask before you sign
Ask every contractor the same questions and the cheapest bid stops looking cheapest. Check them off as you go — your progress is saved on this device.
Free, no signup. Bring this to every walkthrough so you compare bids on the same terms.
What should this project cost?
Enter your project details for a realistic cost range before you call anyone.
Common repairs run $150–$650; repipes and water-heater replacements reach $1,500–$4,500.
- Regional adjustment
- National average
- Labor share (typical)
- ~$754
- Quotes to collect
- 3 written estimates
Educational estimate based on national averages — not a binding quote. Always confirm with written local estimates.
Fixly Project Decision Box
- DIY difficulty
- Professional Recommended
- Estimated time
- Inspection 1–2 hours · repairs 1–3 days
- Cost level
- High
Main tools / materials
- Binoculars for a ground-level look
- Flashlight for attic checks
- Moisture meter
- Roofing cement (temporary patch only)
When to stop and call a pro
- Active leak near lights, fans, or any wiring
- Sagging, bulging, or water-filled ceiling
- Steep, wet, or two-story roof — do not climb it
- Storm or hail damage you plan to claim on insurance
Need professional help?
Free roof assessment first — no phone calls until you ask for them.
Get Local Roofing HelpGet help with your roof now
Stay off the roof. These free tools help you protect the house and reach the right professional fast.
- Emergency repair checklistThe first steps that limit damage before a pro arrives.Open
- Repair or replace your roof?Answer 10 questions about age, leaks, and damage to get a clear next step.Open
- Get local estimatesSend one request and compare written estimates from vetted pros.Open
Free, no signup required. Estimates are educational guidance, not a quote or an inspection.
Frequently asked questions
How do you find a roof leak in the attic?+
To find a roof leak in the attic, first visually inspect the roof deck, rafters, and insulation for water stains, mold, or musty odors. During or after rainfall, or by performing a controlled water test with a helper, systematically apply water to sections of the roof while the other person watches for drips or moisture inside the attic.
What are the first signs of a roof leak?+
The first signs of a roof leak often include discoloration or water stains on your ceiling or attic floor, a musty odor, peeling paint on interior walls, or damp/compacted insulation in the attic. On the exterior, look for missing, cracked, or curled shingles, or damaged flashing around roof penetrations.
Can a roof leak repair be a DIY project?+
Minor roof leaks, such as those caused by a single cracked shingle or a small gap in flashing sealant, can often be a DIY project for a homeowner comfortable working safely on a roof. However, complex leaks, widespread damage, or any situation where safety is a concern should always be handled by a licensed roofing professional.
Discussion
Loading comments…