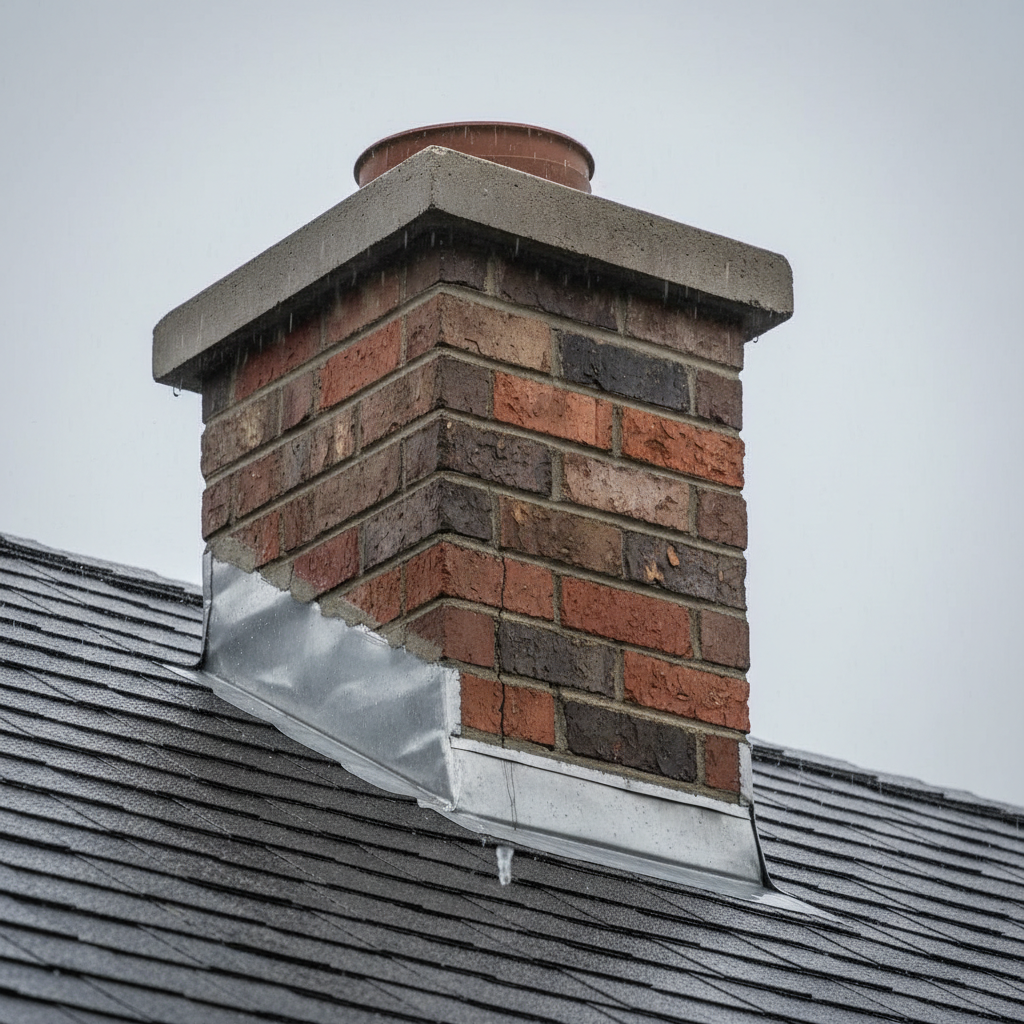
- Damaged or Missing Chimney Cap: The simplest and most direct entry point for rainwater. Without a cap, rain pours down the flue.
- Porous or Cracked Chimney Crown: A cracked concrete crown allows water to seep into the chimney structure, often traveling down the exterior of the flue liner.
- Compromised Flashing: Improperly installed, rusted, or separated flashing Where the chimney meets the roof is a very common source of leakage, as it's a high-stress area.
- Deteriorated Mortar Joints: Over time, weather erodes mortar, creating pathways for water to penetrate the brickwork.
- Saturated Bricks (Spalling): Older or lower-quality bricks can become saturated with water, which then migrates inwards, especially during freeze-thaw cycles.
Plumbing · Leak
| Project category | Plumbing |
|---|---|
| Problem type | Leak |
| Trade required | Plumbing |
| Urgency | Emergency — act now |
| Safety risk | High safety risk |
| DIY suitability | DIY for experienced homeowners |
| Cost category | Low cost |
| Typical timeline | Shut water off now; repair usually same or next day |
| Contractor type | Licensed plumber |
Repair option
Isolate at the shutoff, replace the failed component, and dry the cavity fully.
Replacement option
Repipe the run or the branch when corrosion is widespread.
Common causes
- Failed supply line or shutoff valve
- Worn washers, cartridges, or P-trap connections
- Pinhole corrosion in older copper
Relevant tools:emergency checklistdiy or hire a pro
Published July 9, 2026Last updated August 17, 2026
Tools & materials you'll need
Affiliate linksAs an Amazon Associate FixlyGuide earns from qualifying purchases — at no extra cost to you. Prices and availability are accurate as of publication and subject to change.
Quick Answer
Chimney leaks during rain can be a perplexing and damaging issue for homeowners. While it's easy to assume the roof is the sole problem, water entering through your chimney often stems from specific components designed to protect it from the elements. The most common culprits include a missing or damaged chimney cap, a cracked or improperly sloped chimney crown, compromised flashing around the chimney base, or deteriorated mortar joints in the brickwork. Identifying and addressing these issues promptly can prevent extensive water damage to your home's attic, ceilings, walls, and the chimney structure itself.
The Problem
Imagine the gentle pitter-patter of rain turning into the alarming drip, drip, drip inside your home. Or perhaps you've noticed a tell-tale brown stain spreading across your ceiling near the fireplace, or even water actively running down the inside of your firebox. This is the frustrating reality for homeowners facing a leaking chimney. A chimney, by its very nature, is a large opening exposed to the elements, making it a prime target for water intrusion if its protective layers fail. What starts as a minor leak can quickly escalate, leading to rot in structural timbers, plaster damage, ruined drywall, mold growth, and even compromise the integrity of the chimney flue liner. Ignoring these leaks is not an option; they demand immediate attention to safeguard your home's value and your family's health.
How It Works
Understanding how a chimney is constructed and how water is supposed to be repelled is key to diagnosing a leak. A chimney is more than just a stack of bricks; it's a complex system designed to safely vent smoke and combustion byproducts while simultaneously protecting your home from the weather. Think of it as a series of interlocking defenses against water:
-
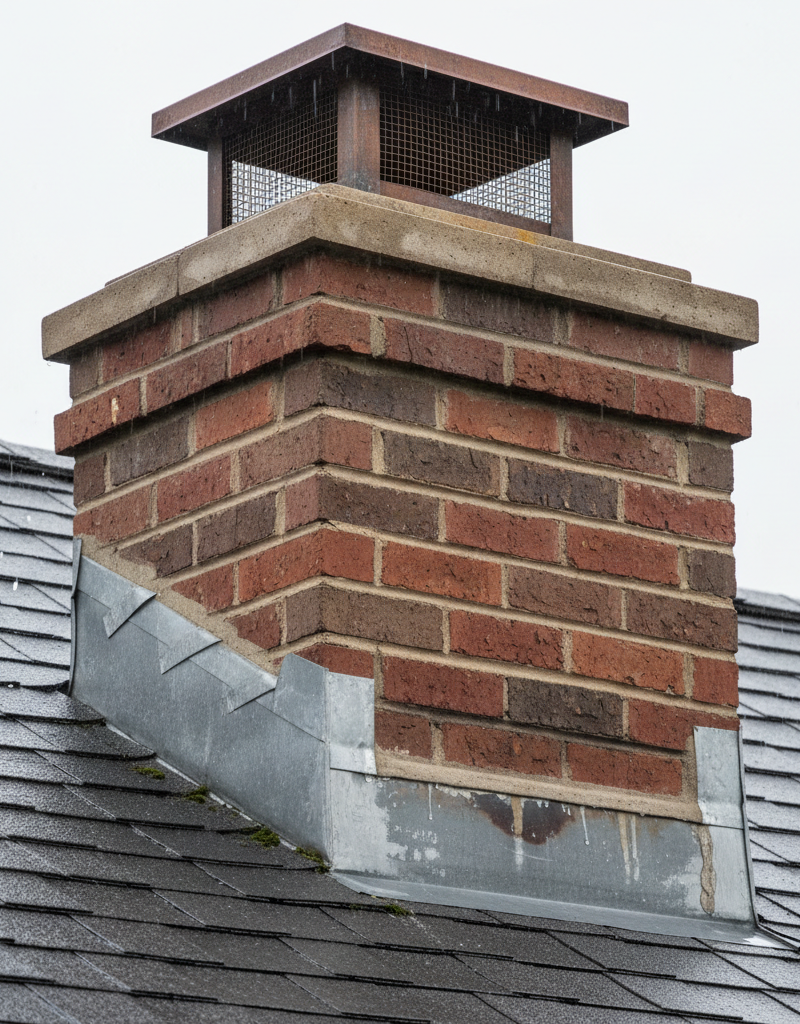
Chimney Cap: At the very top, the chimney cap acts as the first line of defense. It's a hat, essentially, preventing rain, snow, debris, and animals from entering the flue. Many caps also have mesh screens to prevent sparks from exiting. Without a cap, rain pours directly into the flue.
-
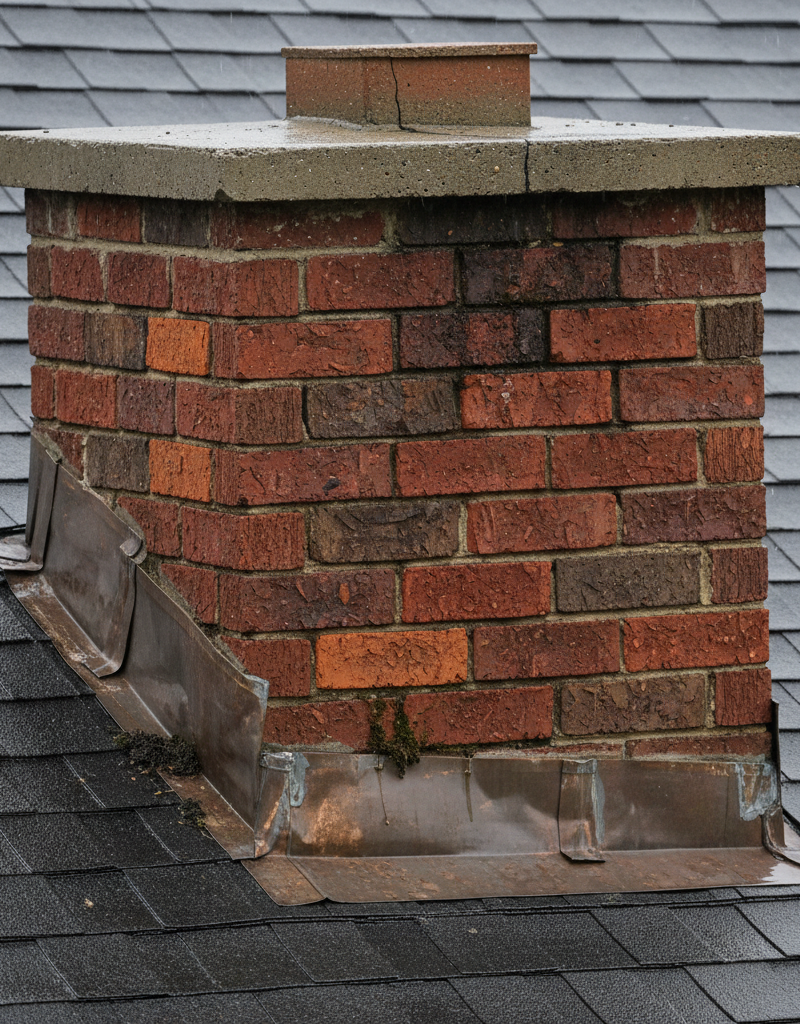
Chimney Crown: Directly beneath the cap, the chimney crown (also called a wash) is a concrete or stone slab that slopes downwards, directing water away from the flue opening and over the sides of the chimney. A well-constructed crown extends beyond the bricks by at least two inches, creating a drip edge. Cracks in the crown allow water to seep into the chimney structure below.
-
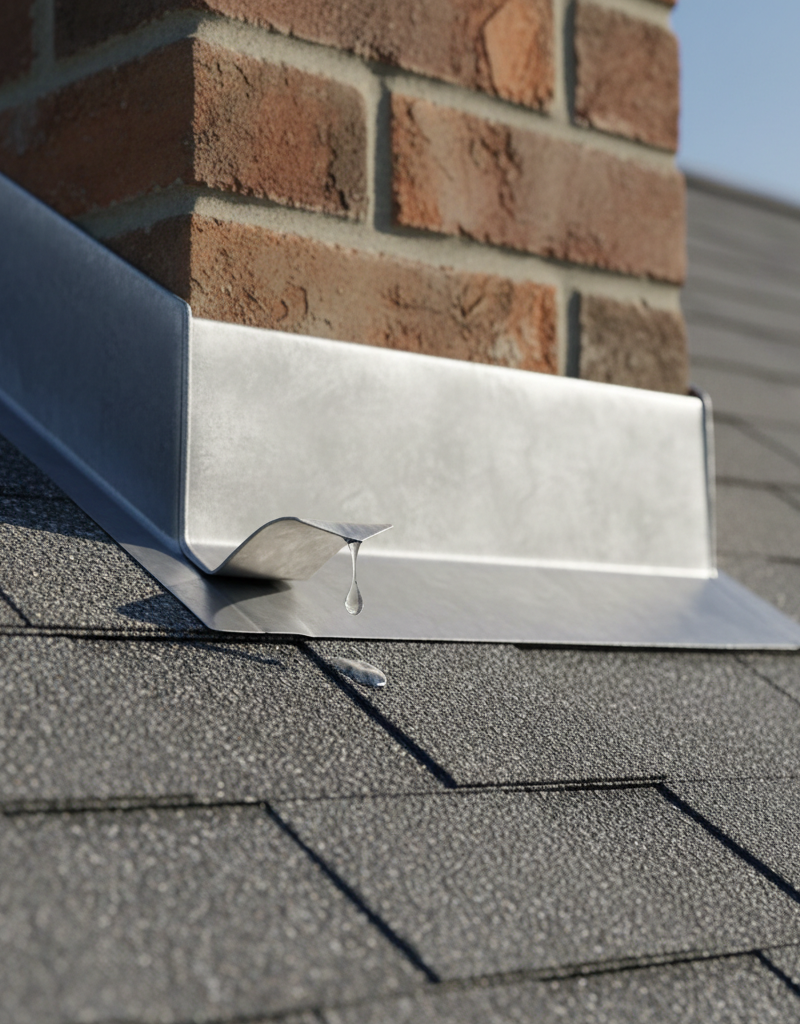
Flashing: This is arguably the most critical component for preventing leaks where the chimney meets the roofline. Flashing consists of metal sheets (typically aluminum, copper, or galvanized steel) bent and installed in two layers: a base flashing (bent up from the roof deck) and a counter-flashing (mortared into the chimney's mortar joints and bent down over the base flashing). This multi-layered design allows for movement between the roof and chimney without breaking the watertight seal. Deteriorated caulk, lifted flashing, or improperly installed flashing are major leak sources.
-
Mortar Joints and Bricks: The mortar between the bricks offers a degree of water resistance, but over time, it can crack, erode, or become porous. Bricks themselves, especially older or lower-quality ones, can also absorb water like a sponge. When mortar joints fail, water penetrates the brickwork and can wick its way down inside the chimney structure.
-
Flue Liner: Inside the chimney, the flue liner (clay tile, metal, or cast-in-place) guides exhaust gases. While not primarily for water repulsion, a damaged liner can allow water that has bypassed other defenses to travel down and enter the living space. When all these components are properly maintained, rainwater flows harmlessly over the cap, across the crown, down the bricks, and over the flashing onto the roof, then into the gutters and away from your home. Any failure in this system, however, invites water to penetrate.
Step-by-Step Fix
Safety Note: Working on a roof, especially near a chimney, involves significant fall risk. Always use a stable ladder, work with a partner, and wear appropriate safety gear. If you are uncomfortable with heights or roof work, call a professional. Never work on a wet or icy roof.
Here's how to diagnose and address common chimney leak sources:
1. Inspect and Repair the Chimney Cap — *The first defense against direct rainfall.
Begin your investigation at the very top. Climb onto the roof safely and visually inspect the chimney cap. Look for missing caps, rust, bent metal, or torn screens. A missing cap is an obvious entry point for rain directly into the flue.
- If missing or heavily damaged: Purchase a new, correctly sized chimney cap. Most are stainless steel or copper for longevity. Secure it firmly over the flue opening according to the manufacturer's instructions, typically with bolts or silicone adhesive. Ensure it covers all flue openings and has a sufficient overhang.
2. Examine and Repair the Chimney Crown — *Directing water away from the structure.
The chimney crown is the concrete slab on top of the bricks. Look for any cracks, large or hairline. Also, ensure it slopes outwards away from the flue and overhangs the chimney masonry by at least two inches to create a drip edge. If water is pooling on the crown, it's a problem.
- For hairline cracks: Clean the crown thoroughly. Apply a high-quality, flexible chimney crown repair sealant. These are typically brush-on or trowel-on products specifically designed for chimney crowns and can seal minor cracks. Follow product instructions for temperature and cure times.
- For larger cracks or spalling (flaking): You may need to chip away loose material, clean the surface, and apply a fresh layer of cement-based crown repair mix. For severely deteriorated crowns, a complete replacement by a professional might be necessary.
3. Inspect and Seal Flashing — *The critical seal between chimney and roof.
This is often the most common leak source. The flashing secures the chimney to the roof. Look for bent, rusted, missing, or loose flashing pieces. Pay close attention to any dried, cracked caulk around the flashing.
- For minor gaps or separated caulk: Clean the area meticulously. Apply a generous bead of high-quality, exterior-grade polyurethane sealant specifically designed for roofing and flashing. Ensure it bonds well to both the metal flashing and the roof shingles/tar. If possible, lift the edge of the counter-flashing and apply sealant underneath as well.
- For lifted or bent flashing: Carefully try to re-secure it. You might need to use roofing nails (with sealant over the nail heads) or specialized flashing adhesive. For severely damaged, rusted, or improperly installed flashing, a complete re-flashing job is recommended, often best left to a professional to ensure proper layering and sealing.
- Check the step flashing: These are individual L-shaped pieces woven in with each shingle course along the sides of the chimney. If any are bent, corroded, or missing, water can easily get underneath. Adjust or replace as needed, ensuring they are properly interleaved with shingles.
4. Examine Mortar Joints and Bricks — *The structure itself can absorb water.
Inspect the entire brickwork of the chimney from top to bottom. Look for cracked, crumbling, or missing mortar joints. Also, note any spalling (where the surface of the bricks is flaking off) or efflorescence (white powdery deposits, indicating water has been migrating through the brick).
- For deteriorated mortar (tuckpointing): This is a more involved repair. Loose mortar must be carefully scraped out to a depth of at least half an inch. The joints are then refilled with new mortar using a pointing trowel. This requires some skill to match the existing mortar and ensure a watertight seal. This is a common DIY task but if you have a lot to do, consider a mason. If you notice efflorescence on your bricks, cleaning them first with a stiff brush and a mild detergent solution (or a specialized masonry cleaner, following safety precautions) can help. After cleaning, apply a breathable, silane/siloxane-based masonry water repellent to the entire chimney surface. This won't trap moisture but will prevent future water absorption.
- For spalling bricks: Severely spalled bricks may need to be replaced by a mason, as their protective face is compromised, making them highly susceptible to water absorption and further deterioration.
5. Check for Condensation from Flue — *Sometimes it's not rain at all.
In some cases, especially with modern high-efficiency furnaces or water heaters venting through an older, unlined or oversized chimney, condensation can form inside the flue. This acidic water can mimic a leak. If your leak appears in dry weather, or seems related to appliance use, this could be the cause.
- If condensation is suspected: This issue typically requires professional assessment by an HVAC technician or chimney sweep. They may recommend installing a properly sized, insulated metal flue liner to prevent condensation.
Common Causes
- Damaged or Missing Chimney Cap: The simplest and most direct entry point for rainwater. Without a cap, rain pours down the flue.
- Porous or Cracked Chimney Crown: A cracked concrete crown allows water to seep into the chimney structure, often traveling down the exterior of the flue liner.
- Compromised Flashing: Improperly installed, rusted, or separated flashing Where the chimney meets the roof is a very common source of leakage, as it's a high-stress area.
- Deteriorated Mortar Joints: Over time, weather erodes mortar, creating pathways for water to penetrate the brickwork.
- Saturated Bricks (Spalling): Older or lower-quality bricks can become saturated with water, which then migrates inwards, especially during freeze-thaw cycles.
- Lack of Drip Edge on Crown: If the chimney crown doesn't extend beyond the brickwork, water runs directly down the chimney face, increasing saturation and wear.
- Condensation: While technically not a rain leak, high-efficiency appliances venting into an unlined or cold chimney can produce acidic condensation that looks like a water leak.
Common Mistakes
- Ignoring the Leak: Thinking a small drip is harmless. Even minor leaks can lead to significant structural damage, mold, and costly repairs over time.
- Just Caulking Over Everything: Applying a bead of caulk over rusted or improperly installed flashing often provides a temporary fix, if any. The underlying issue typically needs to be addressed for a lasting repair.
- Using the Wrong Sealant: Not all sealants are created equal. Using regular silicone caulk instead of specific chimney crown repair products or high-quality polyurethane exterior sealants for flashing will result in a short-lived repair.
- Not Cleaning Surfaces Before Repair: Dust, dirt, and old caulk prevent new sealants and repair materials from properly adhering, leading to premature failure.
- DIYing Complex Flashing Repairs: Installing proper chimney flashing is an art and a science, requiring specific bends, layering, and sealants. If not done correctly, it will almost certainly leak again. Call a professional if the existing flashing is extensively damaged.
- Assuming the Roof is Always the Problem: While roof issues can mimic chimney leaks, specifically diagnosing the chimney components first can save time and money on unnecessary roof repairs.
Cost & Time Breakdown
| Task | DIY cost | Pro cost | Time |
|---|---|---|---|
| Chimney Cap Replacement | $50–$250 | $200–$500 | 30–60 min |
| Chimney Crown Repair (minor) | $30–$100 | $150–$400 | 1–2 hours |
| Flashing Sealing (minor) | $20–$50 | $100–$300 | 30–60 min |
| Tuckpointing (small area) | $40–$150 | $300–$800+ | 2–4 hours |
| Full Flashing Replacement | N/A (Pro recommended) | $400–$1,000+ | 4–8 hours |
| Chimney Waterproofing (DIY) | $50–$200 | $300–$700 | 2–3 hours |
Tips & Prevention
- Annual Chimney Inspection: Have your chimney professionally inspected by a certified chimney sweep at least once a year. They can spot small issues before they become major leaks.
- Clean Gutters Regularly: Clogged gutters can cause water to back up and spill over, often running down the chimney face and exacerbating mortar or brick issues.
- Apply Water Repellent: Every 5-10 years, consider applying a breathable, silane/siloxane-based masonry water repellent to your chimney's exterior. This penetrates the brick and mortar, making them hydrophobic without trapping moisture, significantly reducing water absorption.
- Ensure Proper Crown Overhang: When having crown repairs or replacements done, ensure it has at least a 2-inch overhang with a drip edge to direct water away from the masonry.
- Check for Tree Branches: Trim back any tree branches that overhang or rub against the chimney. They can deposit debris, scrape components, and funnel water onto problematic areas.
- Address Small Issues Immediately: Don't wait for a small stain to become a waterfall. The quicker you address a leak, the less extensive and costly the damage will be.
When to Call a Professional
While some chimney leak repairs are suitable for a confident DIYer, several scenarios warrant calling a licensed professional, such as a certified chimney sweep or roofer specializing in flashing. If you discover extensive mortar deterioration requiring significant tuckpointing across large sections of the chimney, or if the chimney flashing is severely rusted, torn, or requires a complete re-installation (especially if it involves lifting shingles and working with multiple metal layers), professional expertise is crucial. Any structural cracks in the chimney masonry itself, persistent leaks after attempting basic repairs, or if you are uncomfortable working on a ladder at roof height, are clear signals to call a pro. Furthermore, if you suspect the leak is due to condensation from a furnace or water heater, an HVAC technician or chimney sweep with gas appliance expertise should be consulted to ensure proper venting and prevent dangerous carbon monoxide hazards.
Related Articles
Keep troubleshooting with these hand-picked guides from FixlyGuide:
- Why Your Chimney Leaks in the Rain (It's Not Always the Roof) — Discover the hidden causes of a leaky chimney during rain, from flashing failures to damaged crowns, and how to fix them for good.
- The Secret Culprit Behind Your Leaky Chimney (It’s Not Always the Obvious Flashing) — Discover the often-overlooked causes of chimney leaks during rain and how to tackle them with effective DIY solutions and prevention tips.
- The Secret Culprit Behind Your Leaky Chimney (It's Not Always the Obvious Fix) — Discover the often-overlooked causes of a leaky chimney during rain, beyond just a faulty cap, and learn practical steps to fix it.
- The 4 Hidden Reasons Your Chimney Leaks in Rain (And the Smart Fixes) — A leaky chimney during rain can hint at several underlying issues, from a faulty chimney cap to damaged flashing, all of which require prom…
- The Secret Culprit Behind Your Leaky Chimney (It’s Not Always the Obvious Fix) — A leaky chimney during rain can indicate several issues, from simple flashing problems to complex crown damage, requiring homeowners to dia…
- The #1 Reason Your Gutters Overflow (It's Not Clogging) — Discover the surprising true cause of overflowing gutters during heavy rain and how a simple fix can prevent costly water damage to your ho…
Should you do this yourself?
Answer five quick questions before you start. Safety outranks savings every time.
Your experience with work like this
How high do you have to work?
Does the job involve any of these?
Will it need a permit?
Specialty tools
Free and instant. Educational guidance only — not a quote, inspection, or professional diagnosis.
Estimate your own project cost
National averages are a starting point. Enter your details for a range that fits your house.
Roof replacement cost
- Per square (installed)$604 – $866
Add $500–$2,500 if decking is rotten and needs replacement. Storm damage may be covered by insurance.
Educational estimate only — always confirm with written local bids.
What should this project cost?
Enter your project details for a realistic cost range before you call anyone.
Common repairs run $150–$650; repipes and water-heater replacements reach $1,500–$4,500.
- Regional adjustment
- National average
- Labor share (typical)
- ~$754
- Quotes to collect
- 3 written estimates
Educational estimate based on national averages — not a binding quote. Always confirm with written local estimates.
Fixly Project Decision Box
- DIY difficulty
- Professional Recommended
- Estimated time
- Inspection 1–2 hours · repairs 1–3 days
- Cost level
- High
Main tools / materials
- Binoculars for a ground-level look
- Flashlight for attic checks
- Moisture meter
- Roofing cement (temporary patch only)
When to stop and call a pro
- Active leak near lights, fans, or any wiring
- Sagging, bulging, or water-filled ceiling
- Steep, wet, or two-story roof — do not climb it
- Storm or hail damage you plan to claim on insurance
Need professional help?
Free roof assessment first — no phone calls until you ask for them.
Get Local Roofing HelpDecide what your roof needs
Two minutes of questions turns "something is wrong up there" into a clear next step.
- Repair or replace your roof?Answer 10 questions about age, leaks, and damage to get a clear next step.Open
- Compare contractor quotesScore up to four bids on price, warranty, licensing, and timeline.Open
- Get local estimatesSend one request and compare written estimates from vetted pros.Open
Free, no signup required. Estimates are educational guidance, not a quote or an inspection.
Frequently asked questions
Why is my chimney leaking when it rains?+
Chimney leaks during rain often stem from a damaged chimney cap, a cracked concrete crown, failed flashing where the chimney meets the roof, or deteriorated mortar joints in the brickwork. Each component plays a crucial role in diverting water.
Can a chimney leak cause significant damage?+
Absolutely. Even a small, consistent leak can lead to severe water damage, including rotten structural timbers, damaged drywall and plaster, mold growth, and compromised firebox integrity. It's vital to address leaks promptly.
How often should I inspect my chimney for leaks?+
It's recommended to have your chimney professionally inspected by a certified chimney sweep at least once a year. Between professional checks, homeowners should visually inspect the chimney from the ground and during roof maintenance for obvious signs of damage or wear.
Is it safe to DIY a chimney leak repair?+
Minor repairs like sealing small crown cracks or re-caulking flashing gaps can be DIY projects for those comfortable with heights and roof work. However, complex repairs like extensive tuckpointing or full flashing replacement are best left to licensed professionals due to safety risks and the need for specialized skills.
What is chimney waterproofing?+
Chimney waterproofing involves applying a breathable, silane/siloxane-based repellent to the exterior brick and mortar. This treatment penetrates the masonry, making it hydrophobic without trapping moisture, thereby reducing water absorption and preventing leaks through porous materials.
Discussion
Loading comments…