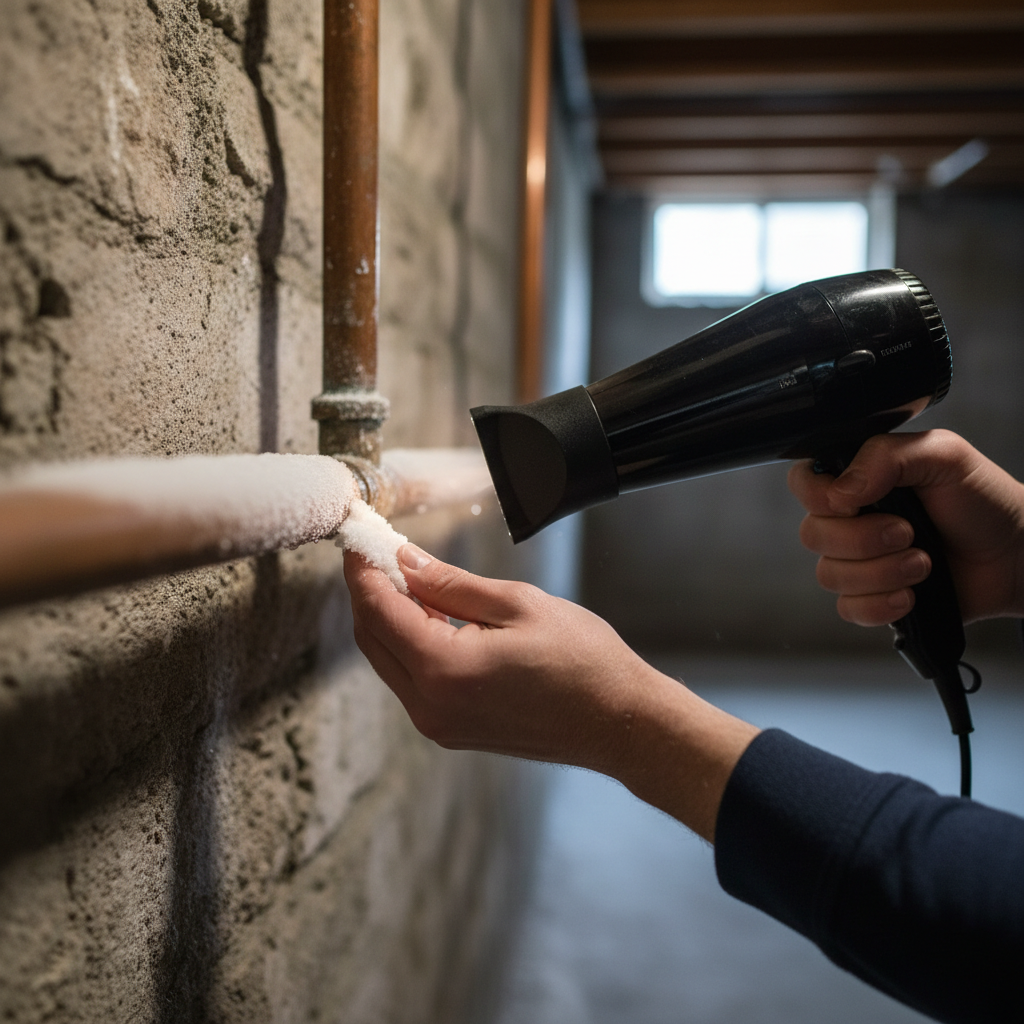
- Hairdryer: The safest and most common method. Hold it 6-12 inches from the pipe, moving it continuously to avoid overheating one spot.
- Heat Gun (on low setting): More powerful than a hairdryer, so use with extra caution. Keep it moving and maintain a greater distance to prevent melting or scorching. Start with the lowest heat setting.
- Hot Towels: Wrap towels soaked in hot water around the pipe. Replace them frequently as they cool. This is excellent for pipes in tight spaces or near flammable materials.
- Portable Space Heater: Position a small space heater near the frozen pipe, directing the heat towards it. Ensure it’s at a safe distance from walls and flammable objects.
Plumbing · Pipe damage
| Project category | Plumbing |
|---|---|
| Problem type | Pipe damage |
| Trade required | Plumbing |
| Urgency | Emergency — act now |
| Safety risk | High safety risk |
| DIY suitability | Licensed pro only |
| Cost category | High cost |
| Typical timeline | Emergency shutoff now; repipes commonly 2–5 days |
| Contractor type | Licensed plumber |
Repair option
Cut out and replace the damaged section with a coupling or new run.
Replacement option
Whole-home repipe when the material itself is the problem.
Common causes
- Freeze-thaw expansion in an uninsulated run
- Corrosion in aging galvanized or polybutylene
- Shifting foundation stressing a slab line
Relevant tools:emergency checklistcompare quotes
Published July 8, 2026Last updated August 17, 2026
Tools & materials you'll need
Affiliate links- AmazonHairdryeror heat gun on a low setting
- AmazonBucket or large basinto catch melting ice or drips if a small leak is found
- AmazonWork glovesto protect hands when handling hot towels or pipes
- AmazonNon-contact infrared thermometeroptional, for precise temperature readings and locating cold spots
- AmazonScrewdriver or wrenchif you need to remove access panels to reach pipes
As an Amazon Associate FixlyGuide earns from qualifying purchases — at no extra cost to you. Prices and availability are accurate as of publication and subject to change.
Quick Answer
To safely thaw a frozen pipe, first locate the frozen section, typically in an unheated area. Apply gentle, indirect heat using a hairdryer, heat gun on a low setting, or hot towels, moving the heat source continuously. Crucially, open the nearest faucet to allow water to flow as the ice melts, relieving pressure and accelerating the thawing process. Take preventative measures immediately after thawing to avoid re-freezing.
The Problem
You wake up on a frigid morning, turn on the faucet, and nothing comes out—or perhaps just a trickle. The likely culprit? A frozen water pipe. Not only is this an immediate inconvenience, but it also poses a serious risk to your home. As water freezes, it expands with immense force, capable of rupturing pipes and causing extensive water damage once the ice thaws. This rupture often occurs not where the ice forms, but downstream from the blockage, where pressure builds between the ice plug and a closed faucet. The problem isn't just a lack of water; it's the ticking time bomb of a potential burst pipe.
How It Works
Water expands by about 9% when it freezes and transitions from a liquid to a solid state. This expansion is unique, as most substances contract when they cool and solidify. When water within a pipe freezes, it forms an ice plug. This plug itself can cause stress, but the real danger lies in the hydraulic pressure it creates. If the ice plug forms between the water main (or well pump) and a closed faucet, any additional freezing will cause the expanding ice to push water toward the closed faucet. Since water is incompressible, this creates immense pressure, often exceeding 2,000 pounds per square inch (psi), easily enough to rupture even robust copper or PEX piping. The weakest points in a plumbing system are usually pipe joints, elbows, and areas where the pipe material has been stressed or thinned. Therefore, a burst pipe often occurs at a fitting or a bend, not necessarily at the exact spot where the ice formed. This pressure build-up explains why you might find a flood after the pipe thaws, far from where you applied heat. Understanding this mechanism is crucial for both thawing the pipe and preventing future incidents, as prevention focuses on insulating vulnerable pipes and allowing a trickle of water to run to alleviate pressure in extreme cold.
Step-by-Step Fix
Step 1: Locate the Frozen Section — Pinpoint the blockage before applying heat.
Start by opening all faucets in your home, both hot and cold, to determine which lines are affected. Then, trace the visible plumbing pipes, especially those running along exterior walls, in unheated basements, crawl spaces, attics, or garages. Look for any visible frost, bulging, or condensation on the pipe's exterior. Often, the frozen section will feel unusually cold to the touch compared to other pipe sections. If a pipe is behind a wall, listen for a distinct silence in water flow where there should be noise, or use a non-contact infrared thermometer to detect cold spots.
Step 2: Shut Off the Main Water Supply — Prevent uncontrolled flooding from a burst pipe.
Safety Note: If you suspect a pipe has already burst (e.g., you see water actively leaking or a noticeable drip), immediately shut off the main water supply to your house. This is typically a valve located where the main water line enters your home, often in a basement, crawl space, or utility room. If you cannot find this valve or if it’s seized, locate your main outdoor shut-off valve near the street. This step is critical to prevent a catastrophic flood once the ice melts.
Step 3: Open the Faucet Closest to the Frozen Section — Allow pressure relief and water flow.
Once the main water supply is off (if necessary), open the faucet that the frozen pipe feeds. If it's a cold water line, open the cold side; if it's hot, open the hot side. If it's your main supply line, open any faucet in the house. This provides an escape route for melting water and steam, relieving pressure within the pipe as it thaws. Leaving the faucet open also helps you monitor when water flow returns, indicating the blockage has cleared.
Step 4: Apply Gentle, Indirect Heat — Gradually warm the pipe without damage.
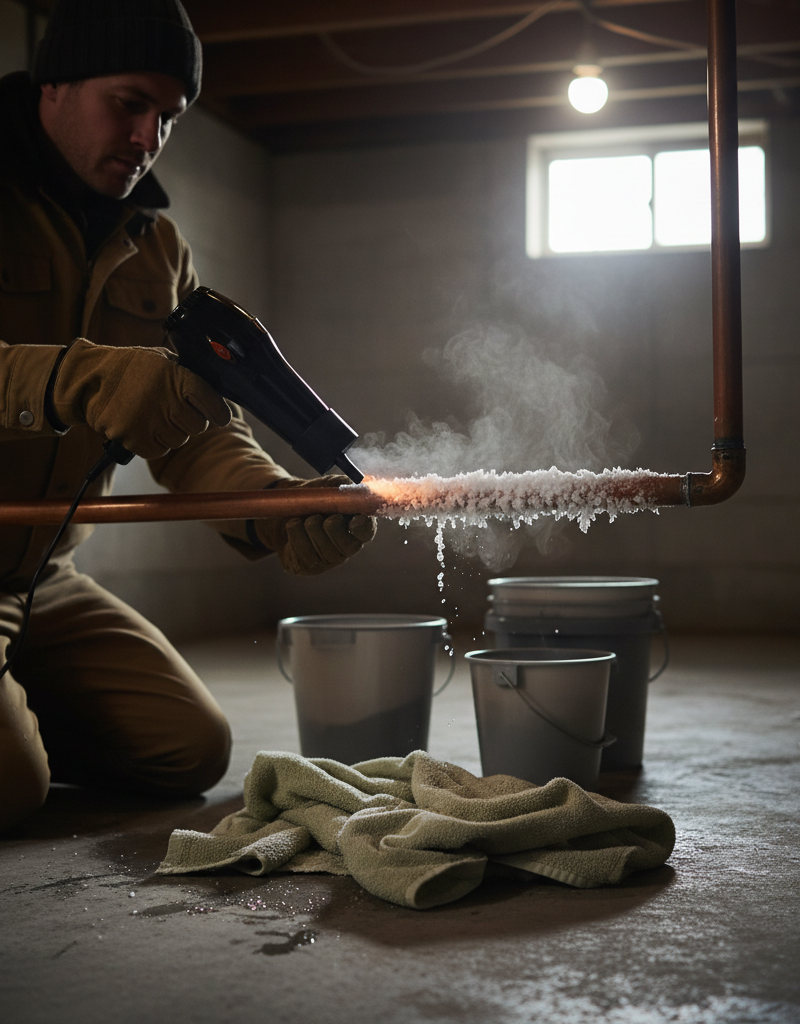
Select a heat source and begin applying it to the frozen section. The key is gentle, consistent heat. Never use an open flame directly on pipes, especially plastic (PEX) or near combustible materials; this poses a severe fire risk and can melt or burst the pipe. Hold the heat source a few inches away and keep it moving back and forth along the frozen section. Continue this process until water begins to flow vigorously from the open faucet.
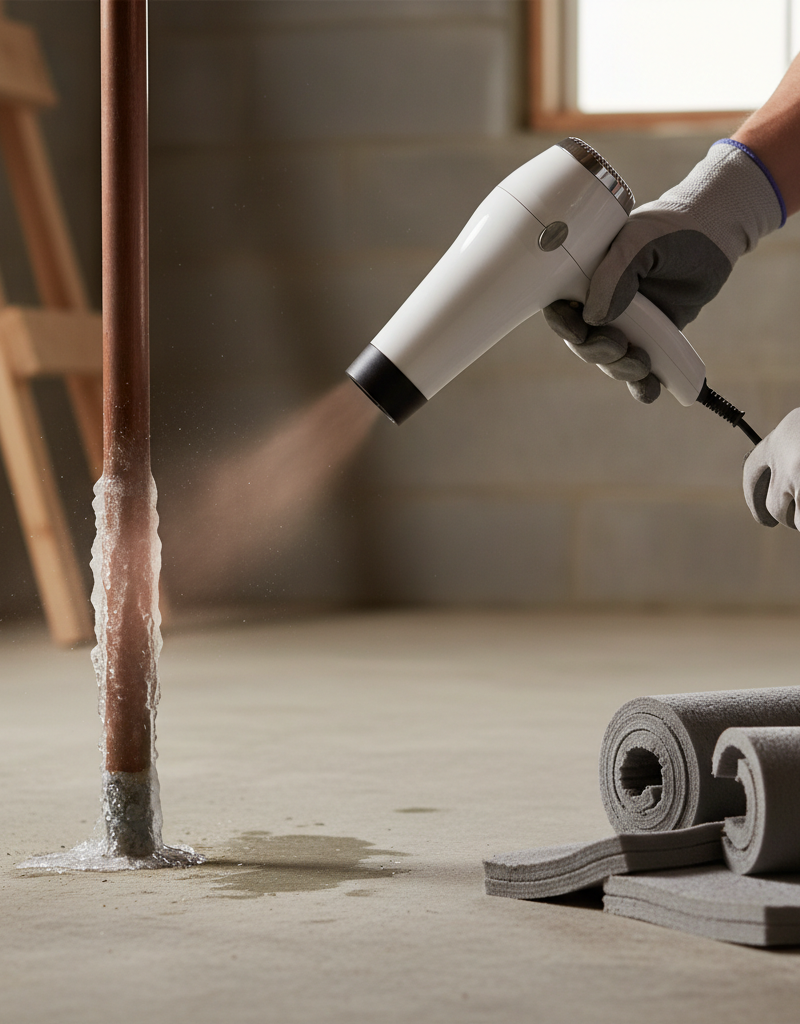
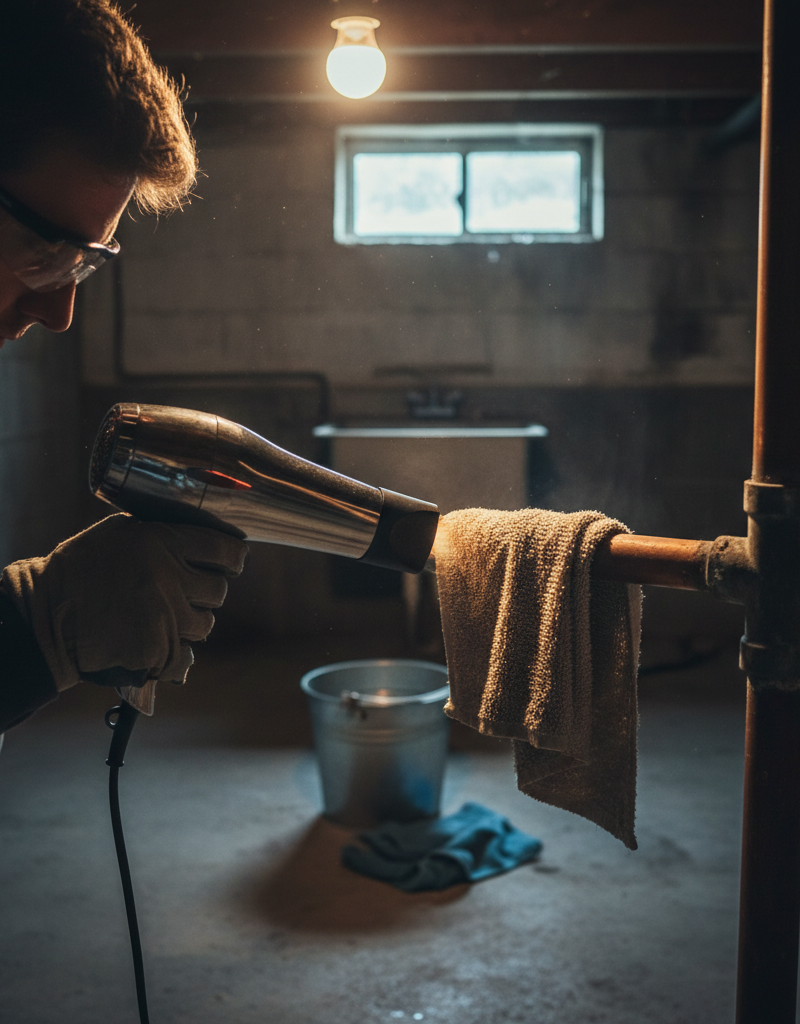
- Hairdryer: The safest and most common method. Hold it 6-12 inches from the pipe, moving it continuously to avoid overheating one spot.
- Heat Gun (on low setting): More powerful than a hairdryer, so use with extra caution. Keep it moving and maintain a greater distance to prevent melting or scorching. Start with the lowest heat setting.
- Hot Towels: Wrap towels soaked in hot water around the pipe. Replace them frequently as they cool. This is excellent for pipes in tight spaces or near flammable materials.
- Portable Space Heater: Position a small space heater near the frozen pipe, directing the heat towards it. Ensure it’s at a safe distance from walls and flammable objects.
Step 5: Monitor for Leaks — Check for damage as the ice melts.
As the pipe thaws and water begins to flow, carefully inspect the entire section where the pipe was frozen, and surrounding areas. Look for any drips, puddles, or cracks. A subtle leak might only become apparent once the pressure returns. If you discover a leak, shut off the main water supply again immediately and call a licensed plumber. Do not ignore even a small drip—it will become a larger problem.
Step 6: Restore Water and Assess — Confirm full functionality and plan prevention.
Once water is flowing freely from the previously frozen faucet and you've confirmed there are no leaks, you can slowly turn the main water supply back on. Let the water run for a few minutes to flush out any air and ensure full pressure is restored. Take this opportunity to check all other faucets and fixtures in your home. Finally, immediately assess why the pipe froze (e.g., lack of insulation, an open vent, a drafty area) and take preventative steps to avoid a repeat incident.
Common Causes
- Lack of Insulation: Pipes running through unheated spaces like crawl spaces, attics, garages, or along exterior walls are highly susceptible to freezing if not adequately insulated. The ambient air temperature drops below freezing, and without proper thermal barriers, the pipes quickly follow suit.
- Extreme Cold Snaps: Even well-insulated homes can experience frozen pipes during prolonged periods of unusually low temperatures or sudden, sharp cold fronts. The cold can penetrate deeper than usual, overwhelming existing insulation.
- Drafts and Air Leaks: Gaps around electrical wiring, plumbing penetrations, dryer vents, or unsealed exterior walls can allow frigid outside air to blow directly onto pipes, even those seemingly protected within walls or cabinets. A small, persistent draft is often enough to freeze a pipe.
- Thermostat Set Too Low: If the indoor thermostat is set too low, especially when away from home for an extended period, the ambient temperature in less-used areas or those with poorer insulation can drop below freezing, leading to frozen pipes.
- Poorly Circulated Heat: Some areas of a home, such as those above unheated garages or in distant corners, may not receive adequate warmth from the central heating system, making pipes in these locations vulnerable.
- Pipes in Exterior Walls: Plumbing often runs through exterior walls, which are colder than interior walls. If the insulation within these walls is inadequate or compromised, the pipes are at a higher risk of freezing.
Common Mistakes
- Using an Open Flame: Never, ever use a blowtorch, propane torch, or any open flame to thaw a frozen pipe. This is incredibly dangerous. It can melt plastic pipes, scorch wooden studs, ignite insulation, or cause a sudden steam explosion if the pipe thaws too rapidly or is already compromised. This is a severe fire and safety hazard.
- Applying Excessive Heat Too Quickly: Rapid heating can cause a sudden expansion of water within the pipe, leading to a burst. Gentle, gradual heat is key. Overheating localized sections can also damage pipes, especially PVC or PEX, which can deform or melt.
- Ignoring the Location of the Freeze: Applying heat randomly without identifying the actual frozen section is inefficient and can be dangerous. You might be heating pipes that are perfectly fine while the problem area remains frozen, leading to continued pressure buildup downstream.
- Not Opening a Faucet: Thawing a frozen pipe without an open faucet nearby is a major mistake. The open faucet allows for pressure relief as water melts and provides an exit point for the thawed water, preventing dangerous pressure buildup downstream from the ice plug.
- Forgetting to Shut Off Main Water Supply (if applicable): If you suspect a pipe has burst (or will burst during thawing), failing to shut off the main water supply before thawing can lead to catastrophic flooding once the ice plug clears. This simple step can save thousands in damage.
- Ignoring the Root Cause: Thawing the pipe is a temporary fix. If you don't address why the pipe froze in the first place (e.g., poor insulation, drafts), you'll likely face the same problem again during the next cold snap.
Cost & Time Breakdown
| Task | DIY Cost | Pro Cost | Time |
|---|---|---|---|
| Locate frozen pipe | $0 | $75–$150 | 10–30 min |
| Gather tools (hairdryer, etc.) | $0–$30 | N/A | 5 min |
| Thaw pipe with hairdryer/gun | $0 (if owned) | Included in call | 30–90 min |
| Check for leaks | $0 | Included in call | 10 min |
| Post-thaw prevention (basic) | $10–$50 | $50–$200+ | 30–60 min |
| Total (DIY if no burst) | $0–$80 | $75–$350+ | 1–3 hours |
Tips & Prevention
- Insulate Vulnerable Pipes: Wrap pipes in unheated basements, crawl spaces, attics, and exterior walls with foam pipe insulation. This is a low-cost, high-impact prevention method. Use heat tape for maximum protection in severely cold areas, but follow manufacturer instructions carefully.
- Seal Air Leaks: Use caulk or expanding foam to seal cracks and holes in exterior walls and foundations, especially where pipes or wires enter the house. Even small drafts can bring freezing air to pipes.
- Open Cabinet Doors: During extreme cold, open kitchen and bathroom cabinet doors, especially those on exterior walls, to allow warmer air from the room to circulate around the plumbing.
- Let Faucets Drip: If temperatures are expected to drop below freezing for an extended period, let cold water drip slowly from faucets connected to pipes vulnerable to freezing. A continuous drip—even a tiny one—relieves pressure and makes it harder for ice to form a solid plug.
- Maintain Indoor Temperature: Keep your thermostat set to at least 55°F (13°C), even if you're away from home. This ensures sufficient ambient heat circulates to prevent pipes from freezing.
- Drain Outdoor Hoses and Sprinkler Systems: Before the first freeze, disconnect and drain all outdoor hoses. Shut off and drain water from irrigation systems and outdoor hose bibs. Use frost-proof hose bibs if possible.
When to Call a Professional
You should call a licensed plumber immediately if you suspect a pipe has already burst, even before attempting to thaw it. Signs of a burst pipe include visible water leaks, water stains on ceilings or walls, a sudden drop in water pressure throughout your home, or a continuous dripping sound within walls. You should also call a pro if you've attempted to thaw a pipe and cannot locate the frozen section, are unable to thaw it after a reasonable amount of time (e.g., 90 minutes), or if you discover any leaks during or after the thawing process, no matter how small. Dealing with burst pipes can quickly escalate into significant water damage and potential mold growth, requiring professional expertise for proper repair and restoration. Plumbers have specialized equipment like thermal cameras to locate hidden frozen sections and can make timely, correct repairs to prevent further damage and ensure your plumbing system is safe and functional.
Related Articles
Keep troubleshooting with these hand-picked guides from FixlyGuide:
- The 90-Minute Hidden Danger of a Frozen Pipe (And the DIY Fix) — Thawing a frozen pipe quickly and safely is crucial to prevent bursting and extensive water damage to your home.
- The 3 Hidden Reasons Your Pipe Froze (And How to Thaw It Fast) — Thawing a frozen pipe safely requires understanding the underlying causes and applying gentle, consistent heat to prevent further damage.
- The 3 Hidden Reasons Your Pipes Freeze (And How to Thaw Them Fast) — Discover the real culprits behind frozen pipes and learn a step-by-step method to safely thaw them, preventing costly damage.
- The 3 Hidden Reasons Your Pipes Freeze (and How to Thaw Them Fast) — Discover the real culprits behind frozen pipes and learn safe, effective methods to thaw them quickly, preventing costly damage to your hom…
- The 3 Hidden Dangers of Frozen Pipes (And How to Thaw Them Safely) — Frozen pipes can burst, causing extensive water damage. Learn to safely thaw them and prevent costly repairs.
- The #1 Hidden Culprit Behind Your Whole-House Low Water Pressure (It's Not Your City!) — Discover the most common, often overlooked cause of low water pressure throughout your entire home and how to fix it yourself.
Should you do this yourself?
Answer five quick questions before you start. Safety outranks savings every time.
Your experience with work like this
How high do you have to work?
Does the job involve any of these?
Will it need a permit?
Specialty tools
Free and instant. Educational guidance only — not a quote, inspection, or professional diagnosis.
What should this project cost?
Enter your project details for a realistic cost range before you call anyone.
Common repairs run $150–$650; repipes and water-heater replacements reach $1,500–$4,500.
- Regional adjustment
- National average
- Labor share (typical)
- ~$754
- Quotes to collect
- 3 written estimates
Educational estimate based on national averages — not a binding quote. Always confirm with written local estimates.
Fixly Project Decision Box
- DIY difficulty
- Moderate
- Estimated time
- 30 minutes – half a day
- Cost level
- Moderate
Main tools / materials
- Adjustable wrench
- Plunger or drain auger
- Bucket and towels
- Thread tape
When to stop and call a pro
- Water you cannot shut off at the fixture or main
- Sewage backing up into more than one fixture
- Water near electrical panels or outlets
- Gas water heater work beyond relighting a pilot
Need professional help?
Get a Licensed PlumberBefore you start
Check the difficulty, permits, and safety risk — then decide whether to call a pro.
- Estimate this projectGet a cost range for your scope and ZIP before you call anyone.Open
- Get local estimatesSend one request and compare written estimates from vetted pros.Open
Free, no signup required. Estimates are educational guidance, not a quote or an inspection.
Frequently asked questions
How long does it take to thaw a frozen pipe?+
The time it takes to thaw a frozen pipe depends on the severity of the freeze, the pipe material, and the heat source. Minor freezes might take 30-60 minutes with a hairdryer, while more severe or deeply frozen sections could take several hours. Patience and continuous, gentle heat are key.
Can I use a blowtorch to thaw a frozen pipe?+
Absolutely not. Never use a blowtorch or any open flame to thaw a frozen pipe. This is extremely dangerous and can cause severe damage to pipes (especially plastic), ignite flammable materials in your walls or basement, and pose a serious fire risk to your home. Always use gentle, indirect heat sources like a hairdryer or hot towels.
What should I do if my pipe bursts after thawing?+
If a pipe bursts after thawing, immediately shut off your main water supply to prevent further flooding. Then, contact a licensed plumber without delay. They will assess the damage, repair or replace the compromised section of pipe, and advise on any necessary water damage remediation.
How can I prevent pipes from freezing in the future?+
To prevent pipes from freezing, adequately insulate all exposed pipes in unheated areas (basements, crawl spaces, attics). Seal air leaks in exterior walls, open cabinet doors under sinks during cold snaps, and consider letting a faucet drip slowly during extreme cold. Always keep your home's thermostat set to at least 55°F (13°C), even when away.
Why did only one pipe freeze, not all of them?+
Pipes typically freeze due to exposure to cold temperatures. If only one pipe froze, it's likely located in a particularly vulnerable spot – perhaps an uninsulated section near an exterior wall, in a drafty cabinet, or in an unheated part of the house like a garage or basement. Other pipes may be better insulated or located in warmer areas.
Discussion
Loading comments…