- Open the Faucet Downstream — Go to the faucet served by the frozen pipe and open both hot and cold handles. That relieves pressure as the ice melts, and it tells you when water starts moving again.
- Apply Gentle Heat — This is where you earn your keep. You want even, gradual heat. Never use an open flame like a blowtorch or propane torch; you'll scorch the place or melt the pipe in no time. I’ve seen the aftermath, and it ain’t pretty.
- Hair Dryer: My go-to. Put it on high heat and keep it moving along the frozen section. Nice, even warmth without getting too wild.
- Heat Gun (Low Setting): Works, but be careful. Keep it on the lowest setting and stay back a bit. You don’t want to melt PEX or PVC, or torch the framing.
- Electric Heating Pad/Tape: Wrap an electric heating pad or specialized heating tape around the pipe. Follow the manufacturer’s instructions to the letter. Good for longer runs, but it takes time.
Plumbing · Pipe damage
| Project category | Plumbing |
|---|---|
| Problem type | Pipe damage |
| Trade required | Plumbing |
| Urgency | Emergency — act now |
| Safety risk | High safety risk |
| DIY suitability | Licensed pro only |
| Cost category | High cost |
| Typical timeline | Emergency shutoff now; repipes commonly 2–5 days |
| Contractor type | Licensed plumber |
Repair option
Cut out and replace the damaged section with a coupling or new run.
Replacement option
Whole-home repipe when the material itself is the problem.
Common causes
- Freeze-thaw expansion in an uninsulated run
- Corrosion in aging galvanized or polybutylene
- Shifting foundation stressing a slab line
Relevant tools:emergency checklistcompare quotes
Published August 21, 2026Last updated August 21, 2026
Tools & materials you'll need
Affiliate linksAs an Amazon Associate FixlyGuide earns from qualifying purchases — at no extra cost to you. Prices and availability are accurate as of publication and subject to change.
Quick Answer
Got a pipe that's stiff on you? You’ll want to find the frozen spot, crack open a faucet downstream, and ease it back with gentle heat. Hairdryers work. Heat guns on low work. Hot rags work, too. The whole trick is slow and steady — you don’t want to shock the pipe and turn a freeze into a flood.
The Problem
Picture this: it's 20 degrees outside, you wake up, and nothing. No water at the kitchen sink, or maybe just a sad little trickle. Yep, you've got a frozen pipe.
What happens is simple enough. Water inside the pipe gets cold enough and turns to ice. Since water expands when it freezes — about 9% by volume, actually — that expansion hammers the pipe walls. But the real danger usually isn't right where the ice is. It’s upstream, between the ice blockage and the closed faucet. That trapped water keeps building pressure, and eventually, something's gotta give. Usually it's the pipe splitting open, then waiting for the thaw to make a real mess.
I’ve seen pipes split clean open from pressure build-up. Last month I pulled into a place in Frisco where a burst line had soaked a hallway in under an hour. That thing had dumped hundreds of gallons by the time I got there, and the damage bill wasn’t small.
How It Works
Freezing in a pipe is just plain physics. Once the temperature drops below 32°F (0°C), water starts turning to ice. In a house, that usually happens in the usual trouble spots: pipes in unheated crawl spaces, basements, exterior walls, attics, or even under a sink in a cabinet that backs up to an outside wall. Those spots lose heat faster than the water moving through them can carry it away.
Once ice forms, it acts like a plug. Water keeps pushing from the main supply until it hits that plug. And because water doesn’t compress much, the pressure between the ice plug and any closed faucet down the line starts climbing. So this isn’t just the ice expanding — it’s hydraulic pressure building up. Think of trying to force water into a sealed container that’s already packed with ice and water. No dice.
That pressure can hit 2,000 PSI, which is way more than most residential plumbing systems are built for. Copper, PEX, PVC — doesn’t matter much. They’ll all fail under that kind of stress. The goal when you thaw it is to relieve that pressure slow and easy so the ice melts and the water moves again without splitting the pipe.
Step-by-Step Fix
Here’s how I handle a frozen pipe. Slow and steady wins this one.
- Shut Off the Main Water Supply — Before you touch anything else, kill the water to the house. You don’t want a hidden burst turning into a full-blown flood. Your main shut-off valve is usually in the basement, utility room, or outside near your meter. Find Your Main Water Shut-Off.
- Open the Faucet Downstream — Go to the faucet served by the frozen pipe and open both hot and cold handles. That relieves pressure as the ice melts, and it tells you when water starts moving again.
- Locate the Frozen Section — This is usually the fussy part. Start with pipes along exterior walls, in unheated basements, crawl spaces, or attics. You might see frost on the pipe, or it may just feel colder than the rest. Sometimes you’ll hear a faint gurgle or drip sound stop dead right where the freeze is. If that doesn’t help, check the pipe closest to where your water service enters the house. I had a job in Maple Grove where the homeowner swore the kitchen sink line was frozen. Turned out, it was a stretch of PEX running through an uninsulated soffit in the garage, a good 20 feet away from the sink. Took a little crawling around to find that one.
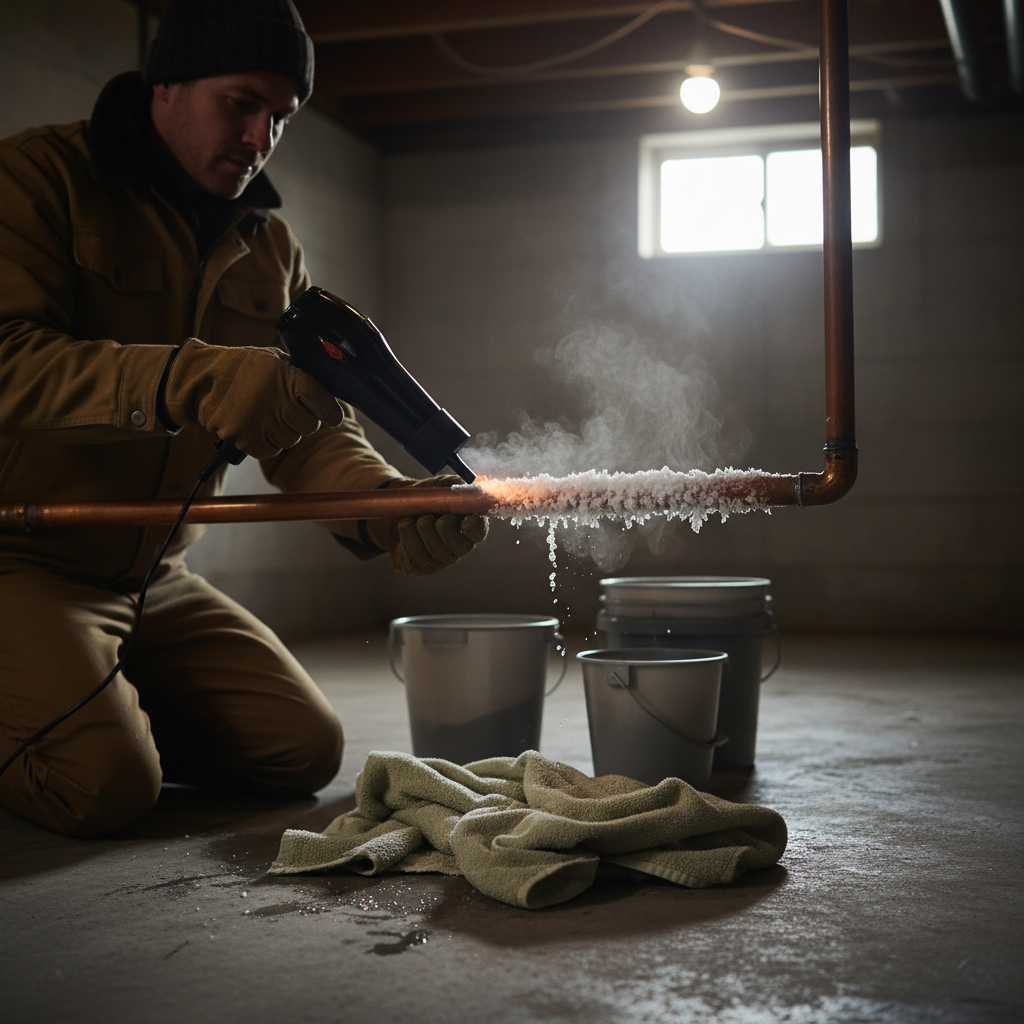
- Apply Gentle Heat — This is where you earn your keep. You want even, gradual heat. Never use an open flame like a blowtorch or propane torch; you'll scorch the place or melt the pipe in no time. I’ve seen the aftermath, and it ain’t pretty.
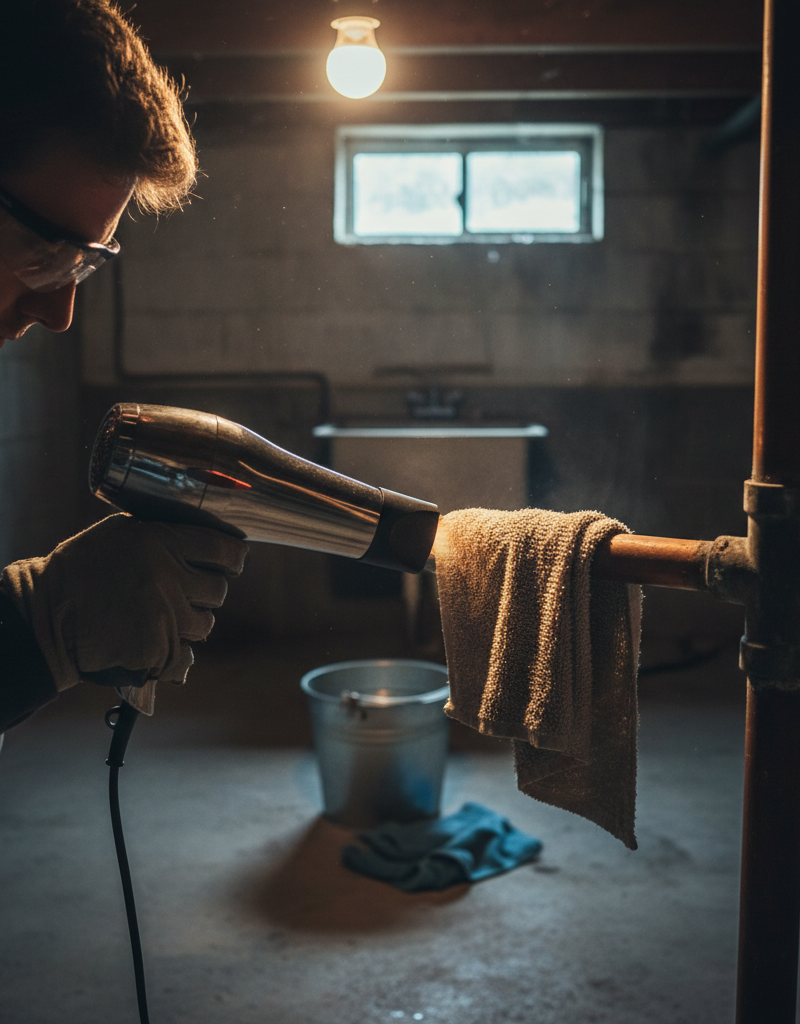
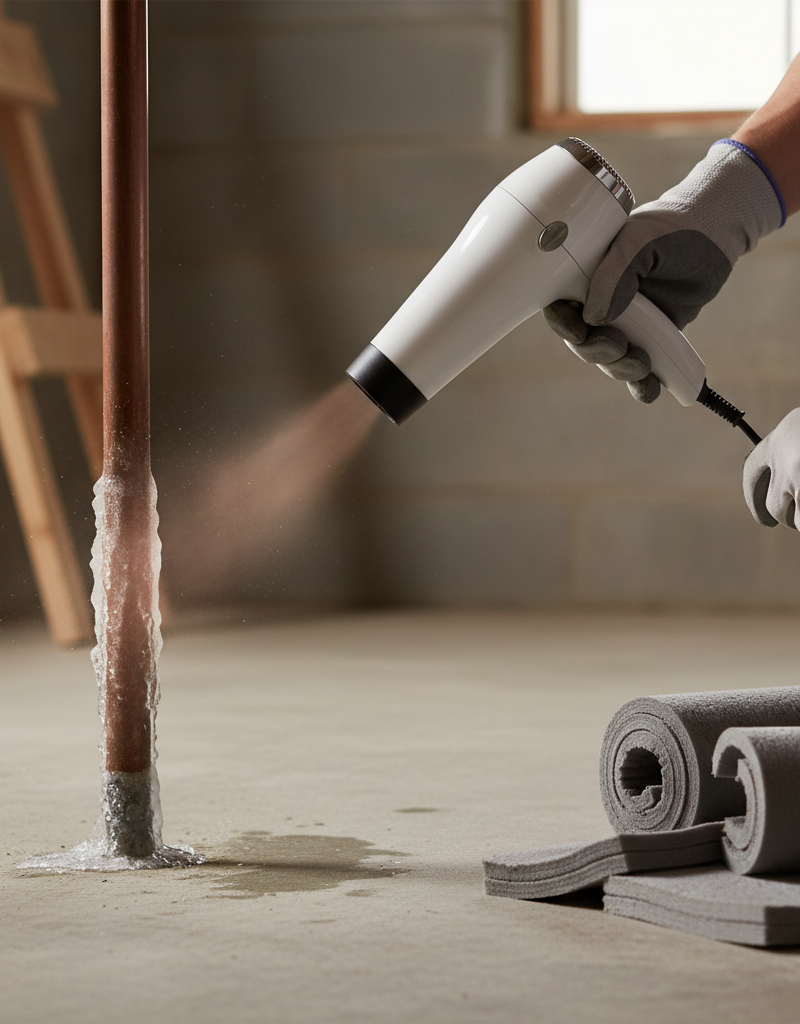
- Hair Dryer: My go-to. Put it on high heat and keep it moving along the frozen section. Nice, even warmth without getting too wild.
- Heat Gun (Low Setting): Works, but be careful. Keep it on the lowest setting and stay back a bit. You don’t want to melt PEX or PVC, or torch the framing.
- Electric Heating Pad/Tape: Wrap an electric heating pad or specialized heating tape around the pipe. Follow the manufacturer’s instructions to the letter. Good for longer runs, but it takes time.
- Warm Towels: Soak towels in hot water, wring them out, and wrap them around the pipe. Swap them out as they cool. Slower, sure, but safe.
- Work from the Faucet Backwards — Start heating near the open faucet and move slowly toward the main water supply. That way the meltwater can drain out and pressure stays relieved. If you start in the middle, you’re just trapping pressure between the thawed section and the still-frozen part.
- Be Patient — Thawing can take 15 minutes or a few hours, depending on how long the freeze is and how bad it got. Don’t get impatient and start cooking the pipe. Keep the heat moving.
- Watch for Leaks — As the ice melts, keep a close eye on the pipe. If it burst, you’ll see drips or sprays pretty quick. Have a bucket and towels ready. If you spot a leak, shut the main water off again right away.
- Restore Water & Check Thoroughly — Once water runs freely from the open faucet, turn it off, then slowly open the main water shut-off valve. Walk the house and check every faucet and fixture to make sure everything’s working and nothing’s leaking. Let the water run for a few minutes to push out any air pockets.
Common Causes
- Poor Insulation: Pipes in exterior walls, unheated crawl spaces, or attics without proper insulation are sitting ducks. Cold air just pulls the heat right out.
- Sudden Temperature Drops: A fast, hard cold snap — especially after a mild stretch — can catch the plumbing flat-footed.
- Open Garage Doors/Vents: Leaving garage doors open or foundation vents unsealed in freezing weather exposes nearby pipes to nasty cold air.
- Lack of Heat: Turning the thermostat too low, or shutting the heat off while you’re away in winter, can freeze the whole system up.
- Hose Bibs Not Drained: If you don’t disconnect and drain outdoor hose bibs before winter, water trapped in the line can freeze and burst inside the wall. Winterize Your Outdoor Faucets.
Common Mistakes
- Using Open Flames: Don’t do it. A propane torch is for soldering, not thawing. You’ll start a fire or destroy the pipe — maybe both.
- Ignoring the Main Shut-Off: If you don’t shut the water off first, you’re rolling the dice if the pipe already split.
- Starting Heat in the Middle: That just builds pressure. Always work from the faucet back toward the source.
- Applying Too Much Heat Too Fast: Big temperature swings can stress pipes and crack them. Ease into it.
- Assuming All Pipes Are Fine: If one froze, others in similar spots might’ve frozen too. Check the vulnerable areas.
- Not Checking for Damage After Thaw: Water running again doesn’t mean the pipe survived. Look for leaks every time.
Cost & Time Breakdown
| Task | DIY Cost | Pro Cost | Time |
|---|---|---|---|
| Thawing a single frozen pipe | $0-$50 (tools) | $150-$400 | 30 min - 2 hours |
| Pipe repair (minor burst) | $50-$150 (parts) | $300-$800 | 1-3 hours |
| Pipe repair (major burst) | NOT RECOMMENDED | $500-$2,000+ | 3-8 hours |
| Water damage cleanup (minor) | $100-$300 (rentals) | $500-$2,000 | 1-2 days |
| Insulation/Heat Tape install | $20-$100 | $100-$300 | 1-2 hours |
Tips & Prevention
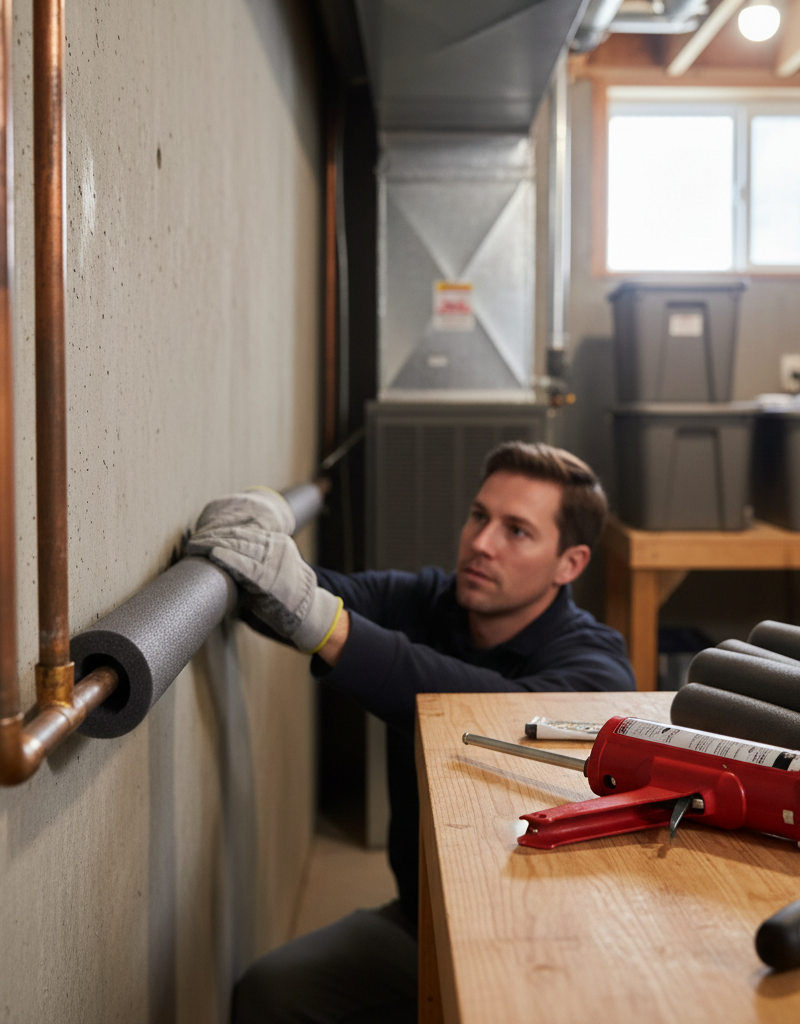
- Insulate Vulnerable Pipes: Wrap pipes in unheated areas — crawl spaces, attics, exterior walls, basements — with foam pipe insulation. Cheap fix. Works well. You can grab a 6-foot section for a few bucks.
- Seal Air Leaks: Caulk cracks and seal openings in your foundation, around windows, and where pipes enter the house. Even a tiny draft can freeze a line.
- Open Cabinet Doors: For pipes under sinks on exterior walls, open the cabinet doors during cold snaps. Warmer room air can get in there and help.
- Let Faucets Drip: During extreme cold, let a tiny trickle run from faucets fed by vulnerable pipes. Moving water is harder to freeze. Just a slow drip, not a stream — think a drop every 2-3 seconds. That also helps keep pressure down.
- Disconnect Hoses: Always pull garden hoses off outdoor spigots before winter. Drain the spigot by opening the interior shut-off valve first, then the exterior spigot.
- Maintain Consistent Heat: Keep the thermostat at least 55°F (13°C) even when you’re out of town. Your heating system won’t love the bill, but your pipes will.
- Know Your Shut-Off: Make sure everybody in the house knows where the main water shut-off valve is and how to use it. If a pipe bursts, that’s huge.
When to Call a Professional
If you can’t find the frozen section, or you’ve been at it over an hour with no real progress, I’d call a plumber. Same deal if you shut off the main water, thaw the pipe, and then spot a leak — even a little one. Don’t try to patch a burst pipe yourself unless you’ve been around the block and you’ve got the right tools.
If the freeze is behind a finished wall or ceiling, or if multiple fixtures are acting up and you can’t pin down the blockage, it’s time to bring in somebody who does this every day. Frozen sewer lines? Definitely a pro job. Don’t mess with that. You’ll regret it. A licensed plumber’s got thermal cameras for hidden freezes and professional thawing machines that can get things moving without tearing up your place.
Related Articles
Keep troubleshooting with these hand-picked guides from FixlyGuide:
- The 3 Hidden Reasons Your Pipes Freeze (And How to Thaw Them Fast) — Discover the real culprits behind frozen pipes and learn a step-by-step method to safely thaw them, preventing costly damage.
- The 3 Hidden Reasons Your Pipes Freeze (And How to Thaw Them Fast) — Uncover the surprising culprits behind frozen pipes and learn the safest, most effective methods to thaw them before costly damage occurs.
- The 3 Hidden Dangers of Frozen Pipes (And How to Thaw Them Safely) — Frozen pipes can burst, causing extensive water damage. Learn to safely thaw them and prevent costly repairs.
- The 3 Hidden Dangers of Frozen Pipes (And How to Thaw Them Safely) — Safely thawing a frozen pipe is crucial to prevent bursting, water damage, and costly repairs. Learn the safest methods and common mistakes.
- The 3 Hidden Reasons Your Pipe Froze (And How to Thaw It Fast) — Thawing a frozen pipe safely requires identifying the frozen section and applying controlled heat to prevent bursting and water damage.
- The $50 Storm Damage Secret Your Insurance Adjuster Won't Tell You — High winds snatched your shingles? Don't panic. I'll show you how to quickly and safely assess the damage and make a temporary repair to pr…
Should you do this yourself?
Answer five quick questions before you start. Safety outranks savings every time.
Your experience with work like this
How high do you have to work?
Does the job involve any of these?
Will it need a permit?
Specialty tools
Free and instant. Educational guidance only — not a quote, inspection, or professional diagnosis.
Questions to ask before you sign
Ask every contractor the same questions and the cheapest bid stops looking cheapest. Check them off as you go — your progress is saved on this device.
Free, no signup. Bring this to every walkthrough so you compare bids on the same terms.
What should this project cost?
Enter your project details for a realistic cost range before you call anyone.
Common repairs run $150–$650; repipes and water-heater replacements reach $1,500–$4,500.
- Regional adjustment
- National average
- Labor share (typical)
- ~$754
- Quotes to collect
- 3 written estimates
Educational estimate based on national averages — not a binding quote. Always confirm with written local estimates.
Fixly Project Decision Box
- DIY difficulty
- Moderate
- Estimated time
- 30 minutes – half a day
- Cost level
- Moderate
Main tools / materials
- Adjustable wrench
- Plunger or drain auger
- Bucket and towels
- Thread tape
When to stop and call a pro
- Water you cannot shut off at the fixture or main
- Sewage backing up into more than one fixture
- Water near electrical panels or outlets
- Gas water heater work beyond relighting a pilot
Need professional help?
Get a Licensed PlumberHandle this before it gets worse
First steps that limit damage, then a way to reach a qualified pro.
- Emergency repair checklistThe first steps that limit damage before a pro arrives.Open
- Get local estimatesSend one request and compare written estimates from vetted pros.Open
- Estimate this projectGet a cost range for your scope and ZIP before you call anyone.Open
Free, no signup required. Estimates are educational guidance, not a quote or an inspection.
Get the print-ready PDF of this guide
A clean, ad-free, printable version you can keep on your phone or pin to the workshop wall. Free with a FixlyGuide account.
- Print-optimized layout
- Tools, materials & every step included
- Saved to your account
Frequently asked questions
How quickly can a pipe freeze?+
In extreme cold, especially with drafts, a pipe can freeze solid in just a few hours. The rate depends on the pipe's exposure, insulation, and the ambient temperature, but you don't need days for it to happen.
What's the absolute worst thing I can do to thaw a pipe?+
Using an open flame like a propane torch or blowtorch is the absolute worst. You risk fire, melting the pipe, or causing it to explode due to rapid expansion. Stick to gentle heat sources.
Can a frozen pipe thaw on its own?+
Yes, if the outdoor temperatures rise, a frozen pipe can thaw on its own. However, this is risky because if it burst while frozen, you won't know until the thaw, potentially leading to significant water damage.
How can I tell if a frozen pipe has burst?+
You might hear a dripping or hissing sound as it thaws, or see water seeping from the pipe. Often, you won't know for sure until you turn the main water supply back on and a visible leak appears.
Is it okay to use boiling water on a frozen pipe?+
Pouring boiling water directly onto a pipe isn't recommended. The sudden temperature change can shock and crack older, brittle pipes, or even newer ones if applied improperly. Warm towels are a safer alternative.
How can I prevent pipes from freezing in the future?+
Insulate vulnerable pipes, seal air leaks, keep cabinet doors open on exterior walls, and consider letting a faucet drip during severe cold snaps. Consistent indoor heating is also key.
What should I do if my main water line is frozen underground?+
A frozen main water line underground is typically beyond DIY. You'll need to call a professional plumber immediately. They have specialized equipment to locate and thaw deeply buried lines safely.
My faucet is frozen, but not the pipe leading to it. What now?+
Sometimes just the faucet mechanism itself freezes. Try wrapping a warm towel around the faucet body for 15-20 minutes, or gently use a hairdryer on it. Ensure the main pipe is indeed clear first.
How cold does it have to be for pipes to freeze?+
While pipes can start to freeze at 32°F (0°C), the risk significantly increases when temperatures drop below 20°F (-6°C), especially for pipes exposed to drafts or uninsulated spaces.
Can I use rock salt to thaw an exterior pipe?+
No, absolutely not. Rock salt can corrode metal pipes, damage landscaping, and contaminate groundwater. It's not a safe or effective method for thawing pipes.
Discussion
Loading comments…