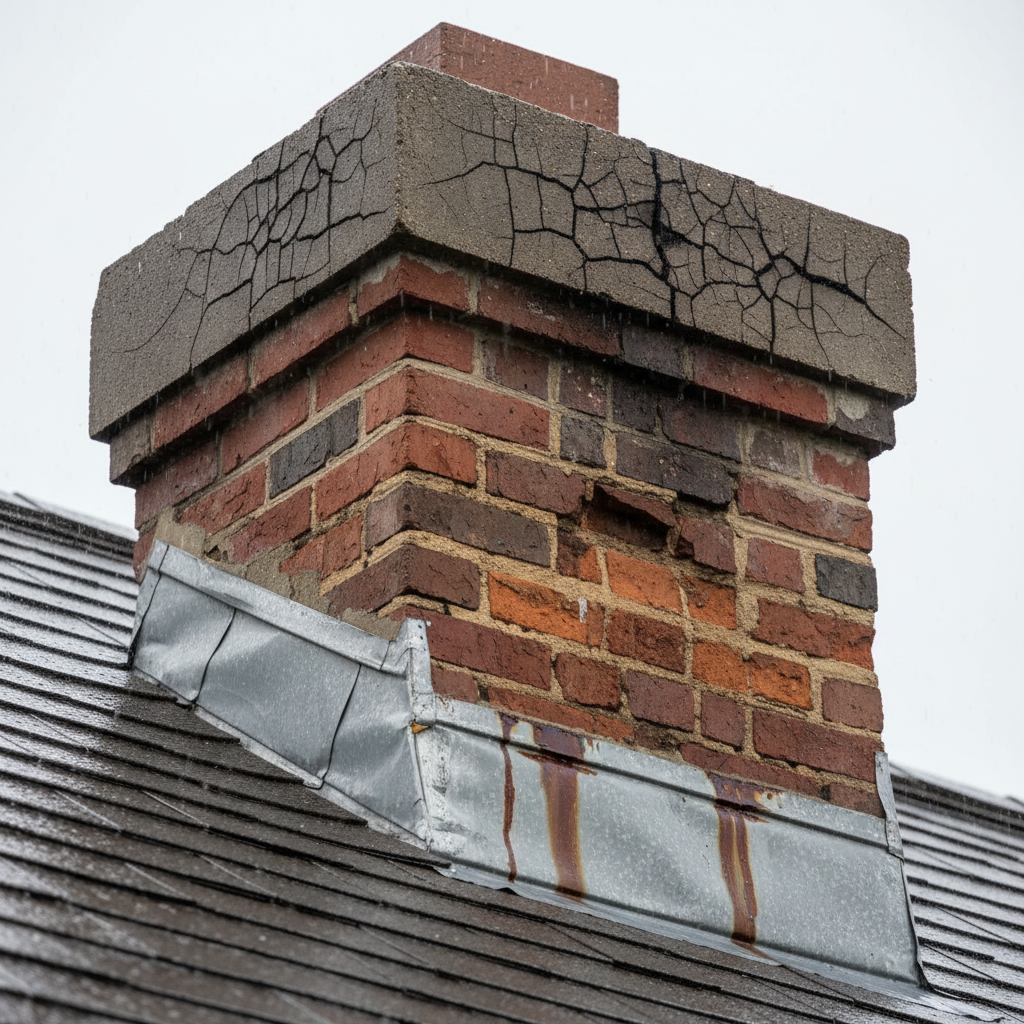
- Cracked Chimney Crown: This is probably the most common one I run into. The concrete crown takes a beating from sun, rain, snow, and freeze-thaw cycles, and those cracks turn into funnels right into the chimney chase.
- Damaged Flashing: The metal strips sealing the chimney to the roof can rust, bend, tear, or pull loose, especially where they overlap shingles or where some old repair used way too much roof cement.
- Deteriorated Mortar Joints: Over time, especially on the exposed upper sections, mortar can erode, crack, and fall out, leaving gaps where water can work into the brickwork.
- Missing or Damaged Chimney Cap: A cap keeps rain from pouring straight down the flue. If it’s gone or full of holes, water’s got an open invitation. Birds and squirrels love that too, which is a whole separate headache.
- Spalling Bricks: When water gets into bricks and freezes, the face of the brick can pop off. That doesn’t just look rough — it makes the brick more porous and more likely to keep soaking up water.
Plumbing · Leak
| Project category | Plumbing |
|---|---|
| Problem type | Leak |
| Trade required | Plumbing |
| Urgency | Emergency — act now |
| Safety risk | High safety risk |
| DIY suitability | DIY for experienced homeowners |
| Cost category | Low cost |
| Typical timeline | Shut water off now; repair usually same or next day |
| Contractor type | Licensed plumber |
Repair option
Isolate at the shutoff, replace the failed component, and dry the cavity fully.
Replacement option
Repipe the run or the branch when corrosion is widespread.
Common causes
- Failed supply line or shutoff valve
- Worn washers, cartridges, or P-trap connections
- Pinhole corrosion in older copper
Relevant tools:emergency checklistdiy or hire a pro
Published July 27, 2026Last updated August 17, 2026
Tools & materials you'll need
Affiliate links- AmazonExtension ladderRated for your weight and comfortable reach
- AmazonBinocularsFor initial ground-level inspection
- AmazonFlashlightFor attic and close-up dark spot inspection
- AmazonGarden hose with sprayer nozzleFor water testing
- AmazonWire brushFor cleaning debris off crown and mortar
- AmazonScraper or putty knifeFor loose caulk removal
- AmazonCaulking gunIf using tube sealant
As an Amazon Associate FixlyGuide earns from qualifying purchases — at no extra cost to you. Prices and availability are accurate as of publication and subject to change.
Quick Answer
If you've got water coming in around your fireplace during a rainstorm, it's easy to jump straight to "bad flashing." And sure, sometimes that's the whole story. But in my thirty-odd years crawling around houses, I've seen plenty of chimney leaks where the flashing was fine and the real problem was something else entirely. Could be a cracked crown. Could be rotten mortar. Could be a missing cap, or even a busted chase top. You’ve gotta work it methodically or you’ll end up paying for half-fixes that don’t solve a thing.
The Problem
There’s nothing quite like that sinking feeling when you spot a water stain spreading across the ceiling or dripping down the fireplace bricks while the rain’s coming down sideways. A chimney leak isn’t just ugly. It can lead to rot in the attic framing, mold, ruined drywall, and even damage to the chimney structure itself. Water’s sneaky that way. It can slip in through a tiny crack up top, travel six or eight feet inside the chimney, then show up somewhere that makes no sense at all in your living room. I’ve seen that trick more times than I can count. That’s why you can’t just follow the drip and call it a day — you’ve gotta figure out how the whole chimney is supposed to keep water out.
How It Works
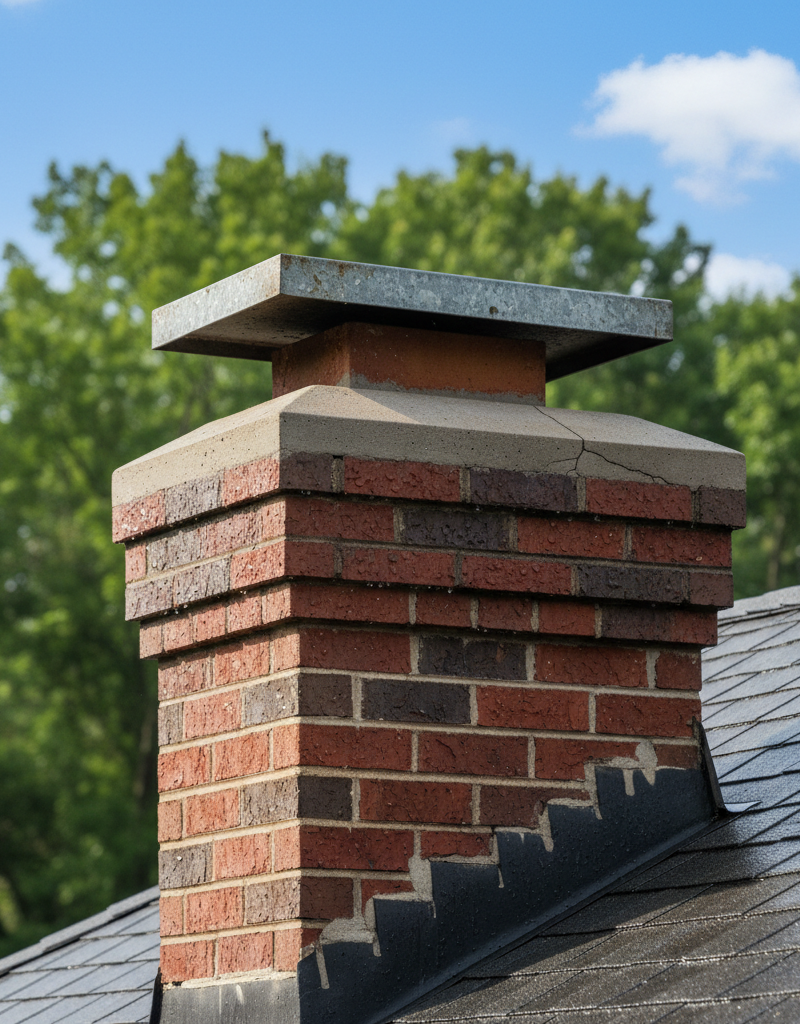
Think of your chimney like a stack of little defenses working together against weather. Up top, you’ve got the chimney cap — basically the hat that keeps rain and critters out of the flue. Below that sits the chimney crown, which is usually concrete or metal and slopes away from the flue so water sheds off the top instead of pooling there. If that crown’s cracked, water goes right where it shouldn’t.
Then there’s the chimney chase or stack, the main structure made from brick, stone, or a wood frame with siding. The brick and mortar joints in that section are supposed to keep moisture out. If the mortar starts crumbling or bricks crack, no dice — water’s getting in. Where the chimney passes through the roof, you’ve got flashing. That’s usually a two-part setup: step flashing woven with the shingles along the sides, and apron flashing at the front and back. Those metal pieces are there to kick water back onto the shingles instead of letting it sneak into the roof deck. If they’re bent, corroded, or pulling loose, that’s a straight shot for water. Inside the chimney, there’s a flue liner — clay, metal, or cast-in-place — that handles the combustion byproducts. It doesn’t directly keep water out of the house, but when it’s damaged, moisture can work its way into the chimney structure and start a mess that spreads.
Lower down, the smoke chamber and firebox are the parts you see and use. All of it works as one system. One weak spot — a hairline crack in the crown, a void in a mortar joint, a lifted bit of flashing — can dump gallons of water into the place during one good storm. So you’ve got to know where one layer ends and the next one begins, then check them one by one.
Step-by-Step Fix
If you’re seeing leaks, it’s time for a real inspection. Safety first: if you’re not comfortable on a ladder or on your roof, or if this is a two-story house, call a pro. I mean it. A fall isn’t worth saving a few bucks. Have somebody spot you, and use a ladder rated for your weight plus your tools.
-
Prep for Inspection — Grab your gear and make a plan. Before you even think about climbing, get binoculars, a decent flashlight, a camera, and a notepad. Start from the ground. Look for trouble you can see from below — crumbling mortar, leaning sections, missing bricks. Write down anything that looks off. Then figure out your climb before you make it. If you plan to do any small repairs while you’re up there, bring a sturdy brush and sealant.
-
Inspect the Top: Cap and Crown — These are your chimney's first line of defense. Check the Cap: Is it bent, rusted, or gone altogether? A missing cap means rain drops straight into the flue. If it’s there, is it tight? Is the mesh torn? Critters love a damaged cap, too. Metal cap? Look for rust holes. Clay cap? Check for cracks. Examine the Crown: This is a big offender. Look for hairline cracks, especially where it meets the flue liner. Water gets in, freezes, expands, and makes the crack worse. I’ve seen crowns so beat up they looked like shattered dinner plates. If you find even a small crack, that’s a direct water path. Clean off any moss or junk around the crown with a wire brush so you can actually see what you’re dealing with.
-
Check the Masonry: Bricks and Mortar — The body of the chimney needs to be sound. Go over every brick and mortar joint on all four sides. Look for crumbling, sandy mortar; missing chunks; spalled bricks, where the face pops off from water and freeze/thaw damage; and any loose or shifted bricks. Pay extra attention to the top few courses, because that’s where the weather hits hardest. A flathead screwdriver will tell you a lot — if the mortar turns to dust, it’s failing. That’s tuckpointing territory, and yeah, it’s tedious, but it matters. I spent two full days tuckpointing one chimney on an old Victorian in Highland Park once, and we found a dozen tiny leaks hiding in there.
-
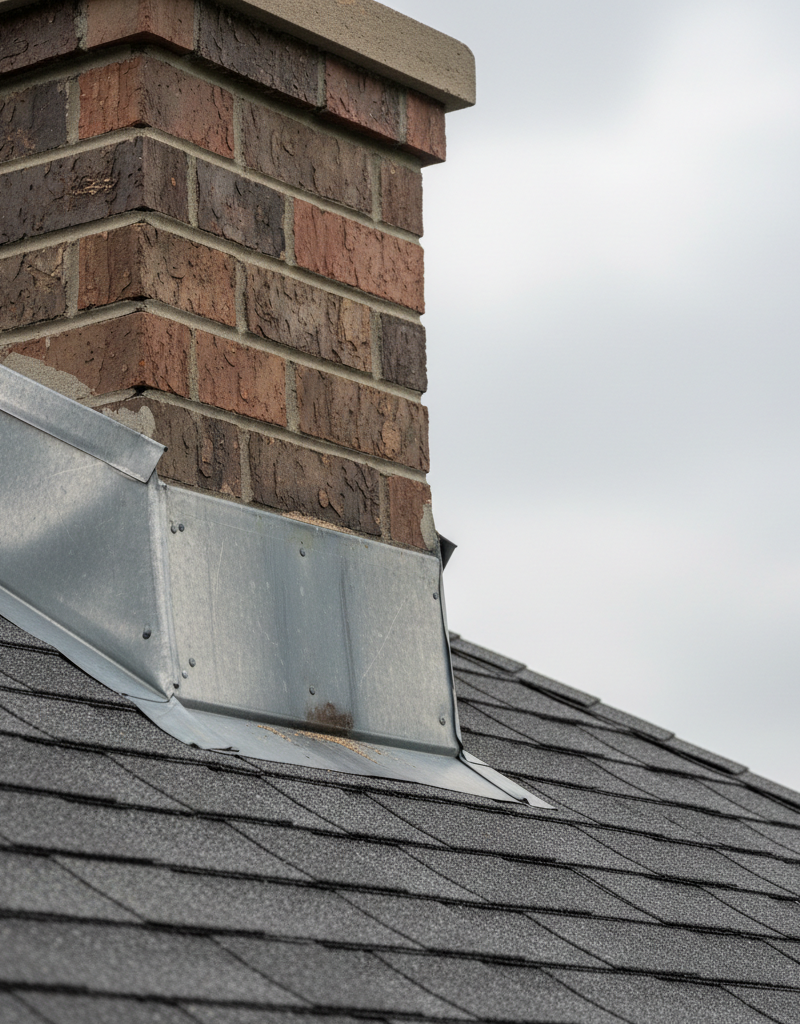
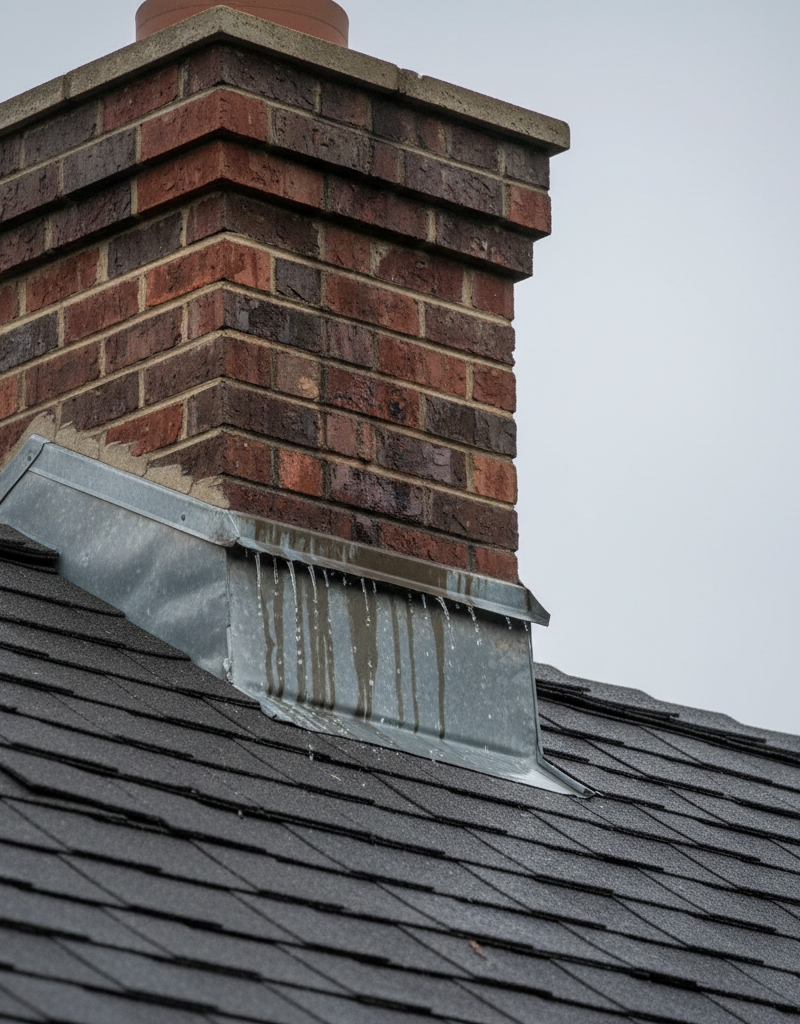
Examine the Flashing — This is where the chimney meets the roof, a classic leak spot. This is the one everybody suspects first. Look closely where the chimney meets the shingles on all sides. Is the metal clean? Rust-free? Any pieces bent, buckled, or pulling away from the chimney or roof deck? Check for rusted spots in the metal; missing or loose nails; old caulk that’s cracked and lifted; and step flashing pieces that have slipped out from under the shingles. Sometimes some previous repair just smeared roof cement over everything — that stuff cracks and fails before long. If you can see bare wood where flashing should be, that’s a real entry point. Don’t forget the counter-flashing, usually cut into the mortar joints above the step flashing. Make sure it’s still set in there.
-
Inspect the Attic/Interior — Follow the water's path from the inside. Get into the attic on a dry day if you can, and look for water stains on rafters, ceiling joists, and around the chimney chase. Old stains tell a story too. If you’re seeing fresh staining during a rain, try to trace it uphill. The leak often isn’t right above the stain — sometimes it’s a few feet away on the roof. Check around the firebox and mantel for damp spots, discoloration, or peeling paint.
-
Water Test (Optional, but effective) — Simulate a rainstorm to pinpoint the leak. Only do this on a dry day when you can work safely on the roof. With somebody inside where the leak shows up, slowly spray one section of the chimney at a time with a garden hose for a few minutes each. Start with the cap, then the crown, then each side of the masonry, and finish with the flashing. Your helper yells when they see water indoors. That’ll help you narrow down the exact entry point. Don’t rush it — sometimes water takes a minute or two to show itself.
- Pro Tip: If you’ve got an aluminum or steel chase top (common on pre-fab fireplaces), check the corners for seams that are separating and the sealant around the flue pipe for cracks. These usually go before the flashing does.
-
Minor Repairs & Sealing — Temporary fixes for small issues. For hairline cracks in the crown, you can use a quality crown repair sealant — urethane-based caulk made for masonry — after you clean the area well. For small gaps in flashing, a good sealant or roofing tar can buy you time, but it’s rarely the forever fix. For missing mortar, a little exterior mortar mix can be pressed into place, but keep that to very small, non-structural spots. Anything serious means proper tuckpointing. These are stopgaps to shut down the immediate water intrusion, not something I’d bet on for years.
-
Re-Inspect and Monitor — Make sure your fix worked. After you’ve made the repair, wait for the next rain and keep an eye on the inside of the house. Did the leak stop? If not, you may have more than one leak point, or you may have chased the wrong culprit. Don’t get discouraged — chimney leaks can be stubborn little animals. Go back through the steps, or bring in a pro if you’re stuck.
Common Causes
- Cracked Chimney Crown: This is probably the most common one I run into. The concrete crown takes a beating from sun, rain, snow, and freeze-thaw cycles, and those cracks turn into funnels right into the chimney chase.
- Damaged Flashing: The metal strips sealing the chimney to the roof can rust, bend, tear, or pull loose, especially where they overlap shingles or where some old repair used way too much roof cement.
- Deteriorated Mortar Joints: Over time, especially on the exposed upper sections, mortar can erode, crack, and fall out, leaving gaps where water can work into the brickwork.
- Missing or Damaged Chimney Cap: A cap keeps rain from pouring straight down the flue. If it’s gone or full of holes, water’s got an open invitation. Birds and squirrels love that too, which is a whole separate headache.
- Spalling Bricks: When water gets into bricks and freezes, the face of the brick can pop off. That doesn’t just look rough — it makes the brick more porous and more likely to keep soaking up water.
Related Articles
Keep troubleshooting with these hand-picked guides from FixlyGuide:
- The Secret Reason Your Chimney Leaks During Rain (It's Not Always the Obvious Culprit) — A leaking chimney during rain can be a frustrating mystery, but often the root cause isn't what you think, leading to costly misdiagnosis.
- The Secret Cause of Your Leaky Chimney (It's Not Always the Obvious Suspect) — A leaking chimney during rain can signify several issues, often stemming from a deteriorated crown rather than just flashing.
- The Secret Culprit Behind Your Leaky Chimney (It's Not Always the Roof) — Discover the often-overlooked causes of a leaky chimney during rain and how to fix them, from flashing issues to masonry problems.
- Why Your Chimney Leaks in the Rain (It's Not Always the Roof) — Discover the hidden causes of a leaky chimney during rain, from flashing failures to damaged crowns, and how to fix them for good.
- The Secret Culprit Behind Your Leaky Chimney (It’s Not Always the Obvious Fix) — A leaky chimney during rain can indicate several issues, from simple flashing problems to complex crown damage, requiring homeowners to dia…
- Why Does Only One Room Have Flickering Lights? The Real Culprit Isn't Always the Bulb — Flickering lights in a single room often point to a localized issue, ranging from a loose bulb to a faulty switch or wiring problem.
Should you do this yourself?
Answer five quick questions before you start. Safety outranks savings every time.
Your experience with work like this
How high do you have to work?
Does the job involve any of these?
Will it need a permit?
Specialty tools
Free and instant. Educational guidance only — not a quote, inspection, or professional diagnosis.
Questions to ask before you sign
Ask every contractor the same questions and the cheapest bid stops looking cheapest. Check them off as you go — your progress is saved on this device.
Free, no signup. Bring this to every walkthrough so you compare bids on the same terms.
What should this project cost?
Enter your project details for a realistic cost range before you call anyone.
Common repairs run $150–$650; repipes and water-heater replacements reach $1,500–$4,500.
- Regional adjustment
- National average
- Labor share (typical)
- ~$754
- Quotes to collect
- 3 written estimates
Educational estimate based on national averages — not a binding quote. Always confirm with written local estimates.
Fixly Project Decision Box
- DIY difficulty
- Professional Recommended
- Estimated time
- Inspection 1–2 hours · repairs 1–3 days
- Cost level
- High
Main tools / materials
- Binoculars for a ground-level look
- Flashlight for attic checks
- Moisture meter
- Roofing cement (temporary patch only)
When to stop and call a pro
- Active leak near lights, fans, or any wiring
- Sagging, bulging, or water-filled ceiling
- Steep, wet, or two-story roof — do not climb it
- Storm or hail damage you plan to claim on insurance
Need professional help?
Free roof assessment first — no phone calls until you ask for them.
Get Local Roofing HelpGet help with your roof now
Stay off the roof. These free tools help you protect the house and reach the right professional fast.
- Emergency repair checklistThe first steps that limit damage before a pro arrives.Open
- Repair or replace your roof?Answer 10 questions about age, leaks, and damage to get a clear next step.Open
- Get local estimatesSend one request and compare written estimates from vetted pros.Open
Free, no signup required. Estimates are educational guidance, not a quote or an inspection.
Get the print-ready PDF of this guide
A clean, ad-free, printable version you can keep on your phone or pin to the workshop wall. Free with a FixlyGuide account.
- Print-optimized layout
- Tools, materials & every step included
- Saved to your account
Frequently asked questions
What are the most common causes of a chimney leak?+
The most frequent causes are a cracked chimney crown, damaged or improperly installed flashing where the chimney meets the roof, deteriorated mortar joints in the brickwork, or a missing/damaged chimney cap that allows rain directly into the flue.
Can I fix a chimney leak myself?+
For minor issues like small crown cracks, re-sealing flashing gaps, or tuckpointing a few small mortar joints, an experienced DIYer can often make repairs. However, anything involving extensive masonry, structural repairs, or working on very tall or steep roofs is best left to a professional for safety and effectiveness.
How much does it cost to fix a chimney leak?+
DIY repair costs can range from $20 for a tube of sealant to $100-$300 for mortar mix and basic tools. Hiring a professional can cost anywhere from $300 for minor flashing repairs to $1,000-$3,000+ for crown replacement, extensive tuckpointing, or full re-flashing, depending on the scope of work.
How do you find exactly where a chimney is leaking?+
The most effective method is a systematic water test. On a dry day, have a helper inside watching for water while you slowly spray different sections of the chimney with a garden hose—start at the cap, then the crown, then the masonry, and finally the flashing—waiting several minutes at each section.
What is chimney flashing and why is it important?+
Chimney flashing is a system of metal strips (step flashing and counter-flashing) that creates a watertight seal where the chimney penetrates the roofline. It diverts water running down the roof and chimney away from the vulnerable intersection, preventing it from entering your home.
How often should I inspect my chimney for leaks?+
I recommend homeowners do a visual check of their chimney from the ground with binoculars at least once a year, preferably in the spring after winter's freeze-thaw cycles. A more thorough professional inspection by a certified chimney sweep is recommended every 1-3 years.
Can a chimney leak cause mold?+
Absolutely. Water penetrating the chimney structure or your home's interior can saturate drywall, wood framing, and insulation, creating ideal conditions for mold growth. Undetected leaks can lead to significant mold remediation efforts.
What's the difference between a chimney cap and a chimney crown?+
A chimney cap sits on top of the flue opening, typically metal, and is designed to keep rain, snow, and animals out of the flue pipe itself. The chimney crown is the solid concrete or mortar slab on top of the chimney masonry chase that typically slopes away from the flue, protecting the bricks below from water penetration.
Why would my chimney leak only sometimes during heavy rain?+
Intermittent leaks often point to subtle issues. It could be a small hairline crack in the crown that only allows water in during prolonged, heavy downpours, or flashing that's only compromised when strong winds drive rain in a specific direction. It makes tracing the source tougher, but a methodical water test is still your best bet.
Is chimney chase top damage a common leak source?+
If you have a metal chase top (common on many prefabricated fireplaces), yes, they are a very common leak source. The seams on the corners can pull apart, and the sealant around the flue pipe where it penetrates the chase top can crack and fail over time. Always inspect these closely.
Discussion
Loading comments…