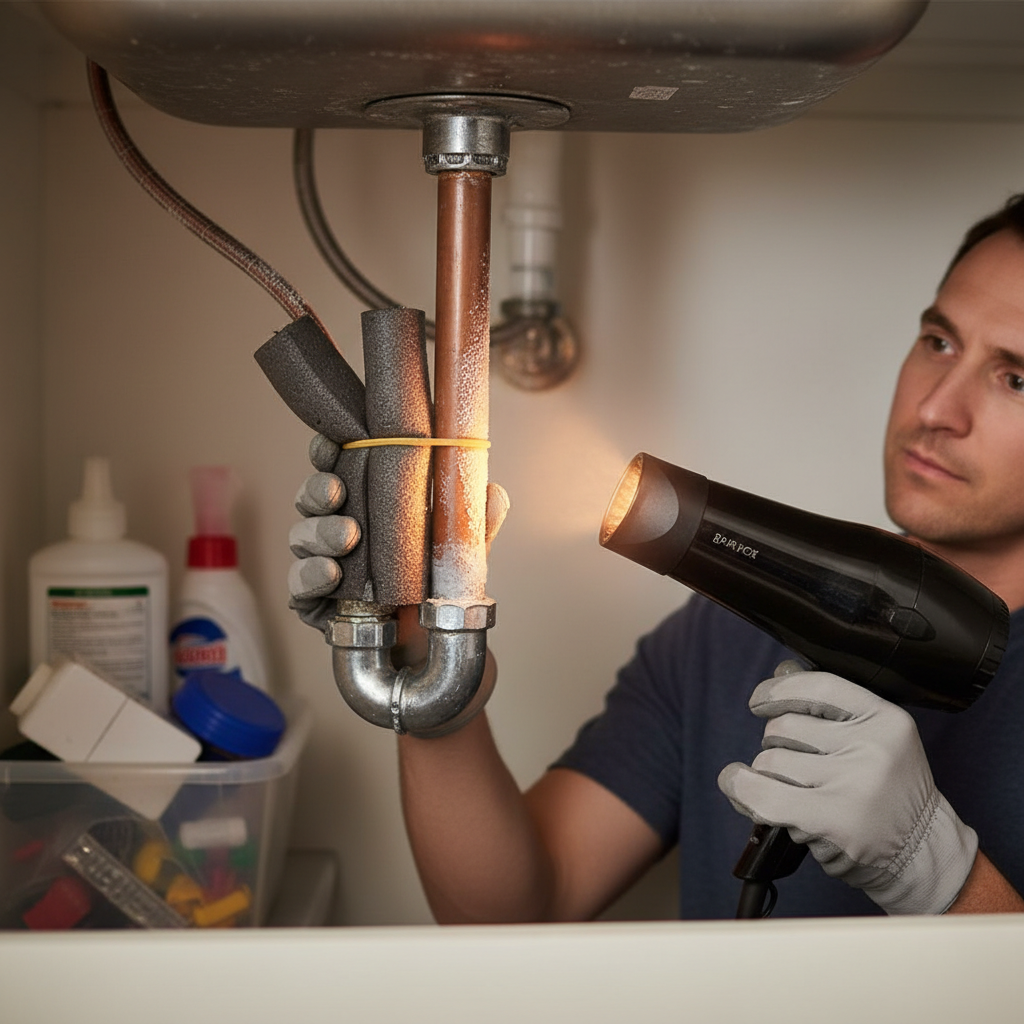
- Hairdryer: My go-to. Use it on a medium or low setting and keep it moving. Don’t park it in one spot. This usually takes 15-30 minutes for a stubborn freeze.
- Heat Lamp: Good for bigger, accessible runs. Keep it at least 1-2 feet away from the pipe and keep an eye on everything around it.
- Electric Heating Pad: Wrap it around the pipe and secure it. Nice and gentle. Handy for hard-to-reach spots or long frozen sections.
- Warm Towels: Soak towels in hot water, wring them out, and wrap them around the pipe. Swap them out as they cool. Messy? Yep. Effective? Also yep.
- Portable Space Heater: If the pipe’s in an open room, this can warm the whole area, but watch it like a hawk. Keep it 3-5 feet away from the pipe and pointed away from anything flammable. Don’t walk off and forget it.
Plumbing · Pipe damage
| Project category | Plumbing |
|---|---|
| Problem type | Pipe damage |
| Trade required | Plumbing |
| Urgency | Emergency — act now |
| Safety risk | High safety risk |
| DIY suitability | Licensed pro only |
| Cost category | High cost |
| Typical timeline | Emergency shutoff now; repipes commonly 2–5 days |
| Contractor type | Licensed plumber |
Repair option
Cut out and replace the damaged section with a coupling or new run.
Replacement option
Whole-home repipe when the material itself is the problem.
Common causes
- Freeze-thaw expansion in an uninsulated run
- Corrosion in aging galvanized or polybutylene
- Shifting foundation stressing a slab line
Relevant tools:emergency checklistcompare quotes
Published July 28, 2026Last updated August 17, 2026
Tools & materials you'll need
Affiliate linksAs an Amazon Associate FixlyGuide earns from qualifying purchases — at no extra cost to you. Prices and availability are accurate as of publication and subject to change.
Quick Answer
If you've got reduced water flow, no water at all from a particular faucet, or visible frost on an exposed pipe, you're probably dealing with a frozen pipe. Fastest safe fix? Gentle heat. I’d grab a hairdryer on a low setting, a heat lamp, or even some hot towels. Start at the pipe closest to the faucet and work your way back toward the main water supply, and keep that faucet open so the meltwater’s got somewhere to go. Don’t ever use an open flame — that’s how you turn a small problem into a full-blown mess.
The Problem
You wake up, turn on the kitchen faucet, and… nothing. Or maybe just a sad little trickle. You try the bathroom sink, same story. That’s not just annoying; it’s a warning sign. When water freezes inside a pipe, it expands. That expansion builds a ton of pressure—not always right where the ice is, either, but between the ice blockage and the closed faucet. That’s what splits pipes open and sends you into thousands of dollars in water damage, usually in some ugly spot like a basement ceiling or behind a wall where you won’t spot it until the damage is already ugly.
I’ve seen this plenty. Just last winter, I got a call from a homeowner in Lakeview. Their main water line had frozen solid in an unheated crawl space. They didn’t catch it until water started dripping through the living room ceiling two days later. By then, the damage was no joke. Knowing how to thaw a pipe the right way can save you a pile of stress and a big plumber bill.
How It Works
Your home’s plumbing is just a network of pipes moving water where it needs to go and taking waste away. Water comes in under pressure, usually around 40-60 pounds per square inch (PSI). Once temps drop below freezing (32°F or 0°C) and you’ve got a pipe in an unheated spot—exterior walls, crawl spaces, attics, or even under a sink by a drafty window—the water in that pipe can freeze.
Here’s the nasty part: the pipe doesn’t have to burst right where the ice forms. The ice acts like a plug. If the faucet downstream is shut, the water trapped between that ice plug and the closed faucet gets squeezed hard. As more water freezes and expands, pressure in that trapped section can climb to over 2,500 PSI. That’ll rupture copper, PEX, or PVC in a hurry. Then the weather warms up, the ice lets go, and suddenly you’ve got a geyser in your wall. No fun. That’s why prevention matters, but quick, careful thawing is your next best move.
Step-by-Step Fix
Here’s how I handle a frozen pipe. Slow and steady wins this race. Don’t rush it, and don’t get cute with a torch.
-
Locate the Frozen Section — Open the cold water faucet that isn’t working, or is just trickling. That part matters; it relieves pressure and gives the meltwater a way out. Then trace the pipe back from that faucet. Look for frost on the pipe, a bulge in the line (rare with copper or PEX before it blows), or pipes running through unheated areas like a garage, crawl space, or exterior wall. If one section feels much colder than the rest, that’s your spot.
- Pro Tip: If you tap gently on the pipe with a screwdriver handle, a frozen section will often sound “solid” compared to the hollow little “clink” of a normal water-filled pipe.
-
Turn Off the Main Water Supply — Before you apply any heat, shut off your main water valve. Seriously. Don’t skip it. If the pipe already split internally and the ice is the only thing holding it together, you’ll get a flood the second it thaws. Better to control the damage from the jump. Open all the faucets in the house too so you bleed off any leftover pressure.
-
Clear the Area — Move anything flammable or heat-sensitive away from the pipe. That means insulation, fabrics, chemicals, cardboard, whatever. You want a clean, safe workspace.
-
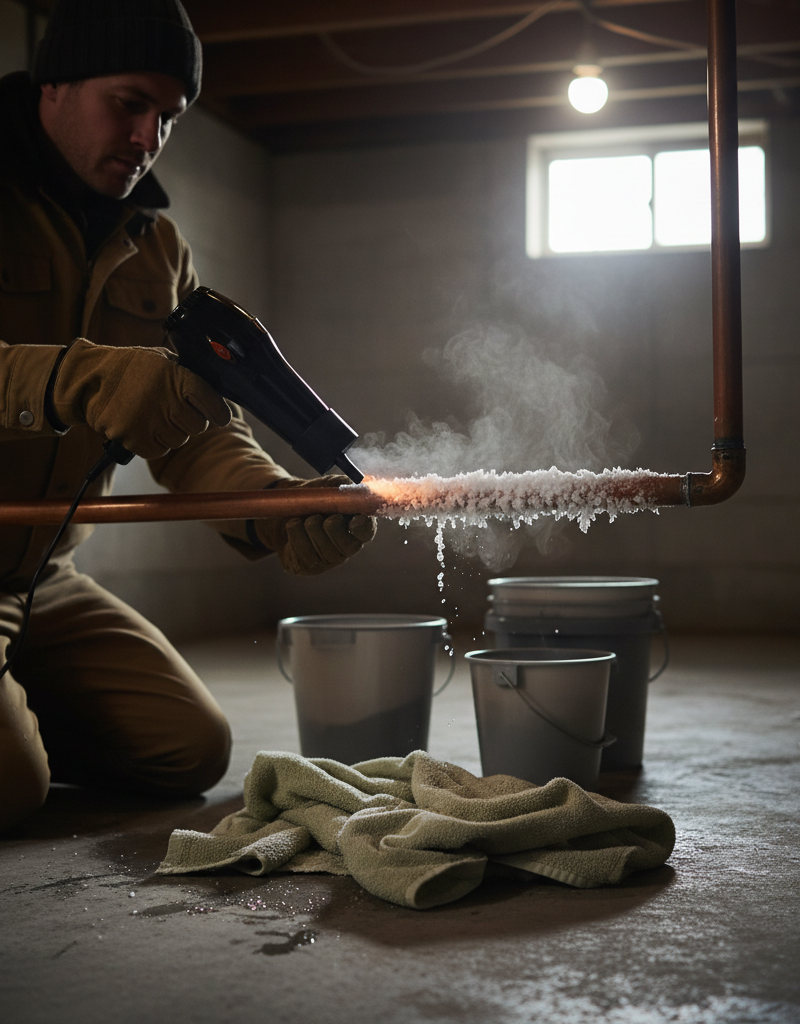
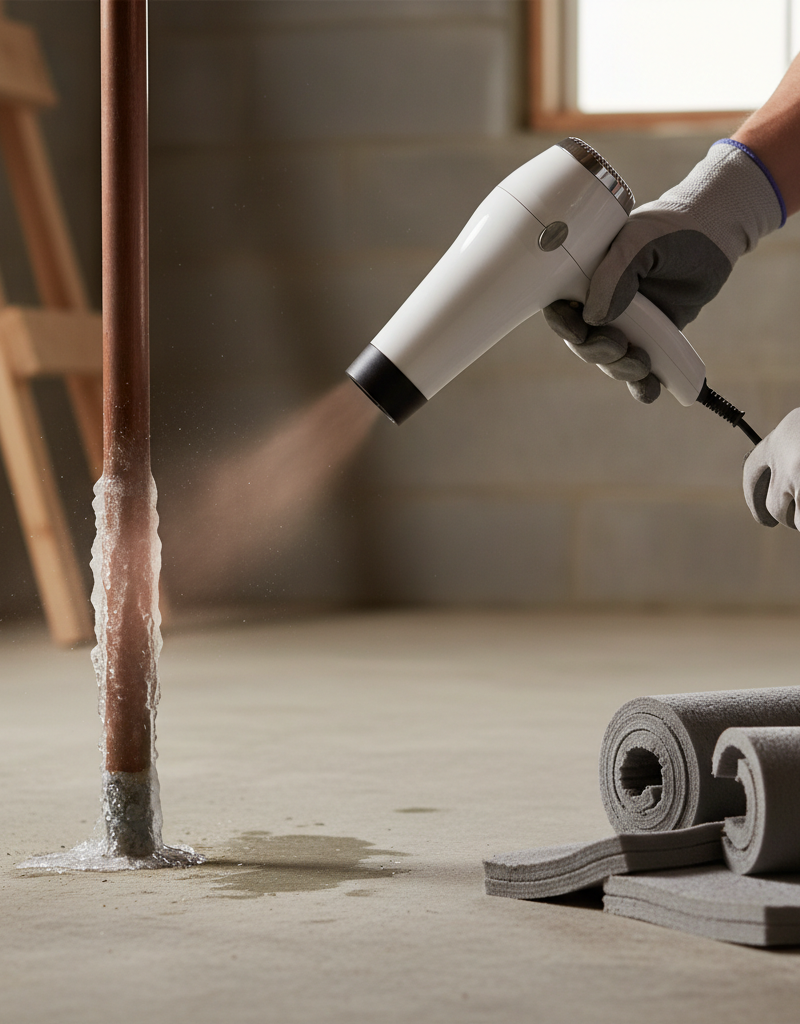
Apply Gentle Heat, Systematically — This is where things start moving. The goal is gradual warming. Start near the open faucet and work your way back toward the frozen section. Keep that faucet open the whole time. As the ice melts, water will start flowing and warm the pipe from the inside.
- Hairdryer: My go-to. Use it on a medium or low setting and keep it moving. Don’t park it in one spot. This usually takes 15-30 minutes for a stubborn freeze.
- Heat Lamp: Good for bigger, accessible runs. Keep it at least 1-2 feet away from the pipe and keep an eye on everything around it.
- Electric Heating Pad: Wrap it around the pipe and secure it. Nice and gentle. Handy for hard-to-reach spots or long frozen sections.
- Warm Towels: Soak towels in hot water, wring them out, and wrap them around the pipe. Swap them out as they cool. Messy? Yep. Effective? Also yep.
- Portable Space Heater: If the pipe’s in an open room, this can warm the whole area, but watch it like a hawk. Keep it 3-5 feet away from the pipe and pointed away from anything flammable. Don’t walk off and forget it.
-
Monitor Water Flow — Keep your eye on the open faucet. Once you get even a trickle, you’re making progress. Let it run. That moving water helps finish the thaw.
-
Check for Leaks Thoroughly — Once water’s flowing freely, and before you call it a day, inspect the thawed pipe and everything around it for leaks. A tiny drip can turn into a real headache fast. Even a small crack will show itself once pressure comes back. Look for discolored drywall, puddles, or the sound of dripping.
Inspection Area What to Look For Pipe surface Cracks, pinholes, bulges, discolored spots Joints/fittings Drips, moisture, mineral deposits (over time) Surrounding walls/ceilings Water stains, dampness, bubbling paint/drywall Floor beneath Puddles, damp spots, warped wood, loose tiles -
Restore Water Supply Gradually — If you don’t see any leaks, slowly open your main water valve. Start with about a quarter turn, listen for anything weird, and watch for new leaks. Then open it all the way.
-
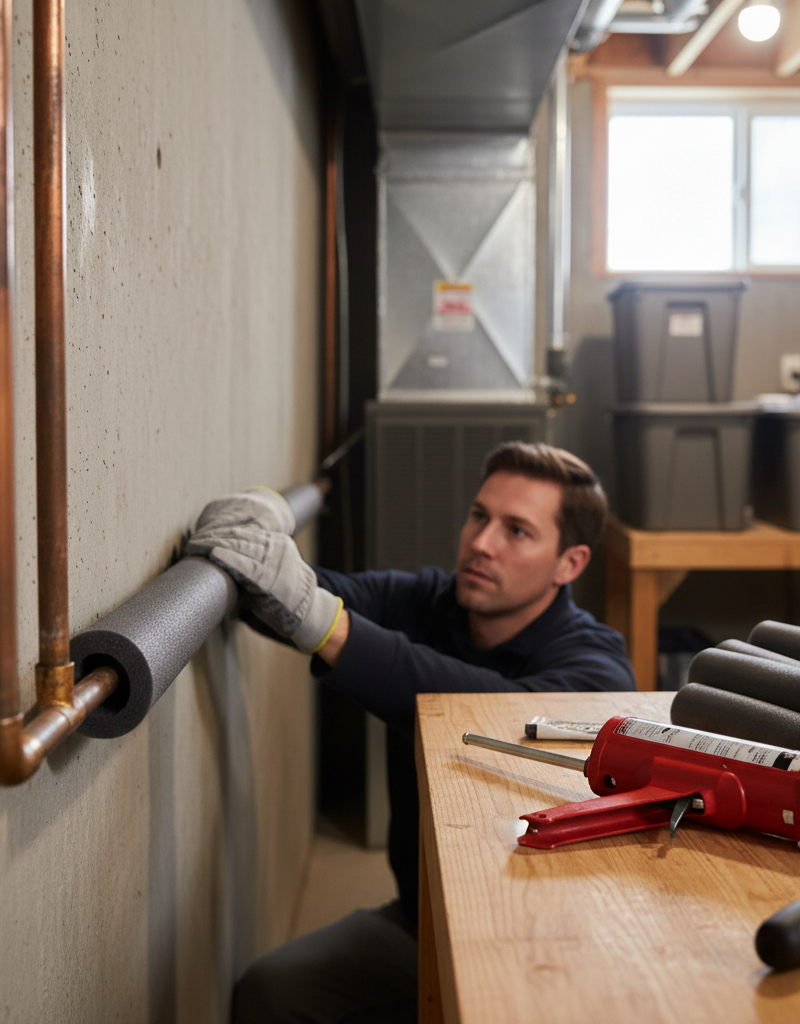
Insulate and Prevent Future Freezes — Don’t wait around for the next cold snap. Insulate any exposed pipes that were vulnerable. I always tell folks to use foam pipe insulation—it’s cheap and easy to install. For pipes in unheated areas, consider heat tape or even letting a tiny trickle of water run from vulnerable faucets when temperatures are plummet for an extended period, especially overnight. Moving water freezes a lot slower, and that can save you a mess.
Common Causes
- Lack of Insulation: Pipes in exterior walls, crawl spaces, attics, or garages without enough insulation are prime targets. Even a decent house can have cold pockets. I’ve seen kitchen sink lines freeze solid because an unsealed dryer vent on the outside wall was blasting cold air right onto the plumbing.
- Drafts and Openings: Small cracks, unsealed spots where pipes enter the house, or even neglected basement windows can let enough cold air in to freeze a pipe overnight. I always tell homeowners to check drafts around rim joists and any exterior hose bib penetrations.
- Prolonged Cold Spells: Long stretches below freezing put even protected pipes at risk. The ground freezes deeper, and the cold creeps into places you wouldn’t expect.
- Poorly Circulated Heat: Rooms that don’t get enough heat, like a north-facing bedroom with closed vents, can let pipes along that exterior wall freeze up.
- Vacant Homes/Low Thermostat Settings: If you’re away and drop the thermostat too low (below 55°F), or part of the house just runs cold, you’re asking for trouble.
Common Mistakes
- Using an Open Flame: This is the worst move on the board. A propane torch will scorch paint, melt plastic pipe, and can start a house fire in a hurry. Even on copper, too much direct heat can flash the water to steam, jack up the pressure, and make the problem worse. And if there’s insulation or wood nearby? No dice.
- Ignoring the Frozen Pipe: Hoping it’ll thaw on its own is a gamble you don’t want to take. The longer it stays frozen, the higher the burst risk. Deal with it right away.
- Turning Off the Faucet: Leaving the faucet closed while you thaw is a common mistake. Keep it open so meltwater can escape, pressure can drop, and you’ll know when flow returns.
- Applying Heat Unevenly or Too Fast: Hammering one tiny spot with intense heat can damage the pipe or cause a sudden pressure change as the ice melts too fast. Gentle, even, steady heat is the play.
- Forgetting to Shut Off Main Water: If the pipe already burst but the ice is holding it shut, you’ll get a big flood the second it thaws. Always shut off the main water first.
- Skipping the Leak Check: The pipe might thaw and flow again, but a hairline crack could still be lurking. A quick glance isn’t enough; feel for dampness, watch for drips, and listen closely.
Cost & Time Breakdown
| Task | DIY Cost | Pro Cost | Time (Active) |
|---|---|---|---|
| Thawing frozen pipe (local) | $0–$50 (tools) | $150–$400 (if no burst) | 30–90 min |
| Replacing burst pipe (DIY) | $50–$150 (parts) | $400–$1,500+ | 2–4 hours (for accessible) |
| Water damage clean up | Varies greatly | $1,000–$10,000+ | Days to weeks |
| Pipe insulation/heat tape | $20–$100 | $100–$300 (per run) | 1–3 hours |
Tips & Prevention
- Insulate, Insulate, Insulate: Best defense you’ve got. Wrap pipes in unheated areas—crawl spaces, attics, exterior walls, garages—with foam pipe insulation. Cheap, quick, easy.
- Seal Air Leaks: Check for cracks or openings in the foundation and exterior walls, especially where pipes or utility lines come in. A tube of caulk can save you a world of hurt.
- Trickle the Faucet: During extreme cold snaps (below 20°F), let a small trickle of cold water run from vulnerable faucets overnight. Moving water is a lot harder to freeze. A pencil-lead thin stream usually does the trick.
- Open Cabinet Doors: For sinks on exterior walls, open the cabinet doors under the sink so warmer room air can reach the pipes. That’s a trick I picked up from an old-timer years ago, and it really does work.
- Drain Outdoor Hoses and Sprinklers: Pull off and drain garden hoses. Shut off and drain outdoor spigots and sprinkler systems so the lines feeding them don’t freeze and burst.
- Maintain Thermostat: If you’re heading out for winter, keep the thermostat at least 55°F (13°C). That’s a whole lot cheaper than fixing a burst pipe.
When to Call a Professional
You can do a lot on your own, but sometimes a frozen pipe is just too far gone for a DIY fix. If you can’t find the frozen section, or if the pipe is inside a wall, ceiling, or some other hard-to-reach spot, it’s time to call a licensed plumber. They’ve got the right gear—commercial heat guns, pipe-thawing machines that use electrical current, even steam generators—to get at those tricky spots without tearing your house apart.
And if you think the pipe already burst—maybe you hear dripping, see water stains, or the water pressure stays way down after thawing—shut off the main water right away and call a pro. Repairing a burst pipe isn’t for amateurs. It usually takes soldering, special fittings, and careful measurements. Don’t roll the dice on making it worse down the line.
Related Articles
Keep troubleshooting with these hand-picked guides from FixlyGuide:
- The 3 Hidden Dangers of Frozen Pipes (And How to Thaw Them Safely) — Safely thawing a frozen pipe is crucial to prevent bursting, water damage, and costly repairs; acting quickly and correctly can save your h…
- The 90-Minute Hidden Danger of a Frozen Pipe (And the DIY Fix) — Thawing a frozen pipe quickly and safely is crucial to prevent bursting and extensive water damage to your home.
- The 3 Hidden Reasons Your Pipes Freeze (And How to Thaw Them Fast) — Discover the real culprits behind frozen pipes and learn a step-by-step method to safely thaw them, preventing costly damage.
- The 3 Hidden Dangers of Frozen Pipes (And How to Thaw Them Safely) — Frozen pipes can burst, causing extensive water damage. Learn to safely thaw them and prevent costly repairs.
- The $7 Trick That Unclogs Your AC Drain Line (and Prevents Nasty Surprises) — Discover the simple, inexpensive method to clear your AC's clogged drain line and prevent costly water damage and reduced cooling efficienc…
- The 3-Minute Sump Pump Secret That Prevents Basement Flooding — Discover how to quickly and effectively test your sump pump before the rainy season hits, ensuring your basement stays dry and preventing c…
Should you do this yourself?
Answer five quick questions before you start. Safety outranks savings every time.
Your experience with work like this
How high do you have to work?
Does the job involve any of these?
Will it need a permit?
Specialty tools
Free and instant. Educational guidance only — not a quote, inspection, or professional diagnosis.
What should this project cost?
Enter your project details for a realistic cost range before you call anyone.
Common repairs run $150–$650; repipes and water-heater replacements reach $1,500–$4,500.
- Regional adjustment
- National average
- Labor share (typical)
- ~$754
- Quotes to collect
- 3 written estimates
Educational estimate based on national averages — not a binding quote. Always confirm with written local estimates.
Fixly Project Decision Box
- DIY difficulty
- Moderate
- Estimated time
- 30 minutes – half a day
- Cost level
- Moderate
Main tools / materials
- Adjustable wrench
- Plunger or drain auger
- Bucket and towels
- Thread tape
When to stop and call a pro
- Water you cannot shut off at the fixture or main
- Sewage backing up into more than one fixture
- Water near electrical panels or outlets
- Gas water heater work beyond relighting a pilot
Need professional help?
Get a Licensed PlumberBefore you start
Check the difficulty, permits, and safety risk — then decide whether to call a pro.
- Estimate this projectGet a cost range for your scope and ZIP before you call anyone.Open
- Get local estimatesSend one request and compare written estimates from vetted pros.Open
Free, no signup required. Estimates are educational guidance, not a quote or an inspection.
Get the print-ready PDF of this guide
A clean, ad-free, printable version you can keep on your phone or pin to the workshop wall. Free with a FixlyGuide account.
- Print-optimized layout
- Tools, materials & every step included
- Saved to your account
Frequently asked questions
How do I know if a pipe is frozen?+
The most common signs are little to no water coming out of a faucet, or only a trickle. You might also see visible frost on exposed pipes, or a section of pipe that feels significantly colder than the rest.
What's the safest way to thaw a pipe?+
The safest methods involve gentle, indirect heat. A hairdryer on a low setting, a heat lamp positioned at a safe distance, an electric heating pad, or towels soaked in hot water are all good options. Always keep the closest faucet open while thawing.
How long does it take to thaw a frozen pipe?+
It really depends on the severity and length of the freeze. Smaller, localized freezes might thaw in 15-30 minutes with a hairdryer, while a longer section could take an hour or more. Patience is key.
Can a frozen pipe burst without me knowing?+
Absolutely. Pipes often burst in hidden areas like behind walls, in ceilings, or in crawl spaces. The ice might hold the pipe together, but once it melts, water will start pouring out. That's why it's critical to shut off your main water first.
Should I turn off the main water supply when thawing?+
Yes, always turn off your main water supply before attempting to thaw a pipe. If the pipe has already burst internally, this prevents a flood when the ice melts completely.
What should I *never* use to thaw a pipe?+
Never use an open flame, such as a propane torch, kerosene heater, or charcoal grill. This is extremely dangerous, can damage pipes, and is a major fire hazard. Also avoid boiling water, which can be too aggressive for some pipe materials.
Can I prevent pipes from freezing in the future?+
Yes, and you should! Insulate exposed pipes, seal any air leaks near plumbing, keep cabinet doors open under sinks on exterior walls, and consider letting a small trickle of water run from vulnerable faucets during extreme cold snaps (below 20°F).
When should I call a plumber for a frozen pipe?+
Call a plumber immediately if you can't locate the frozen section, the pipe is inaccessible (like inside a wall), you suspect the pipe has already burst, or you're simply uncomfortable doing the work yourself. They have specialized tools for safe thawing and repair.
Does turning up the thermostat help thaw frozen pipes?+
While it can help slowly warm the overall house, simply relying on your thermostat isn't usually enough for a directly frozen pipe. You still need to apply direct, gentle heat to the specific frozen section, but keeping the house warm in general is good for prevention.
Discussion
Loading comments…