- Ignoring the Problem: Thinking “it’s just a few shingles” can turn into thousands of dollars in water damage, mold work, and ruined stuff. Water always finds a way.
- Delaying Temporary Repairs: Every hour that roof stays open, you’re rolling the dice. Get the tarp on as soon as you can.
- Unsafe Ladder Practices: Falling off a ladder is no joke. Don’t overreach, don’t rush, and don’t trust a wobbly setup. If you’re not steady, stay on the ground.
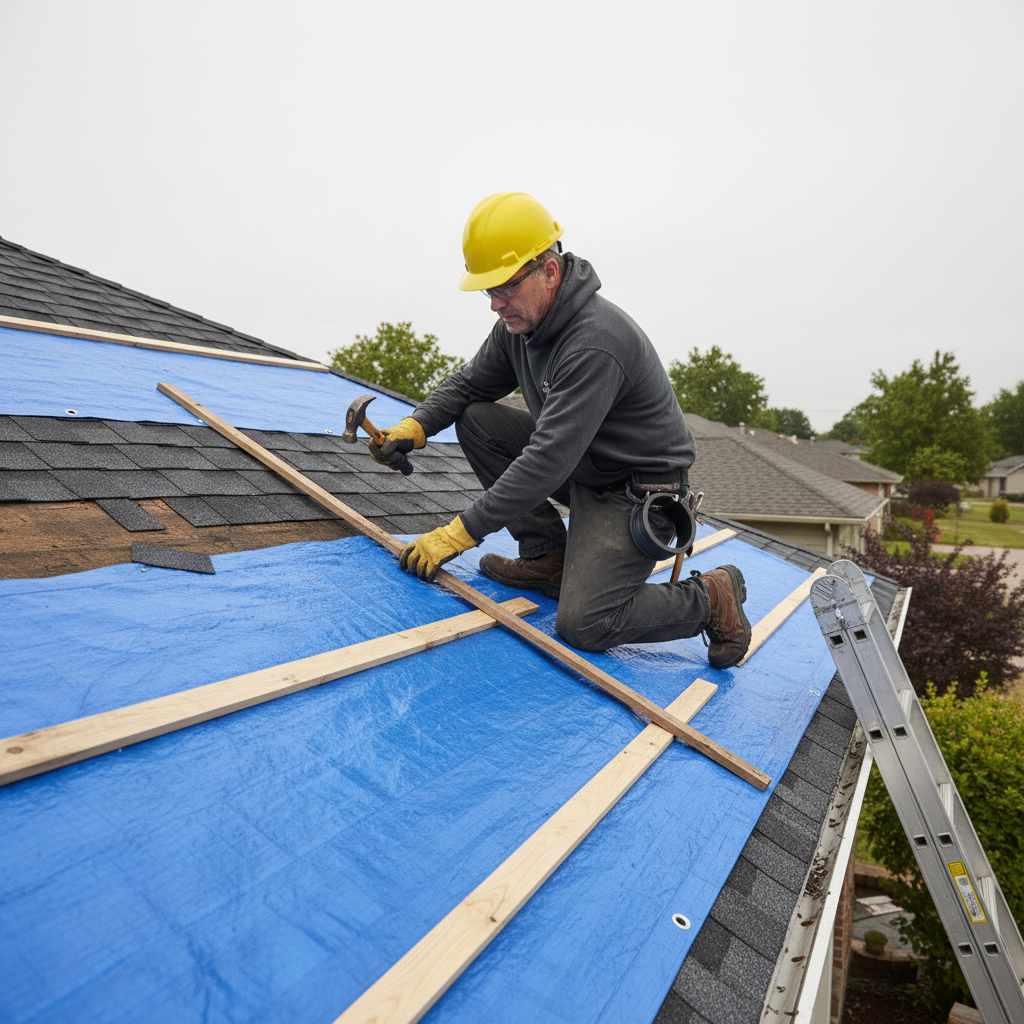
- Improper Tarping: Just tossing a tarp over the hole won’t do it. You need overlap, and you need it fastened with wood strips so wind can’t get under there and make the mess worse.
- Not Documenting Damage: If you skip photos and video before and after the temp repair, you can weaken the claim. Insurance companies want proof, so give them proof.
Roofing · Aging roof
| Project category | Roofing |
|---|---|
| Problem type | Aging roof |
| Trade required | Roofing |
| Urgency | Planned project |
| Safety risk | Low safety risk |
| DIY suitability | Pro recommended |
| Cost category | High cost |
| Typical timeline | Plan 4–12 weeks ahead for scheduling and material lead time |
| Contractor type | Licensed roofing contractor |
Repair option
Maintenance repairs to buy a season or two while you budget.
Replacement option
Planned replacement, which is almost always cheaper than a leak-driven emergency.
Common causes
- Normal weathering past the shingle service life
- Poor attic ventilation cooking the shingles from below
- Repeated repairs on the same slopes
Relevant tools:repair or replace roofproject cost estimatorhome improvement material prices
Published August 18, 2026Last updated August 18, 2026
Tools & materials you'll need
Affiliate linksAs an Amazon Associate FixlyGuide earns from qualifying purchases — at no extra cost to you. Prices and availability are accurate as of publication and subject to change.
Quick Answer
When a storm tears shingles off your roof, you need to move fast, but you’ve gotta stay safe. Get eyes on it somehow—binoculars from the ground if you have to—and figure out what’s missing. Take pictures and video, then get a temporary tarp on there to keep the rain out. That’s not just about protecting the house. It helps protect your claim, too, and insurance folks love receipts. I’ve seen plenty of these, and the people who jump on it right away usually end up in better shape.
The Problem
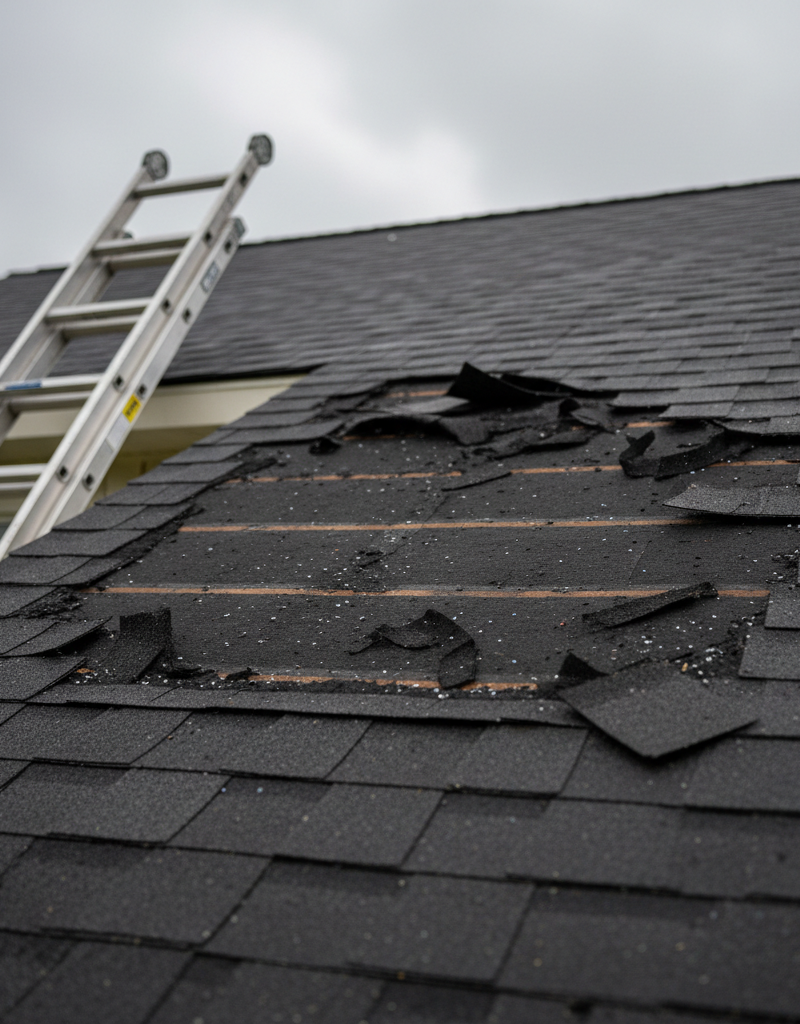
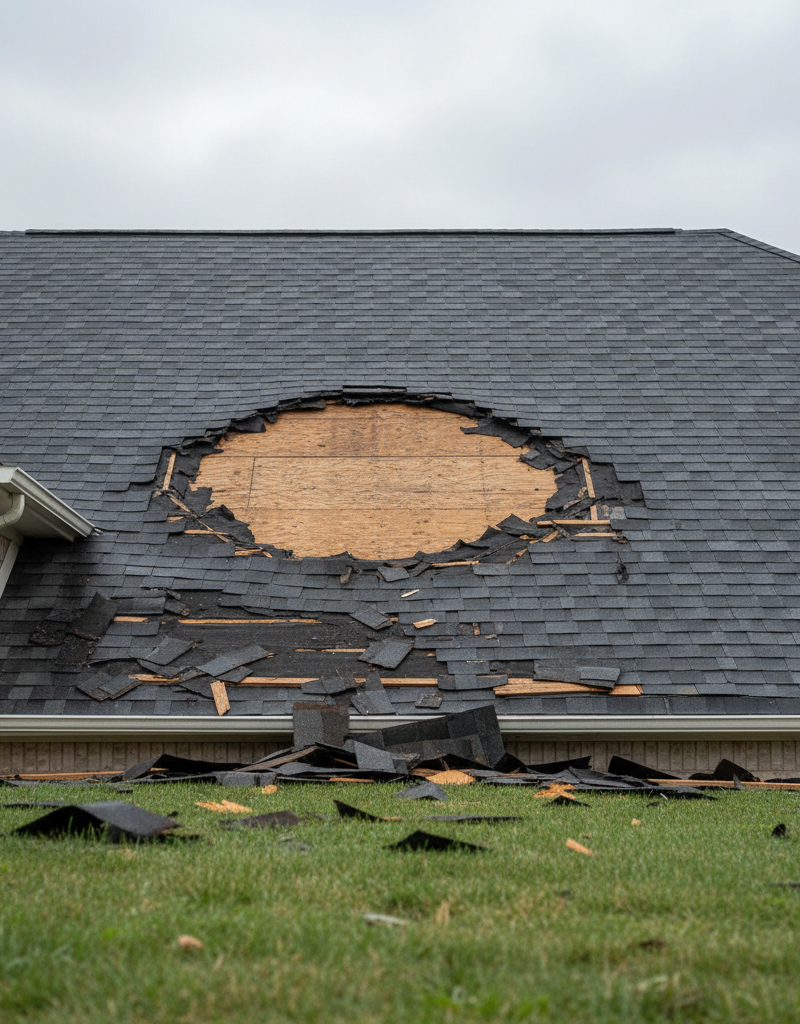
You wake up after a nasty storm, walk outside, and there it is: that ugly patch of roof decking where shingles used to be. Or maybe the shingles are all over the yard like somebody dumped a giant bag of black confetti. Either way, it’s bad news. Water doesn’t need much of an opening, and once it finds one, it’ll run into the attic, soak insulation, stain ceilings, and start chewing up rafters. I pulled a ceiling down in a house in Canton after a little shingle loss turned into a long, expensive water mess. Happens quicker than folks think. You’ve got to get ahead of it before a small repair turns into a full teardown. Leave it open through a couple hard rains and you’re flirting with mold, rot, and a repair bill that’ll make your stomach turn. The whole game is getting that roof sealed back up, even if it’s only temporary for now.
How It Works
A roof isn’t just shingles nailed on top and called it a day. It’s a system, and every layer matters. The shingles overlap to shed water. Under that, you’ve usually got roofing felt or synthetic underlayment, which is your backup line. Beneath that sits the decking, usually plywood or OSB, and that’s what everything’s fastened to.
Now, wind gets under a shingle, and things go sideways fast. Anything over 50 miles per hour can start lifting weak spots, especially if the shingles are older, brittle, or never sealed right in the first place. Once one shingle pops loose, the ones around it can get stressed too. Then you’ve got a chain reaction. The nails matter just as much as the shingles—if they’re not seated right, or the shingle tears around them, the whole section can fail. What you’re left with is an exposed spot where the underlayment, or even bare decking, is sitting there waiting for water. And water will find it. The point of a temp repair is simple: cover the breach and send water down and off until you can do the real fix.
Step-by-Step Fix
Here’s how I handle a missing shingle job when I need to get things safe and dry in a hurry.
-
Assess the Damage Safely – Don’t just run up there!
- Start from the ground. Use binoculars if you’ve got them and look for missing shingles, lifted edges, or spots where the granules are gone. Mark the locations. Take pictures and video from a couple angles while you’re at it—your insurance adjuster’s going to want that later. If the damage looks widespread, or if ladders make you nervous, don’t force it. Call a pro and let somebody with a little more roof time handle it. No shame in that.
-
Gather Your Gear – Have everything in hand before you climb.
- You’ll need a solid ladder, gloves, safety glasses, a utility knife, tape measure, and either a big roofing tarp (I like the blue poly ones, 20x20 ft or bigger if the area’s wide) or heavy-duty plastic sheeting (6-mil minimum). Grab roofing nails or screws with wide heads, plus a hammer or cordless drill. In windy country, I’ll toss in furring strips or 2x4s to help lock the tarp down. You don’t want to be hunting for tools halfway up the ladder.
-
Ladder Placement and Safety – This isn’t a race.
- Set the ladder on firm, level ground. It should stick up at least 3 feet above the roofline. Tie off the base if you can, and have somebody steady it. Keep three points of contact on the ladder. Before you step onto the roof, look for damp spots, moss, or slick areas—those patches can be nasty. Wear rubber-soled shoes, not slick sneakers. I’ve seen guys get cocky here, and the ground wins every time.
-
Clear the Area – Get the junk off the roof.
- Pull off loose debris, broken shingle bits, and any branches sitting in the damaged area. Go easy. You’re trying to help, not tear up more material. A leaf blower works for light stuff, and a soft brush does the trick when you don’t want to scrape the surface.
-
Measure and Cut the Tarp – Bigger is better here, trust me.
- Measure the damaged section, then cut your tarp or plastic so it goes at least 2-3 feet beyond the bad area on every side. You want overlap. If you’ve got a 4-foot by 6-foot hole, don’t cut a 4-foot by 6-foot tarp and call it good—you’d want at least 8-foot by 10-foot. That extra material gives you room to seal it right and keep the wind from sneaking under the edges.
-
Position the Tarp – Get it right the first time.
- Lay the tarp over the damaged area so water runs over it, not under it. That means the upslope edge needs to tuck under existing shingles if you can manage it, or at least run high enough on the roof for water to shed cleanly. On a bigger area, I like to start it just below the ridge so it covers the damage and runs down past the eaves. Overlap the shingles as much as possible. If you lay it wrong, you’ll just trap water. That thing’s toast.
-
Secure the Tarp – Don’t let the next gust peel it right back off.
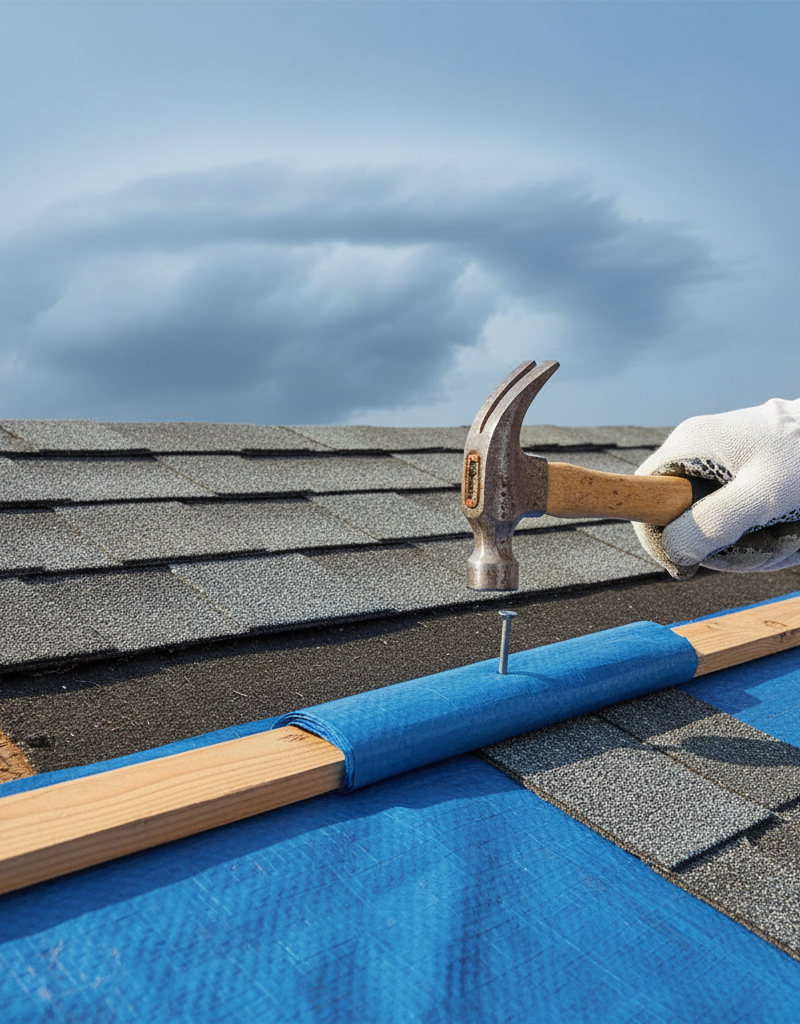
- Roll a 2x4 or furring strip inside the tarp edges on all sides. That gives you a solid anchor point. Nail or screw those strips into the decking, through the tarp, every 12-18 inches. Use roofing nails with large heads, about 1-1/4 to 1-1/2 inches long. If you’re using screws, grab galvanized hex-head screws with washers. Press the strip tight against the roof, especially on the upslope side, so water can’t creep under it. In windy areas, I’ll sometimes run a bead of roofing cement under the strip for a little extra insurance.
-
Final Inspection – Check it twice.
- Look at it from the roof if it’s safe, then again from the ground. Make sure the tarp is tight, covering the whole damaged area, and fastened well. No loose edges flapping around. If it’s a temporary fix, remember that word—temporary. You still need a permanent repair soon.
Common Causes
- High Winds: This is the big one. Anything from a hard thunderstorm gust to hurricane-force wind can lift shingles, especially if they’re older or the seal’s weak. I remember one job after a microburst hit a neighborhood in Rochester; the wind peeled off whole sections like it was nothing.
- Old or Brittle Shingles: Asphalt shingles lose flexibility as they age. Sun, heat cycles, and plain old wear make them easier to crack and blow off. You’ll usually see curling or blistering before they finally give up.
- Improper Installation: If the shingles weren’t nailed right—too few nails, nails too high, or nails driven wrong—they’re sitting there waiting to fail. Manufacturers usually spec at least four nails per shingle, and sometimes six in high-wind zones.
- Tree Damage: Branches coming down in a storm can knock shingles loose or punch holes in the decking. Even a branch rubbing the roof for years can grind the granules off and shorten the life of the shingles.
- Poor Adhesion: The self-sealing tar strip on the back of the shingle might never have set right because of cold weather during install, or it could’ve failed from bad manufacturing or brutal heat. Once that strip lets go, the shingle can lift easy.
Common Mistakes
- Ignoring the Problem: Thinking “it’s just a few shingles” can turn into thousands of dollars in water damage, mold work, and ruined stuff. Water always finds a way.
- Delaying Temporary Repairs: Every hour that roof stays open, you’re rolling the dice. Get the tarp on as soon as you can.
- Unsafe Ladder Practices: Falling off a ladder is no joke. Don’t overreach, don’t rush, and don’t trust a wobbly setup. If you’re not steady, stay on the ground.
- Improper Tarping: Just tossing a tarp over the hole won’t do it. You need overlap, and you need it fastened with wood strips so wind can’t get under there and make the mess worse.
- Not Documenting Damage: If you skip photos and video before and after the temp repair, you can weaken the claim. Insurance companies want proof, so give them proof.
- Walking on Damaged/Wet Roof: Stepping on compromised shingles can make the damage worse, and a wet roof is slick as grease. Don’t walk across the bad area unless you absolutely have to, and even then be careful.
Cost & Time Breakdown
| Task | DIY Cost | Pro Cost | Time |
|---|---|---|---|
| Damage Assessment (ground) | $0 | $0-$150 (for inspection) | 15-30 minutes |
| Temporary Tarp Repair | $50-$200 (materials) | $300-$800 | 1-3 hours |
| Permanent Shingle Replacement | $100-$300 (per square) | $300-$600 (per square) | 2-4 hours (small area) |
| Insurance Claim Filing | $0 | $0 | 1-2 hours |
| Debris Cleanup | $0 | $50-$150 | 30-60 minutes |
Note: "Per square" refers to 100 square feet of roofing material. Most shingle packs cover a third of a square.
Tips & Prevention
- Regular Roof Inspections: I tell folks to give the roof a look from the ground twice a year—spring and fall. Check for curled, cracked, or missing shingles. Catching it early can save you a bundle. You can also hire somebody for a yearly inspection; it’s cheap insurance, usually around $150-$300.
- Keep Gutters Clean: Clogged gutters back water up under shingles, especially in cold climates, and that leads to rot and early shingle failure. Clean ’em out after the leaves fall.
- Trim Overhanging Branches: Trees too close to the roof are trouble waiting to happen. Keep branches trimmed back at least 6-8 feet from the roofline so they don’t bang around or scrape the shingles.
- Know Your Shingle Warranty: Read the warranty and see what it actually covers, especially wind uplift. Some manufacturers offer higher wind ratings (e.g., 130 mph) on premium lines.
- Maintain Attic Ventilation: Good attic ventilation helps keep roof temps in check, and that extends shingle life by keeping them from baking into brittle little chips. Aim for at least 1 square foot of net free vent area for every 150 square feet of attic floor space.
- Have an Emergency Plan: Keep your tarp, rope, and basic tools where you can grab them fast before a storm hits. Minutes matter when the weather turns ugly.
When to Call a Professional
Look, I’m all for DIY, but some jobs are too risky or too big for most homeowners. You need to call a licensed roofing contractor if the damage is spread out over more than a few patches, if the roof pitch is too steep (over a 7/12 slope—that’s where things get dicey), or if heights aren’t your thing. If you see structural damage like sagging roof lines or serious decking penetration, that’s a pro job, period. And for crying out loud, if there are electrical lines or gas meters anywhere near the damage, back off and call for help. Don’t try to outsmart mother nature or building codes. A good roofer can also handle the insurance side a whole lot better than most homeowners can.
Related Articles
Keep troubleshooting with these hand-picked guides from FixlyGuide:
- The Urgent Truth About Missing Roof Shingles (And Your 3-Step Fix) — High winds can rip shingles off your roof, exposing your home to immediate water damage – here’s how to assess, temporary patch, and plan p…
- The #1 Mistake Homeowners Make After Finding Missing Shingles (And How to Fix It Right) — Discover the crucial steps to take after a storm rips shingles from your roof, ensuring a proper, lasting repair and preventing costly futu…
- Wind Tore Off Your Shingles? The 7 Critical Steps Most Homeowners Miss — Discover the essential steps to take when roof shingles go missing after a storm, from immediate safety checks to temporary repairs and ins…
- Missing Shingles? The Real Trouble Is Under Your Roof — After a storm, missing shingles seem like a simple fix. But the high winds that tore them off likely broke the seals on surrounding shingle…
- Your Roof is Leaking. Now What? — A leaking roof after a storm is a homeowner's nightmare. Learn how to safely install a temporary roof tarp to prevent further water damage…
- The Secret Culprit Behind Your Leaky Washer (It's Not Always the Hose!) — Don't panic about a puddle under your washing machine; often, the fix is simpler and cheaper than you think, especially when the leak origi…
Should you do this yourself?
Answer five quick questions before you start. Safety outranks savings every time.
Your experience with work like this
How high do you have to work?
Does the job involve any of these?
Will it need a permit?
Specialty tools
Free and instant. Educational guidance only — not a quote, inspection, or professional diagnosis.
Questions to ask before you sign
Ask every contractor the same questions and the cheapest bid stops looking cheapest. Check them off as you go — your progress is saved on this device.
Free, no signup. Bring this to every walkthrough so you compare bids on the same terms.
What should this project cost?
Enter your project details for a realistic cost range before you call anyone.
Spot repairs commonly run $400–$1,800; full replacement typically $9,000–$18,000 for an average home.
- Regional adjustment
- National average
- Labor share (typical)
- ~$2,948
- Quotes to collect
- 3 written estimates
Educational estimate based on national averages — not a binding quote. Always confirm with written local estimates.
Fixly Project Decision Box
- DIY difficulty
- Professional Recommended
- Estimated time
- Inspection 1–2 hours · repairs 1–3 days
- Cost level
- High
Main tools / materials
- Binoculars for a ground-level look
- Flashlight for attic checks
- Moisture meter
- Roofing cement (temporary patch only)
When to stop and call a pro
- Active leak near lights, fans, or any wiring
- Sagging, bulging, or water-filled ceiling
- Steep, wet, or two-story roof — do not climb it
- Storm or hail damage you plan to claim on insurance
Need professional help?
Free roof assessment first — no phone calls until you ask for them.
Get Local Roofing HelpGet help with your roof now
Stay off the roof. These free tools help you protect the house and reach the right professional fast.
- Emergency repair checklistThe first steps that limit damage before a pro arrives.Open
- Repair or replace your roof?Answer 10 questions about age, leaks, and damage to get a clear next step.Open
- Get local estimatesSend one request and compare written estimates from vetted pros.Open
Free, no signup required. Estimates are educational guidance, not a quote or an inspection.
Get the print-ready PDF of this guide
A clean, ad-free, printable version you can keep on your phone or pin to the workshop wall. Free with a FixlyGuide account.
- Print-optimized layout
- Tools, materials & every step included
- Saved to your account
Frequently asked questions
How quickly do I need to fix missing shingles?+
You need to address missing shingles immediately, ideally within hours of the storm, to prevent water from entering your home. Even a small opening can lead to significant damage with the next rain.
Can I just glue a shingle back down?+
For a very minor lift, you might get away with a small dab of roofing cement, but for missing shingles, you need a full replacement. Gluing an old, damaged shingle back down won't provide a reliable, long-term seal against the elements.
What tools do I need for a temporary tarp repair?+
For a temporary tarp repair, you'll need a sturdy ladder, work gloves, safety glasses, a utility knife, a large roofing tarp, roofing nails (or screws with washers), a hammer (or drill), and possibly some 2x4s or furring strips to secure the tarp.
Will my homeowner's insurance cover missing shingles?+
Most homeowner's insurance policies cover sudden and accidental damage from perils like wind and hail. Document the damage thoroughly with photos and contact your insurer as soon as possible to start the claim process.
Is it safe to get on my roof after a storm?+
Only get on your roof if it's completely dry, you have proper safety gear, and you're comfortable with heights. If the roof is steep, wet, or you see significant damage, it's safer to call a professional for assessment.
How do I prevent shingles from blowing off in the future?+
Regular roof inspections, keeping gutters clean, trimming overhanging tree branches, and ensuring proper attic ventilation can help. When replacing, consider shingles with higher wind ratings and proper installation techniques.
What's the difference between temporary and permanent repair?+
A temporary repair, like a tarp, is designed to prevent immediate water intrusion until a full repair can be made. A permanent repair involves correctly replacing the missing shingles and ensuring the roof system is fully sealed and intact.
Can I replace just a few missing shingles myself?+
Yes, replacing a few individual shingles is a common DIY task if you're comfortable and safe on a ladder. However, if the damage is extensive, or if underlying decking is compromised, a professional is recommended.
What if I can't find matching shingles?+
Matching older shingles can be tough. For a small repair, sometimes you can take shingles from a less visible part of the roof (like under a vent) and replace that area with new, slightly mismatched ones. Otherwise, a pro can help source close matches or suggest a larger repair strategy.
How much does a roofer charge for emergency tarping?+
Emergency tarping typically ranges from $300 to $800, depending on the size of the area, roof pitch, and urgency. Many roofers will credit this cost towards the permanent repair if you hire them for the full job.
Discussion
Loading comments…