- High Winds: This is the main culprit. Wind speeds can beat the adhesion on older shingles, especially if they weren’t installed right to begin with. Anything over 50-60 mph can start lifting weak shingles.
- Aging Shingles: Once shingles get up there — say, past 15-20 years — they start getting brittle. The granules wear off, the asphalt gets exposed, and those sealant strips dry out and quit sticking like they should.
- Improper Installation: This one gets under my skin because it’s preventable. You’ll see too few nails, nails driven crooked, or nails set too high on the shingle (called
Roofing · Missing shingles
| Project category | Roofing |
|---|---|
| Problem type | Missing shingles |
| Trade required | Roofing |
| Urgency | Urgent — within days |
| Safety risk | High safety risk |
| DIY suitability | Pro recommended |
| Cost category | Low cost |
| Typical timeline | Typically a same-visit repair |
| Contractor type | Licensed roofing contractor |
Repair option
Replace the missing shingles and reseal surrounding courses before the next rain.
Replacement option
Replacement when matching is impossible or loss is widespread across slopes.
Common causes
- High wind lifting the sealant strip
- Improper nailing at install
- Brittle shingles past their service life
Relevant tools:repair or replace roofproject cost estimator
Published July 30, 2026Last updated August 17, 2026
Tools & materials you'll need
Affiliate linksAs an Amazon Associate FixlyGuide earns from qualifying purchases — at no extra cost to you. Prices and availability are accurate as of publication and subject to change.
Quick Answer
When a storm rips shingles clean off, you’re not just looking at an ugly spot up top — you’ve got an open door for water to get in. The fix is pretty straightforward: check the area safely, put in a temporary patch so you don’t start leaking, then line up a permanent repair once you’ve got the right materials. You’ll want to match the existing shingles as close as you can, pull any old nails, and slide the new pieces into place with roofing nails. Speed matters here, no doubt about it, but don’t get sloppy. Safety comes first.
The Problem
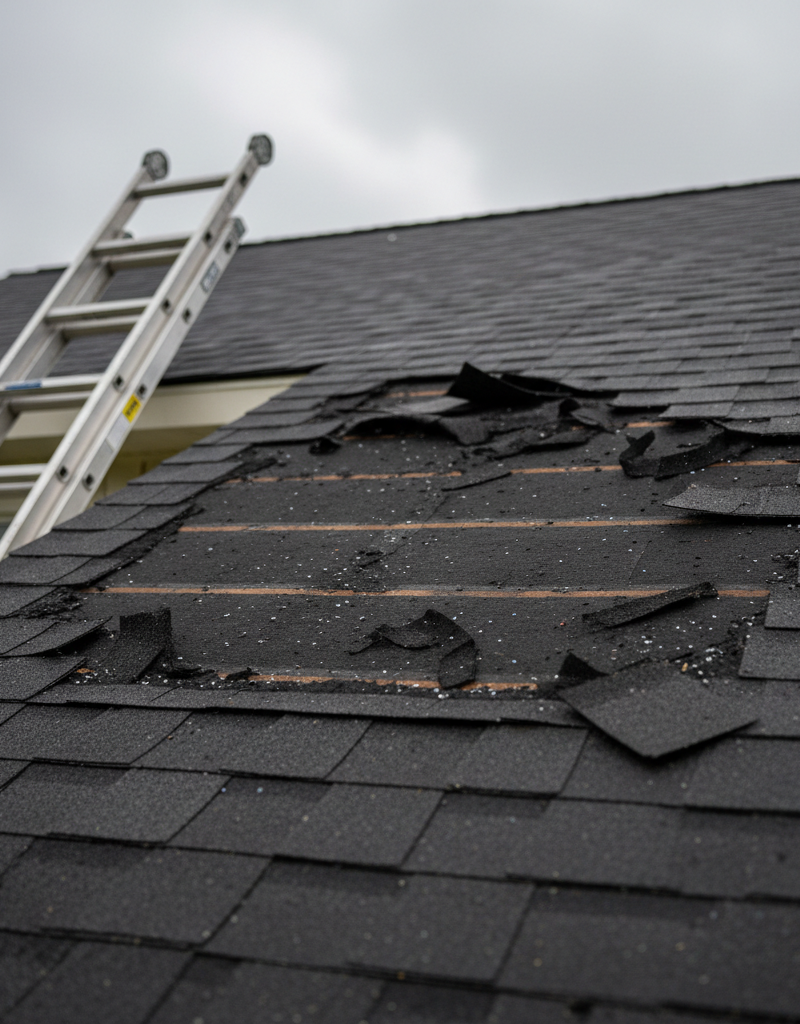
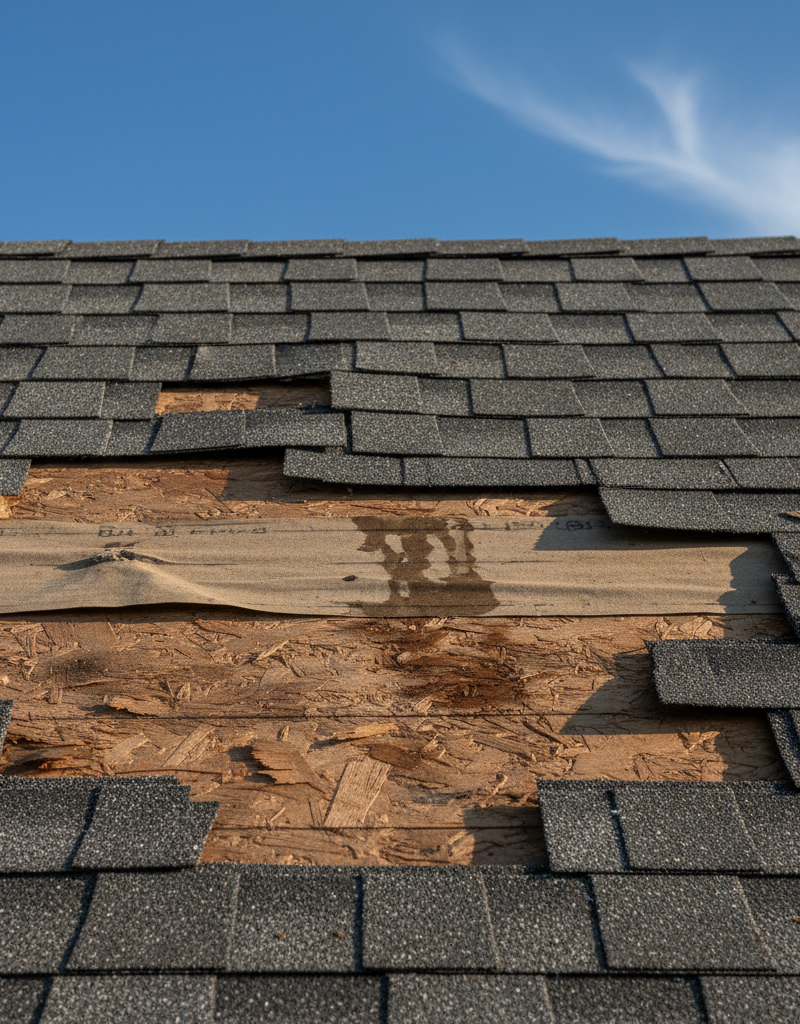
You wake up after a windy night, or a hailstorm blows through, and there it is: that dark patch on your roof where shingles used to be. Or worse, you find shingles scattered across the yard like someone dumped giant potato chips all over the place. I see this kind of mess all the time, especially with the wild weather we’ve been getting in places like Raleigh and Charlotte lately. It’s not just about looks, either; those missing shingles leave your roof’s underlayment — and maybe your attic and the inside of your house — wide open to the weather. Water’s the real problem, and an exposed roof deck is basically an invitation for leaks, rot, and mold.
A lot of homeowners don’t realize that even a small missing section can turn into a big water problem if you sit on it. I’ve been on jobs where somebody ignored a little damaged spot after a spring storm, then called me back in the fall with thousands of dollars in attic insulation and ceiling drywall damage. Happens more than you’d think. It’s a quick fix if you catch it early, but it turns into a headache real fast if you let it ride.
How It Works
To make sense of why a shingle goes missing and how to fix it, you’ve gotta know how the roof is put together. Most residential roofs, especially around here, use asphalt shingles laid over a waterproof underlayment — usually felt paper or a synthetic membrane — and all of that gets nailed to plywood or OSB roof decking. Each shingle has an adhesive strip on the underside, usually called a sealant strip or tar strip. When the sun heats the roof, that strip softens up and bonds to the shingle below it, which gives you that wind-resistant seal. That little setup is what keeps the roof tight and keeps shingles from peeling off when the breeze kicks up.
A few things can throw that whole system out of whack. Over time, UV rays and temperature swings wear out the sealant strip. Shingles get brittle. The adhesive quits holding like it should. Then a good gust of wind — say, a 70 mph microburst — hits the roof and starts creating pressure on those shingle tabs. If the seal’s weak, or the nails weren’t driven right during the install, that wind can get under a shingle, lift it, and tear it loose. Hail can rough up the surface too, knocking off granules and cracking the shingle, which makes wind damage even easier.
It snowballs. One shingle goes, then the exposed edge of the next one becomes the weak link, and before long you’re looking at a whole section gone. That’s why even a storm that doesn’t seem like much can still do real damage if the roof’s already tired. You’re dealing with a broken weather barrier, plain and simple, and every missing shingle is a breach that needs to get sealed up ASAP.
Step-by-Step Fix
Here’s how I handle a few missing shingles. If you’re not comfortable on a ladder, or if the roof pitch is steep, call a pro. Your safety’s worth way more than a few bucks.
-
Safety First, Always — Check the weather before you even grab the ladder. You don’t want to be up there with rain coming down or wind pushing you around. Make sure the ladder’s solid, sitting on level ground, and extended at least 3 feet above the eaves. A spotter helps a lot if you’ve got one. Wear non-slip shoes, gloves, and eye protection. I’ve seen too many people rush a patch job and end up eating it. No dice.
-
Inspect the Damage Thoroughly — Climb up carefully and look over the missing area. Are you dealing with just a few tabs, or is a whole row gone? Are the shingles under it damaged, or did they just get blown loose? Check for exposed nails from the old shingles, tears in the underlayment, or soft spots in the decking. That usually tells the whole story. Sometimes it’s not just a missing shingle — sometimes the nails pulled right through the deck. If that’s the case, you may need to patch the underlayment too. Take pictures for your insurance claim while you’re at it.
-
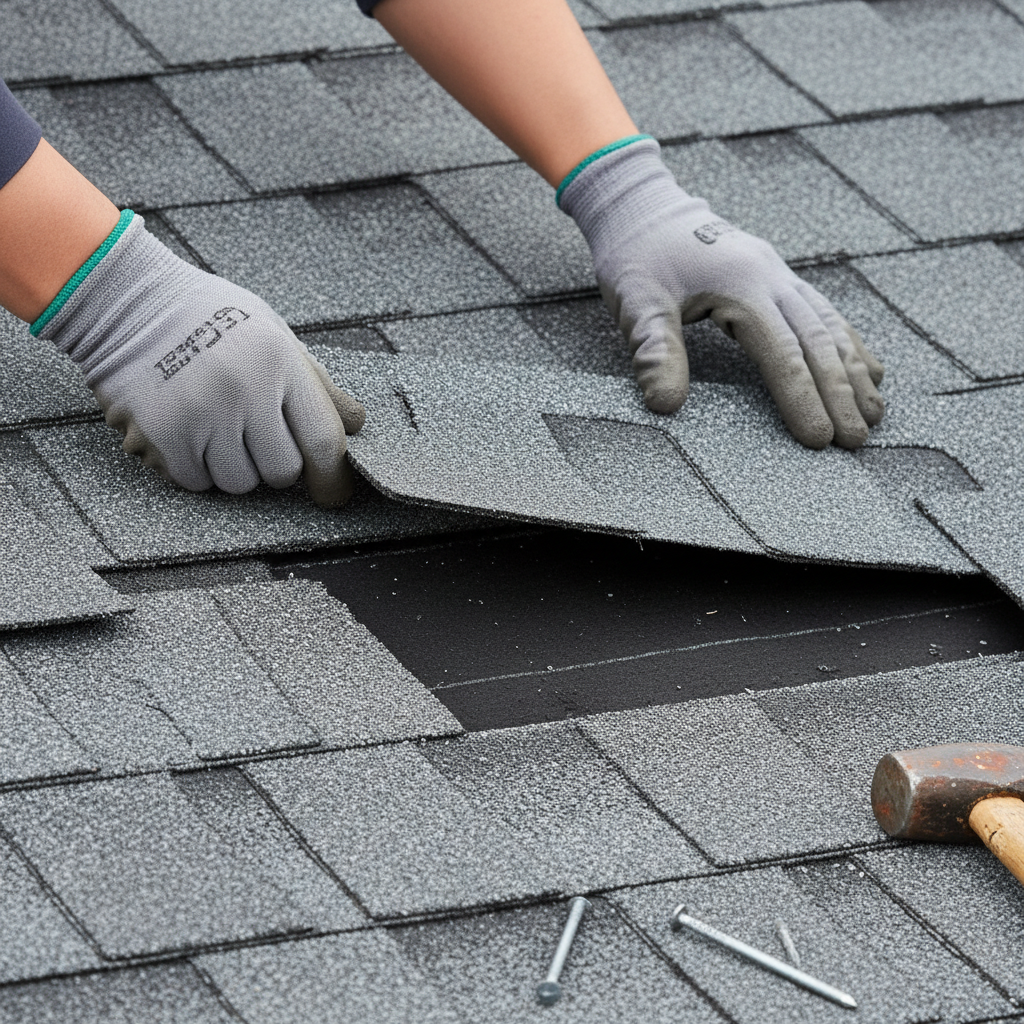
Prepare the Area — Use a pry bar or claw hammer to gently lift the tabs of the shingles directly above the damaged spot. Don’t crease the good shingles if you can help it. Pull out any old nails sticking up or nails that pulled through. You want a clean, flat surface to work on. If the underlayment’s torn, slide a piece of self-adhering patching membrane or roofing felt under it and fasten it with roofing cement. Make sure it overlaps the damaged area by several inches. I keep a small utility knife on me for trimming felt and cleaning up edges.
-
Trim and Prepare New Shingles — If you’re using full new shingles, you might need to trim off the factory-applied adhesive strip from the back top edge for the shingle that’s going under the row above. That makes it easier to work into place. For three-tab shingles, you’ll often cut the shingle into individual tabs or the right lengths to match what’s missing. If you’re replacing a higher row, you may be able to slide a full shingle in without much fuss.
-
Slide in the New Shingle(s) — Carefully work the prepared new shingle(s) underneath the overlapping tab of the shingle directly above the gap. Line it up with the exposed part of the shingle in the course below it so the exposure matches the surrounding shingles. It ought to fit snugly. If it doesn’t, don’t force it — check your cut before you make a mess of it.
-
Secure with Roofing Nails — Once the new shingle is in the right spot, drive four roofing nails through it with a hammer. Put the nails about 1 inch above the cutouts (the slots between the tabs) and about 1 inch in from each side. Those nails need to go through the new shingle and into the decking, ideally catching the shingle below too. The nail heads should sit flush with the shingle surface, but don’t overdrive them or you’ll tear the material. You’re aiming for approximately 18-20 ft-lbs of driving force with a standard roofing hammer.
-
Seal and Adhere — Put a small dab of roofing cement — about a quarter-sized amount — under the bottom edge of the newly installed shingle tabs where it overlaps the shingle below. Press it down good and firm so it seals up. That helps bond the shingle and keeps wind from sneaking under it. If it’s cool out, the factory sealant strips may take a while to activate, so don’t expect instant magic.
-
Clean Up and Final Check — Go back over everything. Are the new shingles sitting flat? Are the nails seated right? Did the seal take? Pick up any scraps, loose nails, or broken shingle pieces. Come down the ladder carefully. Then step back from the ground and make sure the repair blends in the way it should.
Common Causes
- High Winds: This is the main culprit. Wind speeds can beat the adhesion on older shingles, especially if they weren’t installed right to begin with. Anything over 50-60 mph can start lifting weak shingles.
- Aging Shingles: Once shingles get up there — say, past 15-20 years — they start getting brittle. The granules wear off, the asphalt gets exposed, and those sealant strips dry out and quit sticking like they should.
- Improper Installation: This one gets under my skin because it’s preventable. You’ll see too few nails, nails driven crooked, or nails set too high on the shingle (called
Related Articles
Keep troubleshooting with these hand-picked guides from FixlyGuide:
- The One Mistake Homeowners Make When Shingles Blow Off (And How to Fix It Right) — After a storm, finding missing roof shingles can be alarming. Learn the critical mistake homeowners often make and how to properly assess a…
- The One Shingle Mistake That Creates Roof Leaks (And How to Fix It Fast) — Missing roof shingles after a storm can quickly lead to extensive water damage if not addressed correctly. Learn how to safely inspect and…
- The #1 Mistake Homeowners Make After Finding Missing Roof Shingles — Discover the crucial steps to take immediately after a storm leaves you with missing roof shingles, from safety checks to temporary fixes a…
- The #1 Mistake Homeowners Make After Finding Missing Shingles (And How to Fix It Right) — Discover the crucial steps to take after a storm rips shingles from your roof, ensuring a proper, lasting repair and preventing costly futu…
- The 3 Missing Shingles: Why Ignoring Them Costs You $10,000 — Ignoring even a few missing roof shingles after a storm can lead to thousands in water damage and rot – here’s how to safely fix them yours…
- That Heavy Mirror? It Needs More Than Just a Nail — Stop guessing with drywall anchors; the physics of shear force and toggle bolt ratings are the secret to keeping your heavy mirror securely…
Should you do this yourself?
Answer five quick questions before you start. Safety outranks savings every time.
Your experience with work like this
How high do you have to work?
Does the job involve any of these?
Will it need a permit?
Specialty tools
Free and instant. Educational guidance only — not a quote, inspection, or professional diagnosis.
Questions to ask before you sign
Ask every contractor the same questions and the cheapest bid stops looking cheapest. Check them off as you go — your progress is saved on this device.
Free, no signup. Bring this to every walkthrough so you compare bids on the same terms.
What should this project cost?
Enter your project details for a realistic cost range before you call anyone.
Spot repairs commonly run $400–$1,800; full replacement typically $9,000–$18,000 for an average home.
- Regional adjustment
- National average
- Labor share (typical)
- ~$2,948
- Quotes to collect
- 3 written estimates
Educational estimate based on national averages — not a binding quote. Always confirm with written local estimates.
Fixly Project Decision Box
- DIY difficulty
- Professional Recommended
- Estimated time
- Inspection 1–2 hours · repairs 1–3 days
- Cost level
- High
Main tools / materials
- Binoculars for a ground-level look
- Flashlight for attic checks
- Moisture meter
- Roofing cement (temporary patch only)
When to stop and call a pro
- Active leak near lights, fans, or any wiring
- Sagging, bulging, or water-filled ceiling
- Steep, wet, or two-story roof — do not climb it
- Storm or hail damage you plan to claim on insurance
Need professional help?
Free roof assessment first — no phone calls until you ask for them.
Get Local Roofing HelpGet help with your roof now
Stay off the roof. These free tools help you protect the house and reach the right professional fast.
- Emergency repair checklistThe first steps that limit damage before a pro arrives.Open
- Repair or replace your roof?Answer 10 questions about age, leaks, and damage to get a clear next step.Open
- Get local estimatesSend one request and compare written estimates from vetted pros.Open
Free, no signup required. Estimates are educational guidance, not a quote or an inspection.
Get the print-ready PDF of this guide
A clean, ad-free, printable version you can keep on your phone or pin to the workshop wall. Free with a FixlyGuide account.
- Print-optimized layout
- Tools, materials & every step included
- Saved to your account
Frequently asked questions
How quickly do I need to fix missing shingles?+
You should address missing shingles as soon as it's safe to do so. Every hour they're exposed increases the risk of water infiltration, which can lead to costly damage to your roof deck, attic, insulation, and interior ceilings.
Can I just glue the old shingle back down?+
You're better off replacing it. While roofing cement can create a temporary bond, an old shingle that's already detached typically has compromised adhesive and may be brittle or damaged. A new shingle provides a more reliable and lasting repair.
What kind of nails should I use for shingle repair?+
Always use galvanized roofing nails, typically 1 to 1 1/4 inches long. These have a wide head for better holding power and are corrosion-resistant, which is crucial for outdoor applications.
How do I know what type of shingle I have?+
Most residential homes use three-tab or architectural (laminate) asphalt shingles. Three-tab shingles are flat with cutouts creating three tabs. Architectural shingles have a more dimensional, staggered appearance. Take a picture or bring a detached shingle to a local roofing supplier for a match.
Is it safe to go on my roof after a storm?+
Only if it's completely safe. Avoid climbing on the roof if it's wet, icy, windy, or if there's any structural damage. If your roof has a steep pitch (anything more than a 6/12 slope) or if you're uncomfortable, call a professional.
What's the difference between temporary and permanent repair?+
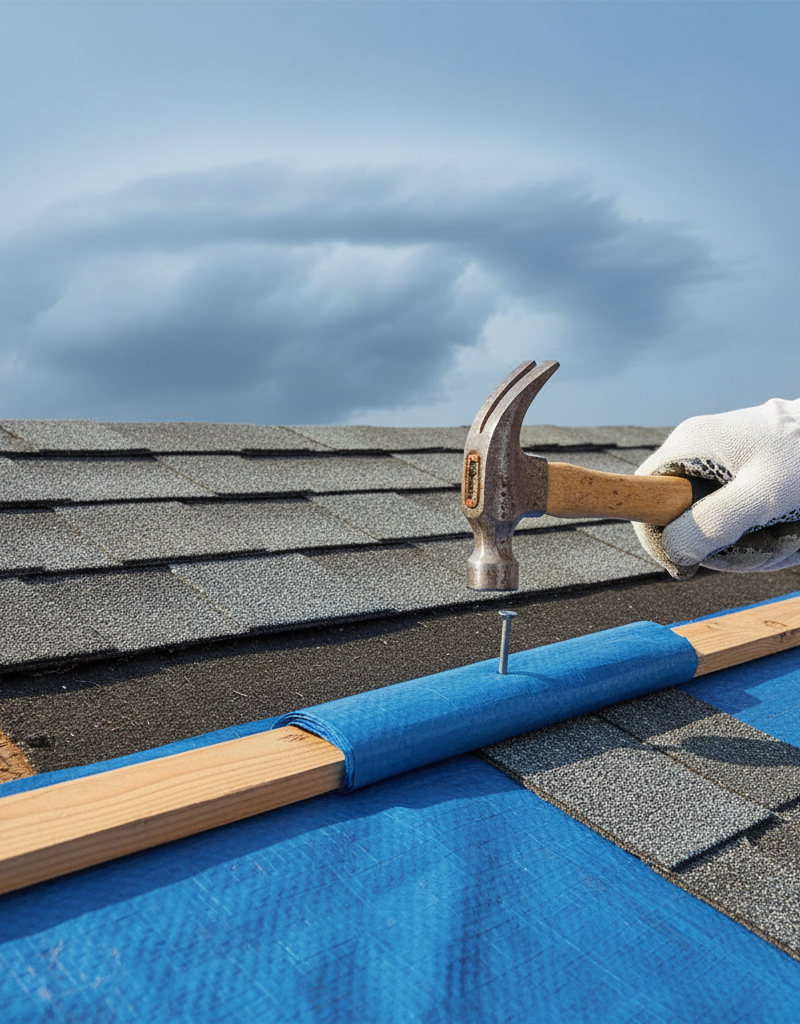
A temporary repair, like covering the damaged area with a tarp and securing it, is meant to prevent immediate leaks. A permanent repair involves properly replacing the missing shingles, often with new ones, ensuring proper nailing and sealing for long-term weather resistance.
Will my homeowner's insurance cover missing shingles?+
Most homeowner's insurance policies cover sudden and accidental damage from perils like wind or hail. It's crucial to document the damage with photos and contact your insurer promptly to file a claim. Be aware of your deductible.
How can I prevent shingles from blowing off in the future?+
Regular roof inspections for loose or curling shingles, maintaining good attic ventilation to prevent heat buildup, and ensuring quality installation with proper nailing are all key preventative measures. Consider upgrading to impact-resistant shingles in very windy areas.
Discussion
Loading comments…