- Manufacturing Defects: While rare, a batch of defective shingles with poor adhesive or brittle material can lead to premature failure and increased susceptibility to storm damage.
- Hail Damage: Large hail can weaken the shingle's structure, crack the asphalt, or loosen granules, making them more prone to being ripped off by subsequent winds.
- Roof Deck Issues: Damaged or rotting roof decking underneath the shingles can prevent nails from holding properly, contributing to shingle detachment during a storm.
Roofing · Missing shingles
| Project category | Roofing |
|---|---|
| Problem type | Missing shingles |
| Trade required | Roofing |
| Urgency | Urgent — within days |
| Safety risk | High safety risk |
| DIY suitability | Pro recommended |
| Cost category | Low cost |
| Typical timeline | Typically a same-visit repair |
| Contractor type | Licensed roofing contractor |
Repair option
Replace the missing shingles and reseal surrounding courses before the next rain.
Replacement option
Replacement when matching is impossible or loss is widespread across slopes.
Common causes
- High wind lifting the sealant strip
- Improper nailing at install
- Brittle shingles past their service life
Relevant tools:repair or replace roofproject cost estimator
Published July 20, 2026Last updated August 18, 2026
Tools & materials you'll need
Affiliate links- AmazonMatching asphalt shingles1-5 individual shingles · Bring extra for future repairs
- Amazon1 1/4 inch roofing nailsSmall box
- AmazonRoofing cement (asphaltic sealant)1 tube · High-quality, all-weather formula
- AmazonHeavy-duty plastic tarp (minimum 6-mil)Varies by damage size · If temporary patch is needed
- Amazon1x2 furring strips2-4 ft · For securing temporary tarp
As an Amazon Associate FixlyGuide earns from qualifying purchases — at no extra cost to you. Prices and availability are accurate as of publication and subject to change.
Quick Answer
After a storm, it's critical to promptly assess your roof for missing shingles from a safe distance on the ground. If you identify missing shingles, the immediate priority is to temporary patch the area with a tarp to prevent further water intrusion, especially before any subsequent rain. Once the weather clears and it's safe to do so, gather appropriate matching shingles and the necessary tools such as a pry bar, a hammer, roofing nails, and roofing cement. Carefully remove any remaining damaged shingle pieces, clean the area, and slide new shingles into place, securing them with nails and sealant. Always prioritize safety by using a stable ladder and having someone spot you, and know when to call a professional for extensive damage or if you're not comfortable working on a roof.
The Problem
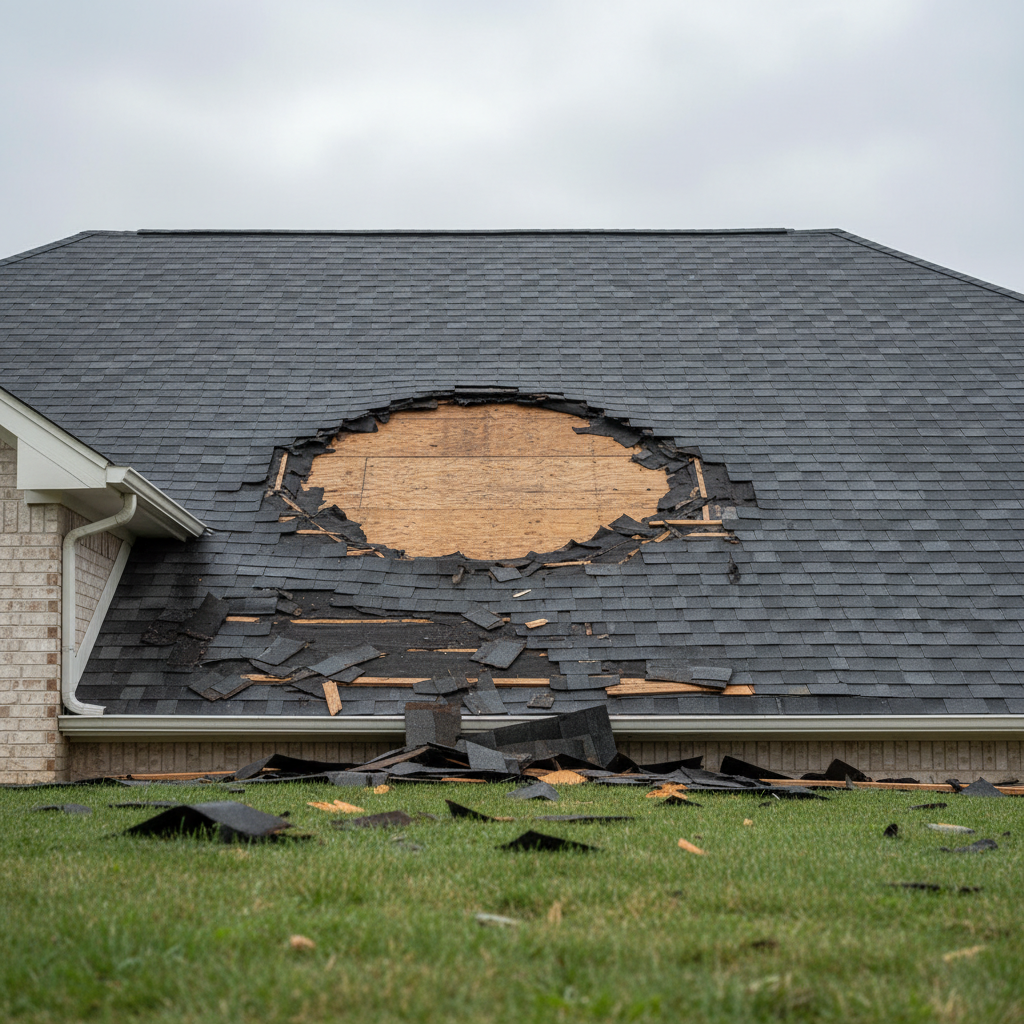
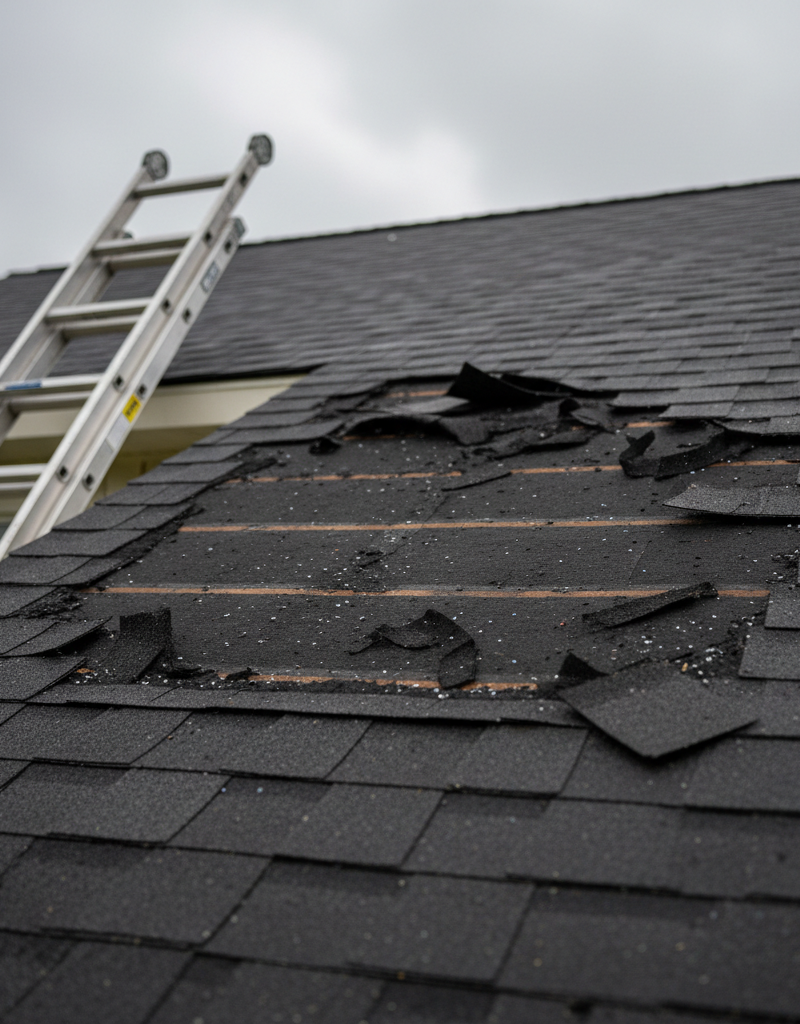
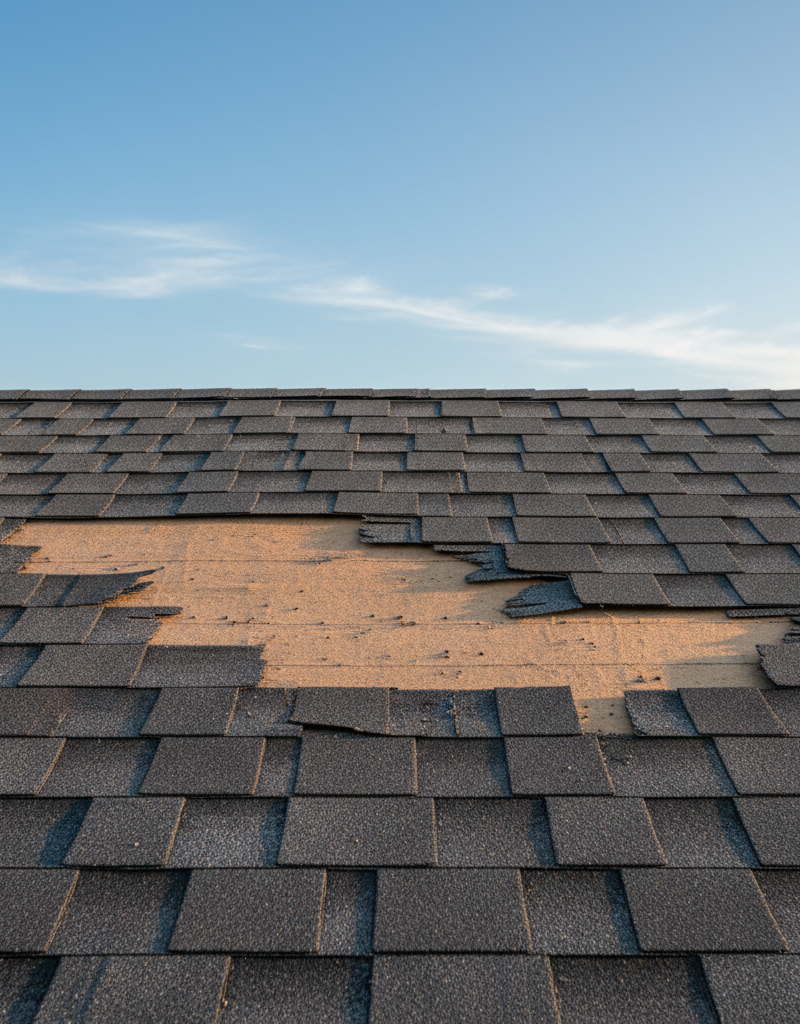
You wake up after a fierce storm, and as you survey your property, your eyes land on a stark patch of bare roof deck where shingles once proudly stood. The sight of missing roof shingles is unsettling, a visible wound that exposes your home's most vital protective layer. This isn't just an aesthetic issue; it's a ticking clock. Every hour that passes with an unprotected roof deck increases the risk of water infiltration, leading to costly damage to your attic, ceilings, insulation, and even structural components. High winds, common in severe storms, can lift and tear away individual shingles or even sections of shingles, exposing the underlayment or, worse, the bare roof sheathing. Without prompt and correct intervention, a small, localized issue can quickly escalate into a widespread problem requiring extensive and expensive repairs.
How It Works
Your roof is a sophisticated system designed to shed water and protect your home. Asphalt shingles, the most common roofing material, are installed in overlapping layers, creating a waterproof barrier. Each shingle has a factory-applied adhesive strip (sealant) that, once warmed by the sun, bonds to the shingle below it, creating a wind and water-resistant seal. This bond is what helps shingles withstand high winds. When strong winds blast across the roof, they create uplift forces. If the adhesive seal has deteriorated due to age, extreme temperature fluctuations, or manufacturing defects, or if the wind forces are simply too great, the wind can get underneath the shingle and tear it from its fasteners or even rip the entire shingle apart. Once one shingle is dislodged, it exposes the nails of the shingle in the course above it, and can create a domino effect, making adjacent shingles more vulnerable to subsequent wind gusts. The underlayment (often tar paper or synthetic material) beneath the shingles provides a secondary barrier, but it's not designed for prolonged exposure to the elements. Its primary role is to protect the roof deck during installation and to catch any minuscule amount of water that might get past the shingles. When shingles are missing, this underlayment is directly exposed to UV rays, rain, and hail, leading to rapid deterioration and inevitable leaks.
Step-by-Step Fix
1. Prioritize Safety and Assess Damage — Before doing anything, ensure the storm has fully passed and it's safe to go outside. From the ground, use binoculars to carefully inspect your entire roof for missing, cracked, or severely damaged shingles. Look for granules in your gutters, which indicate shingle wear. Do not get on the roof if it's wet, icy, windy, or if you're uncomfortable with heights. If the damage is extensive (more than a few shingles in one area), or if you suspect structural damage, call a professional.
- Safety Note: Always use a sturdy ladder placed on a firm, level surface. Have a spotter hold the ladder. Wear non-slip shoes with good grip. Avoid working alone on the roof.
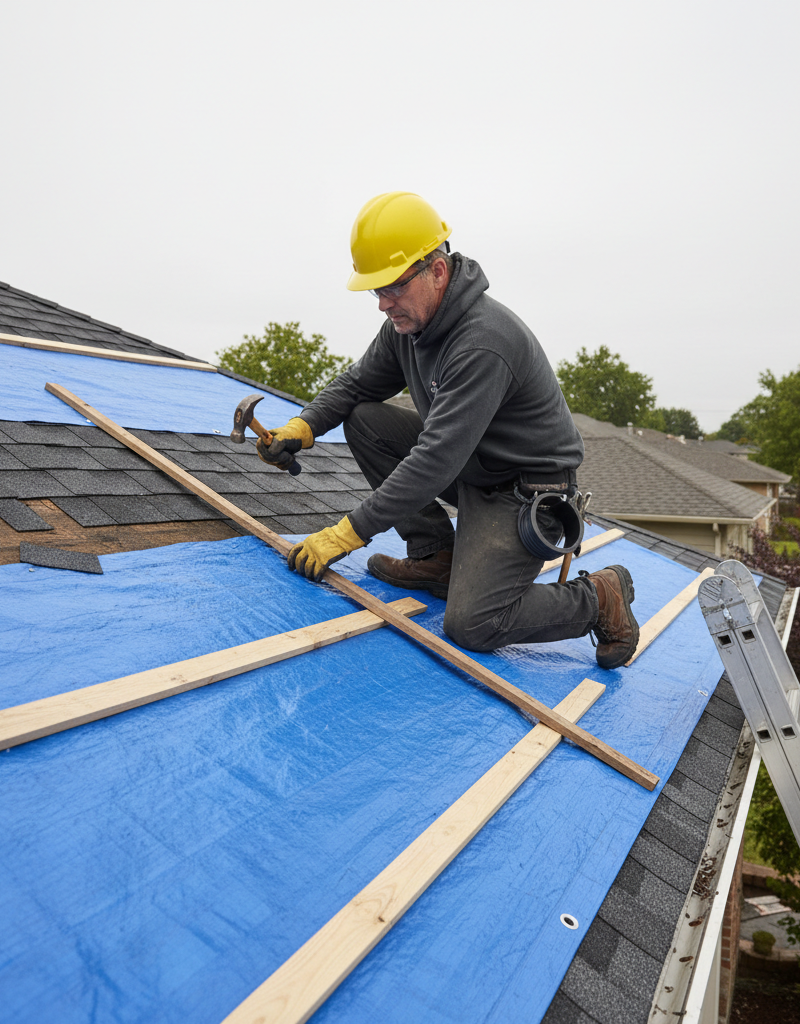
2. Prepare for Temporary Tarping (If Necessary) — If you can't repair the shingles immediately, especially with more rain on the way, a temporary tarp is crucial to prevent water damage. You'll need a plastic tarp (at least 6-mil thick), roofing nails or screws with plastic caps, 1x2 furring strips, and a hammer or drill.
- Tools: Heavy-duty tarp, utility knife, measuring tape, hammer or drill, roofing nails with plastic caps or screws with washers, 1x2 furring strips.
3. Secure the Tarp — Carefully unroll the tarp and position it to cover the damaged area, extending at least two feet beyond all edges of the missing shingles. Wrap the edges of the tarp around the 1x2 furring strips. Secure the furring strips to the roof deck above the damaged area using roofing nails or screws. Do not nail through the tarp in the field of the roof; instead, secure it along the edges to prevent wind from getting underneath.
- Pro Tip: If possible, try to tuck the top edge of the tarp under an existing course of shingles to create a better seal against driving rain.
4. Gather Your Materials — Before climbing onto the roof to begin repairs, make sure you have all your tools and materials organized and within easy reach. This includes matching replacement shingles (bring extras!), roofing nails, roofing cement, a hammer, a pry bar or flat bar, a utility knife, and a caulking gun.
- Matching Shingles: Take a sample photo of existing shingles or bring a loose shingle to your local home improvement store to ensure you get the best match in color and style (3-tab, architectural, etc.).
5. Remove Old Shingles and Nails — Carefully slide a flat bar or pry bar underneath the shingle course directly above the missing shingle's location. Gently lift these shingles to expose the nail heads of the damaged shingle or the ones immediately adjacent. Use the pry bar to carefully pull out any exposed nails. Then, slide the utility knife under the tab of the damaged shingle and cut through the sealing strip. Remove any remaining pieces of the damaged shingle and discard them.
- Caution: Work slowly and carefully to avoid damaging the surrounding shingles or the underlayment. Don't force the pry bar too much, as you could tear the shingle above.
6. Prepare the Area — Once the old shingle pieces are removed, use a stiff brush or blower to clear away any debris, loose granules, or dirt from the exposed underlayment. Ensure the area is clean and dry to allow the new shingles and roofing cement to adhere properly.
7. Install the New Shingle — Take a new replacement shingle and carefully slide it into the void, making sure it aligns perfectly with the adjacent shingles in its course and the shingle below it. Ensure the bottom edge is flush and the side edges are tight against existing shingles.
8. Nail the New Shingle — Lift the shingle course directly above the newly placed shingle. Use roofing nails (approx. 1 ¼-inch hot-dipped galvanized roofing nails) to secure the new shingle. Drive nails approximately 1 inch up from the cut-out (the dark line distinguishing shingle tabs) and about 1 inch in from each side. For 3-tab shingles, typically two nails per tab are sufficient. The nails should penetrate both the new shingle and the shingle below it, passing through the roofing felt into the roof deck. Ensure the nail heads are flush with the shingle surface, not poking up (which can cause leaks) or driven too deep (which can damage the shingle).
- If this doesn't work: If the underlayment seems torn or too degraded to hold a nail, you may need to apply a bead of roofing cement underneath the shingle to help it adhere, in addition to nailing into sound decking if possible. This is a sign of potentially more widespread degradation.
9. Seal the Shingles — Apply a small dab (about a quarter-sized amount) of roofing cement underneath the bottom edge of the newly installed shingle and the edges of any adjacent shingles you lifted. This helps bond the shingles together and creates a tighter seal against wind and water. Press down firmly for a few seconds to ensure good adhesion. For especially windy areas, you can also add a small dab of cement underneath the bottom corners of the new shingle tabs.
- Safety Note: Roofing cement is sticky and can be messy. Wear gloves to protect your hands.
10. Final Inspection and Cleanup — Once the repair is complete, do a final visual inspection from a distance on the roof and from the ground to ensure the new shingle blends in, is properly secured, and all tools and debris are removed. Dispose of old shingle pieces and trash properly. Check your gutters for any tools you might have dropped.
Common Causes
- High Wind Speeds: By far the most common culprit. Strong winds, especially those exceeding 50-60 mph, can create enough uplift to peel back and tear shingles, particularly those with weakened adhesive seals. The wind can also cause trees or other debris to strike the roof.
- Aging Shingles: As asphalt shingles age (typically beyond 15-20 years for 3-tab and 25-30 for architectural), the granules wear off, the asphalt stiffens and becomes brittle, and the adhesive strip loses its effectiveness. This makes them significantly more susceptible to wind damage.
- Improper Installation: Shingles nailed too high (above the common bond line), too few nails used, or nails not driven correctly (under or over-driven) can drastically reduce their wind resistance. Incorrect shingle overlap can also leave them vulnerable.
- Manufacturing Defects: While rare, a batch of defective shingles with poor adhesive or brittle material can lead to premature failure and increased susceptibility to storm damage.
- Hail Damage: Large hail can weaken the shingle's structure, crack the asphalt, or loosen granules, making them more prone to being ripped off by subsequent winds.
- Roof Deck Issues: Damaged or rotting roof decking underneath the shingles can prevent nails from holding properly, contributing to shingle detachment during a storm.
Common Mistakes
- Waiting Too Long to Repair: The biggest mistake. Delaying repairs allows water to seep into your attic, causing insulation damage, ceiling stains, mold growth, and even rot in framing. Address missing shingles as soon as it's safe to do so.
- Ignoring Safety Precautions: Many DIYers underestimate the dangers of working on a roof. Falls from ladders or roofs are a leading cause of home repair injuries. Always use proper safety gear, a stable ladder, and ideally, have a spotter.
- Using Mismatched Shingles: While sometimes unavoidable, installing shingles that don't match the existing ones aesthetically or functionally can create an eyesore and potentially compromise the roof's uniform protection. Try to find an exact match from your original roofing contractor's records or a sample.
- Improper Nailing: Nailing too high, too low, or at an angle can cause the new shingle to lift, leak, or fail prematurely. Nails should penetrate through both shingles and into the roof decking, with the heads flush, not over-driven or under-driven.
- Forgetting Roofing Cement: The sealing strip on new shingles needs heat to activate, which can take time. Applying a small dab of roofing cement ensures an immediate, secure bond, especially important in windy conditions or colder weather.
- Damaging Adjacent Shingles: Being too aggressive with a pry bar when lifting existing shingles can cause tears or cracks in the surrounding, otherwise healthy shingles, creating new points of failure.
Cost & Time Breakdown
| Task | DIY Cost | Pro Cost | Time |
|---|---|---|---|
| Safety Gear & Ladder Rental | $0–$50 (if needed) | Included | 0.5 hours |
| Replacement Shingles (per bundle) | $30–$80 | Included | 0.25 hours |
| Roofing Nails & Cement | $15–$30 | Included | 0.25 hours |
| Tools (Pry bar, utility knife) | $20–$50 (if needed) | Included | 0.25 hours |
| Temporary Tarping (if needed) | $20–$60 | $100–$300 | 1–2 hours |
| Shingle Replacement (1-5 shingles) | $0–$100 | $200–$500 | 1–3 hours |
| Cleanup | $0 | Included | 0.5 hours |
Tips & Prevention
- Regular Inspections: Twice a year (spring and fall) and after every major storm, inspect your roof from the ground with binoculars. Look for missing, cracked, curling, or discolored shingles. Check your gutters for an excessive amount of granules.
- Trim Overhanging Branches: Keep trees trimmed back from your roof to prevent branches from scraping or falling on shingles during high winds.
- Ensure Proper Ventilation: Good attic ventilation helps regulate roof deck temperatures, preventing shingles from overheating and degrading their adhesive prematurely. Inspect soffit and ridge vents regularly.
- Check Gutter Drainage: Ensure gutters are clear and properly draining. Clogged gutters can lead to water backing up under shingles or contributing to ice dam formation, which can damage shingles.
- Consider Wind-Resistant Shingles: If you live in a high-wind area, consider an upgrade to shingles with higher wind ratings (e.g., those rated for 130 mph) when it's time for a full roof replacement. They often have better adhesive strips and nailing patterns.
- Document Damage: After a storm, photograph any damage immediately for insurance purposes. Detailed photos can expedite claims.
When to Call a Professional
While replacing a few missing shingles is a manageable DIY task, there are several critical situations where calling a licensed roofing professional is not just recommended, but essential. Firstly, if you observe extensive damage—meaning more than a half-dozen shingles missing in various locations, or a large contiguous area of the roof deck exposed—attempting a DIY fix becomes significantly more complex and dangerous, and could lead to further damage. Secondly, if the missing shingles are located on a very steep roof pitch, or if reaching the damaged area requires navigating multiple stories or tricky angles, the risk of a fall is dramatically increased, making professional help indispensable. Any signs of interior water damage, such as ceiling stains or drips, indicate that water has already breached your home's defenses, suggesting potential underlayment or deck damage that requires a professional assessment. Furthermore, if you're uncomfortable with heights, lack confidence in your ability to perform the repair safely and effectively, or do not have the proper safety equipment (like a fall arrest system for steep roofs), do not hesitate to call a professional. A licensed roofer can safely install new shingles, properly assess underlying damage, ensure the repair meets local building codes, and often provide warranties for their work, giving you peace of mind.
Related Articles
Keep troubleshooting with these hand-picked guides from FixlyGuide:
- The #1 Mistake Homeowners Make After Finding Missing Shingles (And How to Fix It Right) — Discover the crucial steps to take after a storm rips shingles from your roof, ensuring a proper, lasting repair and preventing costly futu…
- The 3 Missing Shingles: Why Ignoring Them Costs You $10,000 — Ignoring even a few missing roof shingles after a storm can lead to thousands in water damage and rot – here’s how to safely fix them yours…
- Is Your Gutter Sagging After Every Storm? The Hidden Flaw Most Homeowners Miss — Discover the overlooked reason your gutters sag after every storm and learn the lasting fix that most homeowners miss.
- The #1 Gutter Mistake You're Making (And 3 Hidden Causes of Overflow) — Overflowing gutters in heavy rain are often a sign of a deeper issue than just debris, leading to potential foundation damage and costly re…
- The 3 Hidden Mistakes That Make Your Deck Sealer Fail (And How to Fix Them) — Properly sealing your wood deck protects it from the elements, but common mistakes often lead to early failure. Learn how to reseal your de…
- The #1 Mistake Homeowners Make When Caulking a Bathroom Sink (And How to Fix It) — Discover the most common caulk mistake homeowners make around bathroom sinks and follow simple steps to achieve a lasting, watertight seal.
Should you do this yourself?
Answer five quick questions before you start. Safety outranks savings every time.
Your experience with work like this
How high do you have to work?
Does the job involve any of these?
Will it need a permit?
Specialty tools
Free and instant. Educational guidance only — not a quote, inspection, or professional diagnosis.
Questions to ask before you sign
Ask every contractor the same questions and the cheapest bid stops looking cheapest. Check them off as you go — your progress is saved on this device.
Free, no signup. Bring this to every walkthrough so you compare bids on the same terms.
What should this project cost?
Enter your project details for a realistic cost range before you call anyone.
Spot repairs commonly run $400–$1,800; full replacement typically $9,000–$18,000 for an average home.
- Regional adjustment
- National average
- Labor share (typical)
- ~$2,948
- Quotes to collect
- 3 written estimates
Educational estimate based on national averages — not a binding quote. Always confirm with written local estimates.
Fixly Project Decision Box
- DIY difficulty
- Professional Recommended
- Estimated time
- Inspection 1–2 hours · repairs 1–3 days
- Cost level
- High
Main tools / materials
- Binoculars for a ground-level look
- Flashlight for attic checks
- Moisture meter
- Roofing cement (temporary patch only)
When to stop and call a pro
- Active leak near lights, fans, or any wiring
- Sagging, bulging, or water-filled ceiling
- Steep, wet, or two-story roof — do not climb it
- Storm or hail damage you plan to claim on insurance
Need professional help?
Free roof assessment first — no phone calls until you ask for them.
Get Local Roofing HelpGet help with your roof now
Stay off the roof. These free tools help you protect the house and reach the right professional fast.
- Emergency repair checklistThe first steps that limit damage before a pro arrives.Open
- Repair or replace your roof?Answer 10 questions about age, leaks, and damage to get a clear next step.Open
- Get local estimatesSend one request and compare written estimates from vetted pros.Open
Free, no signup required. Estimates are educational guidance, not a quote or an inspection.
Frequently asked questions
How many missing shingles warrant a pro?+
If more than a half-dozen shingles are missing in varied locations, or if a large continuous section of your roof is exposed, it's generally best to call a professional. Extensive damage can indicate underlying issues or require specialized techniques beyond a simple DIY fix.
Can I just nail a loose shingle back down?+
Simply nailing a loose shingle isn't enough. The adhesive strip is crucial for wind resistance. You'll need to lift the shingle above it, carefully nail the loose shingle back in the correct location (usually two nails per tab), and then apply roofing cement under its leading edge to create a proper seal.
How do I temporarily fix a leaky roof after a storm?+
For a temporary fix, use a heavy-duty plastic tarp (at least 6-mil thick) to cover the damaged area. Secure the tarp by wrapping its edges around 1x2 furring strips and nailing the strips into the roof *above* the damaged section, ensuring the tarp extends at least two feet past all edges of the damage. This prevents direct nailing through the tarp's vulnerable field.
What tools do I need to replace a shingle?+
You'll need replacement shingles, 1 ¼-inch hot-dipped galvanized roofing nails, roofing cement, a hammer, a pry bar or flat bar, a utility knife, a caulking gun, and a sturdy ladder. Non-slip gloves and safety glasses are also highly recommended.
Discussion
Loading comments…