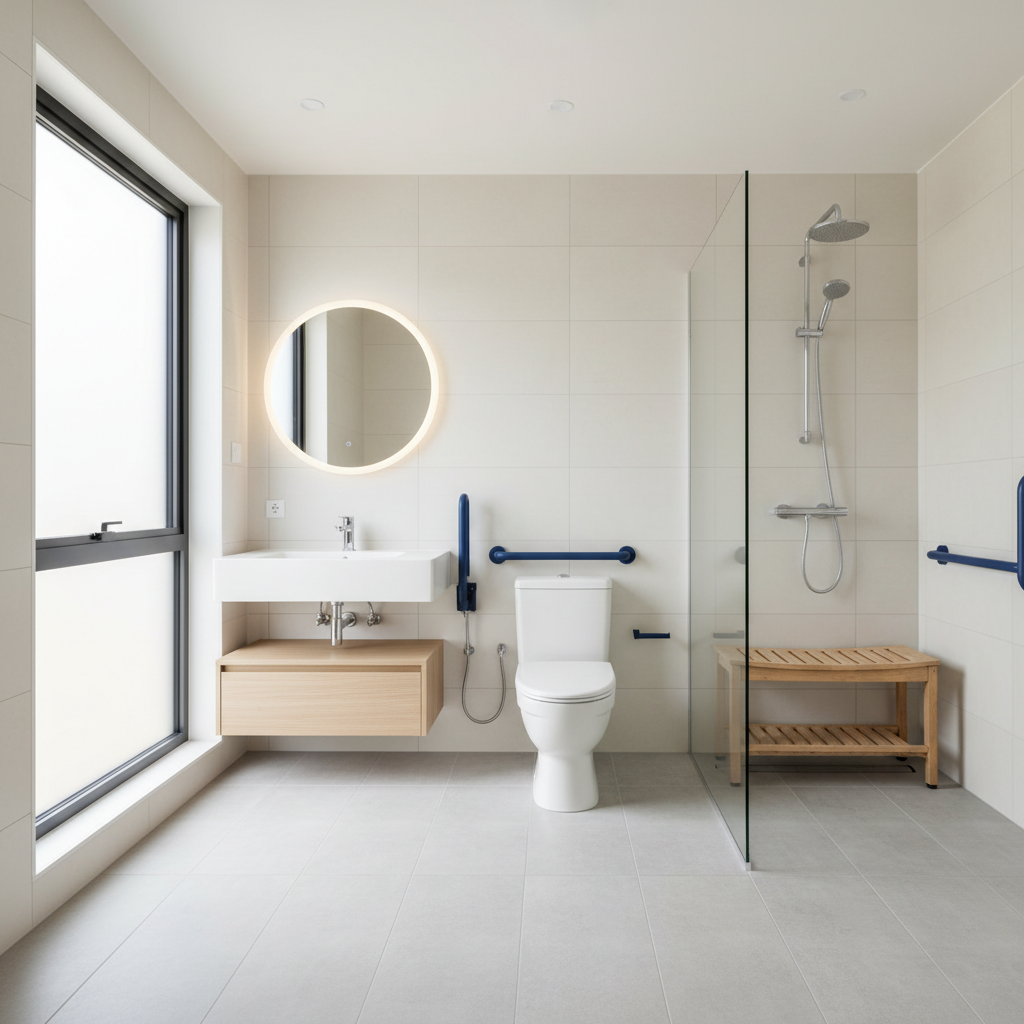
- Pro Tip: Walk through the bathroom from the perspective of someone with limited mobility. Try to access fixtures and move around with your eyes closed or while imagining restricted movement.
- Widen Doorways — If possible, widen existing doorways to at least 32 inches clear opening (typically a 34-inch door slab) to accommodate wheelchairs or walkers. This can involve relocating light switches or outlets.
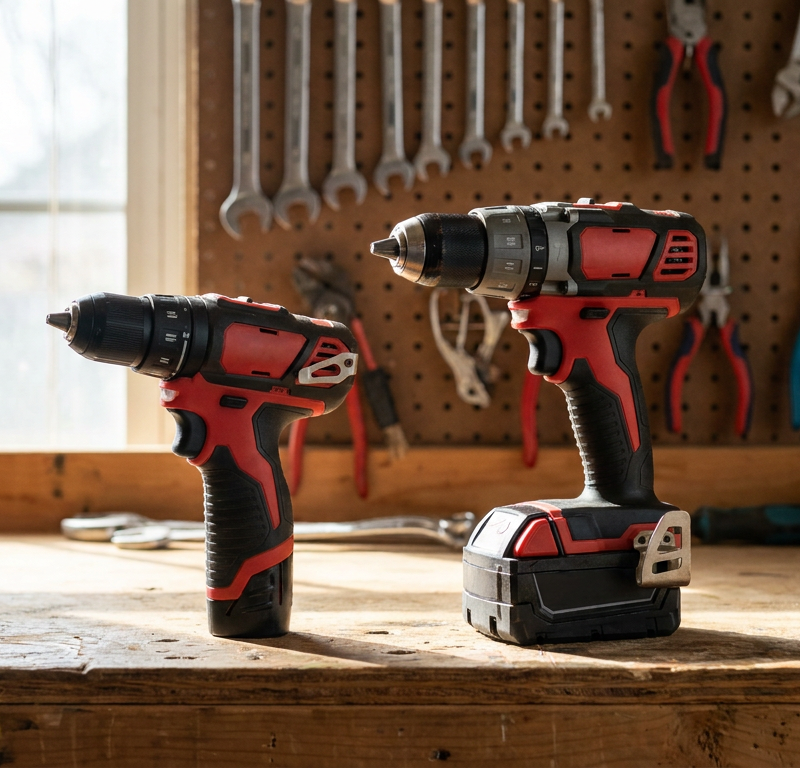
- Tools: Measuring tape, pry bar, hammer, reciprocating saw, lumber, shims.
- Note: This is a more involved structural change and may require professional help if modifying load-bearing walls.
- Install Grab Bars with Reinforcement — Strategically place grab bars near the toilet, inside the shower/tub, and by the entrance. They MUST be anchored into wall studs or blocking to support at least 250 lbs.
Bathroom · Bathroom remodel
| Project category | Bathroom |
|---|---|
| Problem type | Bathroom remodel |
| Trade required | General contracting |
| Urgency | Planned project |
| Safety risk | Low safety risk |
| DIY suitability | Pro recommended |
| Cost category | High cost |
| Typical timeline | Typically 2–4 weeks on site |
| Contractor type | Bathroom remodeler or licensed plumber |
Repair option
Refresh fixtures, grout, and vanity without moving plumbing.
Replacement option
Gut remodel when the pan leaks or the layout changes.
Common causes
- Dated finishes
- Failing tile or pan
- Accessibility needs
Relevant tools:project cost estimatorcompare quotes
Published July 7, 2026Last updated August 17, 2026
Tools & materials you'll need
Affiliate linksAs an Amazon Associate FixlyGuide earns from qualifying purchases — at no extra cost to you. Prices and availability are accurate as of publication and subject to change.
Quick Answer
Creating an accessible bathroom means designing a space that is safe, comfortable, and easy to use for everyone, regardless of age or physical ability. This often involves strategic modifications like installing grab bars, widening doorways, lowering counters, and replacing traditional tubs with roll-in showers. These changes aim to prevent falls, promote independence, and enhance the overall quality of life in your home.
The Problem
Many conventional bathrooms, while aesthetically pleasing, present a myriad of subtle and not-so-subtle challenges for individuals with limited mobility, balance issues, or those simply aging in place. Narrow doorways, high tub walls, low toilets, slick tile floors, and inaccessible storage can turn daily routines into hazardous obstacles. What might seem like a minor inconvenience – a slippery floor after a shower, for instance – can pose a significant fall risk for an older adult or someone recovering from an injury. The problem isn't always obvious until a need arises. A simple reach for a towel can lead to a loss of balance, or struggling to get in and out of a tub can erode confidence and independence.
How It Works
An accessible bathroom operates on principles of universal design, aiming to be usable by all people to the greatest extent possible, without the need for adaptation or specialized design. This means considering spatial relationships, fixture heights, and material choices. For example, a roll-in shower eliminates the barrier of a curb, allowing seamless entry for a wheelchair or shower chair. Reinforcing walls before installing grab bars ensures they can support substantial weight, acting as critical safety anchors. Leveraging contrast in colors, such as between the floor and walls or fixtures, can assist those with visual impairments in navigating the space more easily. Motion-sensor lighting can illuminate pathways when entering, minimizing fumbling for switches. Even small details, like lever-style handles instead of knobs, address dexterity limitations. The underlying mechanism is about strategic modification of the physical environment to remove barriers, enhance functionality, and proactively prevent accidents, fostering a sense of autonomy and dignity in personal care routines.
Step-by-Step Fix
Improving bathroom accessibility involves a series of targeted upgrades. Start with an assessment of your current space and consider the specific needs of its users.
- Assess Your Needs — Carefully evaluate who will be using the bathroom and what specific challenges they face. Do they use a walker or wheelchair? Do they have trouble with balance? Are their hands weak? This initial step is crucial for planning the most effective modifications.
- Pro Tip: Walk through the bathroom from the perspective of someone with limited mobility. Try to access fixtures and move around with your eyes closed or while imagining restricted movement.
- Widen Doorways — If possible, widen existing doorways to at least 32 inches clear opening (typically a 34-inch door slab) to accommodate wheelchairs or walkers. This can involve relocating light switches or outlets.
- Tools: Measuring tape, pry bar, hammer, reciprocating saw, lumber, shims.
- Note: This is a more involved structural change and may require professional help if modifying load-bearing walls.
- Install Grab Bars with Reinforcement — Strategically place grab bars near the toilet, inside the shower/tub, and by the entrance. They MUST be anchored into wall studs or blocking to support at least 250 lbs.
- Placement: Typically 33-36 inches from the floor for horizontal bars, and vertical bars 40-48 inches from the floor for ease of gripping.
- Materials: Stainless steel grab bars, stud finder, drill, appropriate screws (usually 2-3 inches long).
- Safety: Always test the grab bars vigorously after installation to ensure they are secure.
- Elevate the Toilet Height — Replace standard toilets (14-15 inches high) with comfort-height models (17-19 inches, including the seat) or install a toilet seat riser. This significantly reduces the effort required to sit down and stand up.
- Cost Check: Comfort-height toilets typically cost $200-$500. Risers are $30-$80.
- Convert to a Roll-In Shower — If feasible, convert a traditional tub or curbed shower into a curbless, roll-in shower. This creates a seamless entry, eliminating a major fall hazard.
- Complexity: This is an advanced project, often involving waterproofing, sloping the floor to a linear drain, and specialized shower pans. Professional installation is highly recommended.
- Alternatives: If a full conversion isn't possible, consider a walk-in tub with a low threshold, or a transfer bench for existing tubs.
- Replace Flooring with Non-Slip Options — Remove slippery tiles and install non-slip flooring materials like textured porcelain, vinyl, or rubber flooring. Ensure consistent flooring heights to prevent tripping hazards.
- Materials: Non-slip tiles (DCOF rating of 0.42 or higher), vinyl plank, rubber matting.
- Choose Lever Faucets and Accessible Controls — Replace traditional knob faucets with lever-style handles for easier operation, especially for those with arthritis or limited hand strength. Consider touchless or motion-sensor faucets.
- Installation: Usually a straightforward swap; ensure P-trap and supply line connections are secure.
- Lower Countertops and Install Open Vanities — If space allows, lower a section of the vanity countertop to 30-34 inches from the floor to accommodate wheelchair users. Consider an open vanity with clear knee space beneath the sink.
- Note: Ensure plumbing is reconfigured to avoid obstructing knee clearance.
- Enhance Lighting and Contrast — Install brighter, uniform lighting throughout the bathroom. Add task lighting around the mirror. Use contrasting colors for walls, floors, and fixtures to improve visibility, especially for those with visual impairments.
- Lighting Types: LED recessed lighting, vanity strip lights, nightlights.
Common Causes
- Builder-grade standards: Many homes are built to minimum code requirements, not with universal design in mind.
- Aging infrastructure: Older homes often have smaller bathrooms and doorways, making them inherently less accessible.
- Lack of foresight: Homeowners often renovate for aesthetics without considering future mobility needs or the needs of aging family members.
- Budget constraints: Accessible features can sometimes add to renovation costs, leading homeowners to prioritize style over function initially.
- Underestimation of risk: Many people underestimate the likelihood of experiencing temporary or permanent mobility challenges.
Common Mistakes
- Installing grab bars into drywall only: This is extremely dangerous. Grab bars must be anchored into wall studs or solid blocking to be safe and effective.
- Ignoring doorway width: Even if other features are accessible, a narrow doorway can negate all other efforts, making the bathroom unusable for walkers or wheelchairs.
- Choosing slippery tile: Prioritizing aesthetic appeal over safety can lead to falls. Always select tiles with a good slip-resistance rating (DCOF).
- Forgetting about task lighting: While ambient light is good, sufficient task lighting at the vanity and in the shower is crucial for safety and visibility.
- Placing towel bars where grab bars should be: Towel bars are not designed to support body weight and using them as such can lead to serious injury. Always install dedicated grab bars.
- Not planning for future needs: Even if accessibility isn
Related Articles
Keep troubleshooting with these hand-picked guides from FixlyGuide:
- The 3 Hidden Ways Your — Uncover the surprising habits and hidden household issues that are silently increasing your homeownership costs and learn how to fix them.
- The Secret Weapon Against Gaming Clutter: A $25 Custom Controller Stand You Can Build — Discover how a simple, custom-built stand using common materials can transform your gaming space, eliminating clutter and protecting your e…
- 7 Hidden Equity Drains Costing You Thousands Annually — Your home is an asset, but silent problems like minor leaks, poor insulation, and deferred maintenance can drain its value. Discover the se…
- The Hidden Reason Your GFCI Trips (and 7 Ways to Stop It) — A persistently tripping GFCI outlet is a safety warning, often indicating moisture, a faulty appliance, or a wiring problem that homeowners…
- 7 Inspection Red Flags That Secretly Signal a $20,000 Bill — Don't let your dream home become a money pit. Many buyers and even some inspectors overlook subtle home inspection red flags that lead to f…
- The 3 Hidden Reasons Your Gas Burner Won't Light (Beyond a Clog) — Before you call a technician, discover the most common culprits behind a gas stove burner that refuses to ignite and learn how to fix them…
Should you do this yourself?
Answer five quick questions before you start. Safety outranks savings every time.
Your experience with work like this
How high do you have to work?
Does the job involve any of these?
Will it need a permit?
Specialty tools
Free and instant. Educational guidance only — not a quote, inspection, or professional diagnosis.
Estimate your own project cost
National averages are a starting point. Enter your details for a range that fits your house.
Flooring cost estimator
- Material$498 – $1,095
- Installation labor$360 – $720
Tile installs and stairs increase labor cost. Get 2–3 quotes for jobs over 200 sq ft.
Educational estimate only — always confirm with written local bids.
What should this project cost?
Enter your project details for a realistic cost range before you call anyone.
Most rooms run $3–$14 per square foot installed depending on material.
- Regional adjustment
- National average
- Labor share (typical)
- ~$2,036
- Quotes to collect
- 3 written estimates
Educational estimate based on national averages — not a binding quote. Always confirm with written local estimates.
Fixly Project Decision Box
- DIY difficulty
- Moderate
- Estimated time
- 30 minutes – half a day
- Cost level
- Moderate
Main tools / materials
- Adjustable wrench
- Plunger or drain auger
- Bucket and towels
- Thread tape
When to stop and call a pro
- Water you cannot shut off at the fixture or main
- Sewage backing up into more than one fixture
- Water near electrical panels or outlets
- Gas water heater work beyond relighting a pilot
Need professional help?
Get a Licensed PlumberBefore you start
Check the difficulty, permits, and safety risk — then decide whether to call a pro.
Free, no signup required. Estimates are educational guidance, not a quote or an inspection.
Get the print-ready PDF of this guide
A clean, ad-free, printable version you can keep on your phone or pin to the workshop wall. Free with a FixlyGuide account.
- Print-optimized layout
- Tools, materials & every step included
- Saved to your account
This article was independently written by FixlyGuide based on the source topic.
Frequently asked questions
What is the most important feature for an accessible bathroom?+
The most crucial aspect of an accessible bathroom is ensuring clear, unobstructed space for movement, especially around the toilet and within the shower or tub area. This often means widening doorways and creating at least a 30x48 inch clear floor space in front of fixtures.
How high should grab bars be installed?+
Horizontal grab bars are typically installed 33 to 36 inches from the floor. Vertical grab bars can be placed 40 to 48 inches from the floor, depending on the user's height and specific needs. Always ensure they are secured into wall studs.
Can I make my existing bathroom accessible without a full renovation?+
Yes, many accessibility improvements can be made without a complete overhaul. Simple changes like adding grab bars, installing a comfort-height toilet, replacing slippery rugs, and using lever-style faucet handles can significantly enhance safety and ease of use.
What kind of flooring is best for an accessible bathroom?+
The best flooring options are non-slip and provide good traction even when wet. Textured porcelain or ceramic tiles with a high DCOF (Dynamic Coefficient of Friction) rating, sheet vinyl, or rubber flooring are excellent choices. Avoid highly polished or smooth surfaces.
When should I call a professional for bathroom accessibility upgrades?+
For significant changes like widening doorways, converting to a roll-in shower (which involves extensive waterproofing and plumbing), or modifying load-bearing walls, it's highly recommended to consult with a licensed contractor specializing in accessible home modifications. They can ensure structural integrity, proper waterproofing, and compliance with local building codes.

Discussion
Loading comments…