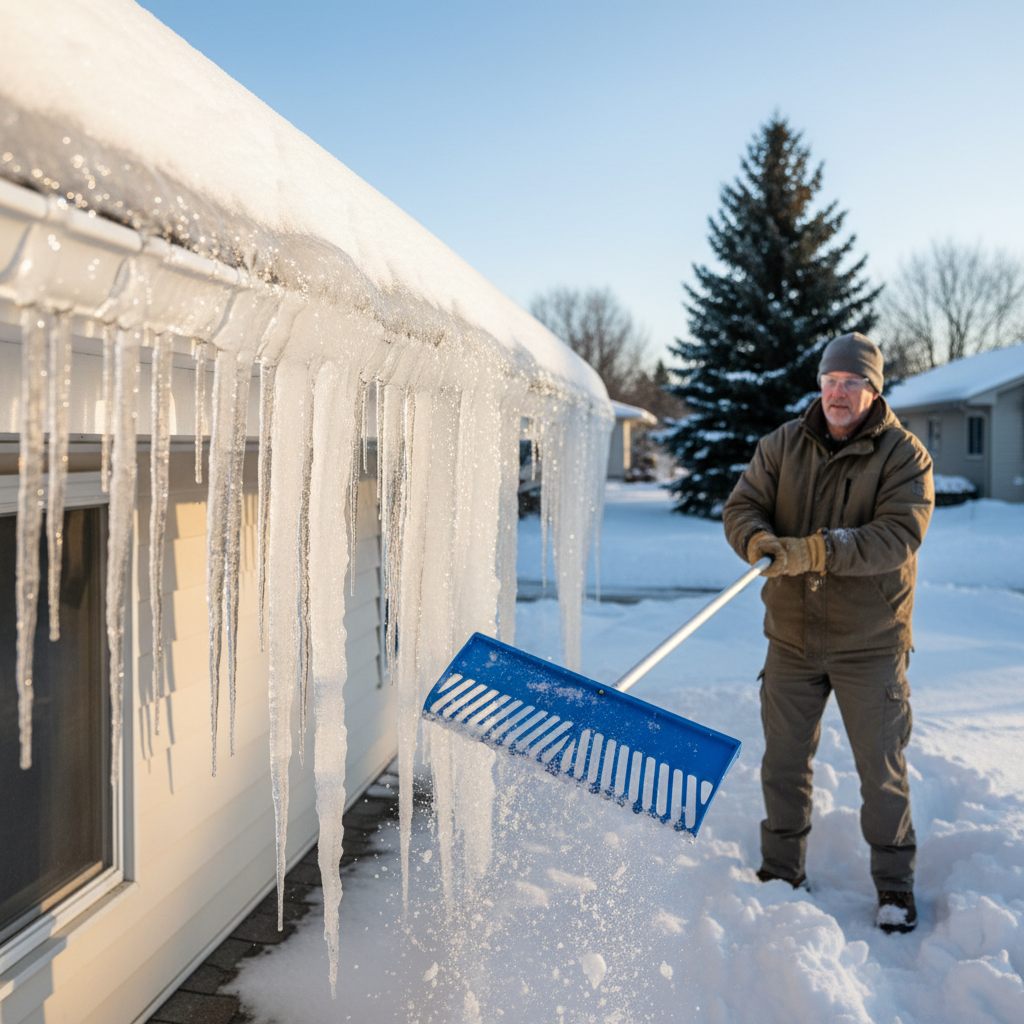
- Clear Snow with a Roof Rake – Remove the primary fuel source for the dam.
- Using a long-handled roof rake, carefully pull snow off the lower 3-5 feet of your roof, starting from the eaves and working your way up. Avoid digging into the shingles. The goal is to remove the snow that will melt and feed the ice dam.
- Safety Tip: Be mindful of falling snow and ice. Clear the area below you and never stand directly under where you are raking. Do this slowly and methodically, ensuring you maintain good footing on the ground.
- If the snow is too deep or frozen to the roof, do not force it. Move to the next step.
General remodeling · Renovation planning
| Project category | General remodeling |
|---|---|
| Problem type | Renovation planning |
| Trade required | General contracting |
| Urgency | Planned project |
| Safety risk | Low safety risk |
| DIY suitability | Pro recommended |
| Cost category | Major investment |
| Typical timeline | Design and permitting often 2–4 months before work starts |
| Contractor type | General contractor |
Repair option
Phase the work and fix the building envelope first.
Replacement option
Full renovation with permits, design, and a general contractor.
Common causes
- Space no longer fits how the household lives
- Resale preparation
- Deferred maintenance stacking up
Relevant tools:project cost estimatorcompare quoteshome improvement material prices
Published July 20, 2026Last updated August 17, 2026
Tools & materials you'll need
Affiliate links- AmazonRoof rakeAdjustable telescoping handle recommended
- AmazonSturdy ladderIf needed for placing socks safely from eaves, ensure it is anchored
- AmazonSafety glassesFor eye protection from falling ice/debris
- AmazonWork glovesFor handling ice melt and cold conditions
- AmazonPush broom or shovelFor clearing fallen snow/ice from ground
As an Amazon Associate FixlyGuide earns from qualifying purchases — at no extra cost to you. Prices and availability are accurate as of publication and subject to change.
Quick Answer
Ice dams are ridges of ice that form at the edge of a roof, preventing melting snow from draining properly. This trapped water can then back up under shingles and into your home, causing significant water damage to ceilings, walls, and insulation. The safest and most effective methods for removing existing ice dams involve using a long-handled roof rake to remove snow before it can melt and refreeze, applying calcium chloride ice melt in pantyhose “socks” to create channels through the ice, or, for more extensive dams, hiring a professional service that utilizes steam. Avoid using hammers, chisels, salt (which can damage your roof), or climbing onto a slippery, icy roof.
The Problem
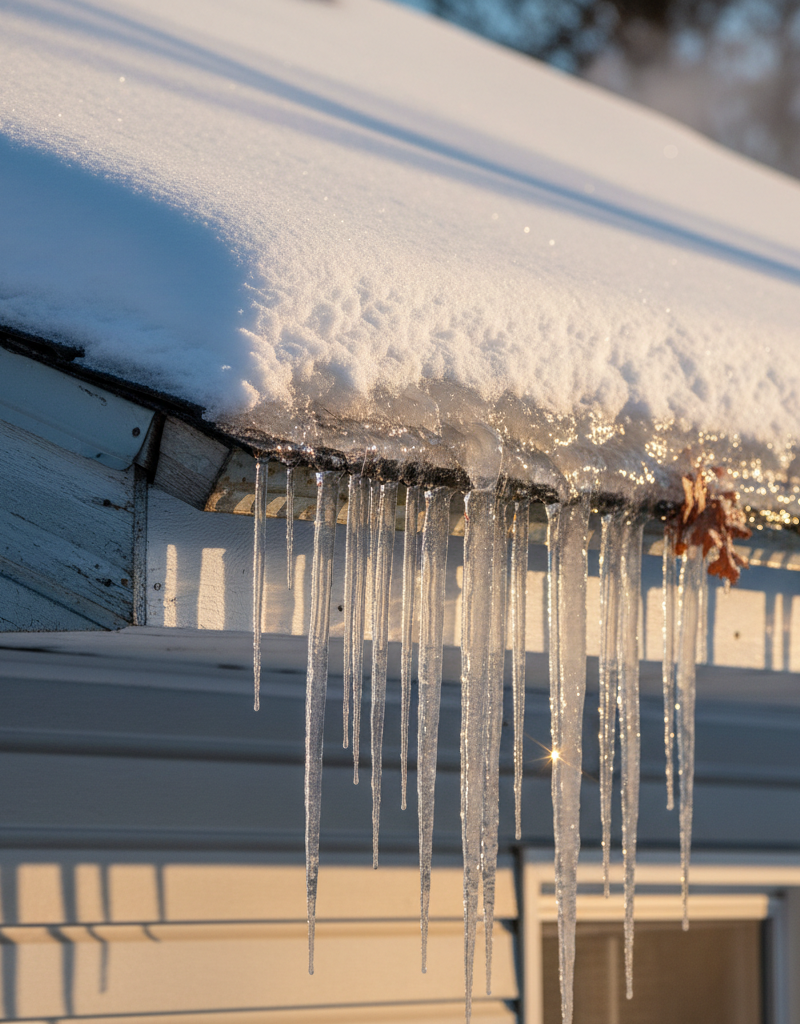
It’s a familiar winter scene: icicles glistening from your eaves, picturesque but potentially problematic. When these icicles connect to a thick ridge of ice at the roof’s edge, you have an ice dam. The real danger isn’t the ice itself, but the water it traps. As heat from your home warms the roof surface, snow melts and runs down towards the colder eaves. The ice dam acts like a miniature dam, blocking this natural flow. The impounded water then has nowhere to go but backward, pushing up under your shingles, saturating your roof decking, and eventually seeping into your attic, walls, and ceilings. This can lead to a cascade of expensive problems, including stained drywall, peeling paint, ruined insulation, mold growth, and even structural damage to your roof and framing.
Beyond direct water damage, ice dams also pose safety risks. Large, heavy ice dams can tear off gutters, pull fascia boards loose, and even send sheets of ice sliding onto anything or anyone below. Understanding how these destructive formations occur is the first step toward preventing and safely resolving them.
How It Works
Ice dams are fundamentally a heat transfer problem. They form when there’s an inconsistent temperature across your roof surface. Here’s the typical sequence:
- Heat Loss: Warm air from your living space rises and escapes into the attic, primarily through poorly sealed attic hatches, uninsulated light fixtures, gaps around plumbing vents, and insufficient attic insulation. This warms the roof sheathing from below.
- Snowfall: A blanket of snow accumulates on your roof. Snow is an excellent insulator, trapping heat beneath it, including the heat escaping from your attic.
- Melting Mid-Roof: The heat escaping from the attic warms the roof deck, causing the underside of the snow mid-roof to melt. This meltwater flows downwards, underneath the remaining snow, reaching the colder portions of the roof.
- Freezing at the Eaves: The eaves of your roof typically extend beyond the exterior walls of your home and are therefore colder, as they are not directly heated by the house and often have better airflow beneath them. As the meltwater reaches these colder edges, it refreezes, forming a barrier of ice – the nascent ice dam.
- Growth and Back-up: As more meltwater flows down, it encounters this developing ice dam, backs up, and refreezes, adding to the dam’s size. This process continues, with the ridge growing thicker and extending further up the roof. The water trapped behind this dam then begins to pool, and if the dam is substantial enough, this pooled water will eventually seep under the shingles through capillary action and gravity, initiating leaks into your home.
Shingles are designed to shed water down and off the roof, but they are not watertight when water pools underneath them. The repeated freeze-thaw cycles only exacerbate the problem, as ice expands, potentially lifting and damaging shingles over time.
Step-by-Step Fix
SAFETY FIRST: Never climb onto a snow- or ice-covered roof. Work from the ground or a stable ladder. Always have someone spot you if using a ladder. Disconnect any electrical power to outdoor outlets if you're working near them.
-
Assess the Situation – Identify the extent of the dam and any active leaks.
- Before you start, visually inspect the ice dam from the ground. Note its thickness, length, and how far up the roof it extends. Look for signs of water intrusion inside your home, such as water stains on ceilings or walls, or dripping water. This assessment helps determine the urgency and appropriate removal method.
- If you see significant structural damage or large, unstable ice formations, call a professional immediately. Heavy ice can weigh thousands of pounds.
-
Clear Snow with a Roof Rake – Remove the primary fuel source for the dam.
- Using a long-handled roof rake, carefully pull snow off the lower 3-5 feet of your roof, starting from the eaves and working your way up. Avoid digging into the shingles. The goal is to remove the snow that will melt and feed the ice dam.
- Safety Tip: Be mindful of falling snow and ice. Clear the area below you and never stand directly under where you are raking. Do this slowly and methodically, ensuring you maintain good footing on the ground.
- If the snow is too deep or frozen to the roof, do not force it. Move to the next step.
-
Create Channels with Calcium Chloride – Melt strategic pathways through the dam.
- Fill old pantyhose or knee-high nylon stockings with calcium chloride ice melt. Tie off the ends to create “socks” about 2-3 feet long. Calcium chloride is gentler on roofing materials than rock salt (sodium chloride).
- Carefully place these calcium chloride “socks” perpendicular to the ice dam, directly over the dam so they create channels for the trapped water to drain off. Space them every 3-4 feet along the dam.
- The calcium chloride will slowly melt through the ice, creating narrow tunnels. This can take several hours depending on temperature and dam thickness. Once a channel is established, the trapped water can flow through it.
- Important: Do NOT use rock salt, as it can damage shingles, gutters, and landscaping. Ensure you are using pure calcium chloride.
-
Consider a Pressurized Hot Water/Steam Method (Professional Only) – For thick, stubborn dams, an expert touch is best.
- For very large or recalcitrant ice dams, a professional service using a steam machine is often the most effective and least damaging solution. Steam gently melts the ice without damaging shingles or gutters.
- Pro Tip: Avoid DIY hot water pressure washing. The high pressure can damage shingles, and cold water will immediately refreeze on the roof, exacerbating the problem or creating dangerous conditions.
-
Monitor Drainage and Repeat if Necessary – Ensure water is flowing freely.
- After applying calcium chloride or professional steaming, constantly monitor the roof for proper drainage. Ensure that the water melted by the calcium chloride is actually flowing off the roof and not simply creating new pockets.
- If new ice forms or original channels refreeze, you may need to apply more calcium chloride socks or consult a professional again.
-
Address Interior Leaks (If Applicable) – Mitigate internal water damage.
- If water has entered your home, immediately contain the leak with buckets. Move furniture and belongings away from the affected area. After the ice dam is removed and the roof is no longer leaking, it's crucial to thoroughly dry the affected internal areas.
- Use fans and dehumidifiers to prevent mold growth. You may need to remove damp insulation, repair drywall, and repaint stained ceilings. Act quickly to prevent secondary damage.
Common Causes
- Insufficient Attic Insulation: This is the most prevalent cause. A lack of adequate insulation allows heat from your home's interior to transfer directly into the attic, warming the roof deck above.
- Poor Attic Ventilation: Even with good insulation, if your attic isn't properly ventilated (e.g., soffit and ridge vents), hot air can become trapped, leading to a warmer roof surface.
- Air Leaks into the Attic: Gaps around recessed lighting, unsealed attic hatches, chases for plumbing or electrical wiring, and gaps where walls meet the ceiling can allow significant amounts of warm, moist air to escape directly into the attic space.
- Uneven Roof Temperatures: Architectural features like dormers, skylights, or even valleys can create cold spots where meltwater rapidly refreezes.
- Heavy Snowfall Followed by Freezing Temperatures: Abundant snow acts as an insulating blanket, exacerbating the effect of heat loss from the attic. When outside temperatures fluctuate around freezing, the conditions are ripe for ice dam formation.
- Clogged or Frozen Gutters: While not a primary cause, clogged gutters filled with leaves or ice can prevent water from draining away from the roof edge, contributing to the formation or worsening of an ice dam.
Common Mistakes
- Using Rock Salt (Sodium Chloride): Regular rock salt can corrode metal gutters, damage sensitive roofing materials, kill landscaping, and leave unsightly white stains. Always use calcium chloride.
- Smashing Ice with Tools: Hitting ice dams with hammers, axes, or shovels is extremely dangerous and can severely damage shingles, gutters, and even the roof deck itself. This can lead to costly repairs.
- Climbing on a Slippery Roof: Attempting to walk on a snow- or ice-covered roof is incredibly hazardous and can result in serious injury or death. Always work from the ground or a secure ladder with proper safety precautions.
- Heating Cables Along the Eaves: While some homeowners install these, they are primarily a preventative measure, not a fix for existing, large ice dams. They are also energy-intensive and can degrade over time.
- Ignoring the Root Cause: Simply removing an ice dam without addressing the underlying issues of heat loss and poor ventilation in the attic means the problem will likely return with the next snowfall.
- Using High-Pressure Hot Water: Blasting ice with a pressure washer, even with hot water, can blast off shingle granules, lift shingles, and force water into your attic. The water will also quickly refreeze, making the situation worse.
Cost & Time Breakdown
| Task | DIY Cost ($) | Pro Cost ($) | Time |
|---|---|---|---|
| Roof Rake (initial snow removal) | $0 | $50–$100 | 15–30 minutes |
| Calcium Chloride Application | $10–$30 | Included in service | 30–60 minutes |
| Professional Ice Dam Removal (Steaming) | N/A | $300–$800+ | 1–3 hours |
| Post-Fix Internal Drying | $0–$50 | $100–$300+ | Ongoing for days |
| Attic Insulation/Ventilation Upgrade | $500–$3,000+ | $1,500–$5,000+ | 1–3 days |
Tips & Prevention
- Improve Attic Insulation: Ensure your attic has adequate insulation (R-49 to R-60 depending on your climate zone) to minimize heat transfer from your living space to the attic floor.
- Enhance Attic Ventilation: Proper airflow from soffit vents to a ridge vent keeps the attic cold, matching the outside ambient temperature. This prevents the mid-roof from warming and melting snow prematurely.
- Seal Air Leaks: Use expanding foam or caulk to seal all penetrations into the attic, such as around light fixtures, plumbing stacks, electrical wiring, and attic hatches. This is often the most impactful preventative step.
- Keep Gutters Clean: Regularly clear leaves and debris from gutters and downspouts before winter. Clogged gutters can contribute to water pooling at the eaves.
- Install Ice and Water Shield: If you're replacing your roof, ensure your roofer installs an ice and water shield membrane under shingles along the eaves and in valleys. This provides an extra layer of protection against water intrusion.
- Regular Roof Raking: After heavy snowfalls, proactively remove snow from the lower portion of your roof using a roof rake to prevent ice dam formation in the first place. This is the most effective immediate preventative measure.
When to Call a Professional
You should call a licensed professional for ice dam removal if the ice dam is extensive, extremely thick, or has been present for a prolonged period, leading to significant water intrusion into your home. If you notice large icicles forming near pathways, doors, or over driveways, or if sections of your gutter system are pulling away due to the weight of ice, professional intervention is critical. Furthermore, if you suspect damage to electrical components due to water leaks, or if you are uncomfortable working on a ladder or near slippery surfaces, a professional equipped with proper safety gear and specialized steaming equipment is the safest choice. Professionals can also accurately diagnose and address the underlying heat loss issues in your attic to prevent future ice dam formation, which is beyond the scope of a temporary fix.
Related Articles
Keep troubleshooting with these hand-picked guides from FixlyGuide:
- The #1 Mistake Homeowners Make with Ice Dams (and How to Fix It SAFELY) — Most homeowners approach ice dam removal incorrectly, creating more damage or safety risks. Learn the right, safe methods to protect your r…
- The $30 Secret to Banishing Ice Dams From Your Roof (Before They Destroy It) — Learn safe and effective methods to remove ice dams from your roof and prevent costly damage to your home's structure and interior.
- The #1 Mistake Homeowners Make Removing Ice Dams (And 3 Safer Fixes) — Discover the safest and most effective ways to remove ice dams from your roof, avoiding common mistakes that can cause severe damage to you…
- The $20 Trick That Melts Ice Dams (and Saves Your Roof) — Discover a surprisingly simple, budget-friendly method to safely remove ice dams and prevent costly roof damage to your home.
- The $30 Trick to Melting Ice Dams (Before They Destroy Your Roof) — Discover how to safely remove ice dams from your roof instantly with common household items, preventing costly damage. Stay safe while tack…
- The #1 Lawn Aeration Mistake Most Homeowners Make (And How to Fix It) — Timing is everything when it comes to lawn aeration, and doing it at the wrong time can do more harm than good for your grass.
Should you do this yourself?
Answer five quick questions before you start. Safety outranks savings every time.
Your experience with work like this
How high do you have to work?
Does the job involve any of these?
Will it need a permit?
Specialty tools
Free and instant. Educational guidance only — not a quote, inspection, or professional diagnosis.
Estimate your own project cost
National averages are a starting point. Enter your details for a range that fits your house.
Roof replacement cost
- Per square (installed)$604 – $866
Add $500–$2,500 if decking is rotten and needs replacement. Storm damage may be covered by insurance.
Educational estimate only — always confirm with written local bids.
What should this project cost?
Enter your project details for a realistic cost range before you call anyone.
Spot repairs commonly run $400–$1,800; full replacement typically $9,000–$18,000 for an average home.
- Regional adjustment
- National average
- Labor share (typical)
- ~$2,948
- Quotes to collect
- 3 written estimates
Educational estimate based on national averages — not a binding quote. Always confirm with written local estimates.
Fixly Project Decision Box
- DIY difficulty
- Professional Recommended
- Estimated time
- Inspection 1–2 hours · repairs 1–3 days
- Cost level
- High
Main tools / materials
- Binoculars for a ground-level look
- Flashlight for attic checks
- Moisture meter
- Roofing cement (temporary patch only)
When to stop and call a pro
- Active leak near lights, fans, or any wiring
- Sagging, bulging, or water-filled ceiling
- Steep, wet, or two-story roof — do not climb it
- Storm or hail damage you plan to claim on insurance
Need professional help?
Free roof assessment first — no phone calls until you ask for them.
Get Local Roofing HelpDecide what your roof needs
Two minutes of questions turns "something is wrong up there" into a clear next step.
- Repair or replace your roof?Answer 10 questions about age, leaks, and damage to get a clear next step.Open
- Compare contractor quotesScore up to four bids on price, warranty, licensing, and timeline.Open
- Get local estimatesSend one request and compare written estimates from vetted pros.Open
Free, no signup required. Estimates are educational guidance, not a quote or an inspection.
Get the print-ready PDF of this guide
A clean, ad-free, printable version you can keep on your phone or pin to the workshop wall. Free with a FixlyGuide account.
- Print-optimized layout
- Tools, materials & every step included
- Saved to your account
Recommended for DIYers & woodworkers
Sponsored
The Top 20 Tools for Workshops of Any Budget
No stationary machines or power tools required — plus 3 fundamental tools that can't be bought at any price.
Get the free guide
Ted's Woodworking — The #1 Woodworking Resource
Detailed instructions, dimensioned drawings, materials & cutting lists, and 3D schematics for every skill level.
See the plansSponsored: links above are affiliate links. FixlyGuide may earn a commission on qualifying purchases — at no extra cost to you.
Frequently asked questions
What causes ice dams to form on a roof?+
Ice dams form due to inconsistent roof temperatures. Heat escaping from your home warms the central portion of the roof, melting snow. This meltwater then flows down to the colder eaves, where it refreezes, creating a barrier that traps more water.
Is rock salt safe to use on ice dams?+
No, rock salt (sodium chloride) is not recommended. It can corrode metal gutters, damage roofing materials, kill landscaping, and leave unsightly stains. Always use calcium chloride, which is a safer alternative.
Can I chip away at an ice dam with a hammer?+
Absolutely not. Hitting an ice dam with a hammer, axe, or shovel is extremely dangerous and can severely damage your roof shingles, gutters, and underlying decking, leading to costly repairs and potential injury. Never attempt this.
How can I prevent ice dams from forming in the future?+
Prevention is key! Improve your attic's insulation and ventilation, seal all air leaks between your living space and the attic, keep gutters clean, and proactively remove snow from the lower edges of your roof with a roof rake after heavy snowfalls.
When should I call a professional for ice dam removal?+
You should call a professional if the ice dam is very large, thick, causing active leaks inside your home, or posing a safety hazard due to heavy icicles or falling ice. Professionals use specialized steaming equipment that safely removes ice without damaging your roof.

Discussion
Loading comments…