Tools & materials you'll need
Affiliate linksAs an Amazon Associate FixlyGuide earns from qualifying purchases — at no extra cost to you. Prices and availability are accurate as of publication and subject to change.
Quick Answer
Fixing a large drywall hole involves a systematic approach to ensure a strong, seamless repair. You'll begin by squaring off the damaged area, then creating a stable backing (typically wood furring strips or a larger piece of drywall acting as a 'California patch') to support the new drywall insert. Once the patch is secured, apply successive layers of joint compound and drywall tape, feathering the edges meticulously to blend with the existing wall. Final sanding and painting will make the repair virtually invisible.
The Problem
A large hole in drywall isn't just an aesthetic issue; it can compromise the integrity of your wall, allowing drafts, pests, or even moisture to penetrate. Whether it's the result of an accidental impact, a removed wall anchor, or a plumbing repair, a hole larger than about 6 inches in diameter requires more than just a spackle patch. Simply filling a large void with joint compound will lead to sagging, cracking, and a visible repair that won't last. The challenge is creating a repair that is strong, flat, and blends perfectly with the surrounding wall texture and paint finish, often without access to the wall cavity behind the existing drywall to add traditional bracing.
How It Works
The fundamental principle behind a large drywall patch is to create a new, stable surface within the existing wall plane. For holes up to about 12-14 inches, the 'California patch' or 'butterfly patch' method is highly effective, as it uses a larger piece of drywall to create its own backing. Here's a quick overview: A new piece of drywall, cut larger than the hole, has its gypsum core cut out, leaving a paper flange of about 1 to 1.5 inches around the perimeter. This flange acts as the 'wings' of your butterfly. You butter this flange with joint compound, insert the gypsum core of the patch into the hole, and press the paper flange firmly against the existing wall around the hole. This method provides immediate, strong adhesion without needing separate wood backing strips, which can be difficult to install in irregularly shaped holes or in areas without studs. For larger, square, or rectangular holes, often due to significant damage or where a section of drywall has been removed for access (e.g., plumbing repair), a more robust backing system is required. This typically involves cutting the hole into a precise rectangle or square, then inserting wood furring strips or plywood pieces behind the existing drywall and screwing them into the back of the drywall around the perimeter of the hole. These strips create a frame to which the new drywall patch can be securely screwed, providing a solid, stud-like anchor where none existed before. Once the patch is firmly in place, the edges are tapered and feathered using multiple thin coats of joint compound, building up the layers gradually and thinning them out towards the edges to create a smooth, invisible transition.
Step-by-Step Fix
Safety First—Before starting any work, ensure there are no electrical wires, plumbing pipes, or gas lines directly behind the area you intend to cut. Use a stud finder with AC detection for wires and proceed with caution. Always wear safety glasses and a dust mask when cutting and sanding drywall.
- Prep the Area & Square the Hole—Begin by laying down a drop cloth to protect your flooring. Using a utility knife and a straightedge, carefully score and cut the damaged area into a perfect square or rectangle. Make your cuts along any existing stud lines if possible, or create a symmetrical opening if the damage is in the middle of a wall. Aim for clean, straight edges. If the hole is irregular, cut it into a clean, geometric shape slightly larger than the damage.
- Cut & Fit the Backing Strips—Cut two pieces of wood furring strip (1x2s or 1x3s work well) a few inches longer than the height of your cut-out hole. Insert one strip horizontally into the hole, positioning it so it spans across the top edge of your cut-out, behind the existing drywall. Drive two 1 1/4-inch drywall screws through the existing drywall into the furring strip, securing it. Repeat this process for the bottom edge, ensuring both strips are flush with the existing drywall thickness. Use a small dab of construction adhesive on the back of the strips before screwing them in for extra hold, especially if your drywall is old.
- Create Blocking for Sides (If Needed)—For very large patches (over 18 inches), or if your cut-out extends between two studs, you may want to add vertical backing strips on the sides as well. Measure the distance between your top and bottom horizontal strips, cut two more furring strips to this length, and screw them into the ends of the horizontal strips, creating a rigid frame behind the hole. Ensure all blocking is flush with the back of the existing drywall.
- Cut the New Drywall Patch—Measure the exact dimensions of your squared-off hole. Cut a new piece of drywall to these precise measurements. Test fit the patch in the hole. It should fit snugly without forcing it. Trim lightly with a utility knife if needed for a perfect fit. Use a T-square for accurate, straight cuts.
- Secure the Patch—Insert the new drywall patch into the hole. Using 1 1/4-inch drywall screws, secure the patch to the backing strips. Drive screws every 6–8 inches around the perimeter of the patch, ensuring they dimple the drywall paper slightly without breaking through. Make sure screw heads are set just below the paper surface, flush with the gypsum.
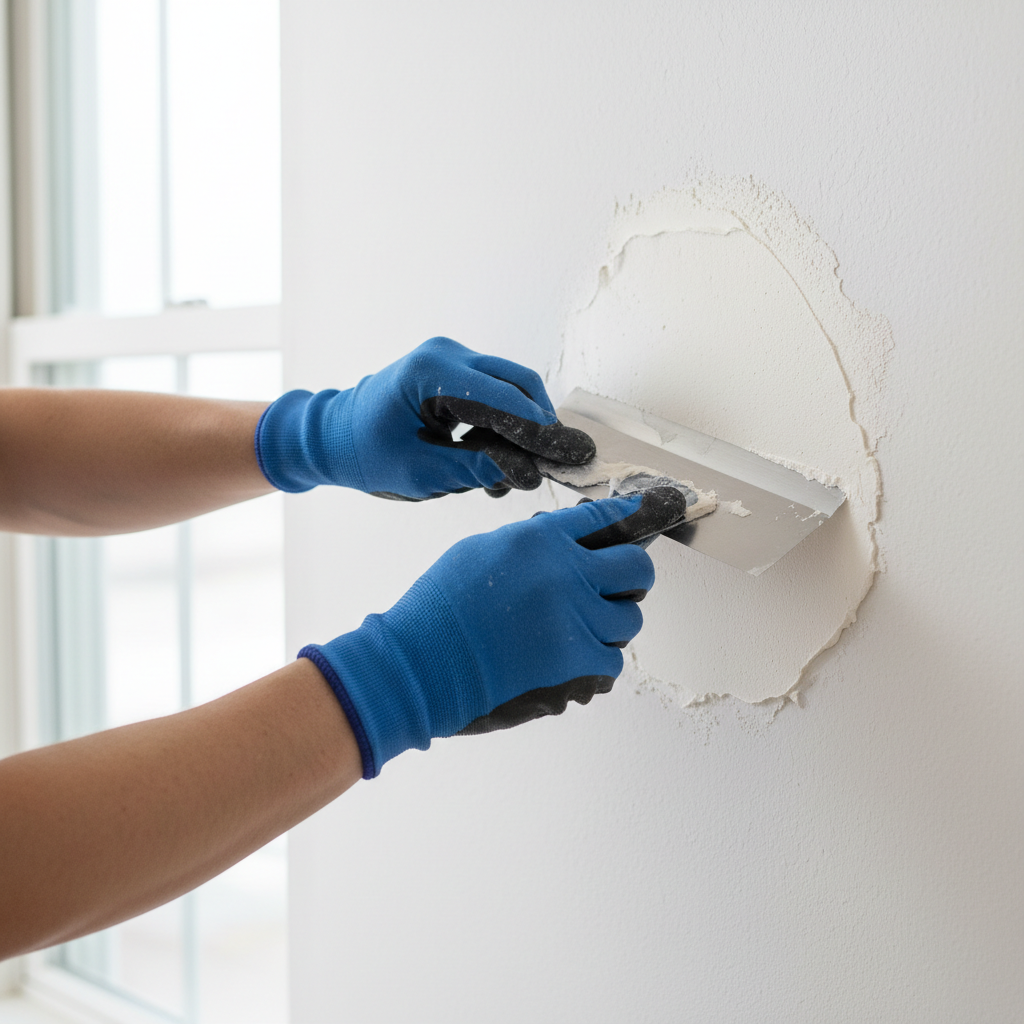
- Apply Joint Compound & Tape (First Coat)—Using a 6-inch drywall knife, apply a thin, even coat of all-purpose joint compound over all seams where the new patch meets the old drywall. Immediately embed paper drywall tape (recommended for strength) over the wet joint compound, centering it over the seam. Press the tape firmly into the mud, ensuring no air bubbles. Follow with another thin layer of joint compound over the tape, feathering the edges. Avoid using mesh tape for large patches; paper tape provides superior strength.
- Second Coat of Joint Compound—Allow the first coat to dry completely (4–6 hours or overnight). Lightly sand any obvious ridges or bumps with 120-grit sandpaper. Apply a second, slightly wider coat of joint compound using an 8-inch or 10-inch drywall knife. Feather the edges out further, extending past the previous coat by several inches to create a subtle transition. Keep coats thin; thick coats take longer to dry and are prone to cracking.
- Third Coat & Feathering—Once the second coat is dry, lightly sand again. Apply a final, very thin and wide coat of joint compound using a 10-inch or 12-inch drywall knife. This coat should extend several inches beyond the second coat, feathering the compound almost to nothing at the very edges. The goal is to create a wide, barely perceptible mound over the seam. Use a spray bottle with water to lightly dampen the mud when feathering to improve workability and smoothness.
- Final Sanding & Priming—After the final coat is completely dry, perform a thorough but gentle sanding with 150-grit or 220-grit sandpaper and a sanding block. Use a work light held at an angle to highlight any imperfections (ridges, bumps, dips). Sand until the patch is perfectly smooth and flush with the surrounding wall. Wipe away all dust with a damp cloth. Apply a high-quality PVA drywall primer to the entire patched area. Do not skip priming; it seals the mud and ensures consistent paint absorption.
- Paint—Once the primer is dry, apply two coats of your wall paint to the patched area, feathering the edges of each coat out slightly further than the last. For best results and an invisible repair, paint the entire wall from corner to corner, or at least from seam to seam. Use the same type, brand, and sheen of paint originally on the wall.
Common Causes
- Accidental Impact: Furniture moving, playful children, or dropped items can easily punch a hole through drywall, which is relatively fragile. This is the most common cause of large, irregular holes.
- Wall Anchor Rip-Outs: Removing heavy wall-mounted items (like TVs, shelves, or cabinets) that were inadequately supported can tear a large section of drywall if the anchors pull out violently.
- Plumbing or Electrical Access: Plumbers or electricians often cut large sections of drywall to access pipes, wires, or junction boxes for repairs or installations. While necessary, these openings often need proper patching afterward.
- DIY Mishaps: Attempting to hang something heavy without locating a stud, misjudging depths when drilling, or installing new fixtures can inadvertently create unwanted openings.
- Moisture Damage: Leaking pipes or persistent humidity can weaken drywall over time, causing it to soften, sag, and eventually crumble, leaving a large, irregular hole that needs professional attention before patching.
Common Mistakes
- Not Squaring Off the Hole: Trying to patch an irregularly shaped hole makes it incredibly difficult to cut a matching patch and get crisp, strong seams. Always square off the damaged area.
- Insufficient Backing: Simply trying to fill a large hole with spackle or a small piece of patch material will result in a weak, sagging repair. Proper backing is crucial for structural integrity.
- Using Too Much Mud at Once: Applying thick layers of joint compound will lead to longer drying times, shrinkage, cracking, and a difficult-to-sand, lumpy finish. Aim for several thin coats.
- Skipping Drywall Tape: For large patches, tape is not optional. It provides essential structural strength to the seam, preventing future cracks. Mesh tape is often inadequate for large repairs; use paper tape.
- Not Feathering the Edges Enough: The key to an invisible patch is gradually tapering the joint compound several inches beyond the patch edges. Abrupt transitions will be visible, especially with angled light.
- Inadequate Sanding or Priming: Poor sanding leaves bumps and ridges. Skipping primer means the patch will absorb paint differently than the surrounding wall, resulting in a visible dull or shiny spot.
Cost & Time Breakdown
| Task | DIY cost | Pro cost (estimate) | Time |
|---|---|---|---|
| Materials (drywall, compound, tape) | $15–$30 | Included in labor | 30–60 minutes |
| Cutting & installing backing | $5–$15 | Included in labor | 1–2 hours |
| Patch installation | Included | Included in labor | 30–60 minutes |
| Taping & 3 coats of mud (drying) | Included | Included in labor | 1–2 days |
| Sanding & priming | Included | Included in labor | 1–2 hours |
| Painting | $10–$20 | Included in labor | 1–2 hours |
Tips & Prevention
- Save Scrap Drywall: Keep small pieces of leftover drywall from other projects. They're perfect for patches and ensure a consistent match.
- Practice Mudding: If you're new to drywall repair, practice applying and feathering joint compound on a scrap piece of wood or cardboard. The technique is key to a smooth finish.
- Store Drywall Flat: Always store drywall sheets flat to prevent warping, which can make patching difficult.
- Use the Right Tools: Don't skimp on good quality drywall knives. Clean blades are essential for smooth application.
- Identify Studs: Before hanging anything heavy, always use a stud finder. Mounting items directly into studs prevents most accidental pull-outs and large holes.
- Protective Wall Coverings: In high-traffic areas or children's rooms, consider wainscoting or durable wall panels to protect drywall from impacts.
When to Call a Professional
While patching a large drywall hole is a common DIY task, there are specific situations where calling a licensed professional is crucial. If the hole is accompanied by signs of water damage, such as discoloration, softness, or a musty odor, it indicates a larger problem like a plumbing leak that needs to be addressed and repaired by a licensed plumber before any patching can begin. Similarly, if the hole exposes electrical wiring that appears frayed, burnt, or live, an electrician must inspect and secure the wiring to prevent fire hazards. Patching over active issues will only lead to future damage and potential safety risks. Additionally, if the hole is exceptionally large (over 2 feet by 2 feet), involves structural damage, or you are uncomfortable with the multi-step process of achieving a seamless finish, a professional painter or drywall contractor has the expertise and tools to ensure a flawless and lasting repair, saving you time and potential frustration.
Related Articles
Keep troubleshooting with these hand-picked guides from FixlyGuide:
- The 4-Inch Drywall Hole Fix: Why Most DIY Patches Fail (And How to Do It Right) — Don't let a small drywall hole become a recurring nightmare – discover the secret to a seamless, lasting repair that disappears into your w…
- The Giant Drywall Hole: 3 Hidden Mistakes That Make Fixing It Worse — Don’t just spackle over that huge drywall hole; learn the right way to repair it and avoid common mistakes that lead to an even bigger head…
- The Secret to a Flawless Drywall Patch Is In the Paper — Frustrated by drywall patches that always show through? That telltale bump or sanding mark can ruin a perfect wall. Discover the 'Californi…
- The 4-Step Drywall Patch Secret That Makes Large Holes Vanish — Discover how to flawlessly repair a large hole in drywall using a simple, effective method that makes the damage disappear without a trace.
- That Falling Closet Rod? It’s The Tiny Anchor You’re Using. — Your closet rod keeps collapsing because the standard plastic anchors can't grip drywall; the fix is to anchor it properly to a wall stud o…
- That Softball-Sized Hole in Your Wall? Make It Vanish — A softball-sized hole in the drywall is an eyesore, but you can make it disappear. Learn the pro method for a seamless patch that vanishes…
Get the print-ready PDF of this guide
A clean, ad-free, printable version you can keep on your phone or pin to the workshop wall. Free with a FixlyGuide account.
- Print-optimized layout
- Tools, materials & every step included
- Saved to your account
Recommended for DIYers & woodworkers
Sponsored
The Top 20 Tools for Workshops of Any Budget
No stationary machines or power tools required — plus 3 fundamental tools that can't be bought at any price.
Get the free guide
Ted's Woodworking — The #1 Woodworking Resource
Detailed instructions, dimensioned drawings, materials & cutting lists, and 3D schematics for every skill level.
See the plansSponsored: links above are affiliate links. FixlyGuide may earn a commission on qualifying purchases — at no extra cost to you.
Frequently asked questions
How big of a hole can you patch in drywall?+
You can patch holes up to about 2 feet by 2 feet in drywall using DIY methods with appropriate backing. Holes larger than this, or those involving structural damage, are best handled by a professional.
What is the best way to patch a large hole in drywall?+
The best way is to square off the hole, install wood backing strips, cut and screw in a new drywall patch, then apply multiple thin coats of joint compound and paper tape, feathering the edges for a seamless finish.
Do I need to use tape for a large drywall patch?+
Yes, for large drywall patches, tape is essential. Paper drywall tape provides the necessary strength to prevent cracking along the seams between the new patch and the existing wall, ensuring a durable repair.
How do you make a drywall patch invisible?+
Making a drywall patch invisible relies on three main techniques: precise cutting and fitting of the patch, using thin, feathered coats of joint compound that extend several inches beyond the patch, and thorough sanding followed by priming before painting.


Discussion
Loading comments…