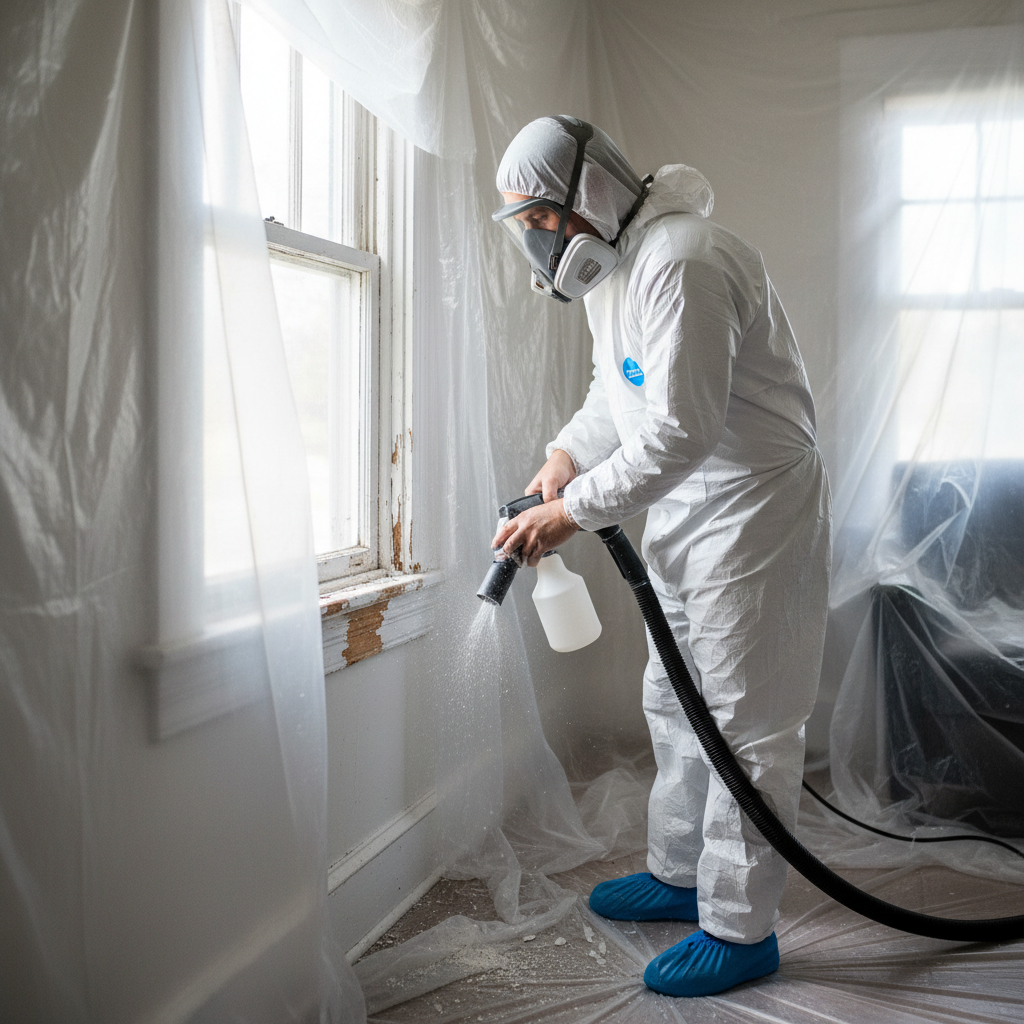
- Two-Stage HEPA Vacuuming and Wet Cleaning — The most critical cleaning steps.
- Tools: HEPA vacuum, buckets, heavy-duty disposable gloves, sponges/rags, EPA-recognized lead-specific cleaning solution (or TSP phosphate-free cleaner).
- Process (Stage 2): Following vacuuming, wet-clean all surfaces using a lead-specific cleaner or TSP solution. Use a
General remodeling · Renovation planning
| Project category | General remodeling |
|---|---|
| Problem type | Renovation planning |
| Trade required | General contracting |
| Urgency | Planned project |
| Safety risk | Low safety risk |
| DIY suitability | Pro recommended |
| Cost category | Major investment |
| Typical timeline | Design and permitting often 2–4 months before work starts |
| Contractor type | General contractor |
Repair option
Phase the work and fix the building envelope first.
Replacement option
Full renovation with permits, design, and a general contractor.
Common causes
- Space no longer fits how the household lives
- Resale preparation
- Deferred maintenance stacking up
Relevant tools:project cost estimatorcompare quoteshome improvement material prices
Published July 8, 2026Last updated August 17, 2026
Tools & materials you'll need
Affiliate linksAs an Amazon Associate FixlyGuide earns from qualifying purchases — at no extra cost to you. Prices and availability are accurate as of publication and subject to change.
Quick Answer
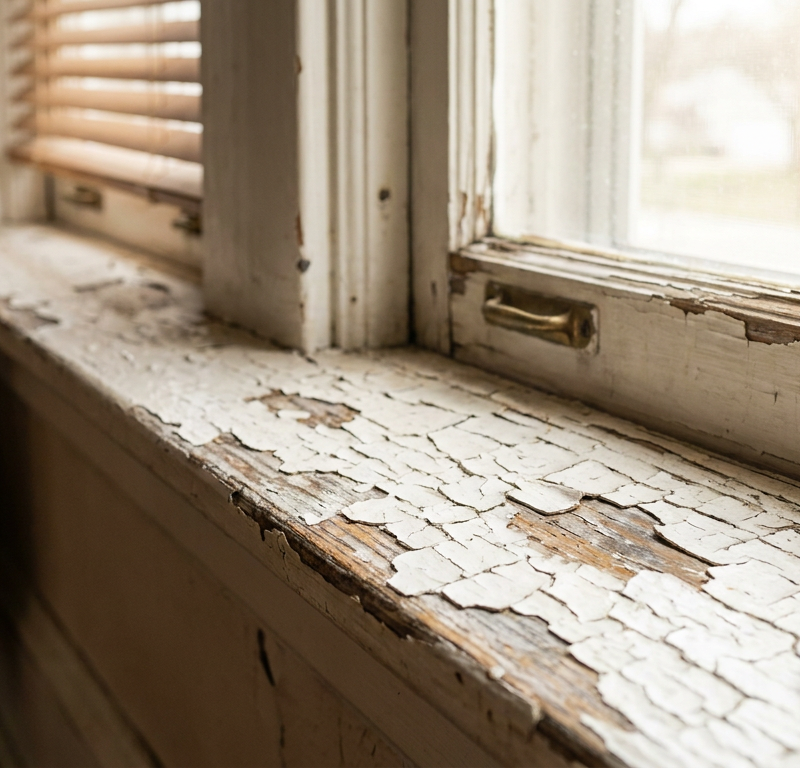
If your home was built before 1978, assume painted surfaces contain lead. The danger isn't intact paint, but the invisible dust created when lead paint is disturbed during renovation or repair. This dust can lead to serious health issues, particularly for children. The critical steps for homeowners are to test for lead, implement strict containment measures to prevent dust spread, use lead-safe work practices, and perform thorough, specialized cleaning.
The Problem
You've just bought a charming 1950s bungalow, or maybe you're finally tackling that kitchen remodel in your childhood home. The excitement of transforming a space can quickly overshadow a silent, invisible threat lurking on the walls: lead-based paint. For decades, lead was a common additive in household paints, valued for its durability and vibrant color. However, by 1978, its severe health risks, particularly to developing children, led to a nationwide ban.
The real problem isn't necessarily the lead paint itself when it's intact and undisturbed. It's when that paint is scraped, sanded, drilled, sawn, or demolished that microscopic lead particles become airborne, settling as invisible dust throughout your home. This lead dust is incredibly dangerous. Children, who often put their hands and toys in their mouths, are especially susceptible to ingesting lead dust. Even adults can suffer from lead poisoning, experiencing symptoms ranging from fatigue and irritability to more severe neurological damage and kidney problems. The stakes are high when you're dealing with lead, making proper identification and safe work practices non-negotiable for any renovation project in an older home.
How It Works
Lead paint poses a hazard because lead is a neurotoxin. When paint containing lead is disturbed, it releases microscopic lead particles. These particles are too small to see, yet they can easily be inhaled or ingested. Imagine sanding a doorframe; tiny paint chips and superfine dust drift through the air and settle on every surface, embedding themselves in carpets, window sills, and even HVAC systems. This dust can remain a hazard indefinitely if not properly cleaned.
The human body, especially a child's developing system, can't easily process or excrete lead. Once ingested or inhaled, lead accumulates in the blood, bones, and soft tissues. In children, even low levels of lead exposure can lead to learning disabilities, behavioral problems, decreased IQ, hyperactivity, and slowed growth. For pregnant women, lead can cross the placental barrier, affecting fetal development. Adults may experience high blood pressure, joint and muscle pain, memory and concentration problems, and reproductive issues. The danger is cumulative; repeated exposure to even small amounts can build up over time to toxic levels. This is why containment and thorough cleanup, using specific methods to capture and remove lead dust, are paramount in any renovation involving older painted surfaces. Standard cleaning methods, like sweeping or vacuuming with a regular household vacuum, often just stir the dust back into the air, exacerbating the problem rather than solving it.
Step-by-Step Fix
Safety Note: Lead paint abatement is serious. If you are pregnant, have young children, or are unsure about any steps, consider calling a certified lead abatement professional. Always wear appropriate PPE.
-
Test for Lead Before You Start — This is the absolute first step for any home built before 1978. Do not assume your home is lead-free without testing.
- Tools: EPA-recognized lead test kits (usually a swab), or professional lead testing services.
- Process: Follow test kit instructions carefully. Swab various painted surfaces (walls, trim, doors, windows, cabinets) in the areas you plan to disturb. Look for a color change indicating lead. For definitive results or if you have any doubts, hire a certified lead inspector. They can perform XRF testing or take paint chip samples for laboratory analysis, providing a comprehensive report on lead presence and concentration.
-
Define the Work Area and Isolate — Once lead is confirmed, the goal is to prevent dust from leaving the work zone.
- Materials: 6-mil plastic sheeting, painter's tape (blue or green low-tack), warning signs.
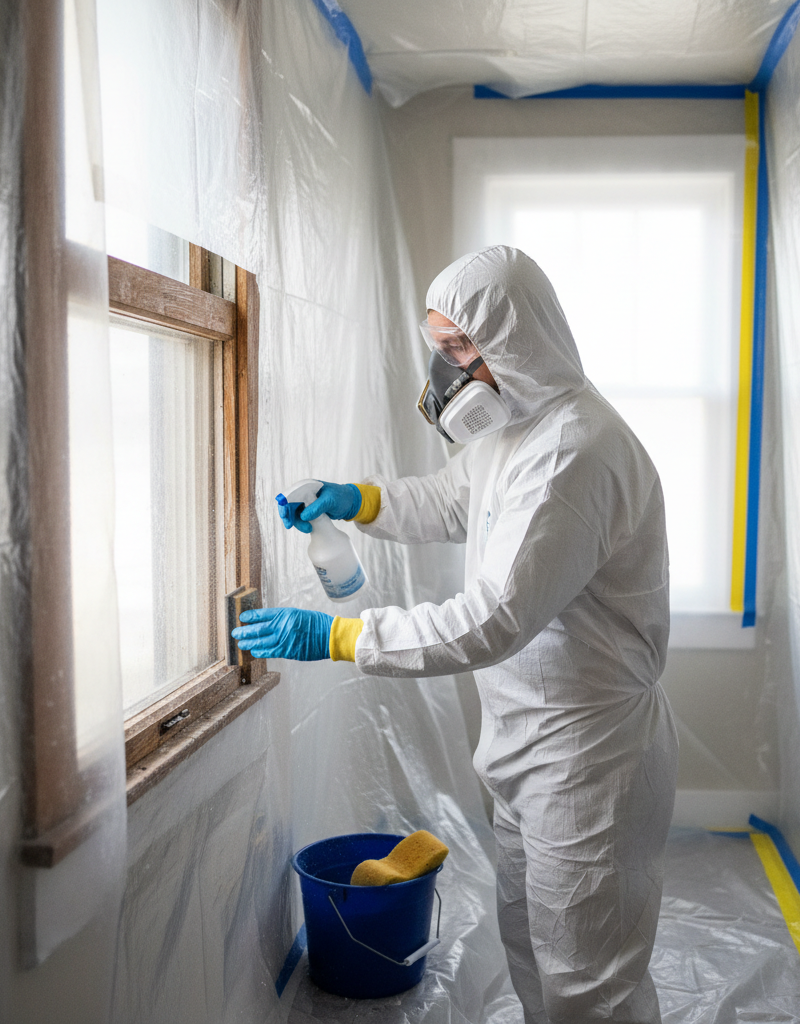
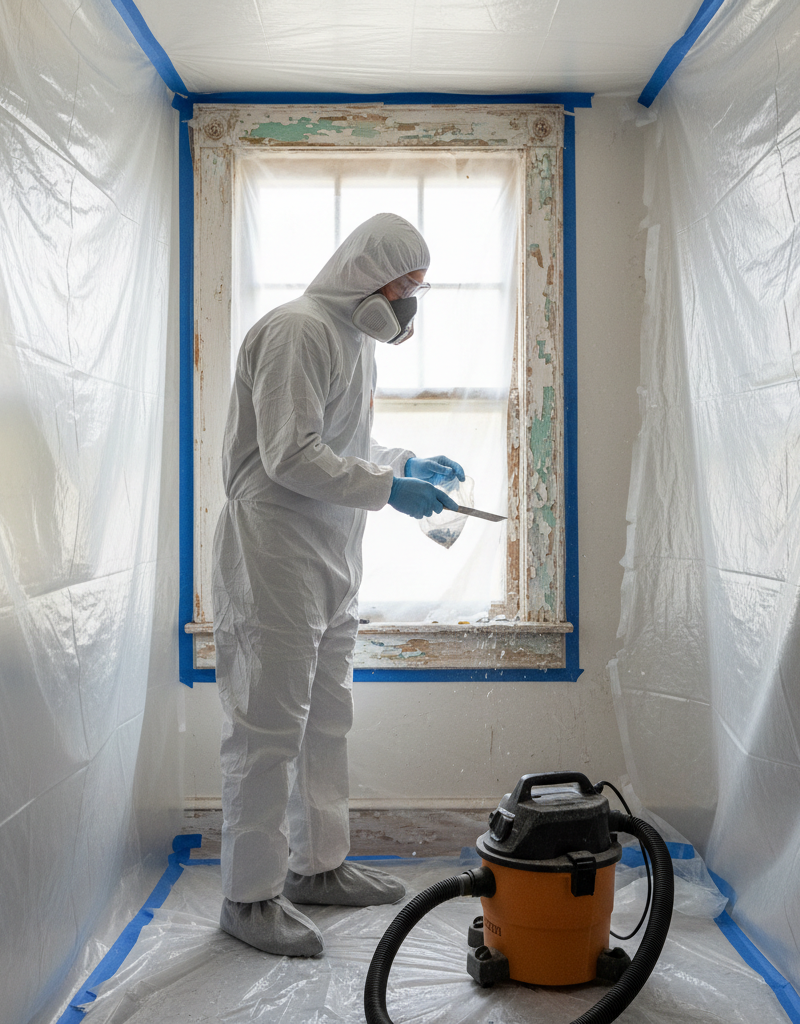
- Process: Remove all furniture, curtains, rugs, and personal items from the room. If items cannot be removed, cover them completely with 6-mil plastic sheeting and seal the edges with tape. Close all windows and doors leading to other areas of the house. Seal off doorways with two layers of plastic sheeting, creating an airlock system. Turn off forced-air heating and air conditioning systems to prevent dust circulation. Cover air vents with plastic and tape.
-
Prepare for Lead-Safe Work Practices — Set up your personal protection and tools.
- Tools: NIOSH-approved P100 respirator, disposable coveralls, disposable shoe covers, safety glasses/goggles, heavy-duty disposable gloves.
- Process: Don your PPE before entering the contained work area. Ensure your respirator fits snugly. Have a dedicated set of tools for lead-safe work that can be easily cleaned or are disposable. Avoid bringing unnecessary items into the work zone.
-
Wet Methods Only (Where Possible) — Minimize airborne dust generation.
- Materials: Spray bottle with water and a few drops of dish soap, sponges, rags.
- Process: Before scraping or sanding, lightly mist the painted surface with a water/soap mixture. This helps to agglomerate lead dust particles, preventing them from becoming airborne. Keep surfaces damp throughout the work. This is effective for scraping and light sanding, but not for power sanding or demolition. For power tools, use those equipped with HEPA-filtered vacuum attachments.
-
Careful Debris Collection — Collect all paint chips and dust as you work.
- Materials: Heavy-duty 6-mil poly bags, duct tape, HEPA vacuum.
- Process: Place 6-mil plastic sheeting directly underneath your work area to catch debris. As you scrape or sand, immediately collect paint chips and dust into heavy-duty poly bags. Do not let debris accumulate on the floor. Use a HEPA-filtered vacuum (not a regular shop vac) to thoroughly clean up small particles and dust frequently during the work process. Seal bags tightly with duct tape when full.
-
Disposal of Lead-Contaminated Waste — Proper waste management is crucial.
- Materials: Heavy-duty 6-mil poly bags, duct tape.
- Process: Place all contaminated materials (plastic sheeting, disposable coveralls, respirator filters, rags, paint chips, etc.) into heavy-duty 6-mil poly bags. Double-bag everything. Seal the bags securely with duct tape. Contact your local waste management facility or health department for specific instructions on lead-contaminated waste disposal in your area, as regulations vary by municipality.
-
Two-Stage HEPA Vacuuming and Wet Cleaning — The most critical cleaning steps.
- Tools: HEPA vacuum, buckets, heavy-duty disposable gloves, sponges/rags, EPA-recognized lead-specific cleaning solution (or TSP phosphate-free cleaner).
- Process (Stage 1): After all visible debris is removed, thoroughly HEPA vacuum all surfaces in the work area, including walls, ceilings, floors, window sills, and exposed framing. Move slowly and systematically. Dispose of the HEPA vacuum bag.
- Process (Stage 2): Following vacuuming, wet-clean all surfaces using a lead-specific cleaner or TSP solution. Use a
Related Articles
Keep troubleshooting with these hand-picked guides from FixlyGuide:
- 7 Hidden Equity Drains Costing You Thousands Annually — Your home is an asset, but silent problems like minor leaks, poor insulation, and deferred maintenance can drain its value. Discover the se…
- 7 Inspection Red Flags That Secretly Signal a $20,000 Bill — Don't let your dream home become a money pit. Many buyers and even some inspectors overlook subtle home inspection red flags that lead to f…
- Your Home's Secret To-Do List: Are You Missing It? — Most new homeowners focus on decorating, but ignoring a basic home maintenance checklist can lead to thousands in unexpected repairs. Learn…
- The Hidden Danger in Your Old Light Switch Wiring (and How to Spot It) — Discover the crucial, often-misunderstood safety hazard hidden in older light switch wiring, where white wires can be live, and learn how t…
- The Secret 5 Bugs Invading Homes (It's Not Just Lanternflies) — Discover the five most common invasive bugs pest professionals treated last year that homeowners often overlook, and learn how to protect y…
- The $20 Trick That Melts Ice Dams (and Saves Your Roof) — Discover a surprisingly simple, budget-friendly method to safely remove ice dams and prevent costly roof damage to your home.
Should you do this yourself?
Answer five quick questions before you start. Safety outranks savings every time.
Your experience with work like this
How high do you have to work?
Does the job involve any of these?
Will it need a permit?
Specialty tools
Free and instant. Educational guidance only — not a quote, inspection, or professional diagnosis.
Estimate your own project cost
National averages are a starting point. Enter your details for a range that fits your house.
Interior paint estimator
- Paint$96
- Supplies (tape, rollers, drop cloth)$35
- Estimated total (DIY)$131
Hiring a pro? Add roughly $1.50–$4.00/sq ft for labor depending on prep work and trim detail.
Educational estimate only — always confirm with written local bids.
What should this project cost?
Enter your project details for a realistic cost range before you call anyone.
Cost depends heavily on which system turns out to be the source.
- Regional adjustment
- National average
- Labor share (typical)
- ~$1,620
- Quotes to collect
- 3 written estimates
Educational estimate based on national averages — not a binding quote. Always confirm with written local estimates.
Before you start
Check the difficulty, permits, and safety risk — then decide whether to call a pro.
Free, no signup required. Estimates are educational guidance, not a quote or an inspection.
Get the print-ready PDF of this guide
A clean, ad-free, printable version you can keep on your phone or pin to the workshop wall. Free with a FixlyGuide account.
- Print-optimized layout
- Tools, materials & every step included
- Saved to your account
This article was independently written by FixlyGuide based on the source topic.
Frequently asked questions
How do I know if my home has lead paint?+
The most reliable way to determine if your home has lead paint is to use an EPA-recognized lead test kit or hire a certified lead inspector. Homes built before 1978 are highly likely to contain lead paint.
Can I renovate safely if my home has lead paint?+
Yes, but it requires strict adherence to lead-safe work practices. This includes meticulous containment, using wet methods, wearing proper personal protective equipment (PPE), and thorough cleanup with a HEPA vacuum and specialized cleaners. If large-scale disturbance is planned, professional abatement is recommended.
What are the health risks of lead dust?+
Lead dust is a serious health hazard, especially for children. It can lead to developmental delays, behavioral problems, learning disabilities, and damage to the brain and nervous system. In adults, it can cause high blood pressure, joint pain, and reproductive problems.
What's the difference between a regular vacuum and a HEPA vacuum for lead dust?+
A regular vacuum or shop vac will simply circulate microscopic lead dust particles back into the air, making the problem worse. A HEPA (High-Efficiency Particulate Air) vacuum is designed with a specialized filter that captures 99.97% of particles 0.3 microns or larger, preventing lead dust from escaping back into the room.
When should I call a professional for lead paint issues?+
You should call a certified lead abatement professional for large-scale renovations, if you are pregnant or have young children, if lead paint is severely deteriorated, or if you are uncomfortable performing the work yourself. They have specialized training and equipment to ensure safe and compliant removal.
Discussion
Loading comments…