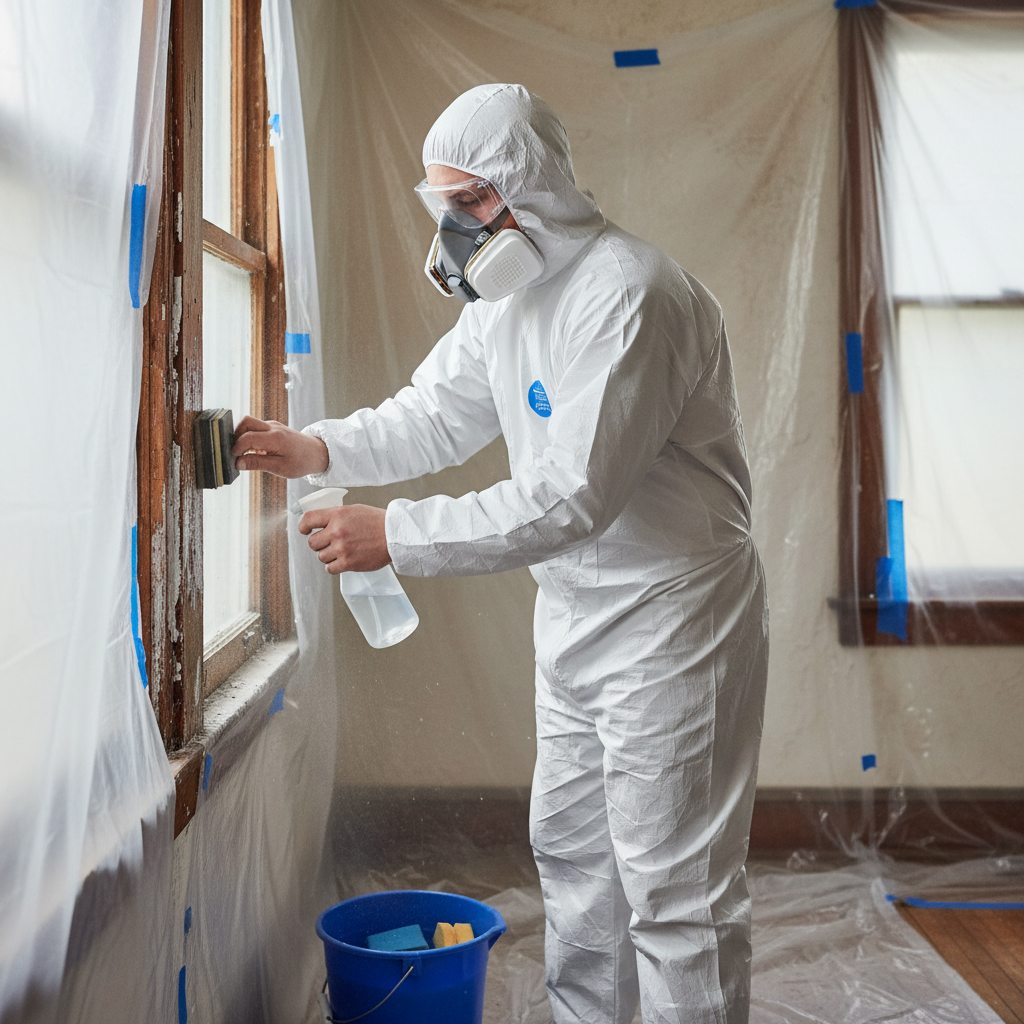
- Test for Lead Present — Confirming the unseen danger.
- Pro Tip: For definitive results, consider sending paint chip samples to an accredited laboratory. This is especially recommended for larger projects.
- If You're Anxious: If testing isn't immediately possible, assume lead paint is present and proceed with full precautions.
Published July 19, 2026Last updated August 17, 2026
Tools & materials you'll need
Affiliate linksAs an Amazon Associate FixlyGuide earns from qualifying purchases — at no extra cost to you. Prices and availability are accurate as of publication and subject to change.
Quick Answer
Before starting any renovation or repair project in a home built before 1978, test for lead paint. If lead is present, use specialized safety procedures like wet sanding, containment, and proper personal protective equipment to prevent the release and spread of hazardous lead dust and chips. Never dry sand, scrape, or use heat guns on suspicious paint, as this creates fine lead dust that is easily inhaled and ingested, posing serious health risks.
The Problem
You've just bought a charming older home, or perhaps you're finally tackling that long-overdue renovation project in your existing pre-1978 house. Excitement builds as you envision new colors, updated trim, or a refreshed kitchen. But there's a hidden danger lurking beneath those layers of paint: lead. For decades, lead was a common additive in household paints, prized for its durability and vibrant color. However, we now know that even small exposures to lead, particularly for children and pregnant women, can cause severe and irreversible health problems, including developmental delays, learning disabilities, and nervous system damage. When intact, lead paint poses minimal risk. The real hazard arises when paint is disturbed—through sanding, scraping, drilling, or demolition. These activities create microscopic lead dust and chips that can become airborne, settle on surfaces, and even be tracked throughout your home, posing a long-term risk to your family.
How It Works
Lead-based paint typically contains lead carbonate, lead sulfate, or lead chromate, among other lead compounds. These compounds were added to paint for various reasons: to speed drying, increase durability, resist moisture, and produce certain colors. Homes built before 1978 are highly likely to contain lead paint, with the probability increasing for homes built before 1960. The 1978 federal ban on lead paint in residential properties marked a critical turning point, but it didn't remove the existing lead paint from millions of homes.
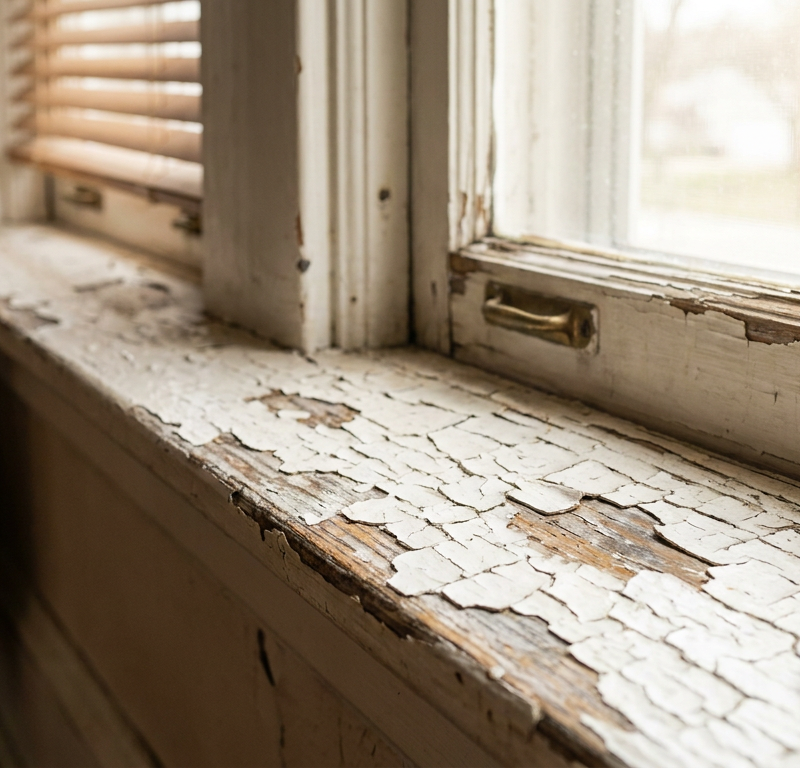
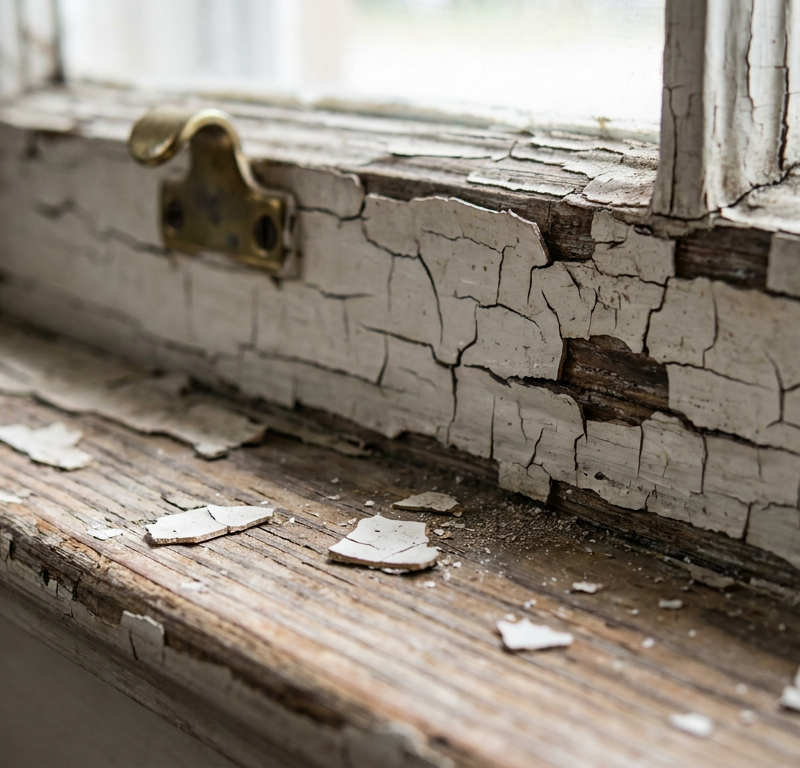
The danger isn't necessarily touching an intact, painted wall. The primary exposure pathway is ingestion or inhalation of lead dust and chips. When paint deteriorates (chalking, peeling, chipping) or is disturbed during renovation, it releases these fine particles. For example, dry sanding a lead-painted window sill can aerosolize lead particles, making them easily breathable. Children are especially vulnerable because they often put their hands or toys in their mouths, and lead dust on floors, windowsills, and play areas can be easily ingested. The human body absorbs lead, and it can accumulate in bones and soft tissues over time, leading to chronic poisoning. There is no safe level of lead exposure, and preventing the release of lead dust is paramount for protecting health during any home repair.
Step-by-Step Fix
Always prioritize testing before disturbing any paint in pre-1978 homes. If lead is present, follow these steps meticulously.
-
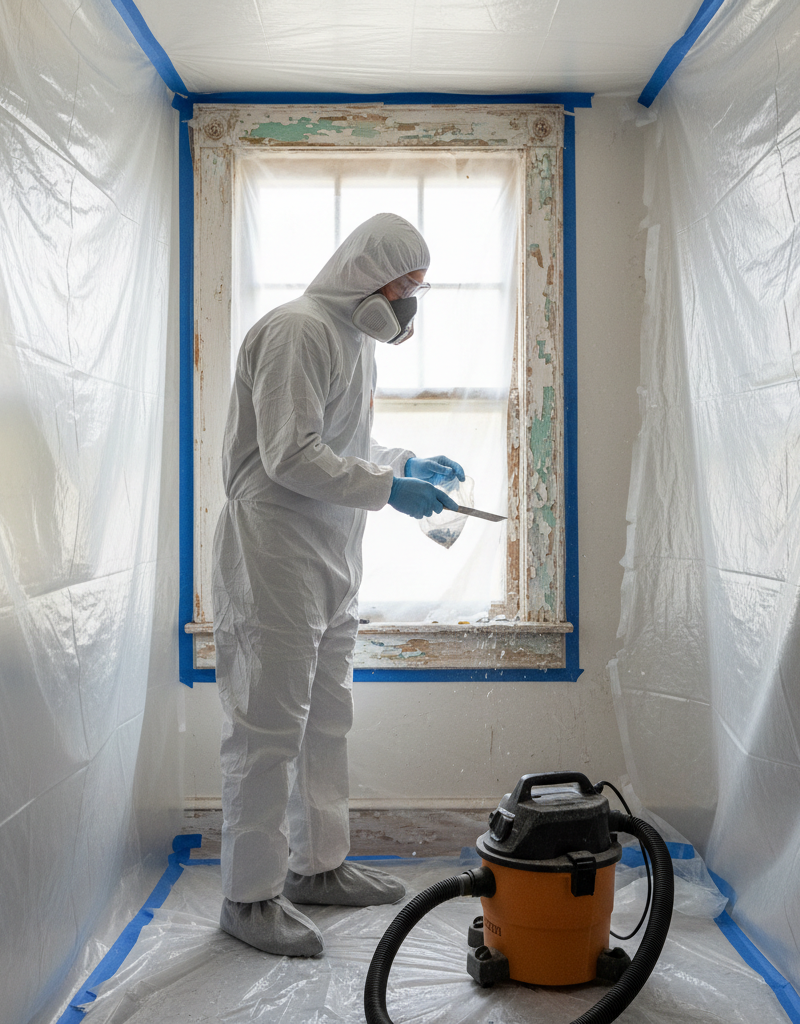
Test for Lead Present — Confirming the unseen danger. Before starting any work, use a reliable lead test kit on multiple painted surfaces you plan to disturb. Follow the manufacturer's instructions carefully. These kits often involve swabbing the area; a color change indicates the presence of lead. Test common problem areas like windows, doorframes, railings, and baseboards.
- Pro Tip: For definitive results, consider sending paint chip samples to an accredited laboratory. This is especially recommended for larger projects.
- If You're Anxious: If testing isn't immediately possible, assume lead paint is present and proceed with full precautions.
-
Clear and Contain the Area — Protecting your home and family. Remove all furniture, rugs, curtains, and personal items from the work area. If items cannot be removed, cover them completely with 6-mil plastic sheeting and seal seams with painter's tape. Close and seal off all heating and cooling vents in the room. Turn off forced-air HVAC systems. Lay down additional 6-mil plastic sheeting on the floor, extending at least 6 feet beyond the work zone. Tape this sheeting to the baseboards, creating a contained workspace.
- Safety First: Ensure children and pets are completely out of the house during containment and all subsequent work.
-
Don Your Personal Protective Equipment (PPE) — Your first line of defense. Before picking up any tools, put on your full PPE: a disposable N100 or P100 respirator, disposable coveralls, disposable gloves (nitrile or latex), and eye protection (goggles, not just safety glasses). Ensure the respirator fits snugly over your nose and mouth.
- Why N100/P100? Standard dust masks are insufficient, as lead particles are too small to be filtered effectively.
-
Isolate the Work Zone — Creating a barrier against lead migration. Use 6-mil plastic sheeting and painter's tape to seal off the work room from the rest of the house. Cover doorways with a zippered plastic containment barrier or overlap two sheets of plastic by several feet, taping one side firmly. This prevents dust from spreading to other areas.
-
Prepare for Wet Methods — Minimizing airborne dust. Lead-safe work practices rely heavily on wet methods. Moisten surfaces with a spray bottle filled with water before scraping or sanding. This significantly reduces the amount of airborne dust. Have a bucket of water and plenty of rags ready for immediate cleanup.
-
Scrape/Sand with Caution — Gentle removal is key. Use a paint scraper or an orbital sander with a HEPA vacuum attachment for paint removal. Avoid aggressive dry scraping or highly abrasive sanding. For delicate areas, wet sand by hand. Always keep the surface damp. Work slowly and methodically, minimizing dust creation.
- NEVER Use: Heat guns (above 1100°F), open-flame torches, power sanders without HEPA attachments, or dry abrasive blasting. These methods create extreme lead hazards.
-
Clean as You Go, Diligently — Constant vigilance against contamination. Throughout the process, regularly mist and wipe down surfaces with damp rags. Collect paint chips and dust in heavy-duty plastic bags. Once a section is complete, thoroughly wet-wipe all surfaces (walls, floors, tools) within the containment area. Use a HEPA vacuum, not a regular shop vac or household vacuum, to clean up fine dust.
-
Dispose of Waste Properly — Protecting the environment and community. Place all used plastic sheeting, disposable coveralls, gloves, rags, and paint chips into heavy-duty plastic bags. Seal the bags tightly with tape. Contact your local waste management facility or health department for proper disposal instructions for lead-contaminated waste. Do not dispose of it with regular household trash.
-
Final Clean-up and Decon — Ensuring an entirely lead-free zone. After removing all visible debris, perform a final detailed clean-up. Wet-wipe all surfaces again, working from top to bottom. Use a second, clean set of damp rags for this final pass. HEPA vacuum again. Carefully remove your PPE inside the containment area, placing disposable items into a sealed waste bag. Shower immediately after leaving the work area.
Common Causes
The primary
Related Articles
Keep troubleshooting with these hand-picked guides from FixlyGuide:
- 7 Inspection Red Flags That Secretly Signal a $20,000 Bill — Don't let your dream home become a money pit. Many buyers and even some inspectors overlook subtle home inspection red flags that lead to f…
- The 12 Checks That Prevent 80% of Costly Home Repairs — Don't wait for a disaster. Our comprehensive monthly home maintenance checklist reveals the surprising, simple tasks that catch small issue…
- The #1 Chainsaw Mistake That Wrecks Your Yard (and Your Back) — Avoid common chainsaw errors that lead to frustration, damage, and unnecessary physical strain.
- 7 Hidden Equity Drains Costing You Thousands Annually — Your home is an asset, but silent problems like minor leaks, poor insulation, and deferred maintenance can drain its value. Discover the se…
- The Secret Power Tool Hiding in Your Garage for a Speedier Clean — Unlock the hidden potential of your cordless drill to tackle stubborn household grime, soap scum, and dirt with specialized cleaning attach…
- The One Shingle Mistake That Creates Roof Leaks (And How to Fix It Fast) — Missing roof shingles after a storm can quickly lead to extensive water damage if not addressed correctly. Learn how to safely inspect and…
Should you do this yourself?
Answer five quick questions before you start. Safety outranks savings every time.
Your experience with work like this
How high do you have to work?
Does the job involve any of these?
Will it need a permit?
Specialty tools
Free and instant. Educational guidance only — not a quote, inspection, or professional diagnosis.
Estimate your own project cost
National averages are a starting point. Enter your details for a range that fits your house.
Interior paint estimator
- Paint$96
- Supplies (tape, rollers, drop cloth)$35
- Estimated total (DIY)$131
Hiring a pro? Add roughly $1.50–$4.00/sq ft for labor depending on prep work and trim detail.
Educational estimate only — always confirm with written local bids.
What should this project cost?
Enter your project details for a realistic cost range before you call anyone.
Cost depends heavily on which system turns out to be the source.
- Regional adjustment
- National average
- Labor share (typical)
- ~$1,620
- Quotes to collect
- 3 written estimates
Educational estimate based on national averages — not a binding quote. Always confirm with written local estimates.
Before you start
Check the difficulty, permits, and safety risk — then decide whether to call a pro.
Free, no signup required. Estimates are educational guidance, not a quote or an inspection.
Get the print-ready PDF of this guide
A clean, ad-free, printable version you can keep on your phone or pin to the workshop wall. Free with a FixlyGuide account.
- Print-optimized layout
- Tools, materials & every step included
- Saved to your account
This article was independently written by FixlyGuide based on the source topic.
Frequently asked questions
How do I know if my paint contains lead?+
The most reliable way is to use a lead test kit (available at hardware stores) or to send paint chip samples to an accredited laboratory. For homes built before 1978, it's safest to assume lead paint is present if you plan to disturb painted surfaces.
What are the health risks of lead paint?+
Lead exposure can cause serious health problems, especially for children and pregnant women. These include developmental delays, learning disabilities, nervous system damage, and behavioral problems. There is no safe level of lead exposure.
Can I remove lead paint myself?+
Yes, but only if you follow strict lead-safe work practices, including containment, wet scraping/sanding, proper personal protective equipment (N100/P100 respirator), and thorough cleanup with a HEPA vacuum. For large or complex projects, it's often safer to hire a lead-certified professional.
What should I do if I accidentally disturb lead paint?+
Stop work immediately. Wet-wipe all surfaces thoroughly with damp rags, collect any chips, and dispose of them in a sealed plastic bag. HEPA vacuum the area. Ventilate the space and keep children and pets away until a thorough cleanup is complete. Consider professional cleaning and testing if you're concerned about significant contamination.
Are lead paint test kits accurate?+
Over-the-counter lead paint test kits can provide a quick indication, but their accuracy varies. For definitive results or before extensive renovations, sending paint chip samples to an EPA-recognized lab is recommended.
Discussion
Loading comments…