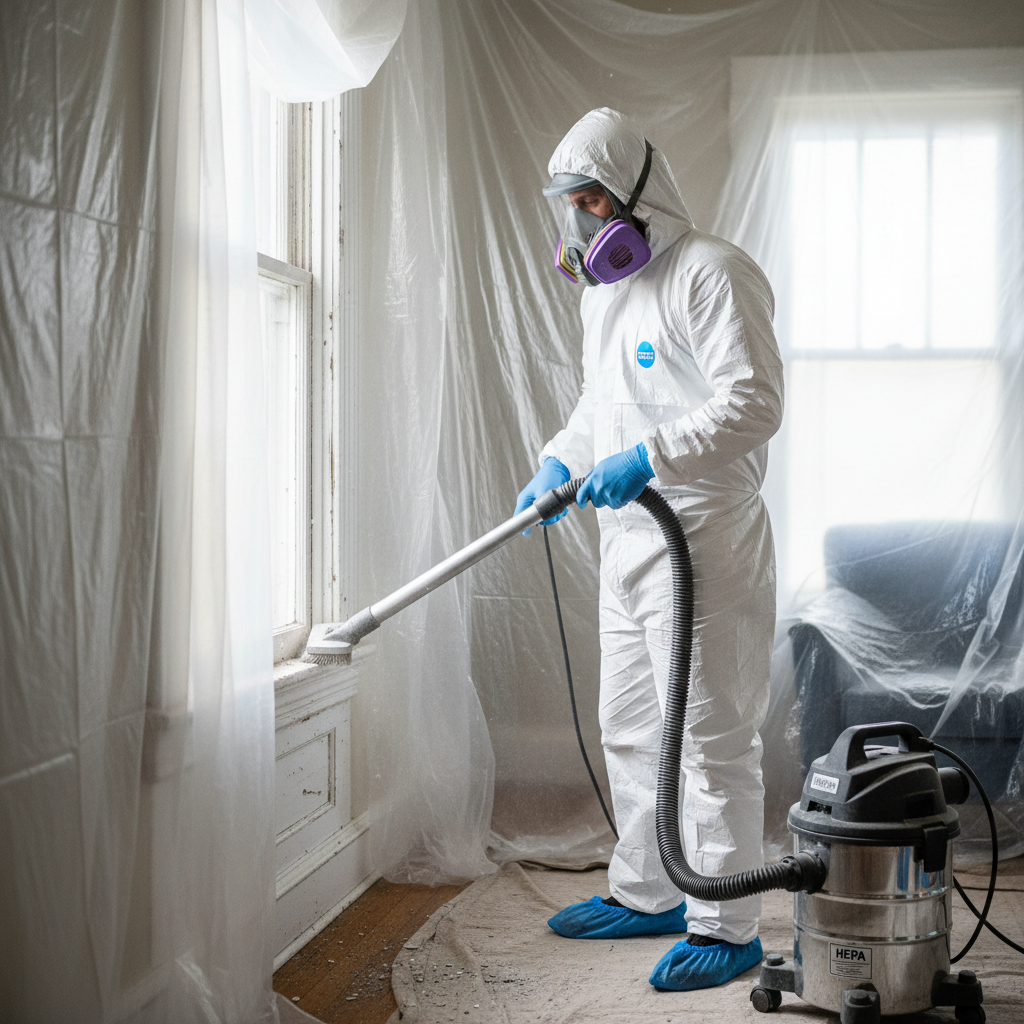
- Clear out all furniture, rugs, and anything that can't be easily cleaned. If items can't be removed, cover them with two layers of 6-mil plastic sheeting, taped securely.
- Close and seal off all heating and cooling vents with plastic and painter's tape.
- Turn off forced-air heating and air conditioning systems to prevent dust circulation.
- Lay down two layers of 6-mil plastic sheeting on the floor, extending at least 6 feet beyond the work area in all directions. Tape the plastic tightly to the walls.
Published July 21, 2026Last updated August 17, 2026
Tools & materials you'll need
Affiliate linksAs an Amazon Associate FixlyGuide earns from qualifying purchases — at no extra cost to you. Prices and availability are accurate as of publication and subject to change.
Quick Answer
If your home was constructed before 1978, there's a significant likelihood that some painted surfaces contain lead-based paint. While intact lead paint generally poses little risk, any activity that disturbs these surfaces—such as sanding, scraping, drilling, or demolition—can release microscopic lead dust and chips into your home environment. This dust is a serious health hazard, especially for children and pregnant women. The safest approach is to test suspect surfaces before beginning any renovation, and if lead is present, to meticulously follow lead-safe work practices including proper containment, personal protective equipment, and specialized cleanup techniques, or to hire a certified lead-safe contractor.
The Problem
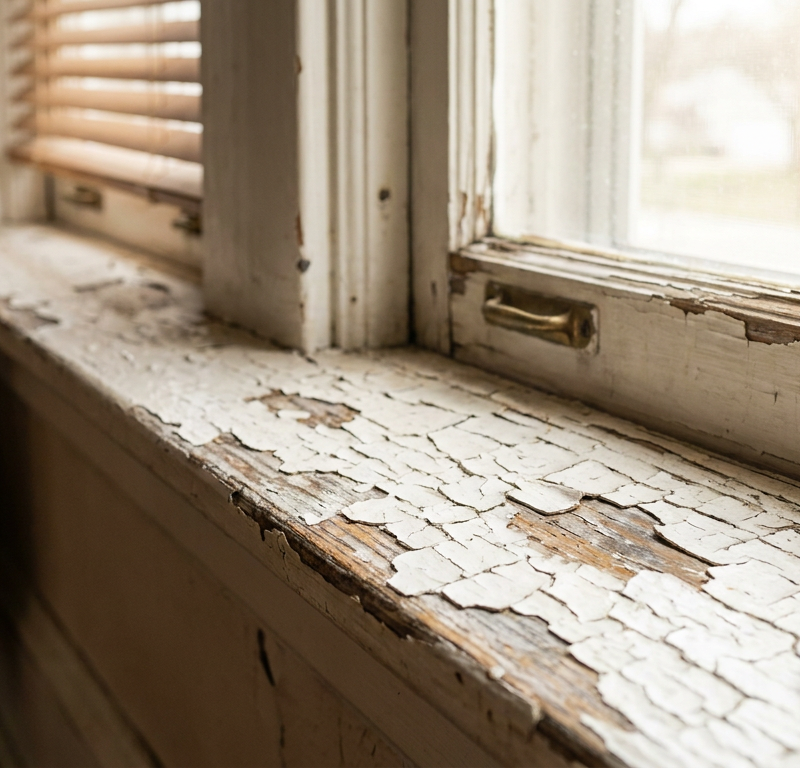
Imagine invisible dust, smaller than the eye can see, settling on your floors, toys, and food. This is the silent threat of lead-contaminated dust, unleashed when once-stable lead paint is disturbed. For homes built before 1978, lead paint was common, used for its durability and vibrant colors. The real danger isn't static, covered lead paint. It’s what happens when that paint chips, peels, or is actively disrupted during a DIY repair or renovation project. Activities like scraping old paint from a window sill, sanding down a doorframe, or even cutting into a wall can aerosolize lead particles. These particles then become airborne, can be inhaled, or settle on surfaces, where they can be ingested—a particular risk for young children who often put their hands and objects in their mouths. Lead poisoning, even at low levels, can lead to serious developmental problems in children, including learning disabilities, behavioral issues, and reduced IQ. In adults, it can cause high blood pressure, kidney damage, and reproductive problems. The insidious nature of lead is that its effects are often irreversible, making prevention paramount.
How It Works
Lead-based paint typically consists of lead carbonate or lead sulfate pigments mixed into an oil-based binder. Before its ban for residential use in 1978, lead was prized for its ability to speed drying, increase durability, and resist moisture. When this paint is intact and in good condition, the lead is encapsulated within the paint film, preventing its release. However, over time, paint can naturally deteriorate, chipping and flaking off, especially in high-friction areas like windows and doors. More significantly, renovating or repairing painted surfaces can mechanically break down the paint film. For instance, sanding creates fine dust particles, each potentially carrying lead. Scraping generates larger chips. Drilling or cutting creates both dust and debris. These particles are not easily contained. They can drift through the air, contaminating surfaces far from the work area. Standard vacuum cleaners, designed for typical household dust, are ineffective against lead dust and can even spread it further by blowing fine particles through their exhaust filters. Lead dust needs specialized HEPA-filtered vacuums to safely capture and remove it without re-releasing it into the air. The chemical stability of lead means that once it's in the environment – in dust, soil, or water – it persists indefinitely, making thorough and specialized cleanup essential for long-term safety.
Step-by-Step Fix
1. Test Before You Touch – Before starting any project on painted surfaces in a pre-1978 home, assume lead paint is present and test for it. DIY test kits are available, but professional testing offers the most accurate results.
- Tool: Lead test swabs or a licensed lead risk assessor.
- If the test is positive, proceed with extreme caution or consider professional abatement.
2. Prepare the Work Area – Isolate the work area completely to prevent lead dust from spreading to other parts of your home.
- Clear out all furniture, rugs, and anything that can't be easily cleaned. If items can't be removed, cover them with two layers of 6-mil plastic sheeting, taped securely.
- Close and seal off all heating and cooling vents with plastic and painter's tape.
- Turn off forced-air heating and air conditioning systems to prevent dust circulation.
- Lay down two layers of 6-mil plastic sheeting on the floor, extending at least 6 feet beyond the work area in all directions. Tape the plastic tightly to the walls.
3. Dress for Protection – Personal protective equipment (PPE) is crucial for safeguarding yourself from lead exposure.
- Material: Disposable coveralls, N-100 or P-100 respirator (NOT a simple paper dust mask), disposable gloves, shoe covers.
- Wear all PPE before entering the contained work area. Your respirator should be fit-tested to ensure a proper seal.
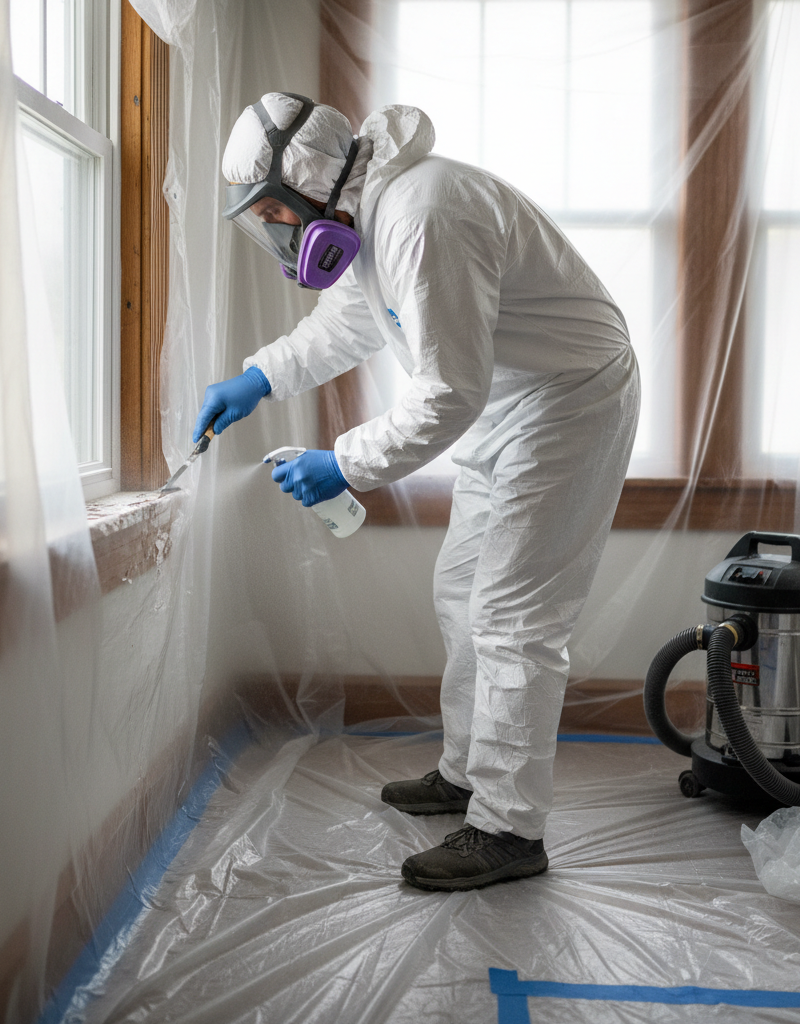
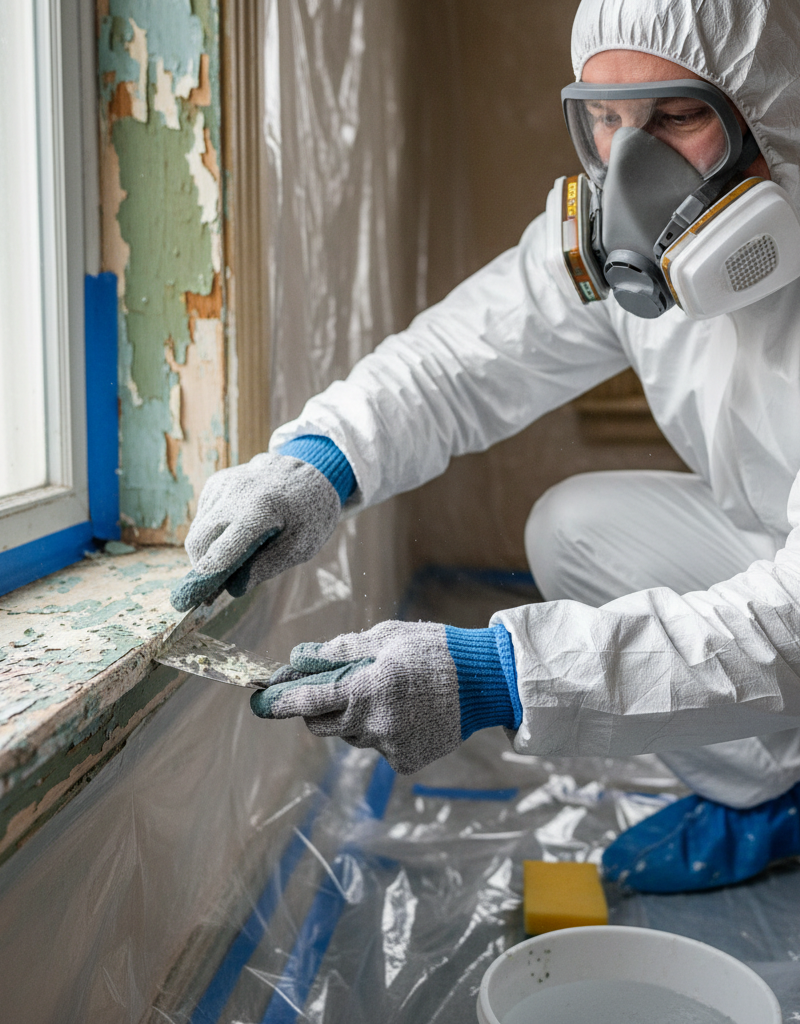
4. Use Lead-Safe Work Practices – Minimize dust generation. Avoid power sanding, dry scraping, or using heat guns above 1,100°F (593°C).
- Tools: Wet/dry sandpaper, chemical paint stripper, HEPA-filtered wet/dry vacuum.
- When scraping or sanding, mist the surface with water to keep dust down. Collect all paint chips and debris immediately in heavy-duty plastic bags.
- For minor repairs, consider encapsulation (painting over the lead paint with a specialized sealant) rather than removal.
- If chemical strippers are used, ensure adequate ventilation and dispose of waste properly.
5. Contain Debris Properly – All lead-contaminated waste must be securely contained.
- Material: Heavy-duty 6-mil plastic bags, duct tape.
- Place all plastic sheeting, coveralls, gloves, and spent materials into heavy-duty 6-mil plastic bags. Seal the bags with duct tape.
- Check local regulations for lead-waste disposal. Often, small amounts can be disposed of as household hazardous waste.
6. Perform Meticulous Cleanup (Two-Stage Process) – This is critical to ensure no lead dust remains.
- Tools: HEPA-filtered vacuum, commercial lead-specific cleaning solution or mix 1 cup of TSP (trisodium phosphate) per gallon of water, clean cloths.
- First Clean: Use a HEPA-filtered vacuum to thoroughly vacuum all surfaces (walls, floors, windowsills). Do not sweep with a broom, as this will aerosolize dust.
- Second Clean: Wet-wipe all surfaces repeatedly using the cleaning solution and fresh cloths until no residue appears on the cloth. Rinse with clean water.
- Vacuum again with the HEPA vacuum after wet wiping, if surfaces have fully dried.
7. Clean Your PPE (and Yourself) – Don
Related Articles
Keep troubleshooting with these hand-picked guides from FixlyGuide:
- The Hidden Reason Your GFCI Trips (It's Not Always a Faulty Outlet) — A continuously tripping GFCI outlet is a critical safety warning, often indicating moisture, a faulty appliance, or a wiring problem that r…
- The Secret to Lush Raised Beds? It's Not Just About How You Water — Smart irrigation for raised garden beds isn't just about automation; it's about delivering the right amount of water precisely when your pl…
- The 3-Ingredient Secret to Sparking Clean Carpets (That Most Don't Know) — Unlock the secret to brilliantly clean carpets with a simple, potent three-ingredient homemade solution that effectively tackles stains and…
- The 9 Sneaky Filters Stealing Your Home's Efficiency (And How to Fix It) — Unseen or neglected filters throughout your home can secretly inflate utility bills, degrade air quality, and lead to expensive appliance b…
- The Hidden Reason Your GFCI Trips (It’s Not Always a Bad Outlet) — A tripping GFCI outlet is a safety mechanism doing its job, often indicating a problem like moisture, a faulty appliance, or a wiring issue…
- The #1 Mistake Homeowners Make When Caulking a Bathroom Sink (And How to Fix It) — Discover the most common caulk mistake homeowners make around bathroom sinks and follow simple steps to achieve a lasting, watertight seal.
Should you do this yourself?
Answer five quick questions before you start. Safety outranks savings every time.
Your experience with work like this
How high do you have to work?
Does the job involve any of these?
Will it need a permit?
Specialty tools
Free and instant. Educational guidance only — not a quote, inspection, or professional diagnosis.
Estimate your own project cost
National averages are a starting point. Enter your details for a range that fits your house.
Interior paint estimator
- Paint$96
- Supplies (tape, rollers, drop cloth)$35
- Estimated total (DIY)$131
Hiring a pro? Add roughly $1.50–$4.00/sq ft for labor depending on prep work and trim detail.
Educational estimate only — always confirm with written local bids.
What should this project cost?
Enter your project details for a realistic cost range before you call anyone.
Cost depends heavily on which system turns out to be the source.
- Regional adjustment
- National average
- Labor share (typical)
- ~$1,620
- Quotes to collect
- 3 written estimates
Educational estimate based on national averages — not a binding quote. Always confirm with written local estimates.
Before you start
Check the difficulty, permits, and safety risk — then decide whether to call a pro.
Free, no signup required. Estimates are educational guidance, not a quote or an inspection.
This article was independently written by FixlyGuide based on the source topic.
Frequently asked questions
How do I know if my home has lead-based paint?+
The most definitive way is to have your home tested by a lead-certified professional. You can also use DIY lead test kits, but professional testing is more accurate. Assume any paint in a home built before 1978 contains lead until proven otherwise.
Is it safe to paint over lead paint?+
Yes, encapsulating intact lead paint with a new layer of non-lead paint or a specialized sealant is generally considered a safe method for managing lead paint, provided the underlying surface is stable and not chipping or peeling. This is often safer than attempting removal.
What kind of respirator do I need for lead paint work?+
You need at least an N-100 or P-100 rated respirator, which filters out at least 99.97% of airborne particles. Simple paper dust masks are not sufficient and will not protect you from lead dust.
How do I dispose of lead paint chips and debris?+
Collect all lead-contaminated waste—paint chips, plastic sheeting, used cleaning cloths, and PPE—in heavy-duty 6-mil plastic bags. Seal them tightly with duct tape. Check with your local waste management facility or health department for specific regulations on disposing of hazardous lead waste in your area. Small quantities are often accepted as household hazardous waste.
Discussion
Loading comments…