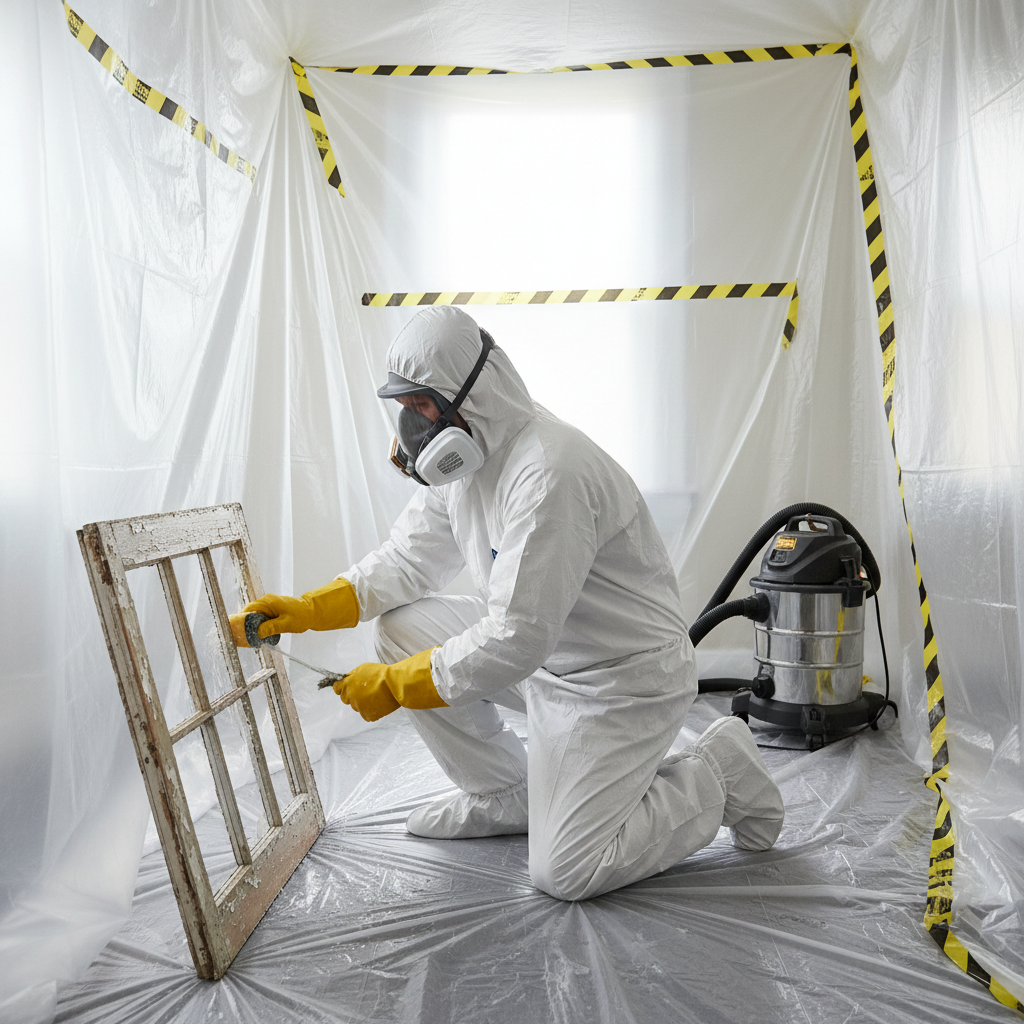
- Wear disposable coveralls or old clothing that can be bagged and laundered separately (or discarded) after work.
- Use an N100 or P100 respirator mask, which is designed to filter out very fine particles, including lead dust. A simple dust mask is NOT adequate.
- Wear disposable gloves, safety glasses, and shoe covers. Change gloves frequently if they become torn or heavily contaminated.
General remodeling · Renovation planning
| Project category | General remodeling |
|---|---|
| Problem type | Renovation planning |
| Trade required | General contracting |
| Urgency | Planned project |
| Safety risk | Low safety risk |
| DIY suitability | Pro recommended |
| Cost category | Major investment |
| Typical timeline | Design and permitting often 2–4 months before work starts |
| Contractor type | General contractor |
Repair option
Phase the work and fix the building envelope first.
Replacement option
Full renovation with permits, design, and a general contractor.
Common causes
- Space no longer fits how the household lives
- Resale preparation
- Deferred maintenance stacking up
Relevant tools:project cost estimatorcompare quoteshome improvement material prices
Published July 23, 2026Last updated August 17, 2026
Tools & materials you'll need
Affiliate linksAs an Amazon Associate FixlyGuide earns from qualifying purchases — at no extra cost to you. Prices and availability are accurate as of publication and subject to change.
Quick Answer
Lead paint is a significant hazard in homes built before 1978. The danger primarily arises when renovation activities like sanding, scraping, or drilling disturb the paint, creating fine, invisible lead dust. This dust can be inhaled or ingested, leading to severe health problems, particularly in children and pregnant women. Proper testing, containment, and cleanup are crucial for safe DIY work.
The Problem
Imagine undertaking a seemingly simple DIY project—sanding an old window frame or drilling into a wall—only to inadvertently release a silent, invisible toxin into your home. This is the insidious danger of lead-based paint. While intact lead paint, undisturbed and in good condition, generally poses a low risk, the moment you begin to scrape, sand, drill, or demolish, you shatter that safety. Microscopic lead particles, too small to see, become airborne or settle on surfaces. These particles can be inhaled, ingested by putting contaminated hands or objects in the mouth, or transferred throughout your home on clothing and shoes. The health consequences of lead exposure are severe and can include developmental delays, learning disabilities, behavioral problems, kidney damage, and nervous system damage, with children being particularly vulnerable due to their developing bodies.
How It Works
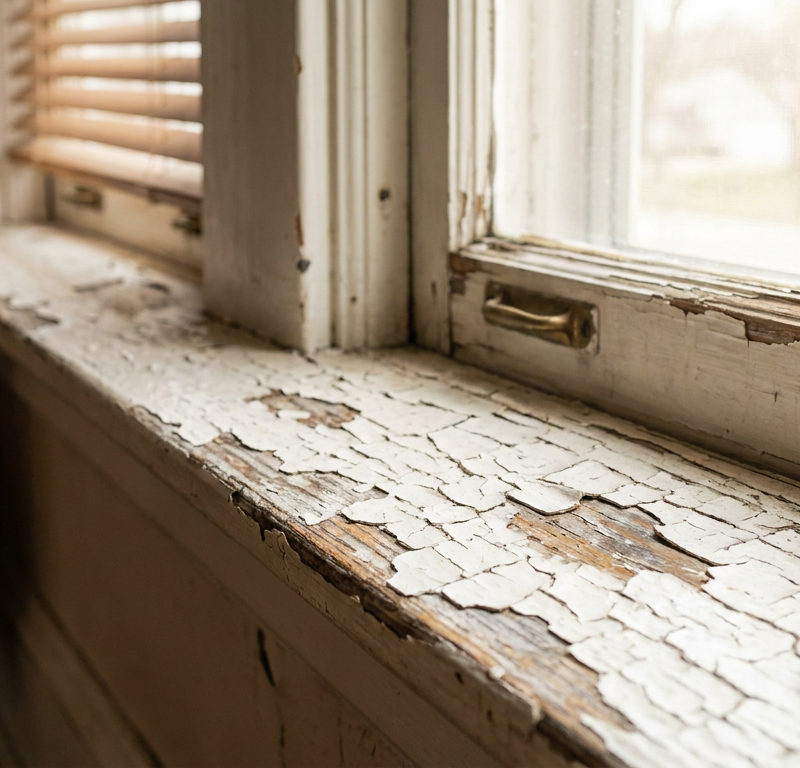
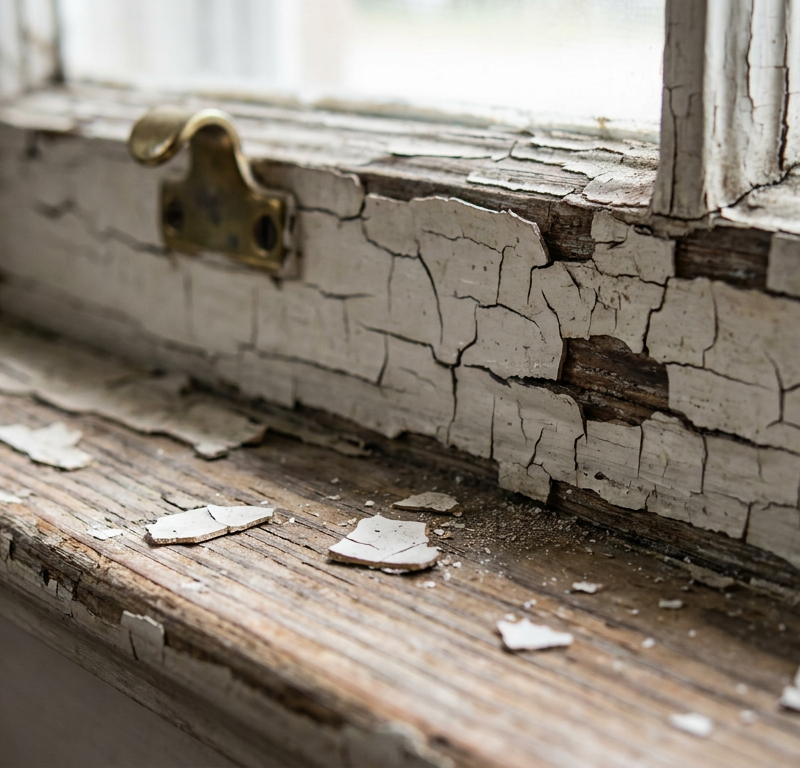
Lead was a common additive in household paints until its ban for residential use in 1978. Its inclusion made paint more durable, vibrant, and resistant to moisture. When this paint ages, it can chip, crack, or chalk, but the real threat emerges when it's physically disturbed. The act of sanding creates a fine, almost imperceptible dust cloud. Scraping dislodges tiny flakes and particles. Drilling generates a plume of fine powder. Even opening and closing an old window can cause friction that grinds lead paint into dust that settles on the sill. This lead-contaminated dust can remain airborne for hours or even days, slowly settling on floors, furniture, toys, and other surfaces over time. Once settled, it's easily stirred up again by normal household activities like walking or vacuuming.
Lead, once ingested or inhaled, isn't easily expelled by the body. It accumulates in the bones, blood, and soft tissues over time, even with low-level exposure. The body mistakes lead for calcium, incorporating it into bones where it can be stored for decades. During periods of stress, pregnancy, or bone remodeling, lead can be released back into the bloodstream, posing a continuous internal threat. Children's developing nervous systems and higher absorption rates make them especially susceptible to harm, with even small amounts of lead capable of causing irreversible damage. Understanding this mechanism underscores why preventing dust generation and thorough cleanup are paramount in any renovation involving older paint.
Step-by-Step Fix
1. Test Before You Touch—Always assume paint in homes built before 1978 contains lead until proven otherwise.
- Use a readily available lead paint test kit from a hardware store for a quick initial screening. These kits are often qualitative (yes/no) and provide an immediate, though not always definitive, answer. Follow the kit instructions meticulously. Test multiple painted surfaces, as different layers or areas might have different paint types.
- For a more accurate and legally defensible result, consider professional lead testing. A certified lead inspector can take samples and send them to an accredited lab, providing precise data on lead levels.
2. Prepare Your Work Area—Create an isolation zone to prevent contamination.
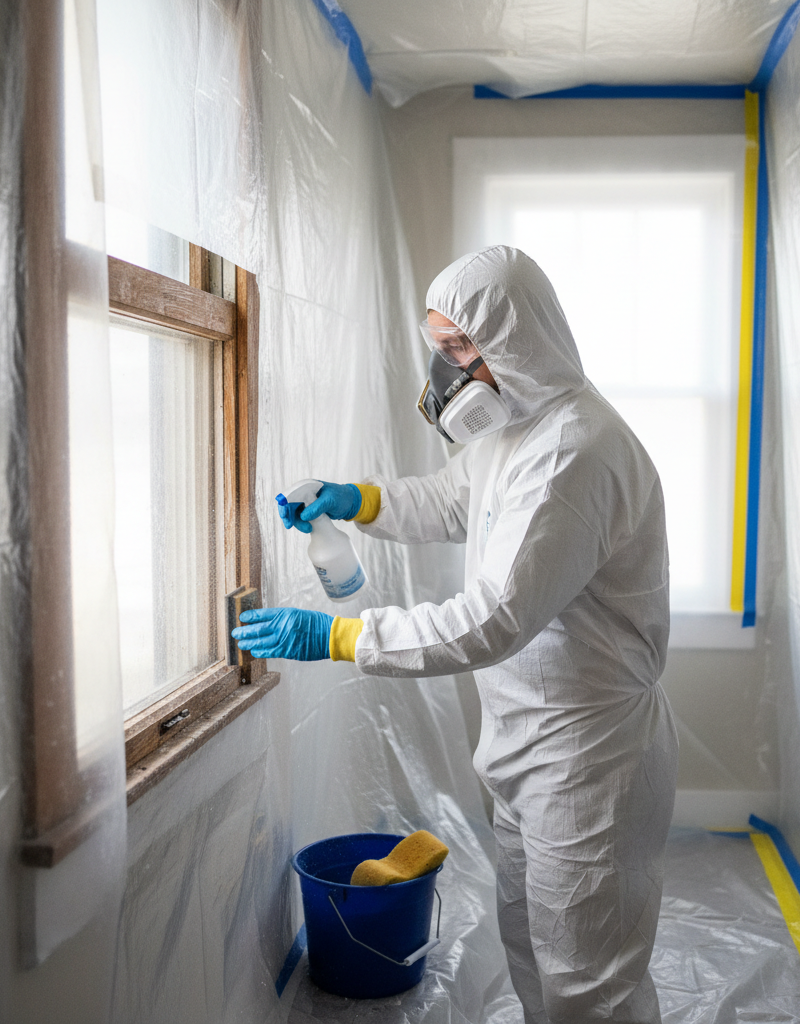
- Remove all furniture, rugs, curtains, and personal items from the room. If items cannot be removed, cover them completely with heavy-gauge plastic sheeting and seal with painter's tape.
- Turn off forced-air heating and air conditioning systems to prevent dust from circulating throughout the house. Close and seal all vents in the work area with plastic and tape. Close all doors and windows except for one designated entry point.
- Lay down two layers of 6-mil plastic sheeting on the floor, extending at least 6 feet beyond your work area. Tape the edges securely to the baseboards, creating a contained environment.
3. Gear Up for Safety—Protect yourself from inhaling or ingesting lead particles.
- Wear disposable coveralls or old clothing that can be bagged and laundered separately (or discarded) after work.
- Use an N100 or P100 respirator mask, which is designed to filter out very fine particles, including lead dust. A simple dust mask is NOT adequate.
- Wear disposable gloves, safety glasses, and shoe covers. Change gloves frequently if they become torn or heavily contaminated.
4. Minimize Dust Generation—Choose your tools and techniques wisely.
- Avoid power sanding, dry scraping, or using heat guns above 1100°F, as these methods generate large amounts of hazardous dust and fumes.
- Opt for wet sanding techniques (using abrasive sponges with water) or chemical strippers designed for lead paint removal. Always test chemical strippers in an inconspicuous area first and ensure adequate ventilation.
- When drilling, use a drill with a HEPA-filtered vacuum attachment to capture dust at the source. For minor repairs, scoring with a utility knife and carefully prying can reduce airborne dust.
5. Contain and Collect Debris—Prevent lead dust from spreading during work.
- Keep a spray bottle filled with water handy to mist surfaces as you work, helping to suppress dust.
- Regularly collect paint chips and dust into heavy-duty plastic bags using a HEPA-filtered vacuum. Do not use a standard household vacuum, as it will simply exhaust lead dust back into the air.
- Use drop cloths and plastic sheeting under the immediate work area to collect any falling debris. Fold these carefully inward to contain particles before disposal.
6. Clean Up Thoroughly—A multi-stage cleaning process is essential.
- After removing all larger debris, vacuum all surfaces (walls, floors, windowsills) with a HEPA-filtered vacuum.
- Wet-wipe all surfaces with a solution of household detergent and water. Use disposable wipes or cloths, changing them frequently. Work from top to bottom, cleaning walls, then windows, then floors.
- Repeat the wet-wiping process at least once, or until no visible dust or residue remains on a clean white cloth. Dispose of all cleaning materials, plastic sheeting, and protective gear as lead-contaminated waste.
7. Dispose of Waste Safely—Treat lead waste as hazardous material.
- Double-bag all lead-contaminated waste—paint chips, dust, plastic sheeting, used rags, and protective gear—in heavy-duty plastic bags. Seal the bags securely with strong tape.
- Contact your local waste management facility or health department for specific instructions on disposing of lead-based paint waste in your area. Regulations vary, and improper disposal can lead to fines and environmental contamination.
8. Post-Renovation Cleaning & Testing—Ensure your home is truly clean.
- Perform a final, meticulous HEPA vacuuming and wet-wiping of the entire work area and adjacent spaces.
- Consider hiring a lead abatement professional to perform a post-renovation lead dust clearance test. This involves taking dust wipe samples that are analyzed by a lab to ensure lead levels are below federal standards. This is the only way to be truly confident your home is safe.
Common Causes
- Age of Home: Homes built before 1978 are the primary concern, as lead paint was widely used during that period. The older the home, the higher the likelihood of lead paint being present.
- Friction Surfaces: Areas subject to wear and tear, like windows and doorframes, often generate lead dust as paint rubs against itself or adjacent surfaces.
- Impact Surfaces: Baseboards, stairs, and railings can be chipped or damaged, releasing lead paint particles into the environment.
- Improper Renovation Practices: Dry scraping, power sanding, and using conventional heat guns on lead paint without proper containment are the leading causes of widespread lead contamination.
- Deteriorating Paint: Peeling, chipping, or chalking paint, even if undisturbed by renovation, can release lead particles over time, especially in high-traffic areas or areas exposed to weather.
Common Mistakes
- Assuming No Lead: Many homeowners neglect to test for lead, assuming their specific paint isn't lead-based or that
Related Articles
Keep troubleshooting with these hand-picked guides from FixlyGuide:
- 7 Inspection Red Flags That Secretly Signal a $20,000 Bill — Don't let your dream home become a money pit. Many buyers and even some inspectors overlook subtle home inspection red flags that lead to f…
- The 12 Checks That Prevent 80% of Costly Home Repairs — Don't wait for a disaster. Our comprehensive monthly home maintenance checklist reveals the surprising, simple tasks that catch small issue…
- The Secret Window AC Trick That Slashes Your Summer Electric Bill By 30% — Mastering simple window AC maintenance can significantly reduce your cooling costs and extend the life of your unit, often by more than 30%.
- The 7 Critical Household Filters You're Forgetting (And What They Cost You) — Neglected household filters are quietly costing you money, diminishing air quality, and paving the way for expensive repairs. Discover the…
- 7 Hidden Equity Drains Costing You Thousands Annually — Your home is an asset, but silent problems like minor leaks, poor insulation, and deferred maintenance can drain its value. Discover the se…
- The Secret Culprit Behind Your Dishwasher's Standing Water (It's Not Always a Clog) — Don't assume a clog is the only reason your dishwasher isn't draining; often, the fix is simpler than you think.
Should you do this yourself?
Answer five quick questions before you start. Safety outranks savings every time.
Your experience with work like this
How high do you have to work?
Does the job involve any of these?
Will it need a permit?
Specialty tools
Free and instant. Educational guidance only — not a quote, inspection, or professional diagnosis.
Estimate your own project cost
National averages are a starting point. Enter your details for a range that fits your house.
Interior paint estimator
- Paint$96
- Supplies (tape, rollers, drop cloth)$35
- Estimated total (DIY)$131
Hiring a pro? Add roughly $1.50–$4.00/sq ft for labor depending on prep work and trim detail.
Educational estimate only — always confirm with written local bids.
What should this project cost?
Enter your project details for a realistic cost range before you call anyone.
Cost depends heavily on which system turns out to be the source.
- Regional adjustment
- National average
- Labor share (typical)
- ~$1,620
- Quotes to collect
- 3 written estimates
Educational estimate based on national averages — not a binding quote. Always confirm with written local estimates.
Before you start
Check the difficulty, permits, and safety risk — then decide whether to call a pro.
Free, no signup required. Estimates are educational guidance, not a quote or an inspection.
This article was independently written by FixlyGuide based on the source topic.
Frequently asked questions
How do I know if my paint contains lead?+
The most effective way is to use a home test kit for a quick check or hire a certified lead inspector for professional sampling and lab analysis. Always assume paint in homes built before 1978 contains lead.
What is the safest way to remove lead paint?+
The safest methods involve minimizing dust generation through wet sanding, chemical stripping, or careful encapsulation, combined with strict containment, personal protective equipment, and a HEPA-filtered vacuum.
Can I just paint over lead paint?+
Encapsulating lead paint by painting over it is an option for intact, non-peeling surfaces. This creates a barrier but does not remove the lead. It's a temporary solution and not suitable for friction or impact surfaces. The lead paint underneath remains a hazard if disturbed later.
How do I dispose of lead paint waste?+
Lead paint waste must be treated as hazardous material. Double-bag all contaminated debris in heavy-duty plastic bags and contact your local waste management or health department for specific disposal instructions in your area.
Discussion
Loading comments…