Tools & materials you'll need
Affiliate linksAs an Amazon Associate FixlyGuide earns from qualifying purchases — at no extra cost to you. Prices and availability are accurate as of publication and subject to change.
Quick Answer
Proper wall preparation before painting is essential for a durable, blemish-free finish. This involves cleaning, patching, sanding, and priming your walls to create a smooth, unified surface that accepts paint evenly and prevents future peeling or cracking. Skipping even one step can compromise the final look and longevity of your paint job.
The Problem
You've spent hours picking the perfect paint color, invested in quality brushes, and cleared your schedule for a weekend of transforming your home. But if you dive straight into painting without adequately preparing your walls, you're setting yourself up for disappointment. Common issues like paint cracking, peeling, uneven finishes, visible patches, and stubborn stains bleeding through new coats are almost always traceable back to insufficient wall preparation. Even a seemingly clean wall can harbor dust, grease, or dirt that prevents paint from adhering properly, leading to frustrating and often costly re-dos. The problem isn't just aesthetic; poorly adhered paint is less durable and more susceptible to damage.
How It Works
Think of your wall as a canvas. Just as an artist prepares a canvas with gesso to ensure paint adheres smoothly and colors appear vibrant, you need to prepare your walls. Paint adhesion relies on a clean, dry, stable, and uniformly porous surface. When you clean a wall, you remove contaminants like dust, grime, and oils that create a barrier between the paint and the substrate. These barriers can cause the paint to literally slide off, or worse, dry with an inconsistent texture. Patching fills holes and cracks, restoring the wall's structural integrity and creating an even plane. Sanding, often overlooked, performs two critical functions: it smooths out patched areas and rough spots, and it microscopically etches the existing surface, creating tiny valleys and peaks that provide teeth for the new paint to grip. Without this mechanical grip, paint struggles to bond permanently. Finally, primer acts as a bonding agent, a transition layer that seals porous surfaces (like new drywall or patched areas) and blocks stains, ensuring a uniform surface absorption. This uniform absorption prevents "flashing" – blotchy areas where the paint appears duller or shinier due to varying rates of absorption. Primer also provides a consistent color base, improving the final paint color's vibrancy and requiring fewer topcoats. Each step builds upon the last, creating an optimal foundation for a beautiful, long-lasting finish.
Step-by-Step Fix
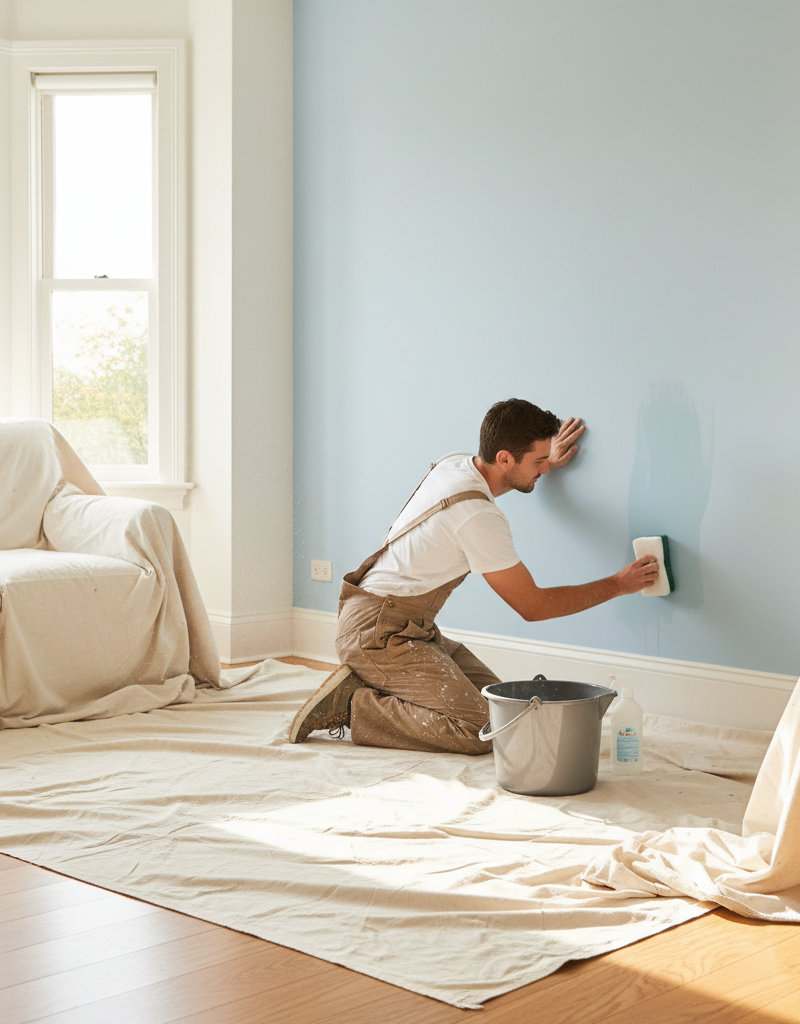
1. Clear the Room and Protect Your Floors & Furniture — Begin by moving all furniture out of the room. For larger items, push them to the center and cover them with plastic sheeting. Spread drop cloths liberally across the entire floor area, securing edges with painter's tape to prevent slipping and accidental drips.
- Tool Tip: Use canvas drop cloths for better slip resistance and durability, especially in high-traffic areas where you'll be moving ladders.
2. Remove Wall Fixtures and Mask Off Areas — Carefully remove all light switch covers, outlet covers, wall art, and curtain rods. Store screws and small hardware in labeled bags to avoid loss. Apply painter's tape meticulously along baseboards, doorframes, window frames, and any crown molding. Press the tape firmly to create a sharp line and prevent paint bleed.
- Safety Note: For outlets and switches, turn off power at the circuit breaker before removing covers to prevent electrical shock.
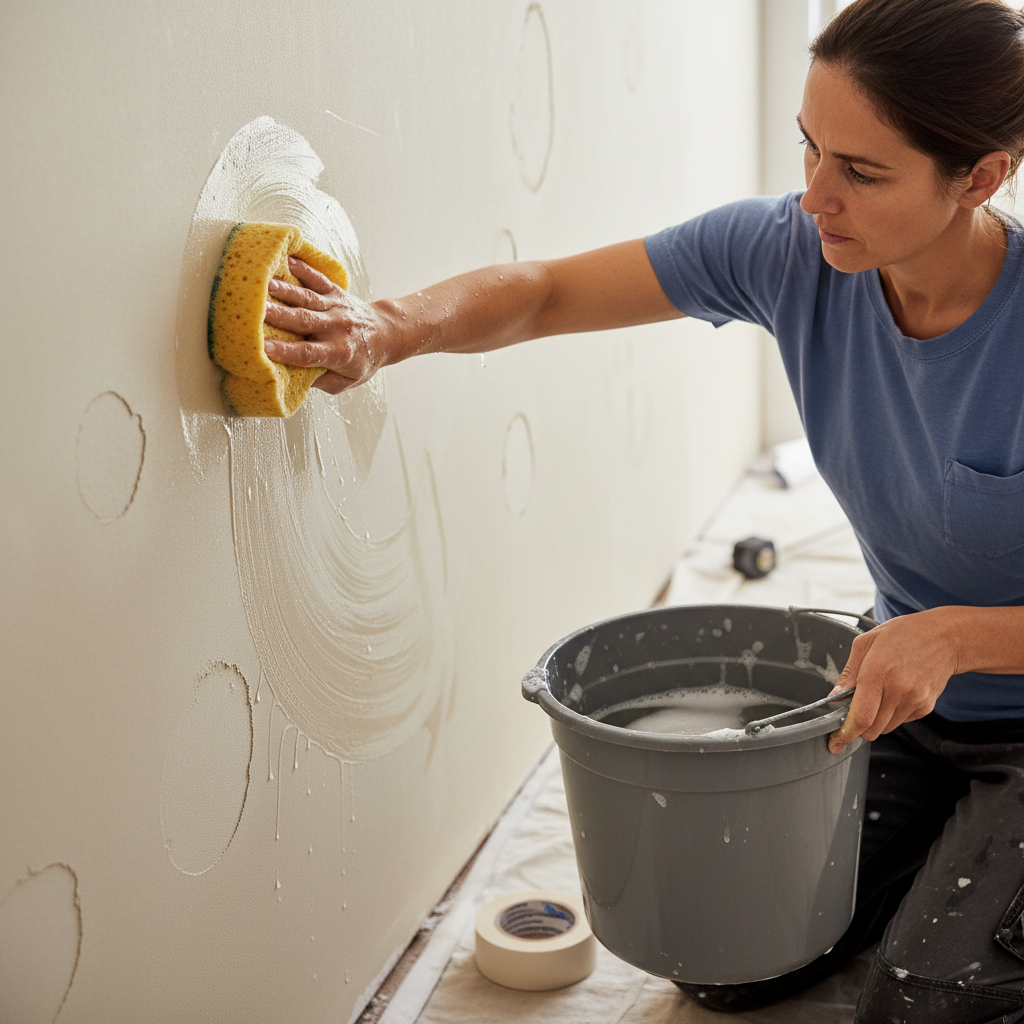
3. Clean the Walls Thoroughly — Mix a solution of warm water and a mild detergent (like TSP substitute) in a bucket. Dip a sponge into the solution, wring it out well, and wash the walls from bottom to top in manageable sections. This prevents streaking. Rinse the walls with clean water using a clean sponge to remove any soap residue. Allow ample time for the walls to dry completely, typically 1–2 hours. Pay extra attention to greasy areas like kitchens or high-traffic spots.
- If this doesn't work: For stubborn grease or smoke stains, consider a stronger degreaser or a specialized stain-blocking primer in that specific area.
4. Patch Holes and Cracks — Using a putty knife, apply spackle or joint compound to fill all nail holes, small dents, and hairline cracks. Slightly overfill the area. For larger holes (e.g., from anchors), consider using a mesh patch first for added stability. Allow the compound to dry completely according to the manufacturer's instructions (usually 30 minutes to a few hours).
- Material Tip: Keep a small container of spackle on hand, as it dries quickly and you may need to apply a second thin coat after the first dries and shrinks slightly.
5. Sand All Patched Areas and Imperfections — Once the spackle is dry, lightly sand the patched areas with 120-grit or 150-grit sandpaper until they are smooth and flush with the surrounding wall. Feather the edges of the sanded area to blend seamlessly. For very rough patches or old paint drips, you might start with 100-grit and then finish with a finer grit. Gently sand any glossy areas of existing paint to create a better profile for adhesion.
- Tool Tip: Use a sanding block for even pressure and better control over flat surfaces. Wear a dust mask for protection.
6. Wipe Down to Remove Dust — After sanding, the walls will be covered in fine dust. Use a clean, damp (not wet) cloth or a tack cloth to wipe down all sanded areas and the entire wall surface. Change your cloth frequently to avoid spreading dust. This step is critical; any residual dust will prevent paint from adhering properly, leading to a gritty finish or premature peeling.
7. Apply Primer — Once the walls are clean and dry, apply a high-quality primer. Use a roller for large areas and a brush for cutting in edges and corners. Apply a thin, even coat, ensuring full coverage, especially over patched areas, new drywall, or areas with significant color changes. Let the primer dry completely according to the manufacturer's recommendations, usually 1–4 hours. Some projects may benefit from two thin coats of primer.
- If this doesn't work: If stains still bleed through after one coat of primer, apply a second coat of a stain-blocking primer.
Common Causes
- Poor Adhesion: The most common cause of paint problems stems from contaminants like dirt, dust, grease, or mildew on the wall surface. If the paint can't properly grip the substrate, it will eventually crack, flake, or peel.
- Uneven Substrate: Unfilled holes, cracks, dents, or rough patches create an inconsistent surface. When paint is applied, these imperfections become highlighted, leading to an unprofessional and unsightly finish.
- Varying Porosity: Different wall materials (drywall, spackle, old paint) absorb paint at different rates. Without primer, this leads to "flashing" or blotchy areas where the paint appears duller or shinier, and the final color can look inconsistent.
- Glossy Surfaces: Painting directly over a high-gloss finish without dulling the surface through sanding or a deglosser prevents proper adhesion, causing the new paint to chip or peel easily.
- Existing Stains: Applying new paint directly over water stains, smoke damage, or ink marks will often result in the stains bleeding through the new topcoat, no matter how many layers you apply, if a proper stain-blocking primer isn't used.
Common Mistakes
- Skipping the Cleaning Step: Many DIYers assume walls are clean enough just by looking at them. Dust, unseen grime, and hand oils are invisible culprits that prevent proper paint adhesion, leading to peeling. Always wash walls thoroughly, especially in kitchens and bathrooms, even if they look clean.
- Not Sanding Patches Thoroughly: Leaving spackle or joint compound proud of the wall surface creates visible bumps and unevenness under paint. Always sand patches flush with the wall and feather the edges to blend seamlessly. Sanding also scuffs glossy paint, which helps new paint stick.
- Ignoring Old Paint Drips and Imperfections: Trying to paint over old drips, texture irregularities, or small nicks will only exaggerate them. Take the time to scrape off old drips and sand down any bumps for a truly smooth finish.
- Using the Wrong Primer (or No Primer at All): Primer isn't just for new drywall. It's crucial for sealing patched areas, blocking stains, ensuring consistent sheen, and promoting adhesion, especially when changing a dark color to a light one. Not all primers are equal; choose a stain-blocking or high-hide primer when needed.
- Not Letting Walls Dry Completely: Painting over damp walls (after cleaning or in humid conditions) traps moisture, which can lead to blistering, mildew growth under the paint, and poor adhesion. Always allow adequate drying time before priming or painting.
- Using Cheap Painter's Tape or Applying it Improperly: Low-quality tape can allow paint to bleed underneath, creating messy lines. Apply high-quality painter's tape firmly and remove it carefully when the paint is still slightly wet (but not tacky) for the cleanest edges.
Cost & Time Breakdown
| Task | DIY Cost | Pro Cost (per room) | Time (DIY) |
|---|---|---|---|
| Cleaning Supplies | $10–$25 | Included | 30–60 min |
| Spackle & Patching Tools | $15–$30 | Included | 30–90 min |
| Sanding Supplies | $10–$20 | Included | 20–40 min |
| Painter's Tape & Drop Cloths | $20–$50 | Included | 20–40 min |
| Primer (per gallon) | $30–$50 | Included | 1–3 hours |
| TOTAL (materials only) | $85–$175 | $75–$150 | 3–6 hours total |
Tips & Prevention
- Inspect Annually: Once a year, do a quick visual inspection of your walls for new nail pops, hairline cracks, or areas showing wear. Catching small issues early makes patching much easier.
- Clean Gently: For routine wall cleaning, use only mild soap and water or a specialized wall cleaner. Harsh chemicals can damage paint finishes over time.
- Use Proper Fasteners: When hanging pictures or shelves, select appropriate anchors for your wall type (e.g., drywall anchors) to prevent large holes or damage.
- Ventilate Properly: Ensure good ventilation in bathrooms and kitchens to prevent excessive moisture build-up, which can lead to mildew and peeling paint in humid environments.
- Store Touch-Up Paint: Keep small labeled containers of your wall paint for quick touch-ups of minor scuffs or marks, reducing the need for full repainting.
- Prime Every Time: Even if you're just repainting the same color, a thin coat of primer can refresh the surface, improve adhesion, and ensure a more vibrant, consistent finish for your new topcoat. This is especially true for high-traffic areas or walls that get a lot of sun.
When to Call a Professional
While most wall preparation tasks are well within the grasp of a confident DIYer, there are specific scenarios where professional help is not just recommended, but vital. If you encounter extensive water damage, mold growth covering large areas, or walls that are crumbling and unstable, a professional painting contractor or even a remediation specialist should be called. These issues often indicate deeper structural or moisture problems that need to be addressed safely and effectively before any painting can occur. Similarly, if you plan to deal with lead-based paint (common in homes built before 1978), a certified lead abatement professional is essential due to serious health risks. Professionals have the necessary training, equipment, and safety protocols to handle hazardous materials and extensive repairs, ensuring the job is done correctly and safely, providing a truly durable and healthy foundation for your new paint finish.
Related Articles
Keep troubleshooting with these hand-picked guides from FixlyGuide:
- The Giant Drywall Hole: 3 Hidden Mistakes That Make Fixing It Worse — Don’t just spackle over that huge drywall hole; learn the right way to repair it and avoid common mistakes that lead to an even bigger head…
- The 4-Inch Drywall Hole Fix: Why Most DIY Patches Fail (And How to Do It Right) — Don't let a small drywall hole become a recurring nightmare – discover the secret to a seamless, lasting repair that disappears into your w…
- Swap Your Leaky Faucet This Weekend, No Plumber Needed — Ready to stop that annoying drip and give your kitchen an instant upgrade? This guide shows you how to replace a kitchen faucet yourself. W…
- The #1 Mistake Homeowners Make Installing Floating Shelves (and How to Avoid It) — Learn the proper techniques for securely installing floating shelves into drywall, avoiding common mistakes that lead to costly damage or w…
- Your Painted Cabinets Are Peeling? The $50 Primer Is Why. — Discover the #1 reason DIY painted cabinets chip and peel—it's not the paint, but the overlooked, non-negotiable prep step pros use for a r…
- The 7 Critical Home Inspection Mistakes Most Homeowners Make (and How to Spot Them) — Discover the crucial home inspection mistakes homeowners commonly overlook and learn how to identify potential problems before they become…
Recommended for DIYers & woodworkers
Sponsored
The Top 20 Tools for Workshops of Any Budget
No stationary machines or power tools required — plus 3 fundamental tools that can't be bought at any price.
Get the free guide
Ted's Woodworking — The #1 Woodworking Resource
Detailed instructions, dimensioned drawings, materials & cutting lists, and 3D schematics for every skill level.
See the plansSponsored: links above are affiliate links. FixlyGuide may earn a commission on qualifying purchases — at no extra cost to you.
Frequently asked questions
How long should walls dry after washing before painting?+
Walls should be completely dry, typically 1–2 hours after washing, before you apply paint or primer. Painting over damp walls can trap moisture, leading to poor adhesion, blistering, or mildew.
Do I always need to use primer if I'm just repainting the same color?+
While not always strictly necessary for a pure color match, using primer is highly recommended. It creates a uniform surface, improves adhesion, hides minor imperfections, and ensures the new paint color looks its best and lasts longer, especially in high-traffic areas.
Can I paint over small cracks and holes without patching?+
No, painting over cracks and holes will only highlight them. Paint will not fill these imperfections; it will often crack along the lines of existing damage. Always patch small holes and cracks with spackle or joint compound, then sand smooth before painting, to achieve a professional finish.
What is the best way to clean walls before painting?+
For most walls, a solution of warm water and a mild detergent like TSP substitute is effective. Wash from bottom to top, then rinse with clean water from top to bottom. For greasy areas like kitchens, a stronger degreaser may be necessary. Always allow walls to dry completely.
Why is sanding important even if my walls look smooth?+
Sanding achieves two things: it smooths out any imperfections (like spackle patches or old paint drips) and, crucially, it microscopically etches the existing paint surface. This etching creates tiny grooves that give the new paint something to grip onto, dramatically improving adhesion and durability.


Discussion
Loading comments…