Tools & materials you'll need
Affiliate linksAs an Amazon Associate FixlyGuide earns from qualifying purchases — at no extra cost to you. Prices and availability are accurate as of publication and subject to change.
Quick Answer
Phantom doorbell rings are usually a sign of a fault within the doorbell system, not a paranormal event. The most frequent culprits are a defective doorbell button (especially older, mechanical ones) where the internal plunger or contacts are sticking, or a minor short in the low-voltage wiring. Less often, electromagnetic interference can be to blame, causing the chime unit to activate without a button press. A systematic approach, starting with the button, then the wiring, and finally the transformer and chime, will help pinpoint the exact cause.
The Problem
Your doorbell has a mind of its own, chiming unexpectedly when no one is at the door. This isn't just an annoyance; it's a breakdown in a basic home security and convenience system. A phantom ring can be startling, disrupt sleep, or lead to unnecessary trips to the door. More importantly, it signals an underlying electrical or mechanical issue that, if left unaddressed, could escalate from a nuisance to a complete system failure or, in rare cases, even a minor electrical hazard if wiring degrades further. We'll explore the common reasons why your doorbell might be developing a will of its own and, more importantly, how you can diagnose and resolve these spectral solicitations.
How It Works
Understanding how a standard wired doorbell system functions is key to troubleshooting. Most wired doorbells operate on a low-voltage circuit, typically 10 to 24 volts AC, supplied by a step-down transformer. This transformer is usually located near your main electrical panel, in your attic, or often mounted directly to a junction box near your chime unit.
When the doorbell button is pressed, it completes a circuit, allowing the low-voltage current to flow from the transformer, through the button, to the chime unit. Inside the chime unit, this electrical current energizes an electromagnet. This electromagnet then pulls a small plunger (or striker) which in turn strikes metal tone bars, producing the familiar 'ding-dong' sound. When the button is released, the circuit is broken, the electromagnet de-energizes, and the plunger returns to its resting position.
A phantom ring indicates that this circuit is being momentarily completed or partially completed without the button being pressed. This could be due to physical contact within the button itself, an unintended connection in the wiring, or an external influence acting on the chime unit or wiring.
Step-by-Step Fix
1. Test the Doorbell Button — *The most common culprit for phantom rings.
Safety Note: While doorbell circuits are low voltage, it's always wise to exercise caution. Avoid touching exposed wires with wet hands.
- Press and release the button several times: Listen closely for any sticking or sluggishness in the button's mechanism. Does it feel 'gummy' or does it return crisply? A sticky button is a prime suspect.
- Wiggle the button: Gently try to wiggle the button in its housing. If this triggers a ring, it suggests loose internal contacts or worn components.
- Visually inspect the button: Look for cracks, corrosion, dirt, or debris around the button or within the small gap where the plunger depresses. Accumulated grime can cause intermittent contact.
- Remove button and bypass: Carefully unscrew the doorbell button from its mounting. You'll typically see two low-voltage wires connected to terminals on the back. Disconnect both wires. Keeping them separate, touch the two bare ends of the wires together momentarily. If the chime rings, your chime unit and transformer are working. If the phantom ringing stops after the button is disconnected, the button itself is almost certainly the problem. Replace it with a new one. Prices for new buttons range from $8 to $30.
- If this doesn't work: The problem is likely further down the line, in the wiring or the chime unit.
2. Inspect the Wiring — *Look for shorts or damaged insulation.
Safety Note: Always disconnect the power to the doorbell transformer at your home's circuit breaker before working with any wiring beyond simply touching the button wires together. Locate the breaker that controls the lighting or outlets in the area where your transformer is installed and switch it off. Use a non-contact voltage tester to confirm no power.
- Check visible wiring near the button: Look for cracked or frayed insulation, especially where the wires enter the wall or go around corners. Pests can chew through insulation, and sun exposure can degrade it.
- Inspect wiring behind the chime unit: Open your chime unit cover (usually snaps off or has small screws). Carefully examine the exposed wires connecting to the chime terminals. Look for loose connections, strands of wire touching each other (a short circuit), or corrosion.
- Trace accessible wiring: If possible, follow the doorbell wire from the button to the chime unit, and from the chime unit to the transformer. Pay special attention to areas where the wire might be pinched, stapled too tightly, or run through doorways or windows where it could be damaged.
- If you find damaged wiring: For small nicks, you can use electrical tape for insulation. For more significant damage, you'll need to cut out the damaged section and splice in a new piece of low-voltage wire using wire nuts, or ideally, replace the entire run if it's easily accessible. Low-voltage doorbell wire (18-gauge) costs about $0.20-$0.50 per foot.
- If this doesn't work: The issue might be within the chime unit itself or the transformer.
3. Examine the Chime Unit — *Internal components can fail or become fouled.
Safety Note: Ensure power to the doorbell circuit is off before opening the chime unit. Confirm with a non-contact voltage tester.
- Remove the chime cover: With the power off, uncover the chime mechanism.
- Clear debris: Use a soft brush, compressed air, or a vacuum cleaner with a narrow attachment to remove any dust, cobwebs, or insects that might be interfering with the plungers or electromagnets. Spiders building nests inside are a surprisingly common cause.
- Inspect plungers/strikers: Gently move the plungers that strike the tone bars. They should move freely and return to their resting position without sticking. Look for bent or rusty plungers or signs of wear. A sticky plunger could be causing an intermittent connection or preventing a full return, mimicking a button press.
- Check internal wiring connections: Similar to the outside wiring, verify that all internal connections within the chime unit are tight and free of corrosion or stray wire strands.
- Check for loose springs: Some chime units have small return springs for the plungers. Ensure they are intact and properly seated.
- If you find a stuck plunger or debris: Clean it thoroughly. If the plunger itself is bent or broken, a full chime unit replacement is usually the most economical solution (costs $20-$70).
- If this doesn't work: The transformer might be the culprit, though this is less common for phantom rings.
4. Test the Transformer Output — *An unstable voltage can cause issues.
Safety Note: The transformer is connected to your home's main electrical supply (120V AC) on one side and outputs low voltage on the other. Unless you are highly experienced with electrical work, it is best to have a qualified electrician test or replace the transformer. If you proceed, ALWAYS ensure the breaker supplying the transformer is OFF before touching any high-voltage wiring. Use a multimeter to confirm power is off.
- Locate the transformer: It's often in the attic, basement, near the chime, or close to the main electrical panel. It's a small box, usually gray or silver, with two low-voltage terminals on one side and high-voltage wiring on the other. It will typically have voltage ratings printed on it (e.g., 16V, 10VA).
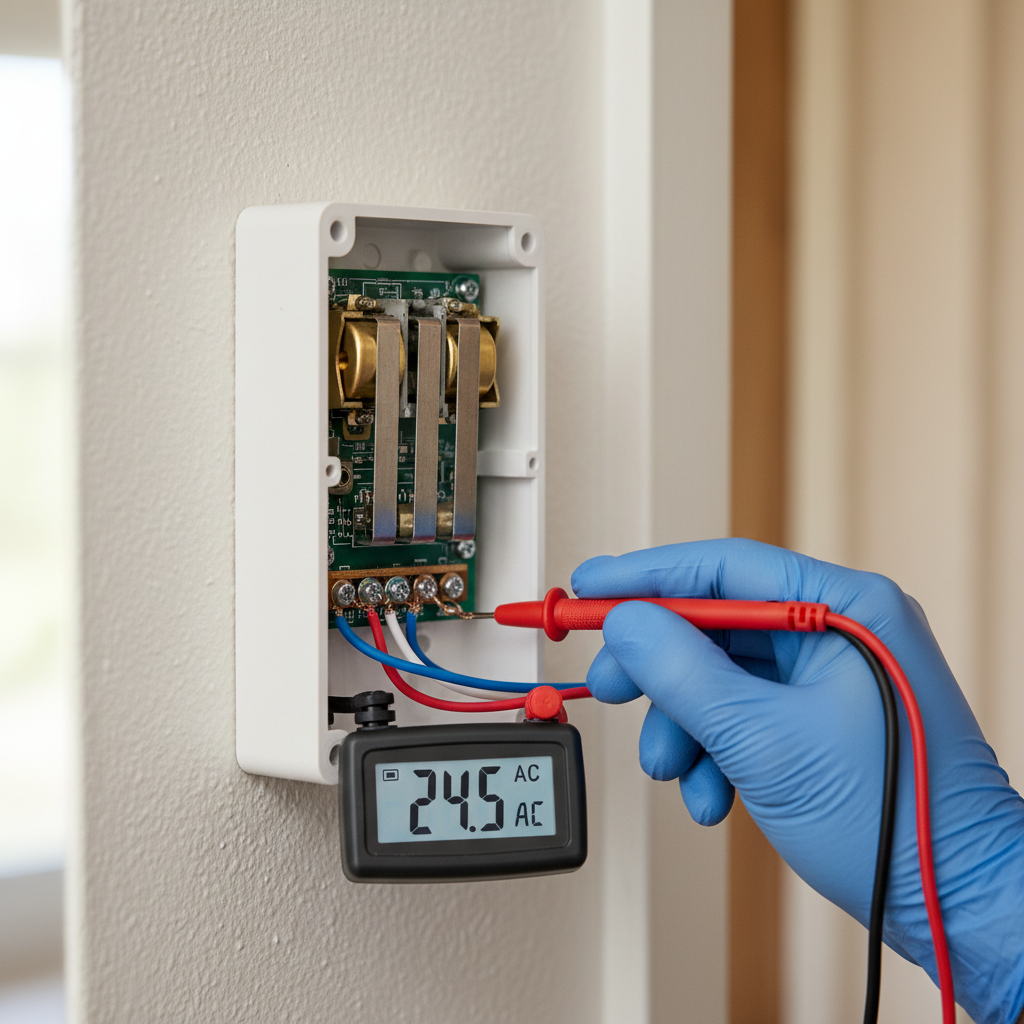
- Measure voltage (if comfortable): With the power ON (be extremely careful), use a multimeter set to AC voltage to measure the output across the low-voltage terminals. It should read close to the rated voltage (e.g., 16V or 24V). Fluctuating or significantly lower voltage might indicate a failing transformer. However, a failing transformer is more likely to cause no chime at all rather than phantom rings.
- If the voltage is significantly off or fluctuating: Consider replacing the transformer. This typically involves disconnecting the high-voltage side, which is a job for a licensed electrician unless you have advanced electrical skills. A new transformer costs about $15-$30.
- If this doesn't work: At this point, if you haven't found the issue, it may be time to consult a professional or consider electromagnetic interference.
5. Consider Electromagnetic Interference (EMI) — *A rare but possible cause.
- Identify nearby devices: Are there any new electronic devices, large motors, or sometimes even amateur radio equipment operating near your chime unit or doorbell wiring run? Strong electromagnetic fields can sometimes induce a current in low-voltage wiring, triggering the chime.
- Relocate or shield: If you suspect EMI, try temporarily unplugging nearby suspect devices. If the problem stops, you've found your source. You might need to relocate the device or, in extreme cases, shield the doorbell wiring (though this is rarely practical for homeowners).
Common Causes
- Sticking Doorbell Button Plunger/Contacts: The plunger inside the button fails to fully retract, or the internal contacts remain partially engaged after a press. This is especially true for older, mechanical buttons exposed to weather or dirt.
- Loose or Shorted Wiring: Wires with degraded insulation can touch each other, or loose strands at the terminals can intermittently short, completing the circuit. Pests chewing on wires can also cause this.
- Debris in Chime Unit: Insects, dust, or small foreign objects can interfere with the delicate mechanism inside the chime unit, causing the plungers to move without a signal.
- Faulty Chime Unit Mechanism: A worn or damaged electromagnet, plunger, or return spring within the chime unit can lead to erratic behavior.
- Electromagnetic Interference (EMI): While rare, strong electromagnetic fields from nearby appliances, power lines, or radio transmitters can induce a current in the doorbell wiring, causing the chime to trigger.
- Faulty Transformer: An unstable or incorrect voltage output from the transformer can cause the chime unit to react unpredictably. This is less common for phantom rings but possible.
Common Mistakes
- Replacing the doorbell button without first testing it properly: Many homeowners jump straight to replacing the button. While often the culprit, a quick bypass test (Step 1) can confirm if your old button is truly the issue before you spend money.
- Ignoring the power source for wiring inspection: Forgetting to turn off the circuit breaker to the doorbell transformer before inspecting chime unit wiring or the transformer itself can lead to electrical shock.
- Overlooking simple environmental factors: Not checking for cobwebs, insects, or excessive dirt inside the chime unit or around the button. These seemingly minor issues can cause major disruptions.
- Tightening wire nuts too loosely or too tightly: Loose wire nuts can lead to intermittent connections, while over-tightening can damage the wire strands or insulation, creating new shorts.
- Assuming the problem is high voltage: Panicking and calling an electrician for an assumed major electrical issue. Doorbells are low-voltage systems; while professionals are great, simple fixes are often DIY-able.
Cost & Time Breakdown
| Task | DIY cost | Pro cost | Time |
|---|---|---|---|
| Diagnose (self) | $0 | $100-$200 (service call) | 15-30 min |
| Replace Doorbell Button | $8-$30 | $150-$250 | 15-30 min |
| Repair/Replace Shorted Wire | $5-$20 | $150-$300 | 30-60 min |
| Clean Chime Unit | $0 (tools you have) | $150-$250 | 10-20 min |
| Replace Chime Unit | $20-$70 | $175-$350 | 30-60 min |
| Replace Transformer | $15-$30 | $175-$400 | 45-90 min (pro's) |
Tips & Prevention
- Regular Cleaning: Periodically clean around your doorbell button and, if accessible, inside your chime unit. A quick dusting or vacuuming can prevent debris from building up and causing issues.
- Check for Pests: Inspect both the outdoor button and interior chime unit for signs of insect nests, especially spiders, which love to build webs in hidden crevices and can interfere with mechanisms.
- Weather Protection: If your doorbell button is exposed to harsh weather, consider adding a small weather shield or ensuring its gasket is intact to prevent moisture ingress, which can corrode contacts.
- Inspect Wiring Annually: During other home maintenance, cast an eye over any visible doorbell wiring for signs of degradation, especially in areas exposed to sunlight or potential animal activity.
- Upgrade Old Components: If your doorbell system is particularly old (15+ years), its components, especially the button and chime unit, may simply be reaching the end of their lifespan due to wear and tear. Proactive replacement can prevent future phantom rings.
When to Call a Professional
While troubleshooting a doorbell is often a DIY-friendly task, there are specific situations where calling an electrician is the safest and most efficient choice. If, after following these steps, the phantom ringing persists, or if you are uncomfortable working with any electrical components, it's time to bring in a pro. Specifically, if you suspect the issue lies with the doorbell transformer, especially if it involves disconnecting or replacing the high-voltage side (120V AC wiring), a licensed electrician should be engaged. They have the expertise and specialized tools to safely diagnose and repair issues with your home's electrical system, ensuring everything is up to code and operating safely. Additionally, if the wiring is inaccessible, runs through finished walls, or if the problem seems to affect other electrical components in your home, a professional can provide a comprehensive assessment.
Related Articles
Keep troubleshooting with these hand-picked guides from FixlyGuide:
- The #1 Reason Your Doorbell Suddenly Dies (and the 10-Minute Fix) — A non-functioning doorbell is often caused by a tripped transformer, a simple issue homeowners can usually resolve in minutes.
- The 4 Hidden Reasons Your Doorbell Dies (And the 20-Minute Fix) — A non-working doorbell is often caused by simple, hidden issues like a tripped transformer or a corroded button, which homeowners can fix i…
- The 5-Minute Trick That Fixes 90% of Dead Doorbells — Learn the surprisingly simple steps to diagnose and fix a non-working doorbell, from sticky buttons to blown transformers, and restore your…
- The 3 Hidden Reasons Your Doorbell Dies (And How to Resurrect It for $0) — A non-functioning doorbell is often due to simple, overlooked issues like a tripped breaker, a stuck button, or a loose wire, and can often…
- The 3 Hidden Reasons Your Garage Door Stops Mid-Close (And the $0 Fix) — Your garage door stopping mid-close is usually a sign of misaligned safety sensors, a blocked path, or incorrect travel limits, all fixable…
- Why Your Extension Cord Keeps Tripping the Breaker (And the Simple Test to Find the Hidden Cause) — Discover why your extension cord keeps tripping the circuit breaker and learn how to safely diagnose and fix the real problem with a simple…
Recommended for DIYers & woodworkers
Sponsored
The Top 20 Tools for Workshops of Any Budget
No stationary machines or power tools required — plus 3 fundamental tools that can't be bought at any price.
Get the free guide
Ted's Woodworking — The #1 Woodworking Resource
Detailed instructions, dimensioned drawings, materials & cutting lists, and 3D schematics for every skill level.
See the plansSponsored: links above are affiliate links. FixlyGuide may earn a commission on qualifying purchases — at no extra cost to you.
Frequently asked questions
Why does my doorbell keep ringing when no one is there?+
The most common reasons for a doorbell to ring by itself are a faulty or sticky doorbell button, a short circuit in the low-voltage wiring, or debris interfering with the chime unit's mechanism.
How do I stop my doorbell from phantom ringing?+
To stop phantom ringing, first inspect and test your doorbell button, then check the wiring for shorts or damage, and finally examine the chime unit for debris or faulty components. Systematically isolate each part of the system until you find the fault.
Can a doorbell transformer cause phantom ringing?+
A faulty doorbell transformer is a less common cause of phantom ringing, but an unstable or incorrect voltage output can sometimes cause erratic behavior in the chime unit. It's more likely to cause the doorbell to not work at all.


Discussion
Loading comments…