
Tools & materials you'll need
Affiliate linksAs an Amazon Associate FixlyGuide earns from qualifying purchases — at no extra cost to you. Prices and availability are accurate as of publication and subject to change.
Quick Answer
An interior door that frequently sticks, rubs, or scrapes against its frame can be a frustrating nuisance. While humidity is often suspected, the root cause could be something as simple as loose hinge screws, an overtightened hinge pin, or even the settling of your home's foundation. Addressing the issue typically involves tightening hardware, adjusting the door's position within the frame, or, in some cases, carefully removing a small amount of wood from the door itself.
The Problem
You push or pull your interior door, and it catches, drags, or refuses to close smoothly. It might scrape along the top, bottom, or side of the door frame, leaving unsightly marks and creating an annoying sound. This isn't just an inconvenience; a sticking door can damage your flooring, chip paint, and even put undue stress on the door frame and hinges, potentially leading to more significant problems down the line. Understanding why your door is misbehaving is the first step to a lasting fix.
How It Works
An interior door functions as a movable barrier, suspended by hinges and secured by a latch and strike plate. For smooth operation, there must be a consistent, small gap (typically around 1/8 inch) between the door and all sides of its frame. The hinges are critical: they allow the door to pivot open and closed. Each hinge leaf is screwed into both the door edge and the door jamb. The hinge pin connects these leaves, allowing the door to swing. The door's exact position in the frame is influenced by the precise placement of these hinges and the condition of the wood they're screwed into.
Wood is a hygroscopic material, meaning it absorbs and releases moisture from the air. In periods of high humidity, wood will swell; in dry conditions, it will shrink. This natural movement is often the primary reason a door might stick seasonally. However, the mechanical components are equally important. Loose hinge screws allow the door to sag, causing it to drag on the floor or rub the frame. An improperly installed or bent strike plate can prevent the latch bolt from engaging fully, making the door appear to stick even though it's simply misaligned.
Less common but significant factors include house settling, which can subtly shift door frames out of square, and excessive layers of paint on the door or frame, which gradually reduce the critical gap. Understanding this interplay between environmental factors, mechanical hardware, and structural elements is key to diagnosing and fixing a sticking door.
Step-by-Step Fix
1. Diagnose the Rub Point — Start by identifying exactly where the door is sticking. Slowly open and close the door, observing closely. Is it the top, bottom, side, or the latch area? Use a pencil to lightly mark the exact spot on the door or frame where contact occurs. This will guide your repair efforts.
- If the door rubs at the top or bottom: This often indicates sagging or an issue with the hinge pins.
- If the door rubs along the latch side: This points to door swelling, hinge issues, or a misaligned strike plate.
- If it rubs near the hinge side: Check for loose hinge screws or an issue with the hinge itself.
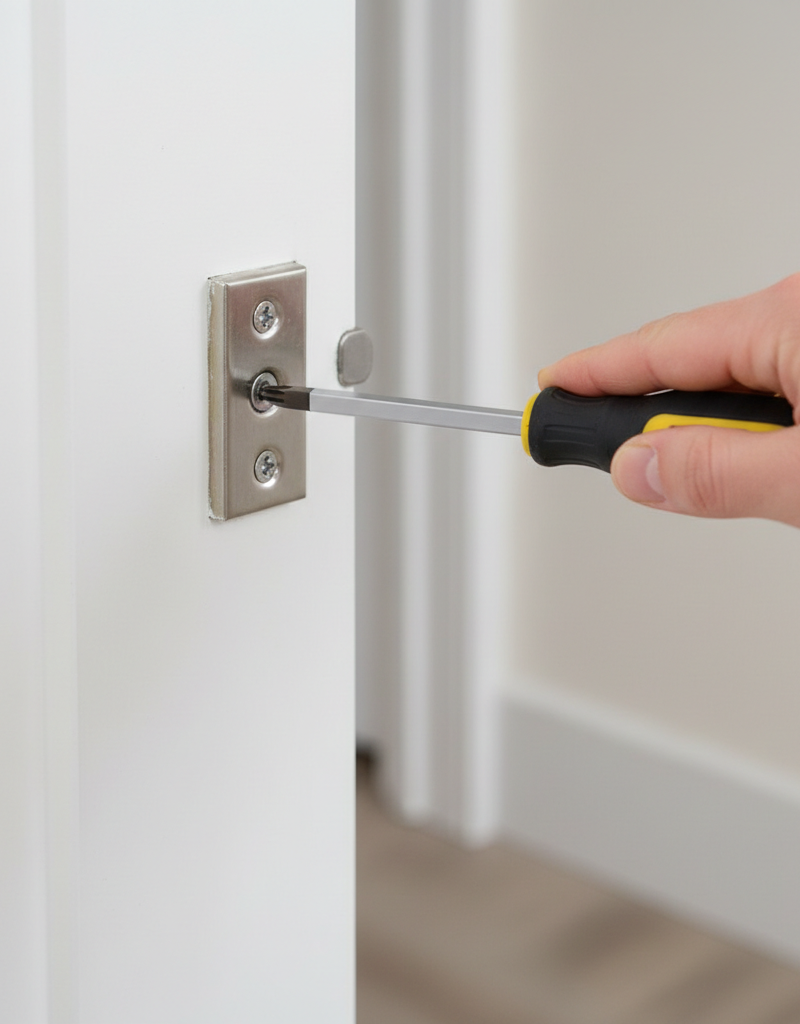
2. Tighten Hinge Screws — This is the most common and easiest fix. Over time, hinge screws can loosen, causing the door to sag. Use a screwdriver to tighten every screw on both the door and the frame side of each hinge. Don't overtighten, but ensure they are snug. If a screw spins freely, the screw hole is stripped.
- If a screw hole is stripped: Remove the screw, insert a few wooden toothpicks (or a golf tee) into the hole with wood glue, let it dry, then break off flush and re-insert the screw. For a quick fix, you can move up to a longer or fatter screw of the same head type.
- Tools: Phillips head or flathead screwdriver (matching your screw type).
3. Check and Adjust Hinge Pins — Sometimes, the hinge pins themselves can be the problem. If a door is rubbing on the latch side, you can try adjusting the hinges to pull the door slightly into the frame.
- For slight adjustment: Remove the hinge pin from the upper hinge. Place the pin on a hard surface and give it a slight tap with a hammer to very slightly bend it. Reinsert the bent pin (the slight bend creates friction, pulling the door inwards). Repeat with the middle hinge if needed. Be very subtle; too much bend will make it hard to reinsert.
- Tools: Hammer, nail set or small punch, flathead screwdriver (to pry up pin if stuck).
4. Adjust the Strike Plate — If the door closes but the latch sticks or doesn't engage fully, the strike plate might be misaligned. Mark the exact position of the latch bolt on the frame with lipstick or chalk, then close the door gently to transfer the mark to the strike plate. If the mark doesn't align with the strike plate opening, adjustment is needed.
- For minor adjustments: Use a file to slightly widen the top or bottom of the strike plate opening to accommodate the latch bolt. Test frequently.
- For major adjustments: Unscrew the strike plate. Use a chisel to carefully enlarge the mortise (the recessed area) in the direction needed. Re-screw the strike plate. If the screw holes are stripped, use the toothpick method from Step 2.
- Tools: Screwdriver, file (rat-tail or flat), wood chisel, hammer.
5. Plane the Door Edge (for significant rubbing) — If tightening hinges and adjusting the strike plate doesn't work, and the door clearly rubs against the frame, you may need to remove a small amount of wood. This is common if humidity has caused significant swelling or if multiple paint layers have built up.
- Safety Note: Always wear eye protection when woodworking. If you need to remove the door from its hinges, have a helper as doors are heavy.
- Identify the high spot: Mark the rub area precisely. If the rub is extensive, you may need to remove the door from its hinges. Lay it flat on sawhorses.
- Planing: Use a block plane or an orbital sander with medium-grit sandpaper (80-120 grit) to remove material from the problem area. Work slowly and check your progress frequently by re-hanging the door. Always plane or sand with the wood grain. For larger amounts of material removal, consider a power planer.
- Finishing: Once the door swings freely, sand the planed edge smooth and repaint or refinish it to protect the newly exposed wood.
- Tools: Block plane or orbital sander, medium-grit sandpaper, sawhorses, measuring tape, pencil, safety glasses, paint/sealer.
6. Check for Paint Buildup — Multiple layers of paint can gradually reduce the clearance between the door and the frame. Examine the edges of the door and the inside of the door frame. If there's excessive paint buildup, especially along the rub points, scrape or sand it down.
- Tools: Paint scraper, sandpaper (120-180 grit), utility knife.
7. Address Foundation Settling — If none of the above fixes work, and you notice multiple doors or windows sticking, or cracks appearing in walls, your home's foundation might be settling. This is a significant issue and requires professional assessment.
- Pro Callout: If you suspect foundation issues, contact a structural engineer or foundation repair specialist immediately.
Common Causes
- Humidity Fluctuations: The most frequent culprit. Wood absorbs moisture and swells in humid conditions, then shrinks when it's dry. This seasonal movement causes doors to stick more often in summer or rainy seasons.
- Loose Hinge Screws: Over time, the constant stress of opening and closing a door can loosen the screws holding the hinges to the door frame and the door itself, causing the door to sag and rub.
- Stripped Screw Holes: If hinge screws are overtightened or removed and reinstalled too often, the wood fibers around the screw can degrade, leading to stripped holes that prevent the screws from holding securely.
- Excessive Paint Layers: Each new coat of paint, especially if applied without proper sanding, adds a minuscule layer to the door and frame, gradually reducing the clearance until the door sticks.
- Building Settling/Shifting: Older homes or homes in areas with unstable soil can experience foundation shifting, which can pull door frames out of square, leading directly to sticking doors.
- Bent or Damaged Hinges/Pins: While less common, a bent hinge leaf or a damaged hinge pin can prevent the door from swinging correctly.
Common Mistakes
- Ignoring the Diagnosis: Don't just start sanding! Incorrectly identifying where the door is sticking can lead to removing wood from the wrong areas, making the problem worse or creating new gaps.
- Overtightening Screws: While tightening is good, excessive force can strip screw holes or even crack the wood, creating a bigger problem than a loose screw.
- Aggressive Planing/Sanding: Removing too much wood in one go is irreversible. Always work slowly, taking off small amounts and retesting frequently. It's easier to remove more wood than to add it back.
- Neglecting Finish on Planed Edges: If you plane or sand a door edge, you've exposed raw wood. Failure to paint or seal this area will leave it vulnerable to moisture absorption, and the door will likely start sticking again faster.
- Assuming Humidity is Always the Cause: While common, only blaming humidity can lead you to ignore simpler mechanical issues like loose hinges or a misaligned strike plate. Always check hardware first.
- Trying to Force the Door: Continuously forcing a sticking door can damage hinges, warp the door, or crack the door frame. Address the problem quickly to prevent further damage.
Cost & Time Breakdown
| Task | DIY Cost | Pro Cost | Time |
|---|---|---|---|
| Tighten Hinge Screws | $0 | $50–$100 | 5–10 minutes |
| Adjust Strike Plate | $0–$5 | $75–$150 | 15–30 minutes |
| Repair Stripped Holes | $5–$10 | $75–$150 | 20–30 minutes |
| Plane Door Edge | $0–$20 | $150–$300+ | 1–2 hours |
| Address Paint Buildup | $0–$10 | $100–$200 | 30–60 minutes |
Tips & Prevention
- Maintain Stable Humidity: In homes prone to humidity swings, consider using a dehumidifier in summer and a humidifier in winter to stabilize indoor moisture levels. This helps prevent wood from expanding and contracting excessively.
- Regular Hinge Checks: Periodically (e.g., twice a year) check all door hinge screws for tightness. A quick snugging can prevent sag before it becomes a problem.
- Proper Painting Technique: When painting doors, always remove them from their hinges if possible. Lightly sand between coats, and avoid heavy paint applications on the edges to maintain proper clearance.
- Seal Exposed Wood: If you ever trim or plane a door, ensure the newly exposed wood is immediately primed and painted or sealed to protect it from moisture.
- Lubricate Hinges: If hinges squeak, a few drops of silicone spray or petroleum jelly on the hinge pin can keep them moving freely, reducing wear and tear.
When to Call a Professional
While many sticking door issues are simple DIY fixes, there are times when calling a professional is the safest and most effective option. If you've tried the basic adjustments and the door still sticks, or if you're uncomfortable using tools like a planer, a handyman or carpenter can quickly resolve the issue. More importantly, if you notice multiple doors and windows sticking, visible cracks in your walls or ceilings, or uneven floors, these could be signs of significant foundation settlement. In such cases, stop all DIY work and immediately contact a licensed structural engineer or foundation repair specialist. Attempting to fix doors in a home with foundation issues is akin to treating a symptom without addressing the underlying disease. A professional can assess the structural integrity of your home and recommend appropriate, long-term solutions.
Related Articles
Keep troubleshooting with these hand-picked guides from FixlyGuide:
- The 4 Hidden Reasons Your Window Won't Stay Up (And the Easy Fixes) — Before you blame a broken window, learn the common culprits behind window sashes that won't stay open and how to fix them yourself.
- The 3 Hidden Reasons Your Door Won't Latch (And the Easy DIY Fixes) — Frustrated by a door that refuses to latch? Discover the common culprits behind this annoying problem and learn simple, effective DIY fixes…
- The 3 Hidden Reasons Your Door Won't Latch (And the Easy Fixes) — Discover the surprising reasons your interior door isn't latching and how to quickly diagnose and fix the issue with simple tools.
- That Crooked Crown Molding? Your Ceiling Is Lying — Discover the surprising reason your perfectly level crown molding still looks crooked. It's not your installation—it's an optical illusion…
- The 5-Minute Trick That Often Fixes a Dead Doorbell (No Electrician Needed) — Before you call an electrician for a dead doorbell, learn the surprising common culprit homeowners overlook and how to fix it in minutes.
- The Secret Culprit Behind Your Leaky Refrigerator (It’s Not Always the Water Line) — Discover the most common, often overlooked, reasons your refrigerator is leaking water and how to fix them with simple DIY steps.
Recommended for DIYers & woodworkers
Sponsored
The Top 20 Tools for Workshops of Any Budget
No stationary machines or power tools required — plus 3 fundamental tools that can't be bought at any price.
Get the free guide
Ted's Woodworking — The #1 Woodworking Resource
Detailed instructions, dimensioned drawings, materials & cutting lists, and 3D schematics for every skill level.
See the plansSponsored: links above are affiliate links. FixlyGuide may earn a commission on qualifying purchases — at no extra cost to you.
Frequently asked questions
Why does my interior door only stick sometimes?+
Seasonal changes in humidity are the most common reason a door sticks only at certain times of the year. Wood absorbs moisture and expands during humid periods (like summer) and contracts when the air is dry (like winter). Loose hinge screws can also cause intermittent sticking.
Can too much paint make a door stick?+
Yes, absolutely. Multiple layers of paint, especially if applied thickly without proper sanding, can gradually build up on the edges of the door and the inside of the door frame, reducing the critical clearance needed for the door to swing freely. This is a common cause of sticking doors in older homes.
How do I know if my door is sticking due to foundation issues?+
If multiple doors and windows throughout your home are sticking, if you see new cracks in walls or ceilings (especially around door frames), or if floors feel uneven, these are strong indicators of potential foundation settlement. In such cases, a professional structural engineer should be consulted immediately.
Is it better to plane the door or the frame?+
In most cases, it's easier and safer to plane the door. The door can be removed, laid flat, and worked on more conveniently. Planing the door frame is more difficult to do accurately in place and can be harder to conceal if mistakes are made. Only plane the frame if the door is perfectly plumb and square and the frame itself is clearly the issue, or if the rub is minimal and easily accessible on the frame.
How often should I check my door hinges?+
It's a good practice to check your interior door hinge screws for tightness at least once or twice a year, especially on frequently used doors. A quick tightening can prevent sagging and sticking before they become noticeable problems.


Discussion
Loading comments…