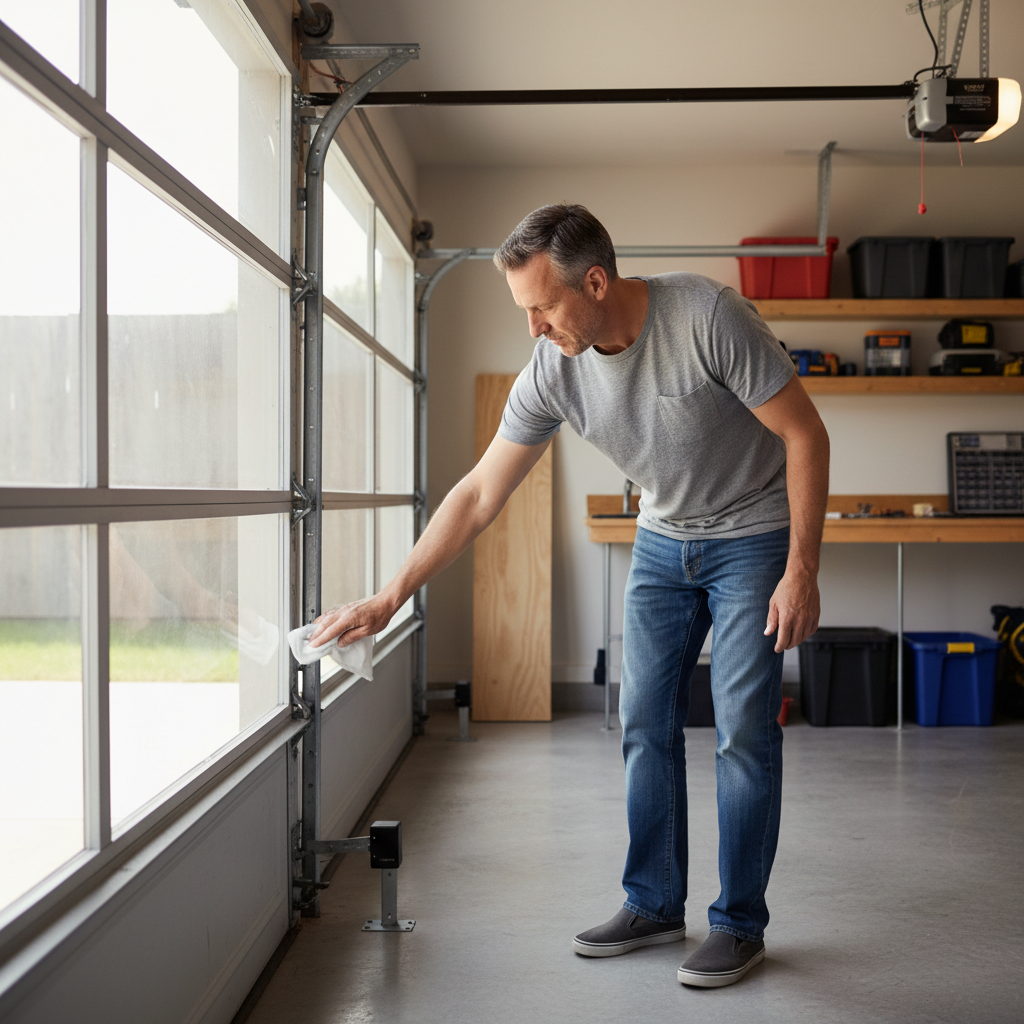
- Safety First: Ensure the garage door is fully open or unplug the opener before working near the sensors.
- Tools: Clean cloth, small screwdriver (for adjusting brackets).
- If this doesn't work: The sensors themselves may be faulty or the wiring is damaged. Consider professional help.
Published July 7, 2026Last updated August 17, 2026
Tools & materials you'll need
Affiliate linksAs an Amazon Associate FixlyGuide earns from qualifying purchases — at no extra cost to you. Prices and availability are accurate as of publication and subject to change.
Quick Answer
A dying garage door opener rarely fails without warning. Key indicators include strange noises (grinding, straining), slow or erratic movement, lights flickering or dimming during operation, and requiring multiple remote presses to activate. Paying attention to these subtle signs can help you replace or repair the unit before it leaves your car trapped inside or outside.
The Problem
Imagine rushing out the door, pressing your garage door opener, and nothing happens. Or worse, it opens halfway and suddenly stops, stranding your car inside. A failing garage door opener is more than an inconvenience; it can be a security risk and a significant disruption to your daily routine. Many homeowners wait until total failure strikes, leading to emergency service calls, higher repair costs, or even getting locked out (or in). Understanding the common red flags allows for proactive maintenance or replacement, saving you time, money, and frustration.
How It Works
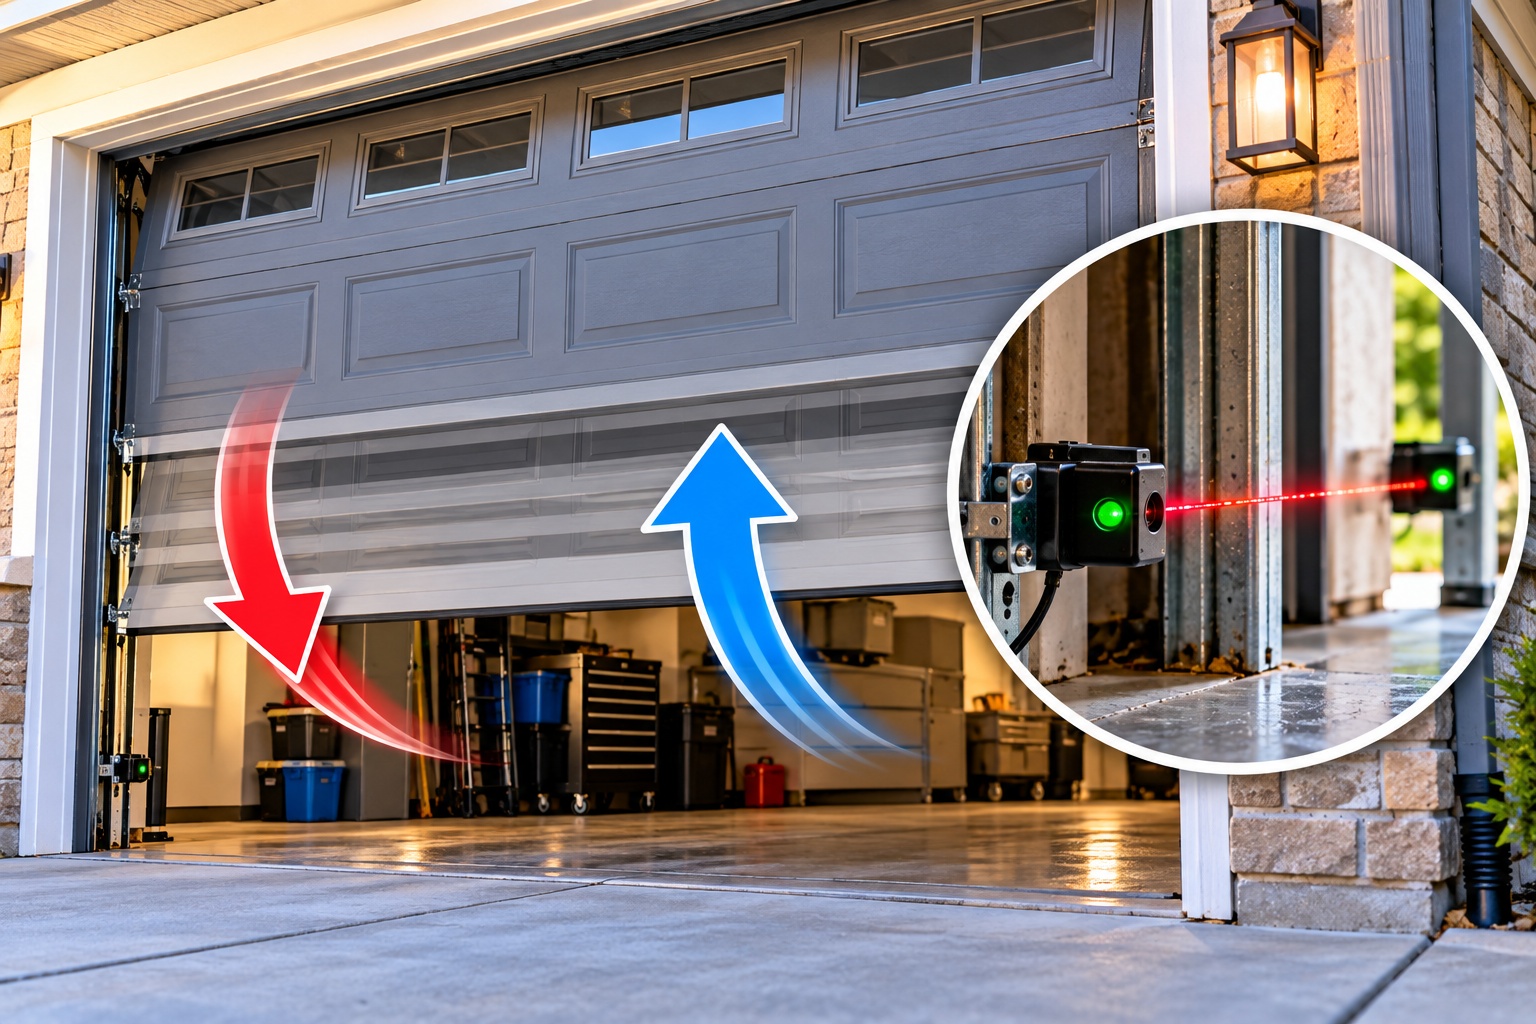
Most residential garage door openers operate on a relatively simple electromechanical principle. At its core, an electric motor, typically either AC or DC, drives a mechanism—be it a chain, belt, or screw drive—that pulls or pushes the garage door along a track. When you press your remote, a radio receiver in the opener unit picks up the signal, activating the motor. Limit switches, set during installation, tell the motor when to stop, preventing the door from over-opening or over-closing. Safety features include photoelectric sensors (the 'electric eyes' near the floor) that detect obstructions and reverse the door, and an auto-reverse mechanism that senses resistance even if the beam is clear. The opener also contains a control board, capacitors to store and release energy, and various gears and pulleys. Over time, components like springs, gears, motor brushes, capacitors, and even the circuit board can wear out, leading to sluggish performance, strange noises, or complete failure. The constant strain of lifting hundreds of pounds daily, combined with environmental factors like temperature fluctuations, slowly degrades these parts.
Step-by-Step Fix
While a completely 'dead' opener requires professional attention or full replacement, some common issues manifesting as 'dying' signs can be addressed.
1. Inspect the Photoelectric Sensors — Check for obstructions or misalignment.
- Safety First: Ensure the garage door is fully open or unplug the opener before working near the sensors.
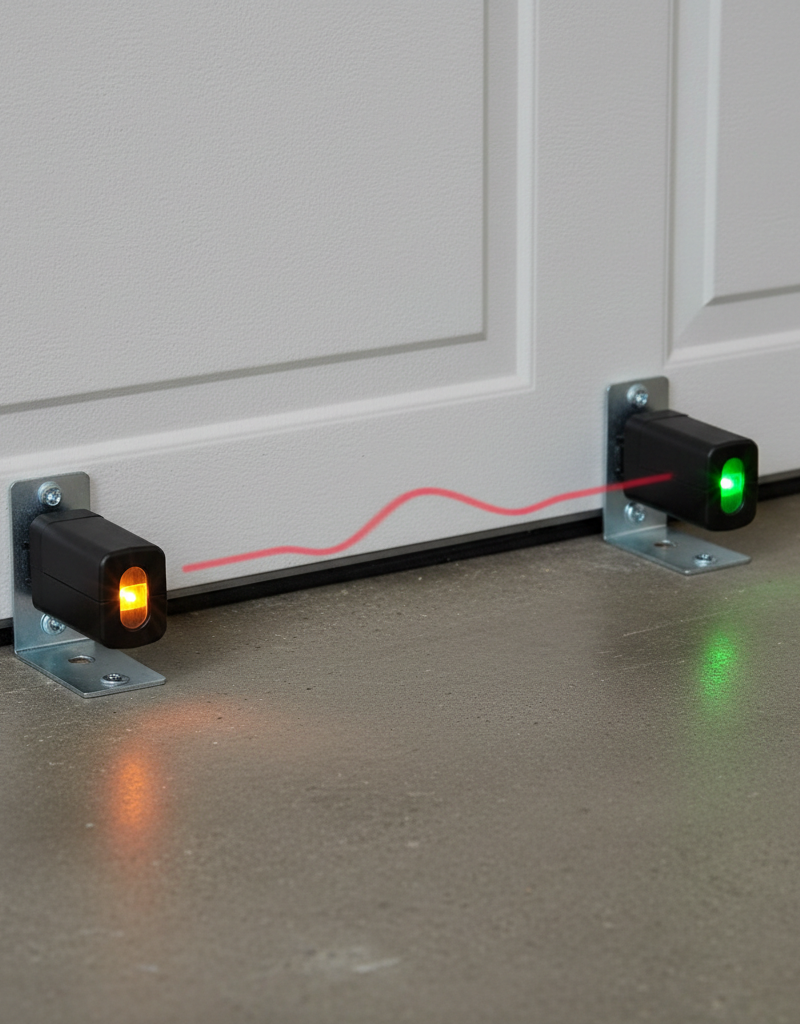
- Locate the two small 'electric eyes' mounted a few inches off the floor on opposite sides of the garage door tracks. A small LED light on one or both sensors often indicates they are powered and aligned. If one light is off or flickering, it likely indicates a problem.
- Tools: Clean cloth, small screwdriver (for adjusting brackets).
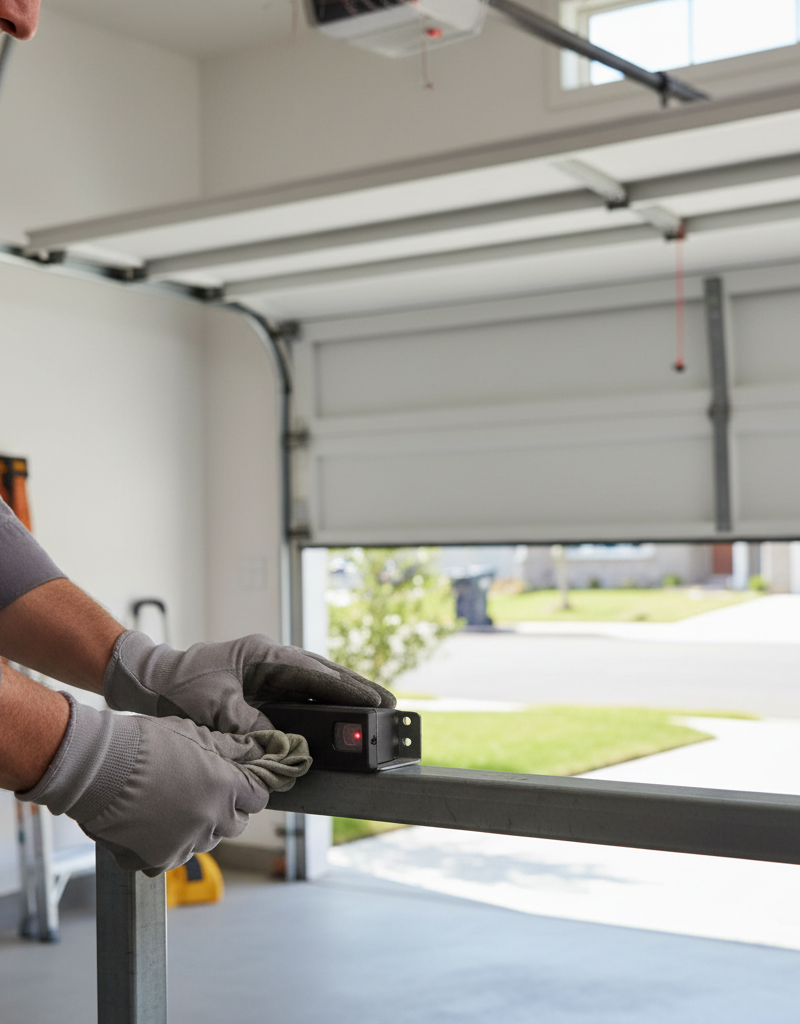
- Action: Gently clean the lenses of both sensors with a soft, clean cloth. Even a spiderweb or a thin layer of dust can block the beam. Check their alignment; they should point directly at each other. Loosen the wing nut or screw on the mounting bracket and slightly adjust the sensor until the LED light illuminates steadily. Tighten the bracket. Test the door.
- If this doesn't work: The sensors themselves may be faulty or the wiring is damaged. Consider professional help.
2. Check the Remote Control and Wall Button — Rule out simple power issues.
- Safety First: No specific safety concerns here, but keep fingers clear of the door path during testing.
- Action: Replace the batteries in your remote control, even if you suspect they're fine. Walk closer to the opener unit to rule out range issues. Try using the wired wall button. If the wall button works but the remote doesn't, it indicates a remote issue. If neither works, the problem is likely with the opener unit itself or its power supply.
- Tools: Small screwdriver (for battery compartment).
- If this doesn't work: The remote might be deprogrammed or broken. Consult your opener's manual for reprogramming instructions, or consider replacing the remote.
3. Inspect the Springs — A common culprit for slow or struggling doors.
- Safety First: WARNING: Garage door springs are under extreme tension and can cause severe injury or death if handled improperly. DO NOT attempt to repair or adjust springs yourself. Call a professional if you suspect spring issues.
- Action: Visually inspect the torsion spring (mounted horizontally above the door) or extension springs (running along the horizontal tracks). Look for visible gaps in the torsion spring coils or broken, stretched extension springs. If a spring is broken, the opener will struggle immensely or fail to lift the door at all.
- Pro Callout: Immediately call a licensed garage door technician if you see a broken spring.
4. Lubricate Moving Parts — Reduce friction and strain.
- Safety First: Unplug the garage door opener from the ceiling outlet before lubricating to prevent accidental activation.
- Action: Using garage door lubricant (not WD-40, which can attract dust), spray along the rollers, hinges, and the bearing plates at the ends of the torsion spring. For chain drives, lightly lubricate the chain. For screw drives, apply lithium grease to the screw mechanism. Operate the door manually a few times to spread the lubricant.
- Tools: Garage door specific lubricant (lithium grease or silicone spray).
- Note: Do not lubricate the tracks themselves, as this can interfere with roller movement.
5. Check the Motor and Drive System — Listen for specific sounds.
- Safety First: Unplug the opener before inspecting any internal components.
- Action: Listen carefully when the door operates. A grinding noise often indicates worn gears within the opener head unit. A straining hum without movement suggests the motor is trying but failing, possibly due to a jammed component, a faulty capacitor, or an overloaded motor.
- Tools: Flashlight.
- If this doesn't work: Internal motor or gear issues often require replacement of the opener head unit or professional repair.
6. Examine the Manual Release Handle — Ensure it's not partially engaged.
- Safety First: Ensure the door is fully closed when engaging or disengaging the manual release, unless the door is balanced and held up safely.
- Action: The red emergency release handle hangs from the trolley on the rail. Make sure it's fully engaged with the motor drive system. If it's partially pulled or snagged, the motor might run, but the door won't move, leading to the impression of a dying opener.
- Note: Pulling this handle detaches the door from the opener, allowing manual operation. Only do this if you can safely lift and lower the door manually.
7. Test the Capacitor (Advanced) — If the motor hums but doesn't move.
- Safety First: WARNING: Capacitors can store a lethal electrical charge even when unplugged. ONLY attempt this if you are experienced with electrical work and know how to safely discharge a capacitor. Otherwise, call a professional.
- Action: A failing start capacitor can cause the motor to hum but not turn. If you are qualified, unplug the unit and safely discharge the capacitor before testing it with a multimeter set to capacitance. Compare the reading to the capacitor's stated microfarad (µF) rating. If it's significantly off, replacement is needed.
- Tools: Multimeter with capacitance setting, insulated screwdriver (for discharge), replacement capacitor (must match original µF and voltage rating exactly).
- Pro Callout: This is a delicate and potentially dangerous task. If unsure, contact a qualified technician.
Common Causes
- Worn Gears/Motor: Constant operation grinds down plastic or metal gears and stresses the motor.
- Failing Capacitors: Critical for giving the motor a 'jolt' to start; they degrade over time.
- Misaligned/Dirty Sensors: Obstructed safety eyes prevent the door from closing completely.
- Broken Springs: The opener is designed to assist spring tension, not lift the entire door's weight. Broken springs put immense strain on the motor.
- Poor Lubrication: Increased friction on rollers, hinges, and tracks makes the motor work harder.
- Remote/Wiring Issues: Dead batteries, faulty remotes, or damaged wiring to the wall button can mimic opener failure.
- Age and Wear: Like any mechanical device, components simply wear out after years of use (typical lifespan is 10-15 years).
Common Mistakes
- Ignoring Early Warning Signs: Waiting until total failure often results in more expensive emergency repairs or being stranded.
- Not Checking Simple Things First: Overlooking dead remote batteries, dirty sensors, or a tripped breaker before assuming a major problem.
- Using the Wrong Lubricant: WD-40 attracts dust and can gunk up parts; use silicone-based or lithium-based garage door specific lubricants.
- Attempting Spring Repairs: Garage door springs are extremely dangerous. DIY attempts can lead to severe injury. Always call a pro for spring issues.
- Over-Adjusting Limit Switches/Force Settings: Incorrect adjustments can cause the door to improperly open or close, or even damage the operator or door.
- Ignoring Routine Maintenance: Regular inspection and lubrication can significantly extend the life of your opener and prevent breakdowns.
Cost & Time Breakdown
| Task | DIY Cost | Pro Cost | Time |
|---|---|---|---|
| Sensor Cleaning/Adjustment | $0 | $75–$150 | 5–10 min |
| Remote Battery Replacement | $5–$20 | Part of service | 2–5 min |
| Lubrication | $10–$20 | Included | 15–30 min |
| Minor Wiring Fix (low voltage) | $5–$15 | $100–$200 | 30–60 min |
| Opener Head Unit Replacement | $150–$500 | $350–$800 | 2–4 hours |
| Spring Repair/Replacement | N/A | $200–$600 | 1–2 hours |
Tips & Prevention
- Annual Lubrication: Once a year, lubricate all moving metal parts (except the tracks) to reduce friction and wear.
- Test Safety Features Monthly: Test the photo-eye sensors by placing an object in their path. Test the auto-reverse by placing a 2x4 flat on the floor and closing the door on it. The door should immediately reverse. Adjust or clean as needed.
- Balance the Door: Disengage the opener (only when the door is closed) and manually lift the door. It should stay at any point you stop it. If it doesn't, your springs are out of balance and need professional attention.
- Check Fasteners: Periodically check that all bolts and screws holding the opener, tracks, and door panels are tight.
- Remote Battery Replacement: Replace remote batteries annually, or when range decreases.
- Listen for Changes: Pay attention to any new or unusual noises during operation; they are often the first sign of a problem.
When to Call a Professional
While many minor issues can be addressed by a diligent homeowner, several problems with garage door openers require the expertise of a licensed professional. If you hear a grinding noise from the opener head unit, it often indicates stripped gears or a failing motor, which are complex internal repairs. Any issues related to the garage door springs—whether they appear broken, excessively creaky, or the door feels very heavy to lift manually—demand immediate professional attention due to the extreme tension and danger involved. Similarly, if the opener hums but the door doesn't move, it could be a capacitor issue, which, if not safely discharged, can deliver a dangerous electrical shock. Major electrical malfunctions, such as sparking, burning smells, or continuous tripping of a circuit breaker, also warrant a professional’s diagnosis to prevent fire hazards or further damage. Don't hesitate to call a certified technician if you're unsure, uncomfortable, or dealing with anything beyond basic cleaning and lubrication.
Related Articles
Keep troubleshooting with these hand-picked guides from FixlyGuide:
- The Hidden Reason Your GFCI Trips (It's Not Always a Faulty Outlet) — A continuously tripping GFCI outlet is a critical safety warning, often indicating moisture, a faulty appliance, or a wiring problem that r…
- The Hidden Reason Your GFCI Trips (It’s Not Always a Bad Outlet) — A tripping GFCI outlet is a safety mechanism doing its job, often indicating a problem like moisture, a faulty appliance, or a wiring issue…
- The Hidden Reason Your AC Isn't Cooling (And Why Most Homeowners Get It Wrong) — Is your central AC blowing warm air or struggling to cool your home? The culprit is often a silent but serious issue many homeowners overlo…
- The Secret to Lush Raised Beds? It's Not Just About How You Water — Smart irrigation for raised garden beds isn't just about automation; it's about delivering the right amount of water precisely when your pl…
- Is That Sweet Car Smell a Secret Killer? (& 6 Other Odors to Watch For) — Unusual odors in your car aren't just unpleasant; they're often critical warnings of underlying mechanical issues that could compromise saf…
- The 5-Minute Trick to Fix a Window That Won't Stay Open (No Tools Needed!) — Discover the surprisingly simple reasons why your window keeps sliding shut and how to fix it in minutes, often without any tools.
What should this project cost?
Enter your project details for a realistic cost range before you call anyone.
Cost depends heavily on which system turns out to be the source.
- Regional adjustment
- National average
- Labor share (typical)
- ~$1,620
- Quotes to collect
- 3 written estimates
Educational estimate based on national averages — not a binding quote. Always confirm with written local estimates.
This article was independently written by FixlyGuide based on the source topic.
Frequently asked questions
How long do garage door openers typically last?+
Most garage door openers are designed to last between 10 to 15 years, though this can vary based on usage, maintenance, and environmental factors. Regular lubrication and prompt attention to minor issues can extend its lifespan.
Why does my garage door opener remote only work sometimes?+
Intermittent remote functionality often points to dead or dying batteries, interference from other electronic devices, or a remote that's losing its programming. Try replacing the batteries, standing closer to the opener, or reprogramming the remote according to your owner's manual. Dirty or misaligned safety sensors can also cause intermittent issues, preventing the door from closing properly.
Is it safe to fix a garage door opener myself?+
Many minor issues, like cleaning sensors, replacing remote batteries, or lubricating moving parts, are safe for DIY. However, any work involving the high-tension springs, internal electrical components like capacitors, or complex motor repairs should be left to a licensed garage door professional due to significant safety risks.
What's that grinding noise coming from my garage door opener?+
A grinding noise typically indicates worn or stripped gears inside the opener's motor head unit. This usually means the motor is struggling to lift the door and is a strong sign that the opener is failing. It often requires professional repair or replacement of the opener head.
Discussion
Loading comments…