- Look for a small red or silver triangle, a star-shaped dial, or an active digital gallon count displaying flow down to hundredths of a gallon.
- If that low-flow dial is spinning while everything inside is quiet, water’s escaping under continuous municipal pressure.
- Snap a clear smartphone photo of the digital counter, leave the house untouched for exactly two hours, and take a second photo; any movement confirms a pressurized leak.
Plumbing · Leak
| Project category | Plumbing |
|---|---|
| Problem type | Leak |
| Trade required | Plumbing |
| Urgency | Emergency — act now |
| Safety risk | High safety risk |
| DIY suitability | DIY for experienced homeowners |
| Cost category | Low cost |
| Typical timeline | Shut water off now; repair usually same or next day |
| Contractor type | Licensed plumber |
Repair option
Isolate at the shutoff, replace the failed component, and dry the cavity fully.
Replacement option
Repipe the run or the branch when corrosion is widespread.
Common causes
- Failed supply line or shutoff valve
- Worn washers, cartridges, or P-trap connections
- Pinhole corrosion in older copper
Relevant tools:emergency checklistdiy or hire a pro
Published October 30, 2026Last updated October 30, 2026
Tools & materials you'll need
Affiliate linksAs an Amazon Associate FixlyGuide earns from qualifying purchases — at no extra cost to you. Prices and availability are accurate as of publication and subject to change.
Quick Answer
If you’re trying to catch hidden water leaks before they rot subfloors or send your utility bill into orbit, start with the five usual suspects: the toilet tank flapper and fill valve, behind the washing machine hoses, the water heater temperature and pressure (T&P) discharge tube, the refrigerator ice-maker supply line, and exterior frost-free hose bibbs. I’d run a 2-hour water meter test first—shut off every fixture, check the red low-flow indicator triangle or digital flow rate, and see if pressurized water’s moving anywhere in the foundation or walls. Simple test. Big payoff.
The Problem
Water is sneaky. It’s patient, too. And it does a pile of damage before anybody spots it. A pinhole leak smaller than a pencil tip—barely 1/16 of an inch—in a pressurized 60 PSI supply line can dump 250 gallons of water every single day. That’s about 7,500 gallons tacked onto your monthly bill before you ever see a stain on the ceiling.
And the nasty part? Water usually doesn’t drip straight down where it escaped. I’ve chased leaks that sprayed inside a wall cavity, hit a stud, ran ten feet along a plate, then showed up in a totally different room as a soft baseboard or a bubble in the paint. Supply lines buried under slab foundations or tucked into insulated crawl spaces can weep quietly for eight to twelve months before you get organic growth or floor tiles tenting. In places with reactive expansive clay soil—North Texas is a prime example—a hidden foundation leak changes the soil moisture under one corner of the slab, and next thing you know you’ve got foundation heave and cracked brickwork. No joke.
How It Works
Your house runs on two separate plumbing systems: pressurized supply and gravity-assisted drainage. Municipal water comes in through a copper, PEX, or galvanized main line at roughly 45 to 80 PSI. From there it feeds a manifold or branches off through 1/2-inch and 3/4-inch lines to fixtures, valves, and appliances. Every joint, crimp ring, brass fitting, and rubber seal is holding back a pile of force 24 hours a day, 365 days a year.
When every faucet’s off, that supply side ought to sit dead still. If water moves past the meter even a little bit, there’s a breach somewhere on the pressurized side. That’s the whole game.
Drain lines work differently. They run at atmospheric pressure and depend on a standard 1/4-inch per foot slope to move greywater and sewage through PVC or cast iron to the sewer or septic tank. Drain leaks usually only show up when a fixture’s running, which is why they can soak framing under subfloors or behind tub surrounds without making a peep. Figuring out whether you’re dealing with a 24/7 supply leak or an intermittent drain issue cuts the search in half right away.
Step-by-Step Fix
Here’s the exact diagnostic workflow I use to hunt down, isolate, and repair the five most common hidden water leaks in a house.
-
Conduct the 2-hour zero-flow water meter test — Shut down every indoor fixture, ice maker, reverse osmosis filter, and irrigation controller. Find your water meter box near the street curb or in the basement, pop the iron lid with a meter key or large flathead screwdriver, and check the dial face.
- Look for a small red or silver triangle, a star-shaped dial, or an active digital gallon count displaying flow down to hundredths of a gallon.
- If that low-flow dial is spinning while everything inside is quiet, water’s escaping under continuous municipal pressure.
- Snap a clear smartphone photo of the digital counter, leave the house untouched for exactly two hours, and take a second photo; any movement confirms a pressurized leak.
-
Execute the toilet tank dye test — Toilet leaks make up over 70% of residential water waste and can quietly send 200 gallons a day straight down the overflow tube without so much as a whisper. Remove the ceramic tank lid carefully and drop six to eight drops of dark food coloring or dedicated blue leak-detector tablets into the reservoir water.
- Don’t flush the toilet for 30 minutes.
- Inspect the bowl: if tinted water creeps into the standing bowl water, the rubber flapper has warped, picked up mineral crust, or lost its seal against the flush valve seat.
- Replace the flapper with a chemical-resistant silicone model sized specifically to your flush valve (usually 2-inch or 3-inch).
-
Check the toilet fill valve critical level and overflow tube — Look down at the open toilet tank while it’s fully pressurized. The water line should sit exactly 1/2 inch to 1 inch below the rim of the vertical overflow tube.
- If water keeps spilling over the top edge of the tube, your fill valve is either adjusted too high or the internal diaphragm has failed to shut off.
- Twist the adjustment screw on the float arm counterclockwise to drop the fill level.
- If water still spills into the tube after adjustment, shut the 3/8-inch compression angle stop valve at the wall and swap the whole fill valve assembly.
-
Pull appliances and inspect rubber-to-braided connections — Slide your washing machine out at least 18 inches from the wall using a steady pull so you don’t snap the drain line. Run your bare fingers along the underside of both hot and cold supply hoses, paying close attention to the crimped metal collars behind the machine and at the shutoff bibbs.
- Look for tiny bulges, calcium blistering, or green oxidation on brass hose threads.
- If the hoses are standard black rubber older than five years, replace them right away with braided stainless steel burst-proof lines rated to 125 PSI.
- Thread them hand-tight to the bibb, then add exactly one-quarter turn with slip-joint pliers; over-tightening crushes the internal rubber washer and causes instant weeping.
-
Inspect the refrigerator ice-maker line and solenoid valve — Roll the refrigerator forward and inspect the 1/4-inch tubing coiled behind it. Brittle translucent polyethylene tubing is a common failure point because heat from the compressor dries out the plastic until it cracks.
- Inspect the compression nut or push-fit connector at the water inlet solenoid valve at the bottom rear of the fridge for calcification or damp dust bunnies.
- If you find thin plastic tubing, replace the run with a braided stainless steel 1/4-inch supply line or soft coiled copper tubing.
- Make sure the line has enough slack coiled in a 6-inch diameter loop so sliding the fridge out doesn’t kink or shear the fitting.
-
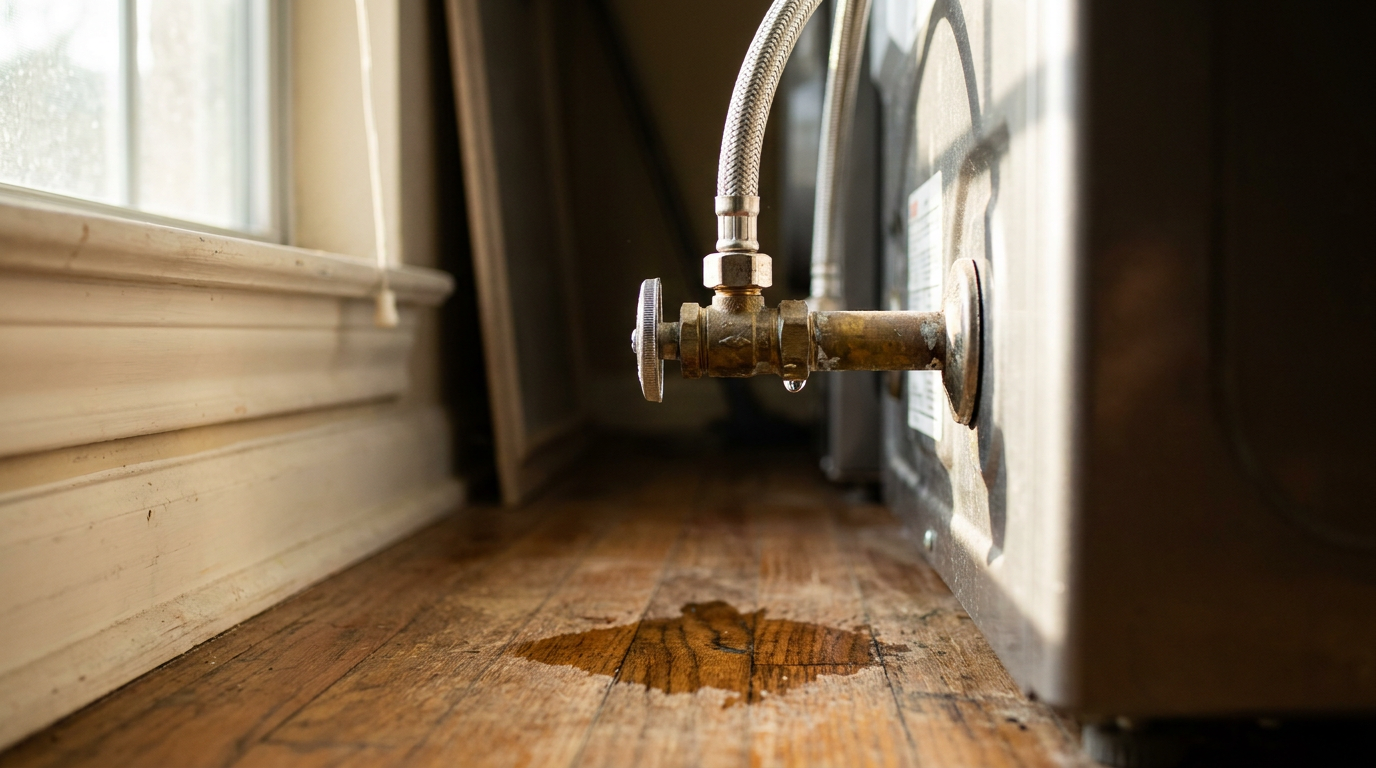
Examine the water heater temperature and pressure (T&P) relief valve — Find the 3/4-inch brass valve near the top or upper side of your water heater tank, fitted with a metal test lever and a copper or CPVC discharge pipe running toward the floor or exterior. Check the open end of that discharge pipe with a dry paper towel.
- If the end is damp or shows white crusty scale, the valve seat has failed, thermal expansion is spiking tank pressure past 150 PSI, or the internal water temperature exceeds 210°F.
- Lift the test lever briefly for two seconds to blast sediment off the seat, letting it snap back firmly.
- If it keeps dribbling after cycling, shut the cold inlet, drain four gallons from the bottom spigot, unthread the old T&P valve using an adjustable pipe wrench, apply three wraps of PTFE thread tape, and install a new relief valve rated to 150 PSI/210°F.
-
Test exterior frost-free sillcocks for freeze ruptures — A frost-free hose bibb hides its valve seat 8 to 14 inches deep inside the insulated wall cavity. If a garden hose was left attached during a winter freeze, trapped water splits the copper tube inside the wall, but it’ll only leak when you actually turn the spigot handle on.
- Thread a brass hose-cap pressure gauge onto the exterior spigot, or cap it firmly with your thumb while wearing a heavy work glove, and crack the valve open.
- If water pressure drops easy or you hear water spraying inside the siding or rim joist, the interior pipe body is split wide open.
- Head into the basement, crawl space, or access panel inside the house to visually confirm the ruptured barrel before turning that spigot on again.
-
Isolate supply branches using shutoff valves — If the water meter indicator keeps creeping and no appliances or toilets show visible leaks, start isolating home zones. Turn off the main shutoff valve feeding the interior of the home (often located in the garage or utility closet).
- If the meter dial stops dead, the leak is inside the home’s interior distribution walls or ceilings.
- If the meter continues to spin with the house main shut off, the leak is underground between the municipal street meter and your foundation wall.
- In that case, shut down the curb valve immediately to protect your yard and call a specialist with acoustic ground microphones.
Common Causes
- Degraded rubber flappers and washers: Municipal chlorine, chloramines, and hard water minerals chew up standard rubber parts within three to five years, leaving micro-channels that let water bypass nonstop.
- Thermal expansion spikes: Closed plumbing systems fitted with backflow preventers or check valves trap expanding hot water from the water heater, driving line pressure from a safe 50 PSI up past 100 PSI, blowing out weak joints and appliance valves.
- Corrosion and galvanic reaction: Mixing dissimilar metals—like screwing brass fittings straight into galvanized steel without a dielectric union—starts electrochemical corrosion that eats pipe threads from the inside out.
- Mechanical vibration and water hammer: Fast-closing solenoid valves in dishwashers and washing machines send hydraulic shock waves back through the piping, loosening solder joints, push-to-connect fittings, and compression nuts over time.
- Freeze expansion in hidden cavities: Leaving a garden hose connected to an exterior faucet keeps the frost-free barrel from draining; freezing water expands roughly 9%, splitting the copper pipe inside the wall envelope.
Common Mistakes
- Tightening compression nuts until they strip: When homeowners spot a weeping nut under a sink or behind a fridge, they usually want to crank it down hard. That’s how you turn a slow drip into a full-blown mess. Over-tightening crushes the brass ferrule or shreds the rubber gasket. Tighten hand-tight, then use a wrench for one-quarter to one-half turn only.
- Ignoring the saddle valve: A lot of older refrigerator water lines tap into copper supply pipes with cheap needle punch-type saddle valves. They never seal well for long and they love to leak behind drywall. Replace saddle valves with a solid brass 1/2-inch by 1/4-inch tee stop valve.
- Using chemical drop-in bleach tablets in toilet tanks: Those bright blue or bleach-dispensing pucks might make the bowl smell clean, but the concentrated chlorine destroys rubber flappers, silicone seals, and plastic flush valve assemblies in under six months, triggering big silent leaks.
- Assuming dry drywall means no leak: Insulation can soak up gallons before moisture ever shows on the front paper face of the drywall. If you smell musty odors or your water bill jumps, use a pinless moisture meter on baseboards and drywall instead of trusting your eyes alone.
- Failing to replace washing machine hoses every five years: Folks assume braided or rubber hoses last as long as the appliance. They don’t. Rubber compounds break down under constant municipal pressure, and hose bursts are still one of the top five homeowner insurance claims in North America.
Cost & Time Breakdown
| Task | DIY Cost | Pro Cost | Time |
|---|---|---|---|
| Toilet Flapper & Fill Valve Replacement | $18–$35 | $175–$275 | 30–45 mins |
| Braided Washer Hose Installation | $25–$45 | $150–$225 | 20–30 mins |
| Refrigerator Ice Maker Line Upgrade | $15–$30 | $150–$200 | 30–60 mins |
| Water Heater T&P Relief Valve Swap | $25–$50 | $225–$350 | 45–75 mins |
| Frost-Free Sillcock Replacement | $35–$70 | $300–$550 | 1–2 hours |
| Whole-House Acoustic Leak Detection | N/A | $350–$650 | 1–3 hours |
Tips & Prevention
- Install smart water leak sensors at high-risk points: Put wireless water puck sensors on the floor beneath every toilet tank, water heater drip pan, washing machine box, and behind the refrigerator. Better systems can hook to an automated motorized whole-home shutoff valve on your main line that cuts water supply within five seconds of moisture contact.
- Test your main shutoff valve twice a year: Ball valves and gate valves can seize up over time from mineral buildup. Turn your main water shutoff valve completely off and back on every spring and autumn to make sure it turns freely and holds back 100% of municipal water pressure in an emergency.
- Monitor your home's static water pressure with a cheap gauge: Thread a simple $10 water pressure gauge onto your laundry tap or outdoor spigot once every six months. If static pressure tops 75 PSI, your municipal pressure-reducing valve (PRV) has probably failed, exposing your whole plumbing system to dangerous pressure surges.
- Never leave garden hoses connected during winter: Disconnect, drain, and store all garden hoses before the first overnight temperature drop below 32°F. Even high-end frost-free spigots will burst inside your rim joist if an attached hose traps water in the stem.
- Inspect subfloor areas around tub skirts and toilets: Grab a high-lumen flashlight and check crawl spaces or unfinished basement ceilings directly beneath bathrooms. Look for water stains, dark wood grain, or white salt deposits (efflorescence) running down drain pipes.
When to Call a Professional
If you do the two-hour water meter test and that low-flow dial is still spinning, but your toilets, fixtures, appliance lines, and outdoor bibbs show zero dampness, you’re dealing with a hidden pressurized leak. Stop guessing, and don’t go punching random holes in your walls. Call a licensed plumber who specializes in non-invasive electronic leak detection.
You need a pro right away if you hear the steady hiss of running water behind finished walls, notice warm spots on concrete slab flooring, smell sewage coming up through heating vents, or spot sheetrock cracking along with unexplained puddling in the yard. Hidden slab leaks can wash out the support soil under your foundation and rack up thousands in settlement repairs in a hurry. If high-pressure water is anywhere near electrical junction boxes, breaker subpanels, or heating equipment, shut off your main water supply and main electric breaker immediately, then wait for emergency plumbing services.
Related Articles
Keep troubleshooting with these hand-picked guides from FixlyGuide:
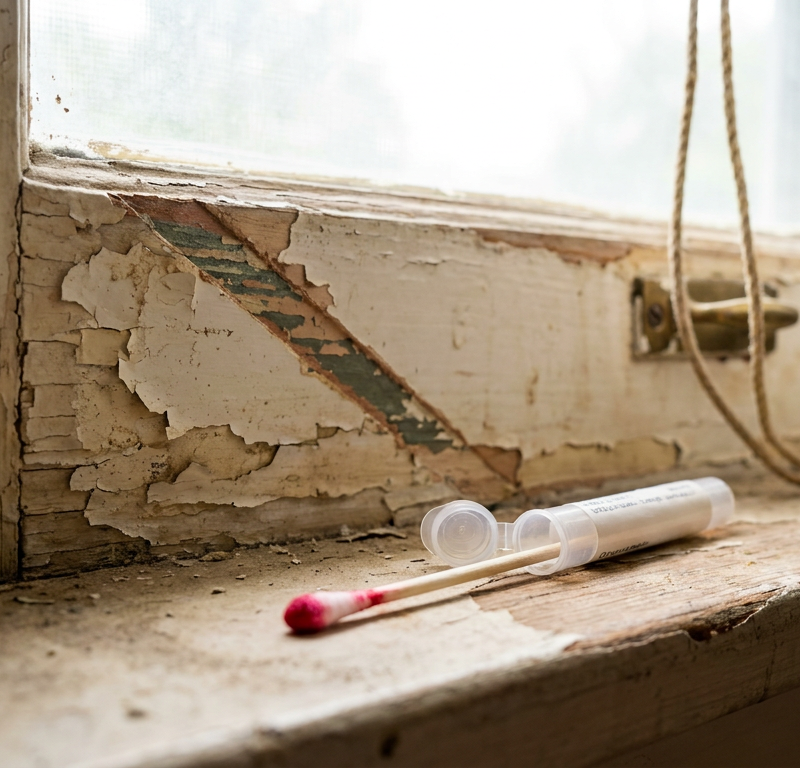
- Paint Peeling in an Old House? Lead Dust Safety for DIY Repairs — If your home was built before 1978, repairs that disturb painted surfaces can create hazardous lead dust—here's how to test and work safely.
- 7 Hidden Equity Drains Costing You Thousands Annually — Your home is an asset, but silent problems like minor leaks, poor insulation, and deferred maintenance can drain its value. Discover the se…
- Worried About Lead Paint? How to Test for It and Stay Safe During DIY Repairs — If your home was built before 1978, you likely have lead paint. Here's how to test for it and what to do to keep your family safe during re…
- House Built Before 1978? What Every Homeowner Needs to Know About Lead Paint — If your home was built before 1978, you likely have lead paint. Disturbing it during DIY repairs can create toxic dust—here's how to work s…
- The 3 Hidden Ways Your — Uncover the surprising habits and hidden household issues that are silently increasing your homeownership costs and learn how to fix them.
- Kitchen Faucet Leaking Under the Sink When Sprayer Runs? 5 Causes and the Step-by-Step Fix — Fix that hidden water leak under your kitchen sink. Step-by-step diagnostic and repair instructions for leaking pull-out hoses, bad O-rings…
Should you do this yourself?
Answer five quick questions before you start. Safety outranks savings every time.
Your experience with work like this
How high do you have to work?
Does the job involve any of these?
Will it need a permit?
Specialty tools
Free and instant. Educational guidance only — not a quote, inspection, or professional diagnosis.
Questions to ask before you sign
Ask every contractor the same questions and the cheapest bid stops looking cheapest. Check them off as you go — your progress is saved on this device.
Free, no signup. Bring this to every walkthrough so you compare bids on the same terms.
What should this project cost?
Enter your project details for a realistic cost range before you call anyone.
Common repairs run $150–$650; repipes and water-heater replacements reach $1,500–$4,500.
- Regional adjustment
- National average
- Labor share (typical)
- ~$754
- Quotes to collect
- 3 written estimates
Educational estimate based on national averages — not a binding quote. Always confirm with written local estimates.
Fixly Project Decision Box
- DIY difficulty
- Moderate
- Estimated time
- 30 minutes – half a day
- Cost level
- Moderate
Main tools / materials
- Adjustable wrench
- Plunger or drain auger
- Bucket and towels
- Thread tape
When to stop and call a pro
- Water you cannot shut off at the fixture or main
- Sewage backing up into more than one fixture
- Water near electrical panels or outlets
- Gas water heater work beyond relighting a pilot
Need professional help?
Get a Licensed PlumberHandle this before it gets worse
First steps that limit damage, then a way to reach a qualified pro.
- Emergency repair checklistThe first steps that limit damage before a pro arrives.Open
- Get local estimatesSend one request and compare written estimates from vetted pros.Open
- Estimate this projectGet a cost range for your scope and ZIP before you call anyone.Open
Free, no signup required. Estimates are educational guidance, not a quote or an inspection.
Get the print-ready PDF of this guide
A clean, ad-free, printable version you can keep on your phone or pin to the workshop wall. Free with a FixlyGuide account.
- Print-optimized layout
- Tools, materials & every step included
- Saved to your account
This article was independently written by FixlyGuide based on the source topic.
Frequently asked questions
How do I tell if I have a hidden water leak using my meter?+
Locate your water meter box, ensure every fixture and appliance in the house is completely shut off, and look at the dial. If the small low-flow indicator (a red/silver triangle, star, or digital register) is spinning or creeping forward, pressurized water is leaking somewhere past the meter.
What is the dye test for toilet leaks?+
Drop 6 to 8 drops of dark food coloring into the toilet tank and wait 30 minutes without flushing. If any color creeps into the bowl water, your flapper or flush valve seal is leaking and needs replacement.
How often should I replace washing machine supply hoses?+
Both standard rubber and braided stainless steel hoses should be replaced every 3 to 5 years. Even braided hoses contain an internal rubber or PVC tube that degrades under continuous municipal pressure.
Why does my outdoor spigot leak inside the wall only when turned on?+
Frost-free sillcocks place their shutoff valve 8 to 14 inches inside the warm envelope of the home. If a hose is left connected in winter, trapped water cannot drain and freezes inside the pipe barrel, causing the copper casing inside your wall to split.
What water pressure is considered safe for residential plumbing?+
Safe residential water pressure is between 45 and 70 PSI. Pressure consistently exceeding 80 PSI damages appliance valves, wears out toilet fill valves, and can cause pinhole supply line leaks.
Why is the pipe on the side of my water heater dripping?+
A weeping T&P valve typically indicates either a failed internal spring seat, excessive water temperature above 210°F, or thermal expansion driving line pressure beyond the valve's 150 PSI safety rating.
Are saddle valves for refrigerator ice makers safe to keep?+
Standard saddle valves pierce a tiny needle hole through copper pipe and rely on an external rubber gasket clamped around the pipe. Over time, vibration and temperature changes cause the rubber to dry rot and slip, making saddle valves a frequent source of hidden leaks.
Can a hidden slab leak damage my home's foundation?+
Yes. In expansive soils like clay, water from a leaking supply line or drain saturates the ground under the slab, causing the soil to swell and lift the concrete (heave), which cracks exterior brick, interior drywall, and door frames.

Discussion
Loading comments…