- Kitchen Faucet Low Pressure? 10 Steps to Restore Weak Flow — Kitchen pull-out faucet suddenly lost water pressure? Learn how to clear clogged aerator screens, flush internal check valves, and fix unde…
- The 5-Minute Trick to Restore Your Kitchen Sink Sprayer's Lost Pressure — Restore your kitchen sink sprayer's low pressure with a quick, simple trick that often takes less than five minutes and requires no special…
- The 5-Minute Trick to Fix a Weak Kitchen Sink Sprayer (No Plumber Needed) — Restore full power to your kitchen sink sprayer with simple, DIY steps that tackle common culprits like clogs and diverter issues.
- The 1 Mistake Homeowners Make When Protecting Pipes From Freezing — Preventing frozen pipes is crucial in winter; many homeowners make a common mistake that leaves their plumbing vulnerable.
- The 1 Caulk Mistake That Leads to Mold Around Your Bathroom Sink — Discover the crucial caulking mistake most homeowners make that allows mold and water damage around their bathroom sink, and how to fix it…
Plumbing · Leak
| Project category | Plumbing |
|---|---|
| Problem type | Leak |
| Trade required | Plumbing |
| Urgency | Emergency — act now |
| Safety risk | High safety risk |
| DIY suitability | DIY for experienced homeowners |
| Cost category | Low cost |
| Typical timeline | Shut water off now; repair usually same or next day |
| Contractor type | Licensed plumber |
Repair option
Isolate at the shutoff, replace the failed component, and dry the cavity fully.
Replacement option
Repipe the run or the branch when corrosion is widespread.
Common causes
- Failed supply line or shutoff valve
- Worn washers, cartridges, or P-trap connections
- Pinhole corrosion in older copper
Relevant tools:emergency checklistdiy or hire a pro
Published October 20, 2026Last updated October 20, 2026
Tools & materials you'll need
Affiliate links- AmazonOEM replacement pull-down hose kit1 · matched to faucet brand and model
- AmazonFaucet screen washers and O-ring kit1 pack · standard 1/2-inch and 3/8-inch sizes
- AmazonDistilled white vinegar8 oz · for soaking mineral-choked spray heads
- AmazonPlumber's silicone grease1 small tube · for lubricating quick-connect O-rings
- AmazonBlue painter's tape1 roll · to mark counterweight position
As an Amazon Associate FixlyGuide earns from qualifying purchases — at no extra cost to you. Prices and availability are accurate as of publication and subject to change.
Quick Answer
If water leaks under your sink only when you run the pull-out or pull-down kitchen spray wand, you’re probably looking at a tired hose crimp, a quick-connect O-ring that’s gone hard, or a check valve in the spray head that’s given up. Shut the water off, unscrew the spray head, and look at the inlet washer. Then run a dry paper towel along the flexible braided hose while it’s pressurized so you can catch those hairline fractures. In my book, replacing the hose assembly or reseating the snap coupling fixes over 90% of these leaks in about 30 minutes for under $35.
The Problem
Few things light a fire under a homeowner like reaching into the under-sink cabinet for a dish sponge and finding soggy cardboard boxes, swollen MDF shelving, and standing water. What makes a kitchen pull-out or pull-down sprayer leak so maddening is how sneaky it is. The faucet deck stays bone dry. The spout doesn’t drip into the basin. The main supply lines running from your dual angle-stop valves don’t leak a drop.
Instead, the water shows up out of sight, under the subfloor or base cabinet, and only when you pull the wand out to rinse a skillet.
Because the leak hides in the dark beneath the sink deck, it can go unnoticed for weeks. In regions with hard water—like the mineral-dense aquifers across North Texas—calcium crust builds up inside the tiny diverter mechanism and the swivel joint. That scale chews up synthetic rubber gaskets every time you tug the hose. Before long, pressurized spray shoots straight backward down the faucet’s center guide tube, runs along the braided nylon sheath, and dumps gallons onto the cabinet floorboards. Leave it alone long enough and that trapped moisture warps cabinetry, delaminates laminate, and spawns black mold within 48 to 72 hours.
How It Works
A pull-down or pull-out faucet doesn’t route water directly from the cartridge to a static spout casting. Inside the main brass or stainless-steel body sits an open conduit sleeve. Hot and cold water blend inside the central mixing cartridge, then drop downward through an outlet tube beneath the sink deck.
[Hot / Cold Inlets]
        │
        ▼
[Cartridge / Mixing Valve]
        │
        ▼
[Deck Outlet Tube] ──(Quick-Connect Fitting)──► [Flexible Hose]
                                                       │
                                                (Under the Sink)
                                                       │
[Spray Wand Head] ◄──(Threaded Coupling / O-Ring)──────┘
Down here, underneath the deck, that mixed water feeds into a quick-connect fitting. The fitting sends pressurized water back upward through a high-flex braided hose—usually 48 to 60 inches of reinforced EPDM rubber or PEX wrapped in braided stainless steel or woven nylon. The hose travels up through the core of the faucet neck and ends at the spray head.
When you flip the wand’s rocker switch between aerated stream and wide spray, you’re working a spring-loaded mechanical diverter valve inside the wand handle. When the wand runs, system pressure inside that flexible line climbs anywhere from 40 to 70 PSI. Counterweight clamps—solid cast iron or lead-free weights ranging between 10 and 16 ounces—hang on the under-sink loop of the hose. Every time you pull the wand out and let it snap back, that metal weight drags across the hose casing, rubbing over copper water pipes, drain trap bends, and cabinet divider walls. That repeated friction, paired with pressure shock, makes this flexible hose the highest-wear plumbing part in your whole kitchen.
I pulled a water heater in Frisco last month that had exactly this kind of hidden leak nearby—looked dry up top, but the damage under the cabinet told the real story. Same song, different house.
Step-by-Step Fix
Follow these steps to find the failure point and replace or rebuild your leaking sprayer line.
-
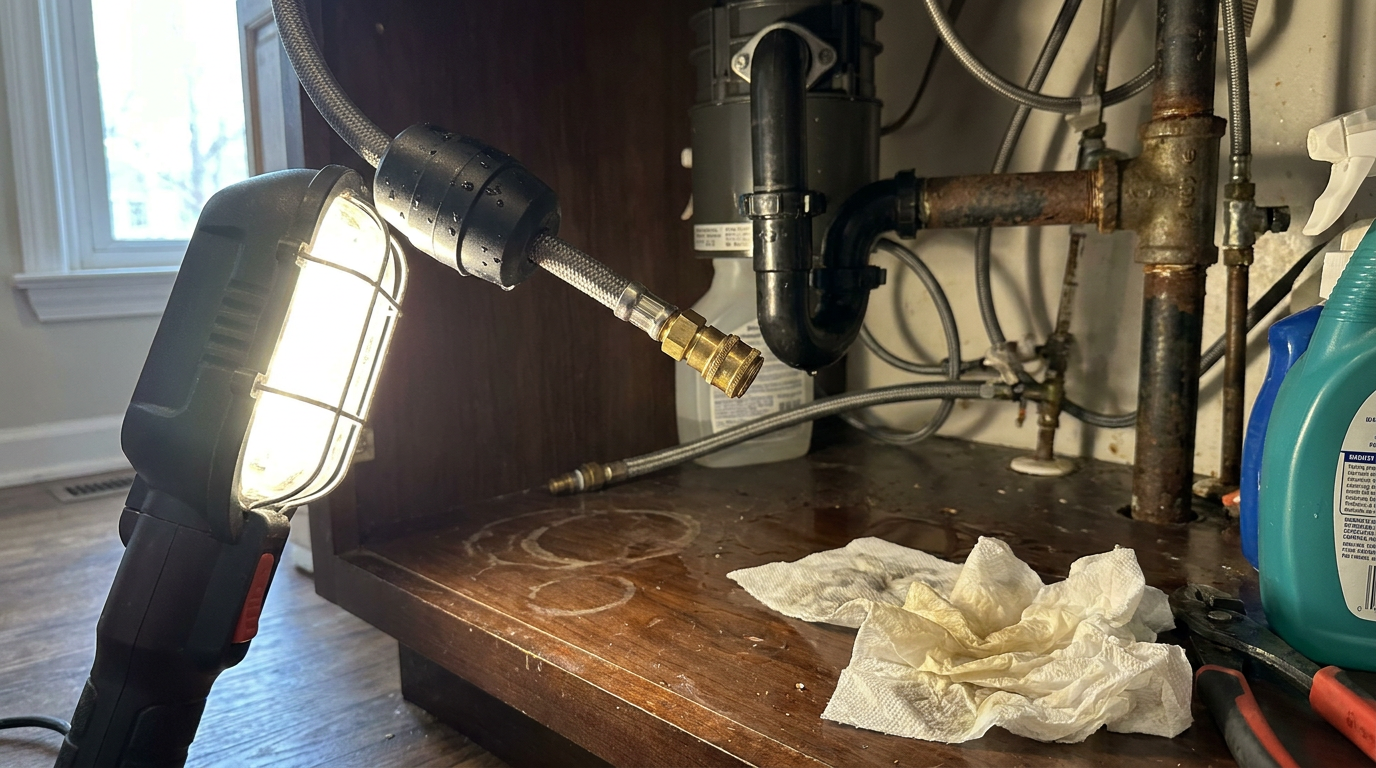
Clear the cabinet and establish a dry baseline — Empty every single cleaning bottle, dish tab bin, and bucket from the under-sink cabinet. Lay down thick, dry white paper towels across the cabinet floor directly beneath the faucet center column and the braided hose loop. White paper towels show even tiny leaks fast by darkening where they get wet.
- Tools: Work light or LED headlamp, dry paper towels.
- Warning: If you’ve got an electrical outlet under the sink powering a garbage disposal or dishwasher, unplug them before you start running water.
-
Conduct the static vs. dynamic pressure test — Turn your faucet handle on full blast with the spray head docked firmly in the neck, running at 120°F mixed temperature. Look underneath with your flashlight for 60 seconds without moving the hose. If no water appears, the cartridge and rough-in connections are fine; your problem is on the dynamic downstream side, meaning the hose, spray head, or quick-connect coupling.
- If water drips immediately: The leak is likely your mixing valve cartridge body or rigid copper supply riser, not the pull-down assembly.
-
Isolate the spray-head connection — Pull the spray wand forward out of the neck collar by about 12 inches. Grip the ribbed metal coupling collar directly behind the wand with your fingers (or wrap masking tape around pliers so you don’t scratch the finish) and unthread the wand counterclockwise. Hold the bare brass hose end firmly so the hose doesn’t zip backward down the neck tube under the pull of the counterweight.
- Tools: Slip-joint pliers with taped jaws, microfiber cloth.
- Key check: Look inside the wand coupling. You should find a small black rubber washer with a fine stainless-steel debris screen. If that washer is crushed, off-center, or hard as a rock from mineral buildup, water will squirt backward out of the threads and track straight down the outside jacket of the hose.
-
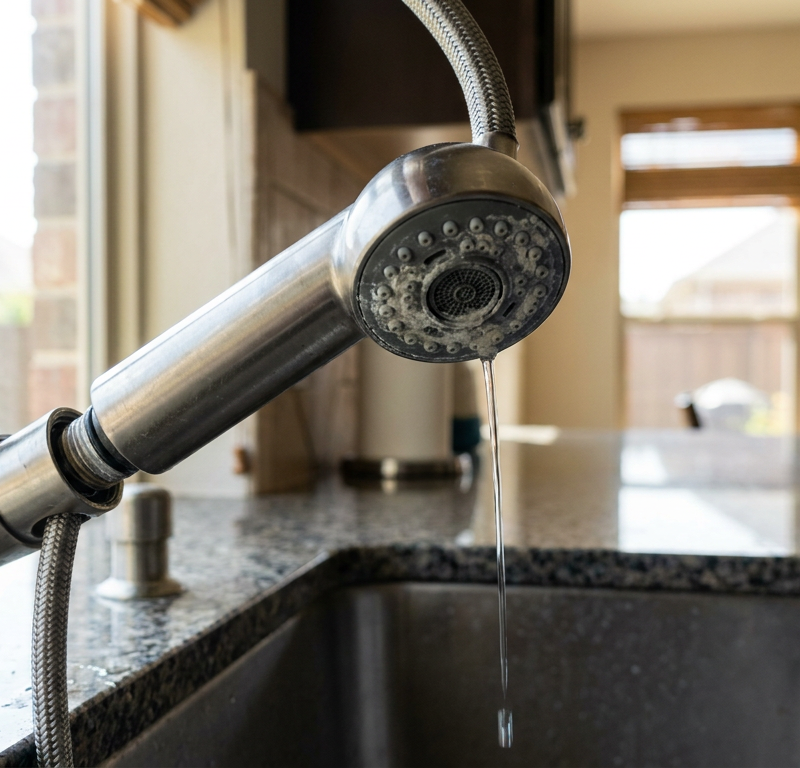
Inspect the internal check valve and aerator — Modern spray wands contain a dual-check backflow preventer inside the plastic wand shank. Mineral sediment and fractured water heater dip-tube plastic can jam those check valves half-open. Soak the detached wand in a plastic bowl filled with a 50/50 mixture of warm tap water and 5% distilled white vinegar for 30 minutes to loosen chalky calcium deposits, then flush it backward under a utility faucet.
- Material: 8 oz distilled white vinegar.
-
Examine the hose crimp and flex zone — With the spray head detached, hold the bare hose end pointing straight down into a deep bucket. Have a helper turn the faucet handle half-on. While water flows out the end at roughly 1.5 to 2.0 GPM, inspect the metal crimp ring where the flexible hose meets the brass threaded fitting.
- Crucial check: Look for pinhole mists shooting sideways from behind the crimp. The repeated back-and-forth bend fatigue from pulling the wand out can split the internal EPDM rubber liner right at the stiff stress-relief collar. If the crimp spits water, stop right there; the hose is blown and needs to be replaced.
-
Shut off water stops and relieve internal pressure — Turn both the hot and cold under-sink angle-stop shut-off valves fully clockwise until they seat tightly. If your valves are old multi-turn units with oval handles, turn them until they stop; if they’re modern quarter-turn ball valves, turn them perpendicular to the pipe. Lift the faucet handle above the deck to bleed off leftover pressure and drain standing water from the riser tubes.
- Safety: Put a shallow catch pan under the shut-off valves. Old compression packing nuts on rarely used angle stops often weep a few drops once you move them.
-
Detach the counterweight — Crawl under the sink and find the black or gray weight clamped onto the hose. Most modern units use a tool-free plastic clamshell latch, while older fixtures use two Phillips-head screws clamping two lead halves together. Pop the clips or back out the two #2 Phillips screws, remove the weight, and set it aside.
- Pro tip: Mark the hose with a piece of blue painter’s tape right above where the weight sat before you remove it. That way you can put it back at the same factory balance point later.
-
Disconnect the quick-connect fitting — Trace the lower end of the pull-down hose to where it meets the central brass or plastic outlet tube under the deck. You’ll run into one of three quick-connect styles: a plastic collar you push upward while pulling the hose downward, a sliding square clip (common on older fixtures) that pulls out sideways, or two squeeze-tabs you compress with your fingertips.
- Action: Depress the release tabs or push the collar, then pull the hose adapter plug out firmly. Keep a rag handy—about 3 to 4 fluid ounces of trapped water will drain out of the line the moment it lets go.
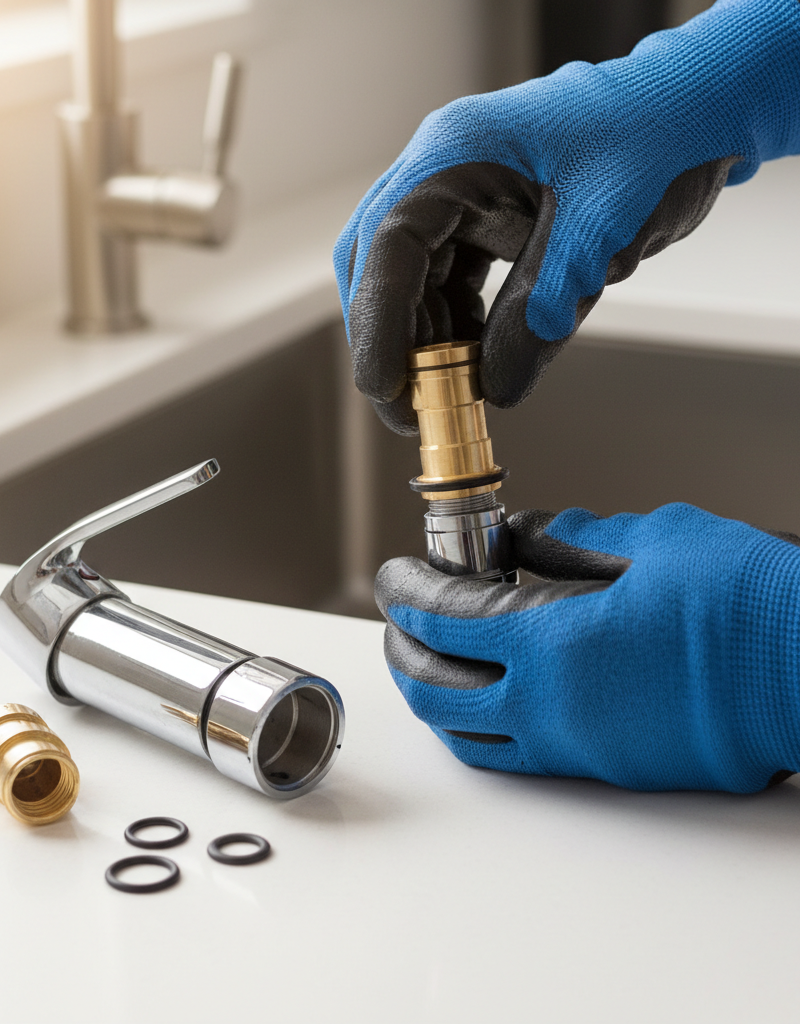
- Inspection: Look into the female receiver or pull the hose male plug into the light. Check the tiny O-ring (typically 3/8-inch OD). If it’s nicked, flattened, or missing its silicone grease, water under full line pressure will blow right past that joint.
-
Extract the old hose assembly — Go back to the top side of the sink. Carefully draw the spray wand coupling and hose up and out through the curved spout neck. If it snags, don’t yank hard; the brass quick-connect plug at the bottom can catch against the faucet’s internal anti-friction bearing or under-sink supply tubes. Guide it with one hand underneath while pulling from above.
-
Install the replacement hose — Drop the male quick-connect end of the new OEM or universal braided hose down through the faucet spout opening. Feed it gently through the internal plastic slip-liner until the brass fitting comes through under the sink. Thread the spray wand back onto the top fitting, making sure the rubber screen washer sits flat inside the recess. Hand-tighten the coupling, then snug it just one-quarter turn past hand-tight with your pliers. Don’t overtighten it; you’ll warp the rubber washer and create a brand-new leak.
- Material: Manufacturer-specific replacement hose kit (e.g., 59-inch nylon-braided hose with matching click-connect terminal).
-
Snap the quick-connect and remount the weight — Push the new hose’s lower adapter firmly into the faucet outlet tube until you hear a distinct, mechanical click. Tug downward on the line with moderate force (roughly 10 lbs of tension) to verify the internal lock fingers have engaged. Re-clamp the counterweight onto the hose, positioning it roughly 2 inches above the bottom of the hose loop on the spray-wand side of the curve, right at your painter’s tape mark.
- Testing clearance: Cycle the hose by pulling the wand out above the sink three or four times. Watch the weight rise underneath. Make sure it moves smoothly without catching on the drain P-trap, supply tubes, or shut-off valve handles.
-
Pressurize, bleed, and verify under working load — Open both angle-stop shut-off valves fully. Detach the spray wand one last time and hold the hose open over the sink. Turn the faucet handle on full hot, then full cold for 30 seconds each to flush manufacturing oils, loose pipe scale, and trapped air bubbles through the line. Reattach the wand. Toggle the selector switch between stream and blast modes twenty times while checking every joint underneath with dry paper towels. If the towel stays bone dry, you’re done.
Common Causes
- Fatigue splits in the flex zone — Pull-out hoses deal with nasty bending radiuses, especially right beneath the spray wand collar. Over years of daily kitchen work, the internal polymer tubing shears inside, sending water backward inside the outer braided protective casing.
- Deteriorated quick-connect O-rings — The quick-release connector relies on a single rubber O-ring to hold back 50+ PSI of mixed water pressure. Chlorine, chloramines, and heat break down Buna-N rubber over time, making it brittle until it cracks and sprays a mist under the cabinet.
- Crushed or missing screen washers — The threaded connection between the wand and the hose needs a flat seal under compression. If a homeowner overtightens the coupling or cleans the screen and puts it back crooked, high-velocity water bypasses the threads and rides the hose straight down into the cabinetry.
- Counterweight hang-ups causing abrasion — If the counterweight snags on corrugated dishwasher drain lines or rough copper pipes, the outer nylon or stainless braiding frays. Once the protective braid splits, the thin inner tube balloons and ruptures.
- Mineral-choked diverter valves — When scale clogs the micro-orifices inside the wand’s spray face, internal hydraulic back-pressure spikes hard. That back-pressure forces water backward through the wand swivel seal and downward through the faucet neck.
Common Mistakes
- Assuming Teflon tape belongs on the wand coupling — Wrapping plumber’s tape over the male threads of a pull-down spray wand is unnecessary and counterproductive. The seal comes from the compressed rubber screen washer inside the female socket, not the threads. Packing tape onto those threads often stops the coupling from bottoming out, which guarantees an internal leak.
- Overtightening the wand or quick-connect components — Plastic wand threads and brass quick-connect sleeves are fragile. Cranking down on them with heavy pipe wrenches strips threads and cracks internal retaining rings. Hand-tight plus a quarter-turn with small pliers is all you need.
- Positioning the counterweight on the wrong side of the hose loop — Putting the weight on the faucet-body side of the hose loop instead of the wand side makes the sprayer fight gravity. The wand won’t retract, and the weight will hang up on the quick-connect adapter, eventually ripping the fitting loose.
- Skipping the post-install line flush — Installing a brand-new hose and immediately firing up the spray wand pushes loose sediment, manufacturing debris, and loosened mineral flakes straight into the wand’s delicate internal check valves. Always flush the bare hose into a bucket before you connect the wand.
- Ignoring universal hose compatibility issues — Faucet makers use proprietary quick-connect designs. While generic "universal" replacement hoses sold at big-box hardware stores include plastic adapter kits, they often leak or pop off under thermal shock. Always source the exact OEM replacement hose matched to your faucet manufacturer and model.
Cost & Time Breakdown
| Task | DIY Cost | Pro Cost | Time |
|---|---|---|---|
| Replace Wand Screen Washer & O-Ring | $4–$8 | $125–$175 | 15 mins |
| Descale Spray Wand & Clean Diverter | $3–$6 | $125–$150 | 45 mins |
| Replace Pull-Down Sprayer Hose Assembly | $25–$55 | $175–$250 | 30–40 mins |
| Replace Complete Pull-Down Faucet Assembly | $120–$350 | $300–$550 | 1.5–2.5 hours |
| Cabinet Base Floor Repair (Minor Water Damage) | $15–$45 | $250–$450 | 2–3 hours |
Tips & Prevention
- Install an under-sink leak sensor — Put a battery-operated water detector puck or a smart wireless sensor right on the cabinet floorboards behind the supply lines. A $15 sensor will sound an 85 dB alarm the moment two drops of water hit its metal contact pins, which can save you thousands in rotted wood repairs.
- Keep the hose travel path completely clear — Give the vertical drop space under your kitchen faucet to the hose and weight only. Move bulk cleaning bottles, tall dish soap containers, and waste bins away from the back wall so the counterweight can move freely without snagging.
- Inspect the hose jacket twice a year — Every spring and fall, reach under the sink, pull out the full length of the hose, and run your fingers along it. Feel for kinks, fraying wire strands, broken nylon fibers, or sticky rubber spots that point to internal breakdown.
- Descale the wand face biannually — If you live in an area with hard municipal water (over 7 grains per gallon), calcium builds up in the soft silicone spray nozzles. Rub the rubber nozzles with your thumb while water flows to knock off crust, or soak the face in white vinegar to keep back-pressure from building.
- Check the quick-connect coupling for play — Give the lower quick-connect plug a gentle upward push every six months. If the fitting feels loose, wobbles too much, or shows green mineral oxidation on the brass collar, replace the retaining clip and internal O-ring before it blows out completely.
When to Call a Professional
Swapping an accessible pull-out hose or seating a fresh screen washer is a pretty straightforward DIY afternoon fix. But some jobs mean it’s time to set the tools down and call a licensed plumbing professional.
If your under-sink angle-stop shut-off valves are corroded, seized shut, or start dripping hard from their stems when you touch them, stop. Trying to muscle a 20-year-old stuck valve can snap the copper stub-out clean off inside the drywall, and that turns into an uncontrolled, high-pressure flood that needs a main-line shutdown.
Same story if your kitchen sink plumbing involves an unvented drain layout, ungrounded Romex wiring for the disposal running loose across the cabinet subfloor, or structural subfloor rot that has made the sink basin sag away from the granite countertop. You’re past a simple hose repair at that point. A licensed plumber can replace failing shut-off stops, re-pipe degraded brass transitions, and install a commercial-grade faucet fixture with full warranty coverage.
Frequently Asked Questions
Why does my faucet only leak when the sprayer is pulled out?
When the spray wand is docked, the flexible hose hangs mostly straight down, which keeps tiny splits compressed and closed. Pulling the wand forward creates a sharp bend radius near the collar and stretches the braided housing, opening stress cracks in the inner rubber core. On top of that, using the spray function activates the wand’s diverter, which spikes internal hydraulic line pressure compared with the unobstructed stream mode.
Can I just wrap the leaky kitchen sprayer hose in silicone self-fusing tape?
No, that repair won’t hold. Kitchen supply lines run under municipal pressures between 45 and 75 PSI, with hot water temperatures up to 125°F. Exterior silicone tape or duct tape can’t handle that constant pressure cycle and flex movement; it’ll blow out within days, usually while you’re not home, and dump gallons of water beneath your cabinetry.
How do I know what replacement hose to buy for my pull-down faucet?
Check the faucet body or the cold water supply tag under the sink for a manufacturer name and model number. Major manufacturers build proprietary quick-connect terminals and wand thread patterns. If the model tag is gone, take clear photos of the faucet deck, the spray head connection, and the under-sink quick-connect fitting, then match them at a dedicated plumbing supply counter or use the manufacturer’s visual identification guide online.
Are all kitchen pull-down faucet counterweights the same?
No. Counterweights generally range from 10 to 16 ounces, and their internal channel diameters have to match the specific outside diameter of your hose. If you put on a weight that’s too light, the spray wand will sag out of the spout collar and won’t retract. If the weight is too heavy or installed wrong, it puts constant mechanical tension on the quick-connect fitting, which speeds up gasket failure.
Why is water leaking from the top of the faucet neck when I run the wand?
This happens when the connection between the wand and the hose loosens, or the screen washer inside that joint goes bad. Water escapes the coupling, runs down the outside of the hose inside the curved spout neck, and comes out through the slip-ring joints at the base of the faucet body above the sink deck, making it look like the faucet metal itself is leaking.
How tight should the pull-out sprayer head be connected to the hose?
It should be hand-tightened firmly, then given an additional one-quarter to one-half turn with adjustable slip-joint pliers. The joint depends on an internal rubber washer to make a compression seal. Overtightening will pinch, tear, or distort that rubber washer, and then you’ve got a steady leak path straight down the hose sleeve.
Why did my new pull-down hose stop delivering full water pressure immediately after installation?
You probably forgot to flush the water lines before screwing on the spray wand. When you shut off supply stops and disconnect old plumbing, mineral scale and pipe sediment break loose inside the valves. When you turn the water back on, that debris shoots straight into the tiny filter screen or the backflow preventer check valve inside the wand, choking off flow. Unscrew the head, clean the screen, and flush the bare hose into a bucket.
Can I shorten a kitchen sprayer hose if it is too long and hitting my pipes?
Never cut or try to shorten a factory-crimped high-pressure sprayer hose. The ends have hydraulic factory-swaged metal crimps built to handle high working pressures without separating. Cutting the line destroys the structural reinforcement braid. If the hose hangs too low and snags on shut-off valves or drain lines, adjust the counterweight location or install a smooth plastic hose guide bracket to steer its travel.
Related Articles
Keep troubleshooting with these hand-picked guides from FixlyGuide:
- Kitchen Faucet Low Pressure? 10 Steps to Restore Weak Flow — Kitchen pull-out faucet suddenly lost water pressure? Learn how to clear clogged aerator screens, flush internal check valves, and fix unde…
- The 5-Minute Trick to Restore Your Kitchen Sink Sprayer's Lost Pressure — Restore your kitchen sink sprayer's low pressure with a quick, simple trick that often takes less than five minutes and requires no special…
- The 5-Minute Trick to Fix a Weak Kitchen Sink Sprayer (No Plumber Needed) — Restore full power to your kitchen sink sprayer with simple, DIY steps that tackle common culprits like clogs and diverter issues.
- The #1 Mistake Homeowners Make When Protecting Pipes From Freezing — Preventing frozen pipes is crucial in winter; many homeowners make a common mistake that leaves their plumbing vulnerable.
- The #1 Caulk Mistake That Leads to Mold Around Your Bathroom Sink — Discover the crucial caulking mistake most homeowners make that allows mold and water damage around their bathroom sink, and how to fix it…
- Is Your Gutter Sagging After Every Storm? The Hidden Flaw Most Homeowners Miss — Discover the overlooked reason your gutters sag after every storm and learn the lasting fix that most homeowners miss.
Should you do this yourself?
Answer five quick questions before you start. Safety outranks savings every time.
Your experience with work like this
How high do you have to work?
Does the job involve any of these?
Will it need a permit?
Specialty tools
Free and instant. Educational guidance only — not a quote, inspection, or professional diagnosis.
Questions to ask before you sign
Ask every contractor the same questions and the cheapest bid stops looking cheapest. Check them off as you go — your progress is saved on this device.
Free, no signup. Bring this to every walkthrough so you compare bids on the same terms.
What should this project cost?
Enter your project details for a realistic cost range before you call anyone.
Common repairs run $150–$650; repipes and water-heater replacements reach $1,500–$4,500.
- Regional adjustment
- National average
- Labor share (typical)
- ~$754
- Quotes to collect
- 3 written estimates
Educational estimate based on national averages — not a binding quote. Always confirm with written local estimates.
Fixly Project Decision Box
- DIY difficulty
- Moderate
- Estimated time
- 30 minutes – half a day
- Cost level
- Moderate
Main tools / materials
- Adjustable wrench
- Plunger or drain auger
- Bucket and towels
- Thread tape
When to stop and call a pro
- Water you cannot shut off at the fixture or main
- Sewage backing up into more than one fixture
- Water near electrical panels or outlets
- Gas water heater work beyond relighting a pilot
Need professional help?
Get a Licensed PlumberHandle this before it gets worse
First steps that limit damage, then a way to reach a qualified pro.
- Emergency repair checklistThe first steps that limit damage before a pro arrives.Open
- Get local estimatesSend one request and compare written estimates from vetted pros.Open
- Estimate this projectGet a cost range for your scope and ZIP before you call anyone.Open
Free, no signup required. Estimates are educational guidance, not a quote or an inspection.
Get the print-ready PDF of this guide
A clean, ad-free, printable version you can keep on your phone or pin to the workshop wall. Free with a FixlyGuide account.
- Print-optimized layout
- Tools, materials & every step included
- Saved to your account
Frequently asked questions
Why does my faucet only leak when the sprayer is pulled out?+
When the wand is docked, the hose hangs straight, keeping tiny fractures sealed. Pulling the wand out flexes the line sharply and activates the wand diverter, boosting internal pressure and opening stress cracks in the inner rubber tubing.
Can I just wrap the leaky kitchen sprayer hose in silicone tape?+
No, tape will not hold. Kitchen lines run under 40 to 70 PSI of pressure with hot water up to 125°F. Flexible silicone or duct tape cannot withstand that constant dynamic pressure and movement; it will blow out within days.
How do I know what replacement hose to buy for my pull-down faucet?+
Look for a manufacturer tag on the cold water supply line under the sink. Major brands use proprietary quick-connect snap fittings. If the tag is missing, take photos of the wand threads and lower quick-connect plug to match at a plumbing supply house.
Are all kitchen pull-down faucet counterweights the same?+
No. Weights range from 10 to 16 ounces and are sized to the outer diameter of the hose. A weight that is too light will not retract the wand, while one that is too heavy puts unnecessary mechanical strain on the quick-connect fitting.
Why is water leaking from the top of the faucet neck when I run the wand?+
This happens when the connection between the wand and hose leaks. Water sprays backward inside the neck, runs down the outer casing of the hose, and seeps out through the swivel joints at the base of the faucet deck.
How tight should the pull-out sprayer head be connected to the hose?+
Hand-tighten it firmly, then turn it one-quarter turn past hand-tight with pliers. The seal comes from compressing the inner rubber screen washer, not from overtightening the mechanical metal threads.
Why did my new pull-down hose stop delivering full water pressure?+
Sediment dislodged during the repair has clogged the wand. Turn off the faucet, unscrew the wand, clean the tiny mesh filter screen, and flush the open hose directly into a bucket for 30 seconds before reattaching.
Can I shorten a kitchen sprayer hose if it is too long?+
Never cut or shorten a factory-crimped hose. The ends use hydraulic machine crimps engineered to hold municipal line pressure. Cutting the line ruins the braided core. Instead, adjust the counterweight position or install a hose guide bracket.
Discussion
Loading comments…