- The 5-Minute Trick to Restore Your Kitchen Sink Sprayer's Lost Pressure — Restore your kitchen sink sprayer's low pressure with a quick, simple trick that often takes less than five minutes and requires no special…
- The $5 Secret to Silencing That Annoying Dripping Faucet (Single-Handle Fix) — Stop a dripping single-handle faucet with a simple and inexpensive DIY fix by replacing a worn-out o-ring or washer.
- The 5-Minute Trick to Stop a Dripping Single-Handle Faucet (No Plumber Needed) — A persistent drip from your single-handle faucet is usually caused by a worn-out cartridge, a repair you can typically complete yourself in…
- The 1 Mistake Homeowners Make When Protecting Pipes From Freezing — Preventing frozen pipes is crucial in winter; many homeowners make a common mistake that leaves their plumbing vulnerable.
- The 1 Mistake Homeowners Make with a Slow Kitchen Drain (and the Real Fix) — Before you reach for harsh chemicals, learn the right way to fix a slow kitchen sink drain and prevent future clogs.
Plumbing · Clog
| Project category | Plumbing |
|---|---|
| Problem type | Clog |
| Trade required | Plumbing |
| Urgency | Soon — within weeks |
| Safety risk | Low safety risk |
| DIY suitability | DIY friendly |
| Cost category | Low cost |
| Typical timeline | Same-day DIY attempt; pro visit within a day or two |
| Contractor type | Licensed plumber |
Repair option
Plunger, hand auger, or trap cleanout before chemicals.
Replacement option
Line replacement when clogs return in the same spot repeatedly.
Common causes
- Hair and soap buildup in the trap
- Grease cooling in the branch line
- Flushed wipes or foreign objects
Relevant tools:diy difficultydiy or hire a pro
Published October 20, 2026Last updated October 20, 2026
Tools & materials you'll need
Affiliate links- AmazonAdjustable wrenchcrescent-style, up to 10-inch
- AmazonNylon-bristle toothbrush
- AmazonDental pick or precision screwdriver
- AmazonSpring clamp or clothespinto hold bare hose above the sink neck
- AmazonSmall bucket or shallow catch basin
- AmazonHex key set (Allen wrenches)3/32-inch or 1/8-inch, if servicing cartridge
As an Amazon Associate FixlyGuide earns from qualifying purchases — at no extra cost to you. Prices and availability are accurate as of publication and subject to change.
Quick Answer
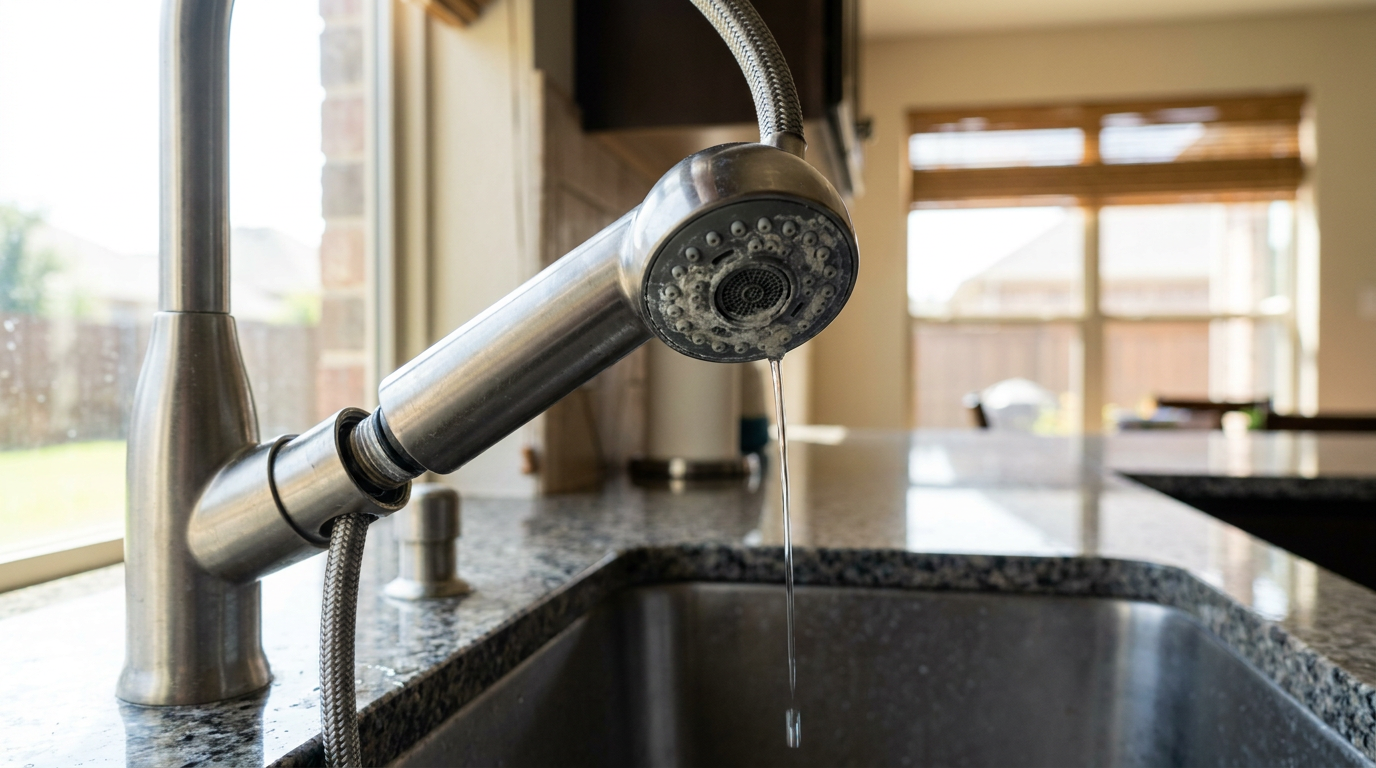
If your pull-out or pull-down kitchen faucet has suddenly lost water pressure while the bathroom and shower run fine, I’d bet money the problem is a blocked aerator screen, a jammed check valve inside the spray head, or a kinked braided supply hose under the sink. You can usually knock out the mineral buildup or shake loose the sediment in about 20 minutes by unscrewing the wand, soaking the spray face in warm white vinegar, and back-flushing the integrated backflow cartridge. Seen it a hundred times. It’s usually something small.
The Problem
Low water pressure at one kitchen faucet is one of those jobs that’ll make a homeowner mutter under their breath. You turn the lever wide open, expecting a decent rinse stream to blast marinara off a dinner plate, and instead you get a sad little spitting trickle. Meanwhile, the rest of the house has roaring 55 to 65 PSI line pressure. Toilet tanks refill quick. The master bath shower runs like a firehose. Yet your pricey pull-down kitchen faucet barely gives you enough stream to wash a spoon.
Most folks think the main water pressure regulator died or the underground utility pipe collapsed. It didn’t. Pull-down and pull-down hybrid faucets cram a bunch of moving parts into a tight space. High-mesh debris screens, dual-action diverter valves, internal check valves, ultra-flexible woven hoses stuffed into cramped under-sink cabinets—there are half a dozen choke points where one tiny grain of pipe scale or mineral grit can choke the flow down to under 0.5 gallons per minute (GPM).
I pulled a kitchen faucet in Frisco last month that had exactly this leak story, except the homeowner was ready to replace the whole fixture. Took me longer to move the trash can than it did to clear the screen.
How It Works
Modern kitchen faucets are built around federal efficiency standards capping flow at 1.8 GPM at 60 PSI (or 1.5 GPM in stricter jurisdictions like California). To keep the spray usable at that low volume and still stop dirty water from sneaking back into your drinking water, manufacturers stack a few mechanical barriers inside the faucet wand.
Water comes from your home’s 1/2-inch copper or PEX rough-in pipes through 3/8-inch flexible braided supply lines, through the cartridge inside the faucet hub, and down into an internal copper or plastic transfer tube under the sink deck. From there, it enters a long, flexible pull-out hose wrapped in stainless steel or nylon mesh. That hose loops down toward the cabinet floor—weighted down with a 1-pound lead or cast-iron counterweight—before heading back up through the faucet neck and tying into the handheld spray wand.
Inside that wand sits a spring-loaded dual check valve built to meet ASME/ASSE backflow standards, then a diverter mechanism that flips between aerated stream and blade spray, and finally a multi-layer micro-mesh aerator. When city utility work, an aging water heater, or hard water knocks loose calcium carbonate flakes, that junk gets swept straight through your rough plumbing and lands at the narrowest bottleneck: the inlet screen of the pull-out spray head.
[Supply Stops (3/8")]
         ↓
[Mixing Cartridge in Hub]
         ↓
[Under-Sink Diverter / Loop Hose] (Vulnerable to Kinks)
         ↓
[Hose-to-Wand Connection] (Debris Screen Bottleneck)
         ↓
[Internal Dual-Check Valve]
         ↓
[Aerator / Spray Faceplate] (Vulnerable to Mineral Scale)
Step-by-Step Fix
Before you go buying a brand-new $300 faucet fixture, walk through these targeted checks and repairs. You’ll usually pin down the restriction in fifteen minutes flat.
1. Isolate Hot vs. Cold Supply Flow —
Turn your faucet lever all the way to full hot and watch the stream, then sweep it over to full cold. If pressure is lousy on hot but strong on cold (or the other way around), the restriction isn’t inside your spray wand—it’s upstream in one angle stop, an inlet screen, or a blocked water heater nipple. If both hot and cold act the same and both are weak, the blockage is downstream where the waters combine: inside the mixing cartridge, the pull-out hose, or the spray head itself.
- Tool: None needed.
- Safety: Keep an eye on the water temp while you switch so you don’t scald your hands.
- If cold runs great but hot trickles: Skip straight to step 9 and inspect the hot-water angle stop.
2. Disconnect the Spray Wand from the Hose —
Pull the spray head out of the faucet spout neck by 6 to 8 inches. Grab the brass or plastic knurled coupling nut at the base of the wand where it threads onto the flexible hose. Twist the nut counter-clockwise by hand, or use an adjustable wrench wrapped with a washcloth so you don’t scar the finish.
- Tool: Adjustable wrench, rag or painter's tape.
- Safety warning: Hang onto the hose once the head comes apart!
- Critical catch: If you let go of the bare hose, the counterweight under the sink will yank it straight down inside the faucet spout. Clip a plastic spring clamp or clothes pin onto the hose neck right away so it doesn’t disappear into the hole.
3. Test Bare Hose Water Volume —
Point the open end of the bare flexible hose straight down into the sink basin. Hold it steady with one hand while you turn the faucet handle on at half volume with the other. If water blasts out with heavy volume and good pressure, your supply lines, cartridge, and hose are fine. The whole problem lives inside your spray head.
- Result A: High pressure out of bare hose = move on to Steps 4, 5, and 6 to clear the wand.
- Result B: Low, weak flow out of bare hose = the issue is under the sink or in the cartridge. Skip to Step 7.
4. Clean the Wand Inlet Screen —
Look right inside the threaded base of the disconnected spray head. You’ll see a tiny circular rubber washer with a domed stainless steel wire mesh screen sitting in the middle. Use a small dental pick, needle-nose pliers, or a straightened paperclip to gently pry that rubber washer out. Rinse the screen backward under a separate running tap to flush out trapped sediment, calcium pebbles, and rust flakes.
- Tool: Dental pick or small flathead precision screwdriver.
- Notice: If the screen looks clean, don’t stop there; fine mineral silt often slips through and gets hung up in the downstream check valves.
5. Clear the Check Valves and Diverter Core —
Look past the screen into the neck of the spray head. You’ll see the plastic core of the internal check valve. Tap the wand upside down against your palm to shake loose any grit. If your spray head has a toggle button to switch from stream to sweep spray, work that button back and forth 20 times under running water to flush trapped sediment out of the spring-loaded rocker carriage.
- If the button feels stiff or crunchy: Gritty sand or calcium buildup has fouled the rocker arms.
6. Submerge the Spray Wand in White Vinegar —
Fill a small glass bowl or plastic container with straight, undiluted white distilled vinegar heated in the microwave for 45 seconds until it reaches roughly 120°F to 130°F. Fully submerge the whole spray wand—nozzle face and threaded inlet—into the warm acid bath. Let it soak for 60 to 90 minutes minimum. The mild acetic acid breaks down chalky calcium carbonate scaling stuck to the tiny silicone spray nubs and internal check springs without harming plastic seals.
- Material: 2 cups standard 5% white vinegar.
- Finish check: Scrub the faceplate with a stiff-bristled nylon toothbrush after soaking to knock off softened mineral rings. Don’t use wire brushes; they’ll wreck chrome, brushed nickel, and matte black coatings in a hurry.
7. Inspect the Under-Sink Hose for Kinks or Snags —
If the bare hose was weak in Step 3, open up the under-sink cabinet and clear the clutter out with a flashlight. Trace the flexible pull-out hose from the bottom of the faucet base down to its low loop and back up to the quick-connect block. Look for a sharp pinch or accordion-style kink where the hose bends.
- Common obstruction: Check whether the heavy counterweight is snagging on your PVC drain P-trap, garbage disposal bracket, or an overfilled bin of cleaning supplies.
- Fix: Re-route the hose so it hangs in a clean "U" shape without rubbing on shut-off valves or cabinet walls.
8. Check and Flush the Quick-Connect Diverter Block —
At the base of your under-sink faucet assembly, the pull-out hose snaps into an outlet manifold using a plastic quick-connect clip (common on Moen, Delta, and Kohler models). Put a shallow baking pan or bucket under this connection. Press the plastic release collar or squeeze the colored tabs to free the hose. Inspect the inside of the plastic quick-connect nipple; a lot of brands hide a second screen or tiny check valve there, and it fills up with black rubber debris from decomposing shut-off valve washers.
- Tool: Small catch bucket, shop towel.
9. Verify Angle Stop Shut-Off Valves Are Fully Open —
Reach to the back wall of the cabinet and check both the hot and cold water shut-off valves (angle stops). If you’ve got quarter-turn ball valves, make sure the metal teardrop handles sit perfectly parallel to the copper supply pipes. If you’ve got older multi-turn compression valves with oval handles, turn them counter-clockwise until they stop spinning.
- Watch out for broken stems: On older multi-turn valves, the plastic or brass stem can snap internally, leaving the valve gate halfway shut even though the handle spins freely to the open position.
10. Flush the Supply Cartridge —
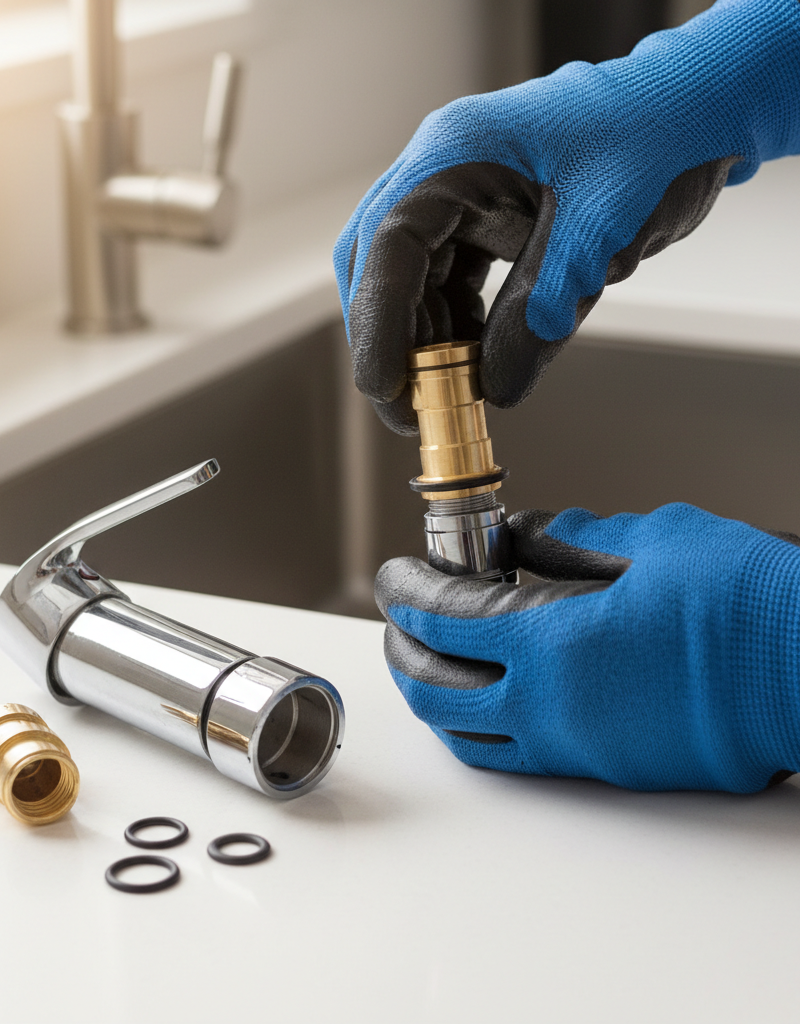
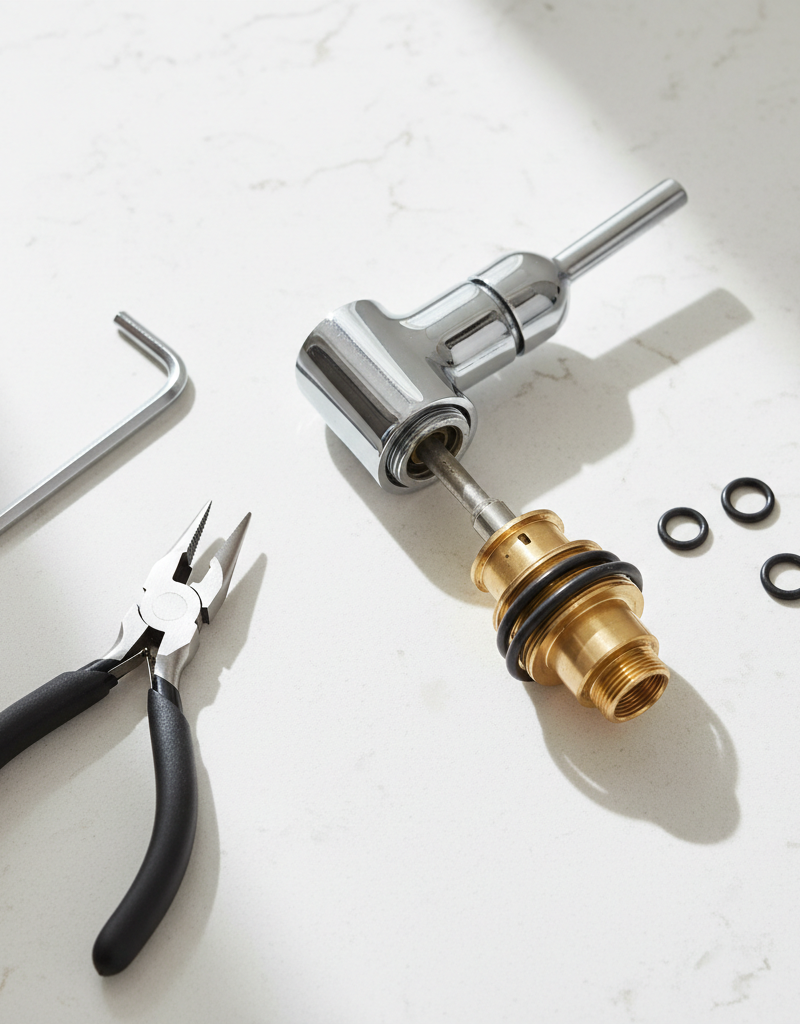
If steps 1 through 9 turn up nothing and the bare hose still runs dry, the ceramic disc mixing cartridge inside the main faucet handle assembly is loaded with sediment. Shut off both under-sink angle stops. Pop out the decorative red/blue index button on your faucet lever, loosen the 3/32-inch or 1/8-inch Allen set screw, and lift off the handle. Unscrew the bonnet nut with an adjustable wrench, pull the cartridge straight out, and check the bottom ceramic ports for trapped grit.
- Tool: Hex key set, adjustable wrench.
- Pro move: With the cartridge pulled out, hold an empty 2-liter soda bottle upside down over the open faucet body and have a helper crack the cold water shut-off open for 3 seconds. That blast cleans line debris out of the brass casting without soaking your drywall.
Common Causes
Why does this show up out of nowhere on a kitchen fixture that worked fine yesterday? Kitchen pull-down faucets sit at the dead end of a complicated home water loop. These five root causes cover just about every sudden pressure drop I see:
- Post-Plumbing Utility Scale Slugs: Any time city crews fix a water main on your street, or anytime you shut off your main valve to repair a toilet or swap a water heater, pressure swings shock your copper and galvanized lines. Flakes of hard calcium, iron rust, and solder slag break loose from pipe walls, race down the pipes when water comes back on, and jam right into your spray wand's 40-mesh intake screen.
- Severe Hard Water Calcification: If you live somewhere with hard municipal water (North Texas, the Midwest, parts of Florida—you name it), dissolved calcium and magnesium carbonates keep dropping out of solution as water evaporates on hot spray nozzles. The tiny 0.04-inch holes on the spray face slowly crust over with rock-hard limescale until water’s got nowhere to go.
- Under-Sink Hose Interference: The flexible braided hose that feeds your pull-down wand has to travel down and back up inside a 24-inch cabinet cavity packed with drain pipes, garbage disposal cords, RO filtration systems, and cleaning spray bottles. When the counterweight catches something, it twists the hose and folds it hard, creating an internal kink that can cut water flow by 80%.
- Degraded Check Valve Springs: Modern plumbing codes require backflow prevention right inside detachable wands so dirty dishwater can’t get sucked backward into municipal drinking supplies if line pressure drops all at once. Those tiny spring-loaded plastic check valves can warp, grab sand grains, or snap, and then they stay stuck in a semi-closed posture.
- Decomposing Shut-Off Valve Washers: Older multi-turn angle stops use internal neoprene rubber washers. Once they get past the 15-year mark, chlorinated water starts breaking that rubber into soft, sticky black grit. Open or close the valve and those chunks break loose, then they head straight into the supply tubes and narrow faucet cartridge inlets.
Common Mistakes
Don’t fall into these common DIY traps. I’ve seen them turn a simple 15-minute cleanup into a $400 emergency plumbing call fast:
- Letting Go of the Disconnected Hose: This is the rookie mistake, plain and simple. When you unthread the spray wand from the hose above the sink, the heavy counterweight clamped underneath yanks the hose down like an anchor. Then it vanishes into the curved faucet neck. Getting it back means crawling under the sink and feeding it up through tight internal channels—a miserable, knuckle-busting chore. Always clamp the hose with a spring clamp or clothespin at the spout opening before you unscrew the head.
- Chewing Up Finishes with Bare Pliers: Never grab the decorative metal or plastic coupling on your spray wand with bare slip-joint or channel-lock pliers. Those serrated steel teeth will gouge right through brushed nickel, oil-rubbed bronze, or chrome plating. Wrap the nut with two layers of electrical tape or use a thick microfiber rag between the tool jaw and the finish.
- Poking Spray Holes with Sewing Needles or Drill Bits: When you’re clearing crusted mineral scale from rubber spray nozzles, don’t jab sewing needles, safety pins, or micro drill bits into the holes. You’ll ream out the precision-engineered plastic orifices or puncture internal silicone diaphragm valves, and then the spray pattern’s ruined for good. Stick with hot vinegar soaks and soft nylon bristle brushes.
- Over-Tightening Plastic Quick-Connects and Wand Couplings: Kitchen faucet wands seal with a rubber O-ring or flat gasket, not brute thread pressure. Screwing the wand onto the hose until your knuckles go white crushes the rubber gasket sideways, which can block water passage or split and leak. Hand-tight plus a gentle 1/8-turn with an open-end wrench is plenty.
- Skipping Cartridge Flushing During Replacement: If you figure out the mixing cartridge is jammed and decide to install a new one, don’t drop it in dry without flushing the faucet body first. If you skip that flush, the same slug of sediment that killed the old cartridge will blast straight into your brand-new $45 replacement the second you turn the angle stop back on.
Cost & Time Breakdown
Clearing low flow yourself costs next to nothing. Here’s how DIY repair options stack up against calling a licensed residential service plumber:
| Task | DIY Cost | Pro Cost | Time |
|---|---|---|---|
| Clean Spray Wand & Aerator Screen | $0–$4 (Vinegar & rag) | $150–$250 (Standard service call fee) | 20–30 mins |
| Re-route Hose & Clear Cabinet Kink | $0 (Free) | $150–$200 | 10 mins |
| Replace Pull-Down Spray Wand | $25–$65 (OEM part) | $220–$350 (Parts + labor) | 15–20 mins |
| Replace Mixing Cartridge | $20–$50 (Cartridge) | $250–$375 | 30–45 mins |
| Replace Faucet Supply Hose Assembly | $18–$35 (Braided hose kit) | $200–$320 | 30–40 mins |
| Install New Complete Pull-Down Faucet | $140–$350 (Fixture cost) | $350–$650 (Install + hardware) | 1.5–2.5 hrs |
Tips & Prevention
You can keep low flow from coming back and keep your kitchen pressure nice and crisp with a few simple habits:
- Flush After Every Water Disruption: Whenever city utilities work on your block or you shut off your home’s main water meter, don’t test the water at your kitchen pull-down faucet first. Use an outside hose bib or a plain laundry tub without an aerator instead. Open it full blast for two minutes until the spitting air and rust-colored water clear out.
- Give the Wand an Annual Vinegar Bath: Don’t wait until the faucet starts spitting like a lawn sprinkler. Once every 12 months, unthread your spray wand, drop it into a bowl of 50/50 warm water and white distilled vinegar, and let it soak for an hour. That keeps calcium from welding itself to the internal diverter springs.
- Guard the Under-Sink Hose Swing Zone: Leave an open 8-inch vertical channel under the faucet base. Don’t let tall bottles of bleach, plastic grocery sacks, or dish-soap buckets pile up against the pull-down hose loop. If the counterweight clanks against the PVC drain pipe every time you pull the spray head, wrap a small piece of foam pipe insulation around the pipe.
- Exercise Shut-Off Valves Twice a Year: Turn your under-sink hot and cold angle stop valves all the way off and on once every six months. That knocks loose creeping calcium scale inside the valve body before it freezes the valve open, and it saves the internal rubber seals from shredding when you need to shut the water off in a hurry.
- Install a Whole-Home Sediment Pre-Filter: If you’re on a private well or living in an older neighborhood with aging cast-iron city mains, a simple 5-micron spin-down sediment filter installed at the main water entry point catches pipe scale and sand before it ever reaches delicate fixture aerators.
When to Call a Professional
Most pull-down kitchen faucet pressure drops clear up with an aerator cleaning or a hose de-kinking. Still, you should set the tools down and call a licensed plumber if you run into serious trouble inside the cabinet wall.
If your under-sink angle stop valves are corroded solid, leaking from the stem packing nut, or won’t shut off water flow to the faucet all the way, don’t force them with a big pipe wrench. Snapping an old copper pipe stub out of a drywall wall-stud cavity can flood a kitchen in seconds.
If both hot and cold water pressure drop suddenly across every fixture in the house at the same time—or if clearing the faucet turns up heavy black oil or metallic blue flakes—you’re probably dealing with a failing whole-home pressure reducing valve (PRV), a ruptured municipal supply line, or severe galvanic corrosion inside your wall framing. Those jobs need professional line diagnostics, pressure testing gauges, and code-certified replacement pipe work. No dice doing that one half-asleep after dinner.
Frequently Asked Questions
Why does my kitchen faucet have low pressure, but every other faucet in my house is fine?
Your kitchen faucet has some of the most restrictive parts in the house. Bathroom faucets use simple, wide aerators, but kitchen pull-down faucets pack fine-mesh debris screens, dual-check backflow preventers, and narrow flexible hoses into a tight wand. Fine pipe sediment that blows harmlessly out of a bathtub faucet gets trapped right away inside the kitchen wand's intake screen.
Can I just remove the flow restrictor from my pull-down spray head?
Technically yes, but I don’t recommend it unless you’ve exhausted the usual fixes and checked your local rules. Most modern spray heads have a green or pink plastic restrictor disc behind the aerator. If you pull it out, your flow may jump to over 2.5 GPM, which can overwhelm your sink basin and make a mess. Cleaning the debris screen and soaking the faceplate in vinegar almost always gets you back to full factory 1.8 GPM pressure without removing the restrictor.
How do I know if the clog is in the cartridge or the spray head?
Disconnect the spray head wand from the flexible hose above the sink, hold the bare hose opening straight down into the basin, and crack the faucet handle open. If water blasts out of the bare hose with good force, your cartridge is clear and the clog is all in the wand. If only a weak trickle comes out of the bare hose, the clog is upstream inside the mixing cartridge or supply lines.
Will soaking my matte black or brushed gold spray head in vinegar ruin the finish?
Pure white vinegar can dull or pit sensitive specialty finishes if you leave it on there for days. For matte black, oil-rubbed bronze, or brushed brass fixtures, keep soaking time to no more than 30 to 45 minutes in a 50/50 mixture of warm water and white distilled vinegar. Stay away from cleaners with ammonia, bleach, or hydrofluoric acid—they strip decorative PVD coatings right off.
What should I do if the bare hose won't pull back up through the faucet neck?
Under the sink, the flexible hose depends on a lead or plastic-encased weight to pull it back down into the cabinet. Check underneath with a flashlight and make sure the weight is clamped onto the hose roughly 4 to 6 inches above the bottom of the "U" loop on the faucet side. If the weight is clamped too high or hung up on a drain pipe, the hose will bind and won’t retract.
Why did my water pressure drop immediately after installing a new water heater?
Draining and refilling your plumbing lines during a water heater install shocks the inside of your copper or galvanized pipes. That sudden rush of water breaks loose years of built-up calcium scale and iron rust flakes. The sediment heads straight to the first fixture you open—which is usually the kitchen sink—and plugs the small debris screen at the base of your spray wand.
How do I clear sand or grit trapped inside a sealed spray wand?
If your faucet model has a permanently sealed plastic wand that won’t come apart, unscrew it from the hose and turn it upside down. Aim a high-pressure stream of water from an outside garden hose backward into the spray faceplate nozzles. That “back-flushes” trapped sand and calcium chips out through the wide threaded inlet at the bottom of the wand.
Why is water pressure only low on the hot side of my kitchen faucet?
If the cold side runs at full pressure but the hot side barely trickles, the restriction is strictly on the hot water line. The two most common culprits are a half-closed hot angle stop shut-off valve under the cabinet or a piece of debris jammed inside the hot inlet port of your faucet mixing cartridge. Shut off the hot supply, disconnect the 3/8-inch supply flex line, and flush it into a bucket to check for clear delivery from the wall valve.
Related Articles
Keep troubleshooting with these hand-picked guides from FixlyGuide:
- The 5-Minute Trick to Restore Your Kitchen Sink Sprayer's Lost Pressure — Restore your kitchen sink sprayer's low pressure with a quick, simple trick that often takes less than five minutes and requires no special…
- The $5 Secret to Silencing That Annoying Dripping Faucet (Single-Handle Fix) — Stop a dripping single-handle faucet with a simple and inexpensive DIY fix by replacing a worn-out o-ring or washer.
- The 5-Minute Trick to Stop a Dripping Single-Handle Faucet (No Plumber Needed) — A persistent drip from your single-handle faucet is usually caused by a worn-out cartridge, a repair you can typically complete yourself in…
- The #1 Mistake Homeowners Make When Protecting Pipes From Freezing — Preventing frozen pipes is crucial in winter; many homeowners make a common mistake that leaves their plumbing vulnerable.
- The #1 Mistake Homeowners Make with a Slow Kitchen Drain (and the Real Fix) — Before you reach for harsh chemicals, learn the right way to fix a slow kitchen sink drain and prevent future clogs.
- The #1 Mistake Homeowners Make When Diagnosing Low Water Pressure (It's Not Your Pipes!) — Before you blame your pipes, check the often-overlooked culprit behind whole-house low water pressure, which is usually a simple fix.
Should you do this yourself?
Answer five quick questions before you start. Safety outranks savings every time.
Your experience with work like this
How high do you have to work?
Does the job involve any of these?
Will it need a permit?
Specialty tools
Free and instant. Educational guidance only — not a quote, inspection, or professional diagnosis.
What should this project cost?
Enter your project details for a realistic cost range before you call anyone.
Common repairs run $150–$650; repipes and water-heater replacements reach $1,500–$4,500.
- Regional adjustment
- National average
- Labor share (typical)
- ~$754
- Quotes to collect
- 3 written estimates
Educational estimate based on national averages — not a binding quote. Always confirm with written local estimates.
Fixly Project Decision Box
- DIY difficulty
- Moderate
- Estimated time
- 30 minutes – half a day
- Cost level
- Moderate
Main tools / materials
- Adjustable wrench
- Plunger or drain auger
- Bucket and towels
- Thread tape
When to stop and call a pro
- Water you cannot shut off at the fixture or main
- Sewage backing up into more than one fixture
- Water near electrical panels or outlets
- Gas water heater work beyond relighting a pilot
Need professional help?
Get a Licensed PlumberFrequently asked questions
Why does my kitchen faucet have low pressure, but every other faucet in my house is fine?+
Your kitchen faucet contains the most restrictive flow components in your house. While bathroom faucets use simple, wide aerators, kitchen pull-down faucets pack fine-mesh debris screens, dual-check backflow preventers, and narrow flexible hoses into a tight wand. Fine pipe sediment that blows harmlessly out of a bathtub faucet gets trapped instantly inside the kitchen wand's intake screen.
Can I just remove the flow restrictor from my pull-down spray head?+
Technically yes, but it is rarely necessary and may violate local water conservation codes. Most modern spray heads feature a green or pink plastic restrictor disc seated behind the aerator. If you remove it, your flow may jump to over 2.5 GPM, which can overwhelm your sink basin and cause violent splashing. Cleaning the debris screen and soaking the faceplate in vinegar almost always restores full factory 1.8 GPM pressure without removing the restrictor.
How do I know if the clog is in the cartridge or the spray head?+
Disconnect the spray head wand from the flexible hose above the sink, hold the bare hose opening straight down into the basin, and crack the faucet handle open. If water blasts out of the bare hose with great force, your cartridge is completely clear and the clog is located entirely inside the wand. If only a weak trickle dribbles from the bare hose, the clog is upstream inside the mixing cartridge or supply lines.
Will soaking my matte black or brushed gold spray head in vinegar ruin the finish?+
Pure white vinegar can dull or pit sensitive specialty finishes if left submerged for days. For matte black, oil-rubbed bronze, or brushed brass fixtures, limit soaking time to no more than 30 to 45 minutes in a 50/50 mixture of warm water and white distilled vinegar. Avoid any cleaning products containing ammonia, bleach, or hydrofluoric acid, which strip decorative PVD coatings immediately.
What should I do if the bare hose won't pull back up through the faucet neck?+
Under the sink, the flexible hose relies on a lead or plastic-encased weight to pull it back down into the cabinet. Check underneath with a flashlight to verify that the weight is clamped onto the hose roughly 4 to 6 inches above the bottom of the "U" loop on the faucet side. If the weight is clamped too high or caught on a drain pipe, the hose will bind and fail to retract.
Why did my water pressure drop immediately after installing a new water heater?+
Draining and refilling your plumbing lines during a water heater installation shocks the interior of your copper or galvanized pipes. The sudden rush of incoming water breaks loose years of built-up calcium scale and iron rust flakes. That sediment travels directly to the first fixture you open—which is typically the kitchen sink—and instantly plugs the small debris screen at the base of your spray wand.
How do I clear sand or grit trapped inside a sealed spray wand?+
If your faucet model has a permanently sealed plastic wand that cannot be disassembled, unscrew it from the hose and turn it upside down. Direct a high-pressure stream of water from an outside garden hose backward into the spray faceplate nozzles. This "back-flushes" trapped sand and calcium chips out through the wide threaded inlet at the bottom of the wand.
Why is water pressure only low on the hot side of my kitchen faucet?+
If the cold side runs at full pressure but the hot side barely trickles, the restriction is strictly on the hot water line. The two most common culprits are a half-closed hot angle stop shut-off valve under the cabinet or a piece of debris jammed inside the hot inlet port of your faucet mixing cartridge. Shut off the hot supply, disconnect the 3/8-inch supply flex line, and flush it into a bucket to verify clear delivery from the wall valve.
Discussion
Loading comments…