Tools & materials you'll need
Affiliate linksAs an Amazon Associate FixlyGuide earns from qualifying purchases — at no extra cost to you. Prices and availability are accurate as of publication and subject to change.
Quick Answer
A persistent drip from your single-handle faucet often points to a worn-out o-ring or seal, a fix typically costing less than $5 and taking under an hour. By disassembling the faucet and replacing these inexpensive parts, you can usually stop the leak and restore full functionality without special tools.
The Problem
That constant drip-drip-drip from your single-handle faucet isn't just annoying; it's also a waste of water and money. A faucet dripping just once every two seconds can waste over 1,000 gallons of water per year. The culprit is almost always inside the faucet body: rubber seals have hardened, O-rings have degraded, or the cartridge itself (the central component controlling water flow and temperature) has failed. Over time, mineral deposits in your water, regular wear and tear, and even changes in water pressure can cause these components to lose their integrity, leading to leaks.
Before you dive in, it’s helpful to understand the type of single-handle faucet you have. While the general principle is the same, cartridge designs vary. Common types include ball faucets (often found in kitchens, with a rotating ball controlling flow), disc faucets (ceramic discs control flow), and cartridge faucets (a cylindrical cartridge contains all the moving parts). Most modern single-handle faucets, especially in bathrooms, use a cartridge system. The good news is that for most leaks, replacing the seals or the entire cartridge is a straightforward process.
How It Works
Single-handle faucets operate on a simple yet ingenious principle: a single lever controls both water temperature and flow rate. This is achieved through an internal mechanism, usually a cartridge, ball valve, or ceramic disc assembly. Let's focus on the common cartridge system, as it's the source of most leaks.
Inside the faucet body, the cartridge is a sealed unit containing a series of ports and moving parts. When you lift the handle, you're manipulating this cartridge. Lifting the handle aligns a port to allow water to flow. Moving the handle from side to side adjusts the mix of hot and cold water. This temperature control is often achieved by rotating internal components within the cartridge, aligning different ports with the hot and cold water supply lines.
Crucially, the cartridge relies on a series of rubber o-rings and seals to create watertight connections between its moving parts and the faucet body. These small, often overlooked rubber components are the first line of defense against leaks. When they age, harden, crack, or become coated in mineral deposits, they lose their ability to create a tight seal. Hot water can accelerate this degradation. Once a seal compromises, water finds a path of least resistance and escapes, manifesting as a drip from the spout, around the base of the handle, or even from the base of the faucet where it meets the sink.
Understanding this internal dance between the handle, cartridge, and seals is key to troubleshooting. When a leak occurs, it's almost always because one of these seals has failed, preventing the cartridge from properly containing the water flow. Your fix will involve getting to these seals and replacing them.
Step-by-Step Fix
Safety First! Always turn off the water supply to the faucet before beginning any work. Locate the hot and cold shut-off valves under your sink and turn them clockwise until tight. Open the faucet handle to drain any residual water from the lines and relieve pressure. Have a bucket and towels handy.
-
Remove the Handle Cap and Screw – Locate and expose the hidden screw. Most single-handle faucets have a decorative cap (often plastic or metal) on top or front of the handle. Pry this off gently with a small flathead screwdriver or your fingernail. Beneath it, you'll find a Phillips head screw. Unscrew it and set it aside in a safe place.
- Tip: If the cap is stubborn, try heating it gently with a hairdryer for a few seconds to soften any built-up residue.
-
Lift Off the Handle – Carefully detach the handle from the stem. Once the screw is removed, the handle should lift straight up off the faucet stem. If it's stuck due to mineral buildup, gently wiggle it or use a penetrating oil (like WD-40) around the base where it meets the stem. Let it sit for 5-10 minutes, then try again. Do not force it, as you could damage the valve stem.
-
Expose the Retaining Nut or Cap – Access the cartridge or ball assembly. Below the handle, you’ll see either a large dome-shaped cap (common on ball-type faucets) or a retaining nut/collar that holds the cartridge in place. For dome-shaped caps, you might need a special faucet wrench (often plastic) or a large pair of channel locks protected with a cloth to avoid scratching the finish. For retaining nuts, an adjustable wrench or channel locks will work.
- If your faucet is a ball type (often Kohler or older Delta): Remove the cap, followed by a cam assembly (a plastic or metal ring with a small tab) and a packing washer. Below this, you'll find the ball and springs/seats.
-
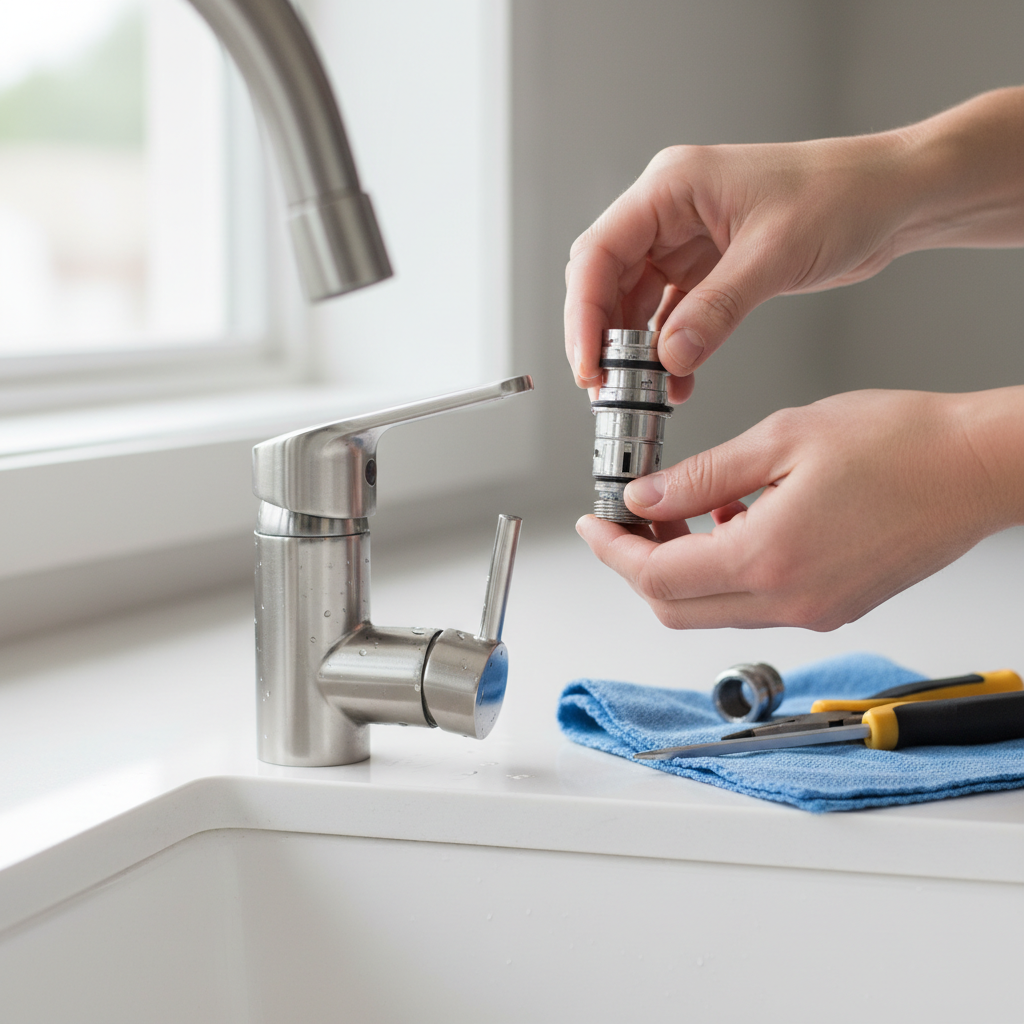
Remove the Cartridge (or Ball Assembly) – Extract the core of your faucet. If it's a cartridge faucet, look for a retaining clip (often a brass or plastic horseshoe clip) that holds the cartridge in place. Use needle-nose pliers to pull this clip straight up. Once the clip is out, you can usually pull the cartridge straight up and out. You may need to gently twist it with pliers to loosen it. Note the orientation of the cartridge for reinstallation.
- For ball-type faucets: Once the cam assembly is out, the ball lifts out. You'll then see the rubber springs and seats at the bottom of the cavity. These are often the cause of leaks in ball faucets.
-
Inspect and Replace Worn Parts – Identify and swap out the culprits. Examine the removed cartridge for any visible cracks, mineral buildup, or worn-out O-rings. If you're replacing the entire cartridge, take the old one to a hardware store to ensure you get an exact match. If you're just replacing O-rings, carefully pry off the old ones with a small screwdriver or awl, noting their position. Replace them with new ones, lubricating them with plumber's grease (silicone grease) before installation.
- For ball-type faucets: Replace the springs and seats. These are usually sold in a kit tailored to your faucet brand (e.g., Delta RP70). Make sure to orient the new springs with the tapered side facing up and install the new rubber seats firmly on top.
- Crucial: Even if the O-rings look okay, if they feel hard, flattened, or lack elasticity, replace them. They are inexpensive and often the root cause.
-
Clean the Faucet Body – Remove mineral deposits for better sealing. Before installing new parts, thoroughly clean the inside of the faucet body. Use a small brush or old toothbrush and a mixture of white vinegar and water to scrub away any mineral deposits or gunk. Ensure all surfaces are smooth where the new seals will sit.
-
Reinstall New Parts – Reverse the disassembly process. Lubricate new O-rings or the new cartridge with silicone plumber's grease. Carefully insert the new cartridge, making sure it's oriented correctly (some have a
Related Articles
Keep troubleshooting with these hand-picked guides from FixlyGuide:
- The $5 Secret to Fixing Your Drip: Why Single-Handle Faucets Leak (and the O-Ring Trick) — A persistent drip from your single-handle faucet is often caused by worn-out O-rings or seals, a common issue with a simple, inexpensive DI…
- The 5-Minute Trick to Stop a Dripping Single-Handle Faucet (No Plumber Needed) — A persistent drip from your single-handle faucet is usually caused by a worn-out cartridge, a repair you can typically complete yourself in…
- The 1 Common Reason Your Single-Handle Faucet Leaks (And How to Fix It in 30 Minutes) — A persistent drip from your single-handle faucet often points to a worn-out cartridge, a simple fix any homeowner can tackle.
- The 30-Minute Trick to Stop Your Single-Handle Faucet Drip (And What Plumbers Charge if You Don't) — A persistent drip from a single-handle faucet often signals a worn-out cartridge, a common issue homeowners can fix with basic tools in und…
- The $5 Secret to Silencing That Annoying Dripping Faucet (Single-Handle Fix) — Stop a dripping single-handle faucet with a simple and inexpensive DIY fix by replacing a worn-out o-ring or washer.
- The Secret Reason Your Thermostat Lies (And How to Fix It in Minutes) — Discover why your thermostat isn't hitting its set temperature and learn simple, actionable steps to diagnose and fix the most common culpr…
Get the print-ready PDF of this guide
A clean, ad-free, printable version you can keep on your phone or pin to the workshop wall. Free with a FixlyGuide account.
- Print-optimized layout
- Tools, materials & every step included
- Saved to your account
Frequently asked questions
How do I know if my faucet needs a new cartridge or just new O-rings?+
If water is consistently dripping from the spout, it's often a sign of worn-out O-rings or seats within the cartridge. If the handle is stiff, difficult to move, or the leak is coming from around the handle base, the entire cartridge might be failing. It's often best to replace both the O-rings and the cartridge if in doubt, as they are inexpensive and work together.
What tools do I need to fix a leaky single-handle faucet?+
You'll typically need a small flathead screwdriver, a Phillips head screwdriver, an adjustable wrench or channel locks, needle-nose pliers, and possibly a basin wrench or specialized faucet nut wrench depending on your faucet type. Don't forget penetration oil for stubborn parts and plumber's grease for new seals.
Can I use any universal cartridge for my single-handle faucet?+
No. Faucet cartridges are specific to brand and often to model. It's crucial to remove your old cartridge and take it to the hardware store to find an exact match. Some manufacturers also stamp part numbers on the old cartridge, which can help in identification.
How do I prevent my faucet from leaking again in the future?+
Regular cleaning of aerators helps prevent mineral buildup. Avoid overtightening the handle, as this can prematurely wear out seals. If you live in an area with hard water, consider a whole-house water softener to reduce mineral deposition in your plumbing fixtures. Promptly addressing minor drips can prevent bigger issues.
Is it safe to do this DIY or should I call a plumber immediately?+
Fixing a leaky single-handle faucet is generally a safe and manageable DIY project for most homeowners. The primary safety concern is ensuring the water supply is completely shut off before starting. If you encounter any unexpected issues like stripped screws, inability to remove parts, or if the leak persists after your repair, that's when it's smart to call a professional plumber to avoid further damage.


Discussion
Loading comments…