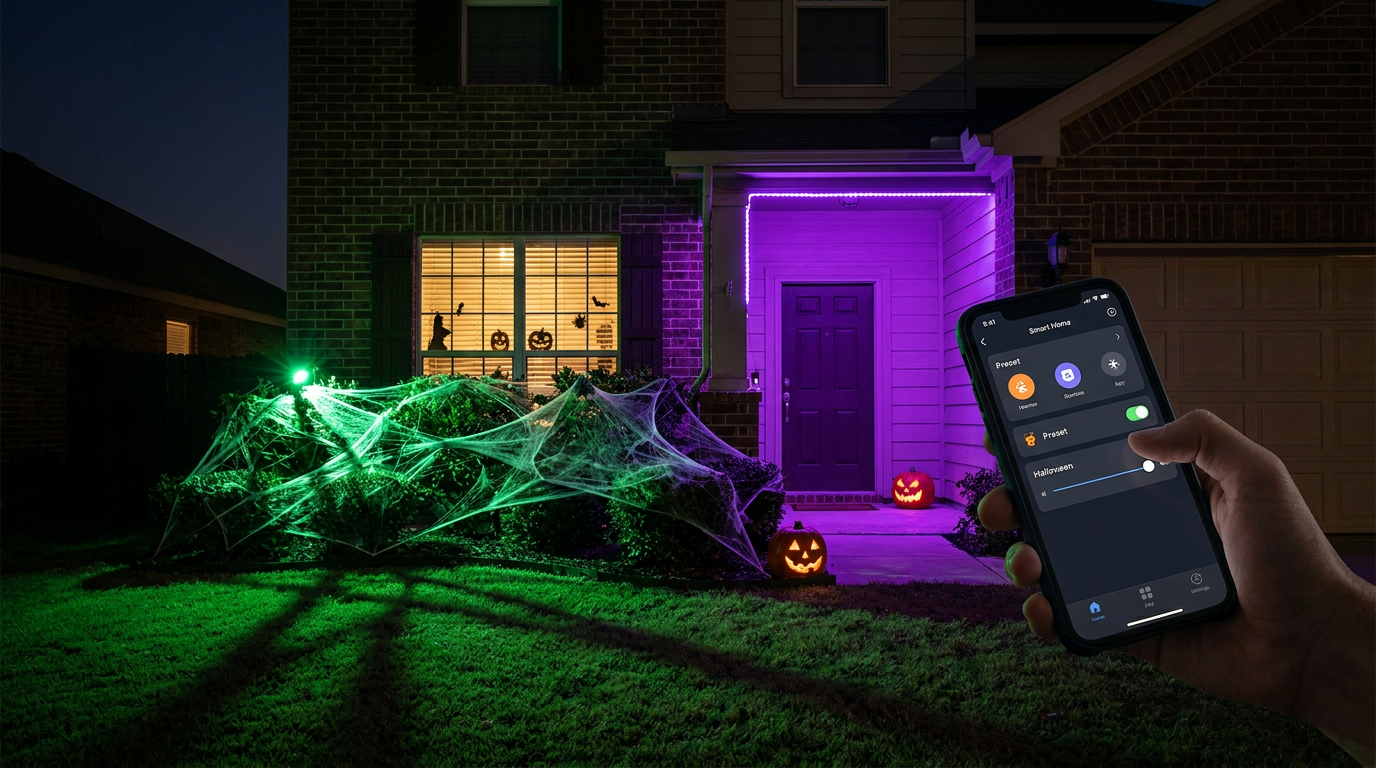
- Spotlights/Floodlights: These are your bread and butter. Use them to "uplight" trees, throw long shadows from props, or wash a wall in color. I’d start with 2-4 of these.
- Light Strips: These are great for outlining the house. Run them under the porch roof, around window frames, or along a walkway. You get a clean, even glow instead of a bunch of hot spots.
- String Lights (Permanent): If you want something you can use all year, permanent outdoor smart lights along the roofline are worth a look. Orange for Halloween, red and green for Christmas, warm white the rest of the year.
Published October 16, 2026Last updated October 16, 2026
Tools & materials you'll need
Affiliate linksAs an Amazon Associate FixlyGuide earns from qualifying purchases — at no extra cost to you. Prices and availability are accurate as of publication and subject to change.
Quick Answer
Using smart lights for Halloween is one of the easiest ways I know to get a really good spooky effect without turning your yard into a wiring mess. You can run app-controlled spotlights, strip lights, and string lights to make ghostly glows, lightning flashes, and color changes that actually feel alive. And yeah, it beats the old plug-in stuff by a mile — safer, more flexible, and way less of a headache. You can switch scenes, set timers, and sync the lights to music right from your phone.
The Problem
You’ve hung the skeletons, stretched the spiderwebs, and set the fake tombstones in place, but once the sun goes down, the whole display just disappears into the dark. Static, bargain-bin Halloween lights don’t give you that real haunted-house feel. They’re annoying to set up, they eat extension cords for breakfast, the timers crap out, and you’re stuck with one tired color — usually that same loud orange or purple. You want those deep shadows and creepy shifting tones, but you don’t want to spend a fortune or wrestle a knot of wires for half the night.
How It Works
Smart lighting gives you full control of your Halloween scene from a phone app. Instead of the old plug-it-in-and-hope-for-the-best setup, these lights connect to your home’s Wi-Fi or Bluetooth. That connection is the whole trick. It lets a tiny chip in each bulb or strip take commands from the app and actually do something useful with them.
Here’s what that means for you:
- Color Control: Instead of being stuck with one color, smart LEDs (Light Emitting Diodes) can throw out millions of shades. They do it by mixing red, green, and blue light (RGB) at different levels. Want a sickly green wash on a tombstone? A deep blood-red glow across the front door? Pick it on the color wheel and call it a day.
- Dynamic Scenes: This is where it gets fun. The app can keep feeding the lights new instructions, changing color, brightness, or flash pattern over and over. That’s how you get a flickering candle, a crackling fire, or a fake lightning storm that actually sells the scene. Most apps come with canned looks like "Spooky" or "Thunderstorm," or you can build your own if you’re picky like I am.
- Grouping & Zoning: You can group lights into separate zones. Say your porch lights are one group and the yard spotlights are another. That lets you control each area all at once. You can flash the whole house red, or have the yard slowly pulse blue while the porch flickers like a gas lamp.
- Timers & Automation: Since they’re smart, you can set them and forget them. Have them turn on at 7:00 PM and shut off at midnight so you’re not burning power for no reason. You can even change scenes later in the night — subtle glow early, then crank up the lightning for the trick-or-treat crowd.
- Power & Safety: Most outdoor smart lights run low-voltage, usually 12V or 24V DC. They still plug into a standard 120V outlet, but the transformer steps the voltage down. That makes them a lot safer to handle in damp outdoor conditions than regular 120V string lights. I pulled a water heater in Frisco last month that had exactly this kind of botched outdoor power mess nearby — wrong cord, wrong outlet, wrong idea. No dice.
Step-by-Step Fix
Ready to build your haunted setup? Here’s how I’d tackle it if I were doing my own place.
1. Make a Plan—and a Sketch Before you buy anything. Walk the yard at dusk. Where’s it dead dark? What do you want to show off — a big tree, the front door, some nasty-looking prop? Sketch the house and yard on paper. Mark the main light spots. Think in layers: background, mid-ground, foreground. That’s how you keep it from looking flat.
2. Choose Your Lights You’ll probably want a mix. For a setup that doesn’t feel cheap, I’d go with:
- Spotlights/Floodlights: These are your bread and butter. Use them to "uplight" trees, throw long shadows from props, or wash a wall in color. I’d start with 2-4 of these.
- Light Strips: These are great for outlining the house. Run them under the porch roof, around window frames, or along a walkway. You get a clean, even glow instead of a bunch of hot spots.
- String Lights (Permanent): If you want something you can use all year, permanent outdoor smart lights along the roofline are worth a look. Orange for Halloween, red and green for Christmas, warm white the rest of the year.
3. Set Up the Hub and App Do this first. Before you head outside, plug in the system hub, if it needs one, and download the brand’s app (Govee, Philips Hue, Wyze, etc.). Make your account and connect everything to Wi-Fi. You want a solid signal before you start planting lights in the yard.
4. Place Your Spotlights Think like a cinematographer. Start with the main spotlights. Don’t just blast them straight at the house.
- Tools: The lights themselves.
- Set one on the ground a few feet from a big tree and aim it almost straight up. That gives you a tall, creepy silhouette and makes the branches look like skeletal fingers.
- Put another behind a tombstone or skeleton prop and aim it back toward the house. That throws a long, dramatic shadow across the lawn or wall.
5. Wash a Wall with Color Build your backdrop. Take one or two spotlights and place them 5-10 feet back from the house, aimed at a big flat wall. Set them to a deep color like blood red, ghoul green, or eerie blue. That’s your base layer.
- Pro-Tip: If you’ve got two lights, set them to slightly different shades of the same color, like dark blue and a lighter purple, so the whole thing has more depth.
6. Install Light Strips Define the space. Now add the accent lighting.
- Safety: Make sure the power is off when you plug in the strips. Most outdoor strips come with adhesive backing and clips. Clean the surface first — the underside of a porch eave, for example — with an alcohol wipe so they stick better.
- Press the strip into place. Use the clips for extra hold, especially around corners. This works great if you want that "haunted portal" look around the front door.
7. Connect and Group the Lights Bring it all to life. Plug everything in. Open the app. It should find the new lights on its own. Follow the prompts to add each one to your virtual "home." As you add them, rename them to something sensible like "Yard Tree Light" or "Porch Strip." Then use the app’s "Group" function to make zones. A solid starting point is an "All Halloween" group, a "Yard Lights" group, and a "Porch Lights" group.
8. Program Your Scenes This is the fun part. Start playing around.
- Select your "Yard Lights" group and try a "Music Sync" mode. Put on some spooky sound effects and watch the lights react.
- Select your "Porch Lights" group and choose a flickering candle or fire effect.
- Select your "All Halloween" group and find the "Thunderstorm" or "Lightning" scene. That’ll make the whole setup flash white now and then, which is perfect for jumpy trick-or-treaters.
- If the pre-made scenes don’t do it for you, build your own. A slow pulse between orange and purple usually looks pretty good.
9. Set Your Timers Automate it. Once you’ve got a look you like, open the automation or schedule section in the app. Set a "Turn On" timer for just after sunset (e.g., 7:15 PM) and a "Turn Off" timer for your target time (e.g., 11:00 PM on weeknights, 1:00 AM on Halloween itself). Now the whole haunted house runs without you babysitting it.
Common Causes
If your smart lights aren’t acting right, it’s usually one of these plain-vanilla problems:
- Weak Wi-Fi Signal: Most smart lights need a decent 2.4 GHz Wi-Fi signal. If they’re way out in the yard, your router might not be reaching them. A Wi-Fi extender may fix it.
- App/Firmware Updates: The app or the light’s firmware might need an update to clear bugs. Check for update notices inside the app.
- GFCI Outlet Tripped: Outdoor outlets have to be GFCI (Ground Fault Circuit Interrupter) protected. Heavy rain or moisture can trip it and cut power to the lights. Check the outlet and hit the "Reset" button.
- Incorrect Grouping: If one light’s acting weird, make sure it didn’t get tossed into the wrong group or set to its own scene that’s overriding everything else.
- Power Supply Overload: If you’ve got too many lights daisy-chained together, the power adapter might be overloaded. Check the manufacturer’s limit for how many lights one power source can handle.
Common Mistakes
Avoid these rookie mistakes and your setup will look better and stay safer.
- Using Only One Color: Biggest mistake I see is everything set to the same bright orange. Flat as a pancake. Use 2-3 colors: a main color, a secondary color, and an accent.
- Flat, Head-On Lighting: Don’t put all your lights in front of the house and aim them straight back. That washes everything out and kills the shadows. Put lights behind objects, off to the side, and at sharper angles so you get texture and creepy silhouettes.
- Ignoring White Light: Don’t sleep on plain white light. A hard blast of white in a lightning scene looks great. And a dim cool white can feel like moonlight, which makes your colors pop more.
- Forgetting About the Neighbors: Be decent about it. Aim your lights at your house and yard, not straight into the neighbor’s bedroom window. And don’t go nuts with strobe effects if they’re going to be a nuisance.
- Using Indoor Lights Outside: Never use smart lights rated for indoor-only use outside. They’re not sealed against moisture and that thing’s toast the second weather gets involved. Always look for an outdoor rating like IP65 or higher.
- Leaving It on 24/7: You don’t need to run the spooky scene all day and all night. It wastes power and shortens the life of the lights. Use the timer function — that’s why you bought smart lights.
Cost & Time Breakdown
Here’s a realistic look at what it takes to get a starter smart lighting setup going for Halloween.
| Task | DIY Cost | Pro Cost | Time |
|---|---|---|---|
| Basic 2-Spotlight Starter Kit | $50–$100 | N/A | 30 minutes to set up |
| Adding 16-ft Outdoor Strip | $40–$70 | N/A | 20 minutes |
| Wi-Fi Extender (if needed) | $25–$50 | N/A | 15 minutes |
| Permanent Roofline Lights | $300–$700 (for 100ft) | $1,500–$3,000 installed | 3–5 hours |
| TOTAL (Starter Setup) | $90–$170 | N/A | 1-2 hours |
Tips & Prevention
- Buy Expandable Systems: Pick a brand with a decent lineup of lights. That way you can start small and add more spotlights, path lights, or strips next year without juggling a bunch of different apps.
- Label Your Power Adapters: Once you’ve got a few different lights, the adapters all start looking the same. Use a label maker or even masking tape to mark each one (e.g., "Govee Spots," "Hue Strip") so you’re not guessing later.
- Check for Holiday-Specific Scenes: Around October, poke around in the app for updates. A lot of companies add new Halloween scenes and effects you can use with one tap.
- Incorporate Fog: If you want the whole thing to really pop, pair the lights with a fog machine. Low fog catches the light, shows off the beams, and makes the scene feel bigger and deeper.
- Secure Your Cords: Don’t leave wires hanging where trick-or-treaters can trip. Use outdoor-rated tape or lawn staples to keep cords tidy along walls or tucked into the edges of garden beds.
- Take a Picture: Once you land on a lighting setup you love, grab a screenshot of the app settings and a photo of the house. That saves a pile of time next year when you want to recreate it.
When to Call a Professional
Smart lighting is pretty DIY-friendly. The whole idea is that homeowners can handle it without much trouble. But you should absolutely call a licensed electrician if you need a new outdoor-rated electrical outlet installed. Don’t ever run an extension cord from inside the house or garage through a window or door for anything semi-permanent. A pro can put in a proper weatherproof GFCI outlet exactly where you need it for about $200–$350, and that keeps everything safe and up to code.
Related Articles
Keep troubleshooting with these hand-picked guides from FixlyGuide:
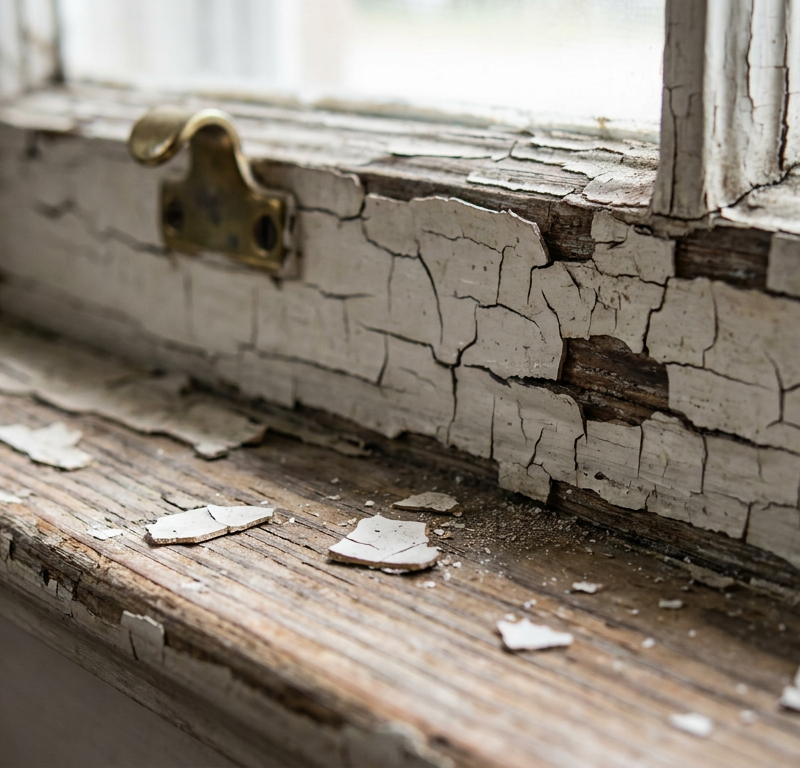
- Paint Peeling in an Old House? Lead Dust Safety for DIY Repairs — If your home was built before 1978, repairs that disturb painted surfaces can create hazardous lead dust—here's how to test and work safely.
- The Shocking Truth About GFCIs vs. AFCIs: Are You Really Protected? — GFCIs prevent electrocution from ground faults, while AFCIs stop fires from dangerous electrical arcs. Understanding their distinct roles i…
- The Big Rig Mystery: Why Those Wheel Spikes Aren't What You Think — Ever wondered about those intimidating spikes on big truck wheels? They're not for defense, but they do tell us something about basic vehic…
- Electric Heater Smells Like Burning? 6 Common Odors Explained — An electric heater that smells like burning plastic, dust, or chemicals can be alarming, but it's often a fixable problem. Here's what's ca…
- Worried About Lead Paint? How to Test for It and Stay Safe During DIY Repairs — If your home was built before 1978, you likely have lead paint. Here's how to test for it and what to do to keep your family safe during re…
- The Flickering Light Switch Fix Plumbers Don't Want You to Know (Because They Can't Help) — Don't live with flickering lights or a switch that feels loose. I'll walk you through diagnosing and replacing a faulty light switch safely…
Should you do this yourself?
Answer five quick questions before you start. Safety outranks savings every time.
Your experience with work like this
How high do you have to work?
Does the job involve any of these?
Will it need a permit?
Specialty tools
Free and instant. Educational guidance only — not a quote, inspection, or professional diagnosis.
What should this project cost?
Enter your project details for a realistic cost range before you call anyone.
Cost depends heavily on which system turns out to be the source.
- Regional adjustment
- National average
- Labor share (typical)
- ~$1,620
- Quotes to collect
- 3 written estimates
Educational estimate based on national averages — not a binding quote. Always confirm with written local estimates.
Before you start
Check the difficulty, permits, and safety risk — then decide whether to call a pro.
- Estimate this projectGet a cost range for your scope and ZIP before you call anyone.Open
- Get local estimatesSend one request and compare written estimates from vetted pros.Open
Free, no signup required. Estimates are educational guidance, not a quote or an inspection.
This article was independently written by FixlyGuide based on the source topic.
Frequently asked questions
What are the best smart light colors for Halloween?+
Don't just stick to orange. A great Halloween palette uses deep, saturated colors like blood red, ghastly green, and eerie indigo. Use bright white or cool blue sparingly for shocking lightning effects or a moonlight look.
Can I leave smart lights outside in the rain?+
Only if they are specifically rated for outdoor use. Look for a rating of IP65 or higher, which means they are sealed against dust and jets of water. Never use indoor-rated lights outside.
Do I need a hub for my Halloween smart lights?+
It depends on the brand. Many newer brands like Govee and Wyze connect directly to your Wi-Fi and don't require a hub. Other systems, like Philips Hue, require a central hub to connect the lights to your network.
How do I make my lights look like lightning?+
Most smart light apps (like Govee, Hue, etc.) have pre-programmed dynamic scenes. Look for a scene named 'Thunderstorm' or 'Lightning.' When you apply this scene to your lights, they will automatically flash white in a random pattern.
Will smart lights run up my electricity bill?+
Not really. LED lights are incredibly energy-efficient, using up to 80% less energy than traditional incandescent bulbs. Since you'll be using the app's timer to run them for just a few hours each night, the impact on your bill will be negligible.
How can I make my Halloween lights sync to music?+
Many smart light systems have a built-in microphone on the power adapter or hub, or they can use your phone's microphone. In the app, select a 'Music Sync' mode. The lights will then flash and change color in time with any spooky music or sound effects you play.
What's the best way to create spooky shadows?+
The key to great shadows is backlighting. Place a strong spotlight on the ground *behind* your prop (like a skeleton or tombstone) and aim it towards a wall or your house. This will cast a long, distorted, and very dramatic shadow.
Can I control my Halloween lights with my voice?+
Yes. Most major smart light brands can be linked to voice assistants like Amazon Alexa, Google Assistant, and Apple's Siri. Once linked, you can use commands like 'Hey Google, turn the Halloween lights to red' or 'Alexa, start the spooky scene.'
Discussion
Loading comments…