
- Remove the Faceplate — Get to the guts of the switch.
- Take off the two screws holding the faceplate to the wall. They're usually flathead, sometimes Phillips. Set them aside in a safe spot – a magnetic dish works wonders so you don't lose them.
- Gently pull the faceplate away from the wall and set it aside.
Electrical · Outlet or lights not working
| Project category | Electrical |
|---|---|
| Problem type | Outlet or lights not working |
| Trade required | Electrical |
| Urgency | Soon — within weeks |
| Safety risk | Moderate safety risk |
| DIY suitability | DIY for experienced homeowners |
| Cost category | Low cost |
| Typical timeline | Often under an hour once the cause is found |
| Contractor type | Licensed electrician |
Repair option
Reset the upstream GFCI first, then replace the failed device.
Replacement option
Rewire the circuit when connections are failing in multiple boxes.
Common causes
- Tripped GFCI upstream on the same circuit
- Loose neutral in a daisy-chained run
- Failed switch or receptacle
Relevant tools:diy difficultydiy or hire a pro
Published September 10, 2026Last updated September 10, 2026
Tools & materials you'll need
Affiliate links- AmazonNon-contact voltage testerCrucial for verifying power is off
- AmazonPhillips head screwdriverFor most switch screws
- AmazonFlathead screwdriverFor faceplate, sometimes terminals, or releasing back-stab wires
- AmazonWire strippersIf wires need to be trimmed or re-stripped
- AmazonNeedle-nose pliersUseful for bending wire loops
- AmazonMagnetic parts dishOptional, but prevents lost screws
As an Amazon Associate FixlyGuide earns from qualifying purchases — at no extra cost to you. Prices and availability are accurate as of publication and subject to change.
Quick Answer
You've got a flickering light, and it's driving you nuts. Nine times out of ten, it isn't the bulb, and it usually isn't the wiring buried in your walls either, at least not right off the bat. More often than not, that annoying flicker or that weird intermittent "on" is coming from a tired, loose, or just plain worn-out light switch. The good news? You can usually handle this yourself with a few basic tools and a healthy respect for electricity. We'll get that flicker gone and your lights back to doing their job.
The Problem
Picture this: you flip the switch, the light comes on, then it sputters, flickers like a bargain-bin horror prop, or maybe it won't come on unless you jiggle the toggle. Or maybe the switch feels warm, or you hear a little buzz. Those aren't just little annoyances; they're signs the switch is failing. And a failing electrical part is never something to shrug off. A loose connection makes heat, and heat is where problems start. I've seen homes in South Denver where folks lived with this for months, telling themselves it was just "old house quirks" until the thing finally went sideways. We're gonna get to the bottom of it and make sure your family's safe.
How It Works
Alright, let's talk about what's happening behind that wall plate. A light switch is a simple little piece of gear. It's just interrupting an electrical circuit, making or breaking the flow of power to your light fixture. Flip the toggle to "on," and it completes the circuit, letting 120-volt AC power flow from your electrical panel, through the switch, up to the light, and then back to the panel. Flip it "off," and it breaks that path. Pretty straightforward.
Inside the switch, you'll usually find one or two brass screw terminals for the "hot" wires (usually black), a silver screw terminal for the "neutral" wire (usually white, though not always connected in a simple switch), and a green screw or bare copper wire for the ground. Some switches, especially dimmers or three-way switches, get a little more complicated, but the basic idea stays the same: they control the path of current. Over time, the guts wear out. The contacts can corrode, the springs can weaken, and then you start getting intermittent connections. Sometimes the screw terminals loosen up too, especially if somebody didn't snug them down right during install. That creates resistance, which makes heat and can cause flickering. It isn't rocket science, but it does need to be done right.
Step-by-Step Fix
Okay, let's get into it and fix that flickering switch. Safety first, always. Don't even think about skipping the power-off step. I had a helper once, fresh out of trade school, get popped because he was "sure it was off" but forgot a second breaker. He learned fast.
-
Kill the Power — Find the right breaker in your electrical panel.
- Safety First: Go to your main electrical panel. It's usually in the basement, garage, or a utility closet. Flip the main breaker for the room you're working in, or if you can identify it, the specific breaker for that light circuit. Don't just trust the switch; sometimes they're wired funky. A non-contact voltage tester is your best friend here.
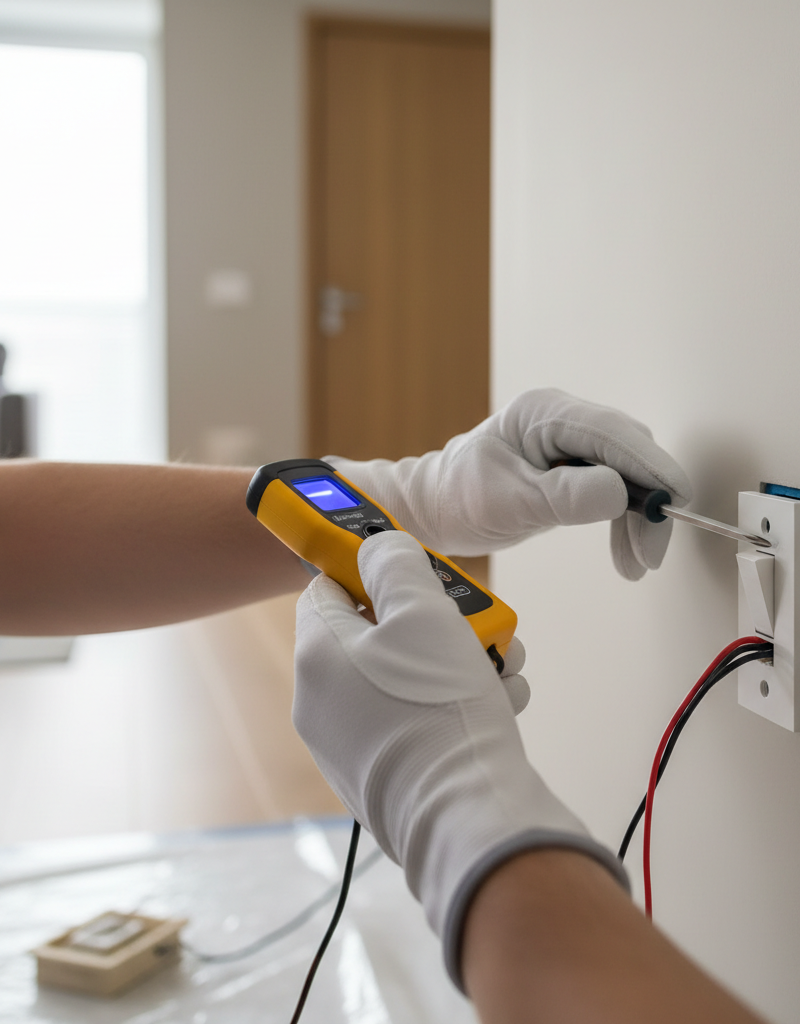
- Verify: Head back to the light switch. Flip it on and off a few times. If the light doesn't come on at all, you're on the right track. Then, before you touch anything, use your non-contact voltage tester on the wires coming into the switch box (you'll test this again later). No beeps, no light on the tester means no power. You want a dead circuit.
-
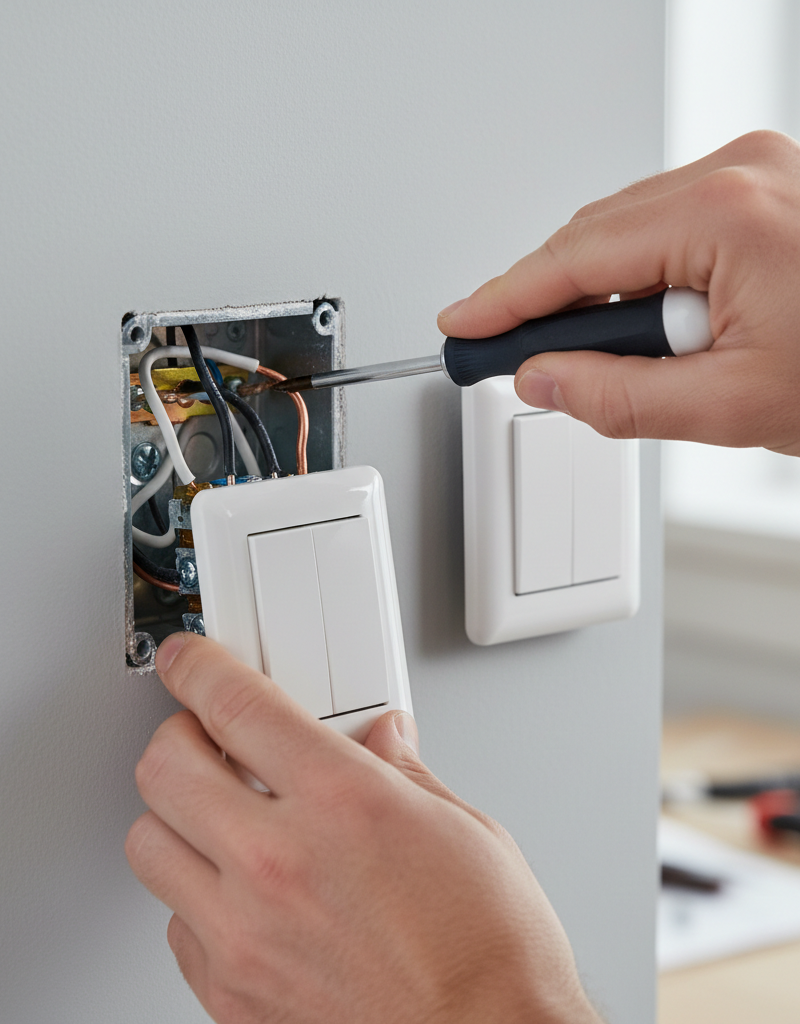
Remove the Faceplate — Get to the guts of the switch.
- Take off the two screws holding the faceplate to the wall. They're usually flathead, sometimes Phillips. Set them aside in a safe spot – a magnetic dish works wonders so you don't lose them.
- Gently pull the faceplate away from the wall and set it aside.
-
Unmount the Switch — Pull the switch from the box.
- You'll see two more screws, one at the top and one at the bottom, holding the switch mechanism to the electrical box. Unscrew these. Again, keep them safe.
- Carefully pull the switch straight out of the electrical box. Don't yank it; the wires are still connected.
-
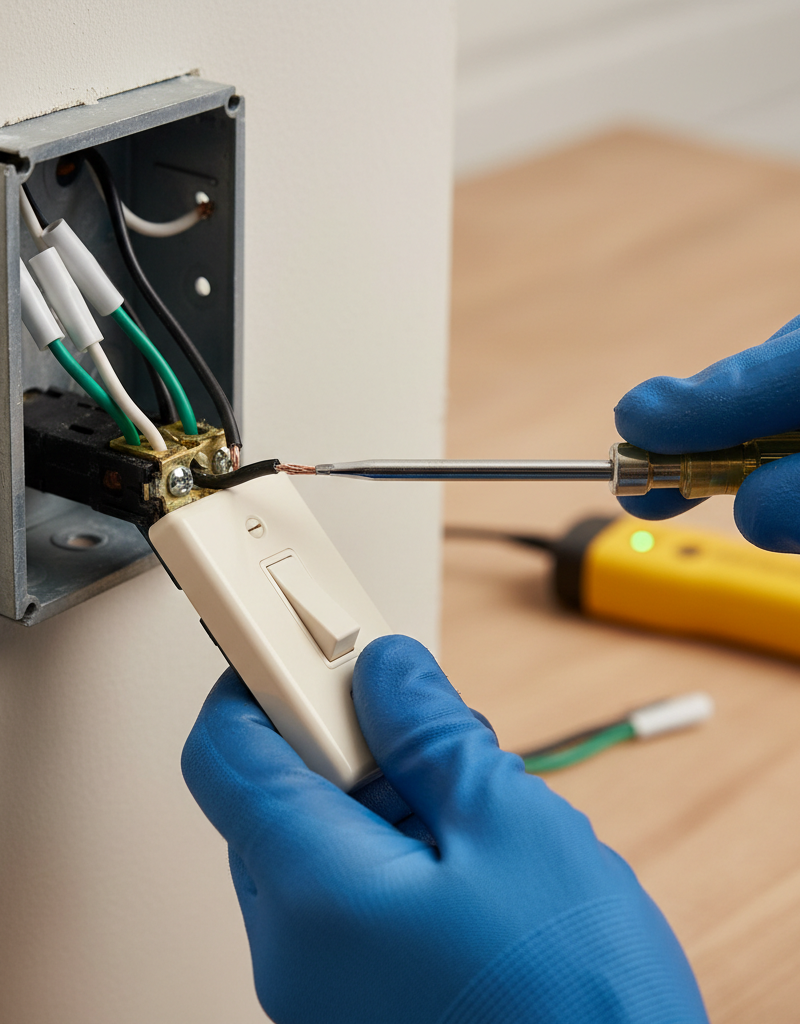
Inspect and Disconnect Wires — See what you're dealing with.
- Take a good look at how the wires are connected. You'll typically see a bare copper or green wire (ground) connected to a green screw, and two or more black wires (hot) connected to brass screws. Sometimes, you'll have white wires capped together, not connected to the switch itself. If you're replacing a three-way switch, you'll see more wires and often one black "common" screw and two "traveler" screws of a different color, like dark brass or silver. Take a photo with your phone right now. Seriously, it'll save you a headache when putting the new one in.
- Re-Verify: Use your non-contact voltage tester again, touching it to each wire and terminal inside the box. Make absolutely sure there's no power. If it beeps, stop immediately and go back to your breaker panel. Double-check everything. This is where I saw that helper get surprised, convinced the power was off. Don't be that guy.
- Once you're certain it's dead, use a screwdriver to loosen the terminal screws and carefully remove the wires. If the wires are pushed into "stab-in" connectors on the back, you'll usually need a small flathead screwdriver or an awl to release the tab next to the wire hole.
-
Prepare New Wires — Clean up your connections.
- Examine the ends of the wires you just disconnected. If they're bent into hooks, fine. If they're frayed, discolored, or look damaged, trim them back slightly with your wire strippers and strip off about 3/4 inch of insulation, exposing fresh copper. You want clean, solid contact.
-
Connect New Switch — Wire it up right.
- Start with the ground wire. Wrap the bare copper or green-insulated wire clockwise around the green screw terminal on your new switch. Tighten it down firmly. The clockwise wrap helps the wire stay put as you tighten.
- Next, connect the hot wires (usually black). If you have two black wires, one is usually the incoming power, and the other goes to the light. On a standard single-pole switch, it doesn't usually matter which black wire goes to which brass screw, but it's smart to match the old setup using your photo. Loop each black wire clockwise around a brass screw terminal and tighten it down snug. Make sure no bare copper is showing beyond the screw head.
- If you removed white wires from the old switch, connect them to the silver terminal on the new switch. Many simple switches don't use a neutral, so don't go inventing one if it wasn't there.
- Important: Don't overtighten, but definitely make sure those screws are tight. Loose connections are the main culprit for flickering and overheating. A good solid connection is key. I usually give each wire a little tug after tightening to confirm it's secure.
-
Mount New Switch — Push it back into the box.
- Carefully fold the wires back into the electrical box. You want them neat, not stuffed in there like a junk drawer. Leave enough room so the switch can sit flush.
- Align the new switch with the screw holes in the electrical box and re-insert the mounting screws (top and bottom). Tighten them until the switch is firmly seated and flush with the wall surface.
-
Reinstall Faceplate — Finish it up.
- Put the faceplate back on, aligning it over the switch. Secure it with the two faceplate screws. Don't crank these down; just snug them up so the plate sits flat.
-
Restore Power & Test — The moment of truth.
- Go back to your electrical panel and flip the breaker back on. If all goes well, your lights should now work perfectly. Test the switch a few times to make sure it's solid. No more flicker, no more jiggle. Crack open a cold one, you earned it.
Common Causes
- Loose Wire Connections: This is the big one. Over time, or if the thing was installed sloppy, the wires on the switch terminals can loosen. That creates resistance, which makes heat and causes intermittent contact, and that shows up as flickering.
- Worn-Out Internal Contacts: Switches aren't built to last forever. After tens of thousands of cycles, the metal contacts inside can wear, corrode, or get pitted, and then the electricity doesn't flow cleanly. Think brake pads on a car — they just wear out.
- Faulty Switch Mechanism: Sometimes you just get a bad one. The internal spring might fail, or a part inside may break, and then the switch won't make a solid connection every time.
- Overheating: If a switch feels warm, that's a red flag. Usually that means a poor connection or an overloaded circuit. Keep ignoring it, and the wear piles up fast, along with the fire risk.
- Back-stab Wiring: Older or cheaper switches sometimes use "back-stab" connections where you just push the wire into a small hole. Those things are notorious for loosening over time compared to good screw terminals. If your old switch has these, I'd absolutely use the screw terminals on the new one.
Common Mistakes
- Forgetting to Kill the Power (or not verifying it): This is the number one mistake. Getting shocked is no joke, and it can be deadly. Always, always verify with a non-contact voltage tester, even if you think the breaker is off.
- Loose Terminal Connections: Hand-tight isn't enough. Those screws need to be snug and firm. A loose wire connection is a recipe for flickering, heat, and eventual failure. Give each wire a gentle tug after tightening to be sure.
- Not Wrapping Wires Clockwise: When you put a looped wire around a screw terminal, always wrap it clockwise. That way, as you tighten the screw, it pulls the wire into the terminal instead of pushing it out.
- Exposing Too Much Bare Wire: When stripping insulation, aim for just enough to go around the screw terminal (about 3/4 inch). Too much bare wire outside the terminal is a short circuit waiting for a chance.
- Ignoring Ground Wires: Don't just tuck the bare copper wire into the back of the box. The ground wire is a critical safety feature, diverting fault current away from you and your home. Always connect it to the green screw on the switch.
- Mismatching Switch Types: Trying to replace a three-way switch (which controls a light from two locations) with a single-pole switch, or vice-versa, won't work. Make sure your replacement switch matches the original in function. Look for "SPST" (single-pole, single-throw) or "3-way" markings.
Cost & Time Breakdown
Let's talk brass tacks for getting this job done.
| Task | DIY Cost | Pro Cost | Time (DIY) |
|---|---|---|---|
| Standard light switch | $5–$20 | N/A | N/A |
| Decorative switch (dimmer, smart) | $20–$100+ | N/A | N/A |
| Basic hand tools | $0 (if owned)–$50 | N/A | N/A |
| DIY labor (your time) | $0 | N/A | 20–45 mins |
| Pro Labor (hourly) | N/A | $100–$250 | 30–60 mins |
| Service call fee | N/A | $75–$150 | N/A |
| Total (DIY) | $5–$70 | N/A | 20–45 mins |
| Total (Pro) | N/A | $175–$400+ | 30–60 mins |
Tips & Prevention
- Use Quality Switches: Don't skimp on a couple of bucks for a switch. Better quality switches (Leviton, Lutron, Cooper Wiring Devices) have sturdier internal parts and better screw terminals that hold wires more securely. It's worth the extra $5.
- Check Annually: Once a year, when you're changing smoke detector batteries, take a minute to feel your light switches. Do any feel warm? Do you hear buzzing? Deal with it before it turns into a real headache. Just a quick touch is all it takes.
- Tighten Connections: If you ever open an electrical box for any reason, give the wire terminals a quick check. If they look loose, gently tighten them. This applies to outlets too, not just switches.
- Avoid Overloading: While not usually an issue with a standard light switch, be mindful of what's on the circuit. If you're putting a huge load on a circuit, it can create heat at all connection points, including switches.
- Consider Upgrades: If you're frequently replacing switches in an older home, it might be a sign of deeper wiring issues, or maybe the original builder just used cheap components. Upgrading to better quality switches as they fail can save you a pile of headaches later.
- Don't Ignore Buzzing/Warmth: These are definite red flags. A healthy switch should be silent and cool to the touch. If you notice either of these, it's time for inspection and probably replacement.
When to Call a Professional
Listen, some jobs just aren't worth taking on yourself. If you open up that electrical box and see aluminum wiring, stop right there. That's a whole different animal and needs specialized connectors and know-how to avoid serious fire hazards. Same goes if the flickering doesn't clear up after replacing the switch, or if you suspect a bigger issue — like a breaker tripping over and over, lights flickering all over the house, or burnt smells coming from your panel — that's electrician territory. They've got the tools and training to diagnose the real problem, keep the damage down, and make sure your home's electrical system is up to code. I pulled a water heater in Frisco last month where the homeowner had the exact same "just a little flicker" story, and it turned out the problem wasn't the switch at all. Don't mess with electricity if you're not 100% comfortable or confident; your home and family's safety are on the line.
Related Articles
Keep troubleshooting with these hand-picked guides from FixlyGuide:
- Why Your Wall Switch Feels Hot: The Hidden Danger Most Homeowners Miss — A hot light switch isn't just uncomfortable; it's a critical warning sign of potential electrical hazards that demand immediate attention.
- Why Does Only One Room Have Flickering Lights? The Real Culprit — Flickering lights in a single room often point to a localized electrical issue, frequently a loose connection in a light fixture or switch.
- Why Does Only One Room Have Flickering Lights? The Real Culprit — Flickering lights in a single room often point to a localized electrical issue, ranging from a loose bulb to a faulty switch or wiring.
- Why Your Light Flickers After a Bulb Change: It's Not the Bulb — Many homeowners replace a flickering light bulb only to find the new one flickers too. It's often a problem at the switch or fixture, not t…
- Why Does Only One Room Have Flickering Lights? The Real Culprit — Flickering lights in a single room often point to a localized electrical issue, frequently a loose connection, easily diagnosed and repaire…
- The 30-Second Toilet Fix Plumbers Don't Want You to Know — Stop that phantom-flushing toilet with this quick guide to diagnosing and fixing the most common silent water leaks.
Should you do this yourself?
Answer five quick questions before you start. Safety outranks savings every time.
Your experience with work like this
How high do you have to work?
Does the job involve any of these?
Will it need a permit?
Specialty tools
Free and instant. Educational guidance only — not a quote, inspection, or professional diagnosis.
What should this project cost?
Enter your project details for a realistic cost range before you call anyone.
Outlet and switch work usually $150–$400; panel upgrades commonly $1,800–$4,200.
- Regional adjustment
- National average
- Labor share (typical)
- ~$709
- Quotes to collect
- 3 written estimates
Educational estimate based on national averages — not a binding quote. Always confirm with written local estimates.
Fixly Project Decision Box
- DIY difficulty
- Moderate
- Estimated time
- 30 minutes – half a day
- Cost level
- Moderate
Main tools / materials
- Adjustable wrench
- Plunger or drain auger
- Bucket and towels
- Thread tape
When to stop and call a pro
- Water you cannot shut off at the fixture or main
- Sewage backing up into more than one fixture
- Water near electrical panels or outlets
- Gas water heater work beyond relighting a pilot
Need professional help?
Get a Licensed PlumberGet the print-ready PDF of this guide
A clean, ad-free, printable version you can keep on your phone or pin to the workshop wall. Free with a FixlyGuide account.
- Print-optimized layout
- Tools, materials & every step included
- Saved to your account
Frequently asked questions
Why is my light switch flickering?+
Most often, flickering is due to loose wire connections at the switch terminals or worn-out internal contacts within the switch itself. Over time, these can degrade, leading to intermittent electrical flow and visible flickering.
Can a bad light switch cause a fire?+
Absolutely. Loose or corroded connections can create excessive resistance, generating heat. This heat can be significant enough to melt insulation, ignite nearby combustible materials, and lead to an electrical fire. Always address warm or buzzing switches promptly.
How do I know what type of light switch to buy?+
Check your old switch first. If it controls a light from one location, it's a single-pole switch. If it controls a light from two locations, it's a three-way switch. If from three or more locations, it's a four-way switch. Make sure your new switch matches the old one's functionality.
Do I need an electrician to replace a light switch?+
For a standard single-pole switch replacement, most DIYers can handle it safely if they follow proper power-off procedures and wiring. However, if you're uncomfortable, dealing with complex wiring, or have aluminum wiring, always call a licensed electrician.
What tools do I need to replace a light switch?+
You'll need a screwdriver (Phillips and flathead), a non-contact voltage tester, wire strippers (if wires need re-stripping), and possibly needle-nose pliers. These basic tools will get the job done safely.
Why does my new light switch not work?+
First, check the circuit breaker to ensure it's on. Then, revisit the wiring: make sure all connections are tight, wires are properly seated in their terminals, and no bare wires are touching. Ensure you used the correct type of switch (e.g., a single-pole for a single-pole circuit).
Should a light switch feel warm?+
No, a light switch should generally be cool to the touch. If a switch feels warm, it's a strong indicator of a loose connection or an overloaded circuit, both of which can be hazardous. This warrants immediate investigation and potential replacement.
What's the difference between a single-pole and a three-way switch?+
A single-pole switch controls a light fixture from one location. A three-way switch is used in pairs to control a single light fixture from two different locations, like at the top and bottom of a staircase. They have different wiring configurations and numbers of terminals.
Can I replace a regular switch with a dimmer switch?+
Yes, in most cases, you can replace a standard single-pole switch with a dimmer switch, as long as the light fixture and bulbs are dimmable. Ensure the dimmer switch's wattage rating can handle your total bulb wattage.
How tight should the wire screws be?+
The wire terminal screws should be tightened firmly but not overtightened. They should be snug enough that the wire cannot be easily pulled out with a gentle tug. This ensures good electrical contact and prevents overheating.
Discussion
Loading comments…