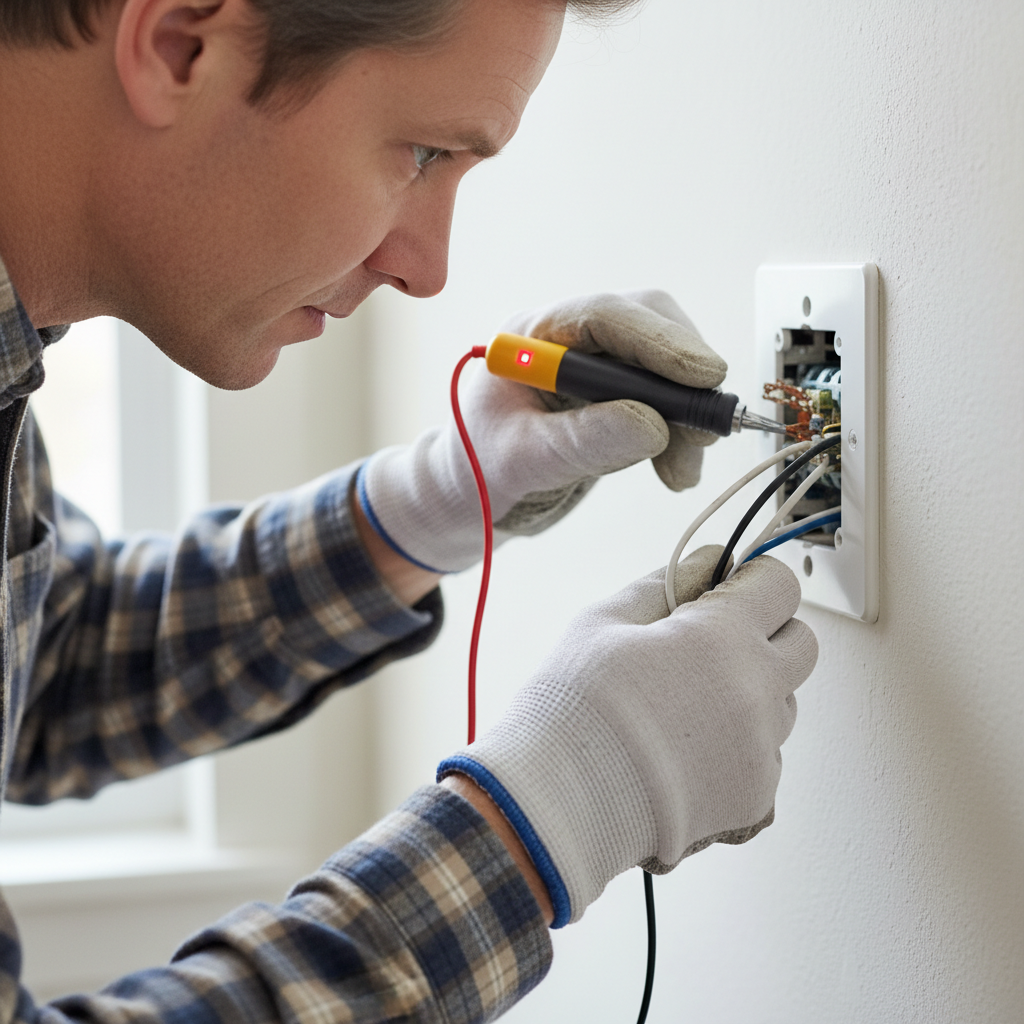
- Loose Wire Connections: This is the big one. A wire not secured tight to a screw terminal or pushed far enough into a backstab terminal is the most common reason for flickering or power that cuts in and out.
- Incorrect Wiring: Swap the line and load, or miswire a three-way switch, and you’ll have trouble. That’s why a quick photo before you pull anything apart can save your bacon.
- Damaged Wires: Over-stripped or nicked wires, or insulation trapped under the screw terminal, keep you from getting a proper connection. Bad stripping can also expose wires to arcing, and that’s a fire hazard.
- Incompatible Switch Type: Trying to dim LEDs with a non-LED-compatible dimmer is a fast way to get flickering. Some plain on/off switches can act up too if they’re not designed for LED drivers.
- Faulty Switch: Sometimes the new switch is just junk. If you’ve checked everything else twice, the switch itself might be bad. Happens more than you’d think.
Electrical · Outlet or lights not working
| Project category | Electrical |
|---|---|
| Problem type | Outlet or lights not working |
| Trade required | Electrical |
| Urgency | Soon — within weeks |
| Safety risk | Moderate safety risk |
| DIY suitability | DIY for experienced homeowners |
| Cost category | Low cost |
| Typical timeline | Often under an hour once the cause is found |
| Contractor type | Licensed electrician |
Repair option
Reset the upstream GFCI first, then replace the failed device.
Replacement option
Rewire the circuit when connections are failing in multiple boxes.
Common causes
- Tripped GFCI upstream on the same circuit
- Loose neutral in a daisy-chained run
- Failed switch or receptacle
Relevant tools:diy difficultydiy or hire a pro
Published July 27, 2026Last updated August 17, 2026
Tools & materials you'll need
Affiliate linksAs an Amazon Associate FixlyGuide earns from qualifying purchases — at no extra cost to you. Prices and availability are accurate as of publication and subject to change.
Quick Answer
Flickering lights right after you’ve replaced a light switch? Don’t sweat it. Nine times out of ten, it’s something simple: a loose wire connection or a miswired switch. It’s easy to slip up, especially if you’re not used to electrical work. Sometimes, though, it’s an incompatible switch with your fancy new LED bulbs. I’m gonna walk you through the usual suspects and how I’d track them down on a real job. Most of the time, you’ll get the lights steady again without tearing the whole wall apart.
The Problem
You just spent a good half-hour wrestling with a new light switch, feeling pretty proud of yourself, and now the light’s flickering like a cheap horror movie prop. Or maybe it’s not flickering, but just not working at all. I’ve been there, and yeah, it’ll test your patience. You’ve done the work, followed what you thought were the right steps, and now you’ve got a bigger headache than before. That’s not just annoying; flickering lights can chew through bulb life and, in some cases, point to a deeper electrical issue that needs attention.
How It Works
Before we get into the fix, let’s back up and look at how a plain old light switch actually works. It’s not fancy. It’s just a gate for electricity. Power (the "hot" wire, usually black) comes from your breaker panel into the switch box. From there, it lands on one of the switch’s terminals. When you flip the switch, it either completes or breaks a circuit, which lets electricity flow to your light fixture or stops it dead. The "switched hot" wire (also often black, but sometimes red, depending on the setup) then carries that power up to the light. The neutral wire (always white) carries the unused power back to the panel, closing the loop. The ground wire (bare copper or green) is your safety net, giving stray electricity a path to follow if something goes sideways. A standard single-pole switch has two screw terminals for the hot wires and a green ground screw. Three-way switches, used to control a light from two different locations, are a little trickier, with a "common" terminal and two "traveler" terminals. Get any of those wires in the wrong spot, or leave a connection loose, and the whole thing gets flaky. It’s basically a bad conversation in a tiny metal box.
Step-by-Step Fix
Alright, let’s crack it open. Safety first, always. Before you touch anything electrical, cut the power.
1. Kill the Power — Flip the breaker for the circuit you're working on.
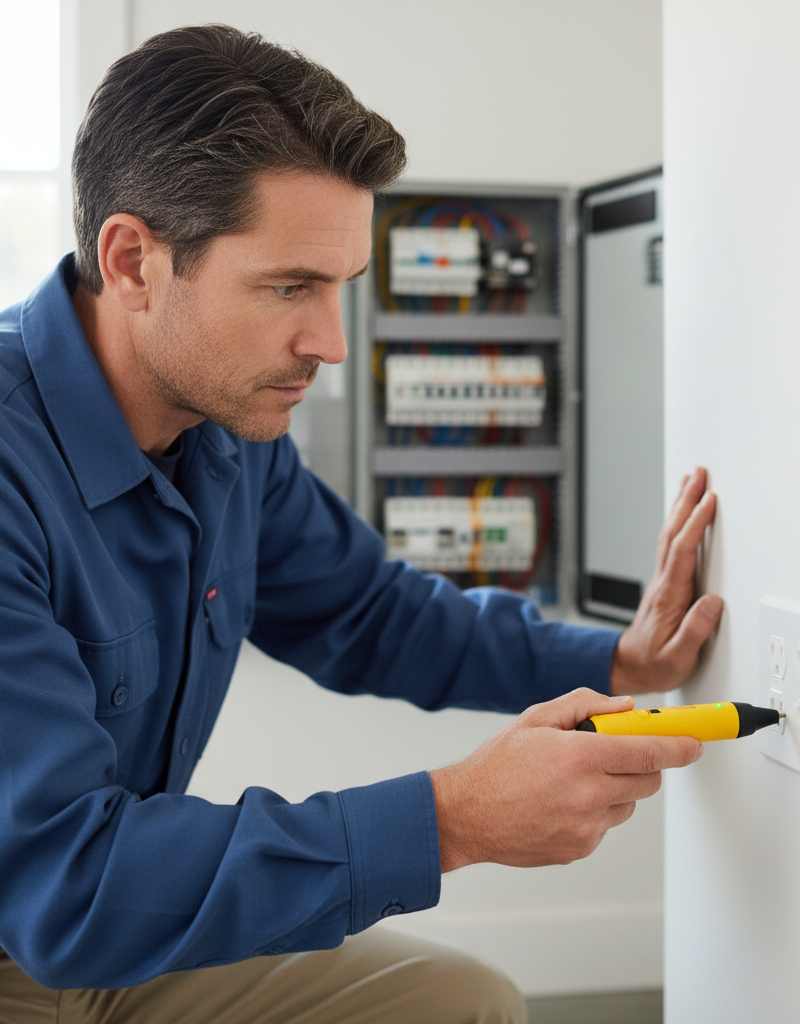
This isn’t a suggestion; it’s mandatory. Go to your electrical panel and find the breaker that controls the room or fixture. Flip it to the "OFF" position. I always recommend using a non-contact voltage tester on the switch wires after you’ve flipped the breaker, just to make sure the power’s actually dead. I pulled a switch in a hallway in Frisco last month that had exactly this problem—the breaker label was dead wrong, and that thing still had juice. Never trust old labels; trust your tester.
2. Remove the Faceplate — Unscrew the cover plate and pull the switch out of the box.
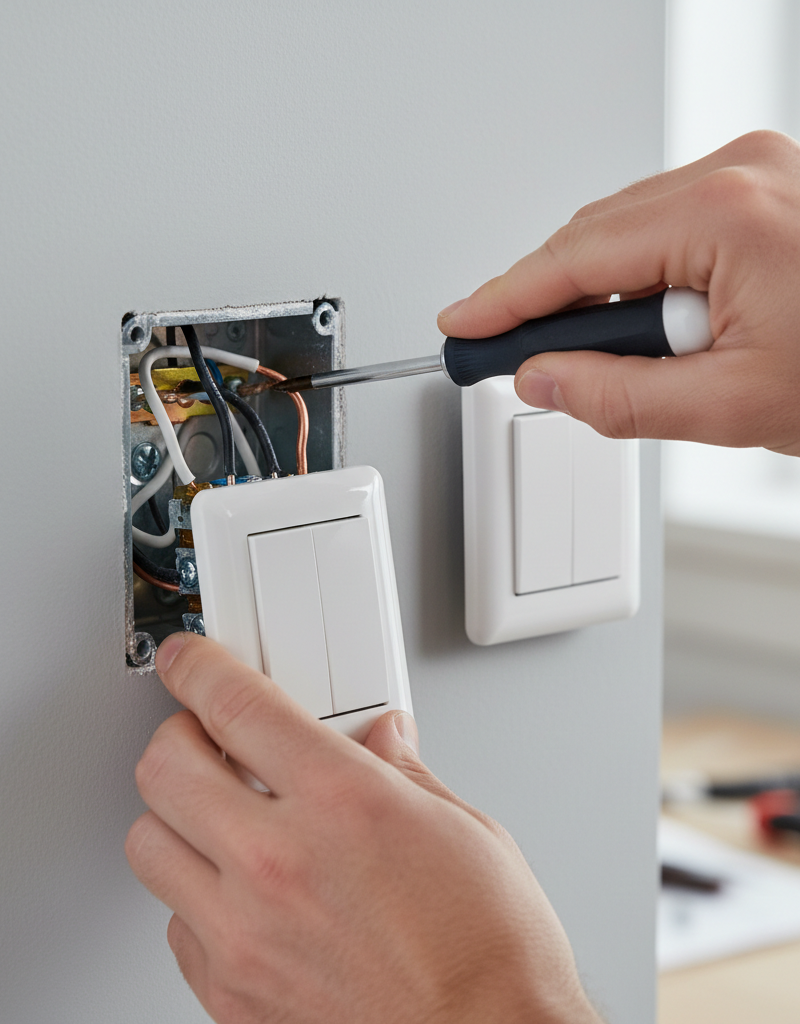
Using a flathead screwdriver, carefully remove the two screws holding the faceplate to the wall. Once the faceplate is off, use a Phillips head screwdriver to take out the screws holding the switch to the electrical box. Gently pull the switch out so you can get to the wires. Don’t yank it; those wires can be stiff as rebar in older homes.
3. Inspect Terminal Connections Loose — Check every wire connection for tightness.
This is the number one culprit. Look at each screw terminal where the wires connect. Are they cinched down tight? Give each screw a snug clockwise turn with your screwdriver. You don’t need to gorilla it and strip the head, but it should feel solid. If you used the push-in (backstab) terminals on the back of the switch – I generally don’t like those – you might want to move the wires to the screw terminals instead. Backstabs are notorious for loosening up over time. I’ve been on plenty of service calls where the fix was nothing more than moving wires off the backstabs and onto proper screw terminals. Quick job. Better connection. Call it a day.
4. Examine Wire Integrity — Look for frayed, nicked, or improperly stripped wires.
Pull each wire gently to make sure it’s actually seated in the terminal. Check the insulation right where it enters the screw terminal. Is it nicked or stripped too far back, leaving too much bare copper? Or did somebody leave insulation under the screw head so the metal isn’t really grabbing wire? You want about 3/4 inch of bare wire wrapped clockwise around the screw terminal so, when you tighten it, the screw pulls the wire in instead of kicking it out. If a wire looks damaged, cut off the bad section and strip it again with proper wire strippers. Clean end. No fancy tricks.
5. Verify Wiring Diagram — Confirm your wiring matches the correct configuration.
Did you replace a single-pole switch with another single-pole? Or a three-way with a three-way? If you swapped a standard single-pole switch with a three-way, even by accident, that’ll do it. A single-pole switch only has two terminals for current-carrying wires (plus a ground). A three-way will have three or four (common, two travelers, and ground). Make sure the wires are on the right terminals. The hot (line) wire usually goes to the common terminal on a three-way switch, and the switched hot (load) wires go to the travelers. For a simple single-pole switch, it doesn’t matter which screw the line and load go on, as long as they’re both hooked up tight. If you snapped a picture before disconnecting anything, now’s the time to compare it. If not, go by standard wiring: line wire (incoming power from the breaker) goes to one terminal, and load wire (outgoing power to the light) goes to the other. The ground wire always connects to the green screw on the switch.
6. Test for Incompatible Switch/Bulb — Consider if your new switch works with your existing bulbs, especially LEDs.
This one’s getting more common because everybody’s got LED bulbs now. A lot of older, cheaper dimmer switches just aren’t built for the low wattage and different electrical load of LEDs, so you get flickering, buzzing, or lights that won’t shut off clean. If you installed a dimmer and the lights are acting up, check the switch specs – it might say "incandescent only." In that case, you’ll need an LED-compatible dimmer. Even if it’s not a dimmer, some basic switches can still act weird with certain LED drivers. Try putting in an old incandescent bulb, if you’ve got one, and see if the flickering stops. If it does, you’ve found your culprit, and you’ll need a switch rated for LED use. Look for "LED compatible" or "dimmable LED."
7. Check Other Nearby Connections — Inspect other wires in the box that aren't connected to the switch.
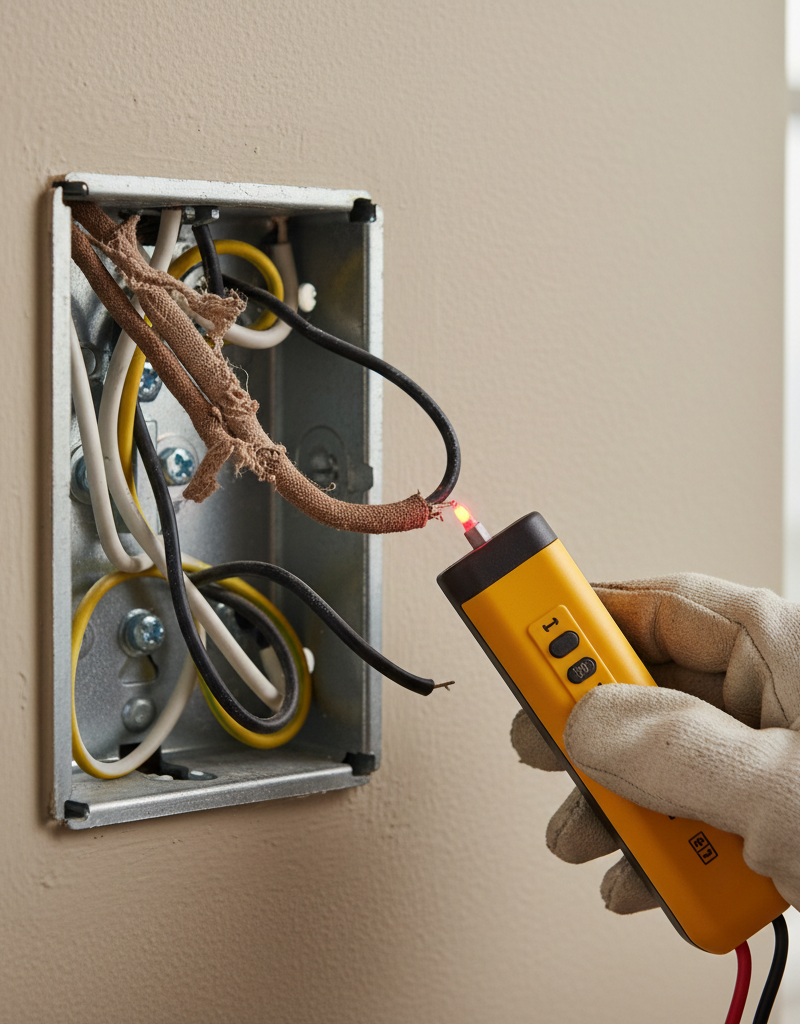
Sometimes the flicker isn’t coming from the switch wiring at all. It’s another splice in the box that got bumped when you were working. That’s especially true if you’ve got a bunch of wires tied together with wire nuts. Gently tug on any wire coming out of a wire nut. If one slides loose, you’ve found another likely problem. Re-twist the splice tight and put the wire nut back on. Make sure you twist wire nuts clockwise until they’re good and snug, with the wires twisted together underneath. A proper splice should hold even if you give it a firm pull.
8. Reassemble and Retest — Carefully push the switch back into the box, screw it in, and reattach the faceplate.
Once you’re sure all the connections are correct and tight, fold the wires back into the electrical box carefully. Don’t just cram them in there; try to lay them in so they don’t get pinched or strained. Screw the switch back into the box, making sure it’s plumb (straight). Then put the faceplate back on. Head back to the breaker panel and turn the power back on. Test the switch. Hopefully, that flickering nonsense is done.
Common Causes
- Loose Wire Connections: This is the big one. A wire not secured tight to a screw terminal or pushed far enough into a backstab terminal is the most common reason for flickering or power that cuts in and out.
- Incorrect Wiring: Swap the line and load, or miswire a three-way switch, and you’ll have trouble. That’s why a quick photo before you pull anything apart can save your bacon.
- Damaged Wires: Over-stripped or nicked wires, or insulation trapped under the screw terminal, keep you from getting a proper connection. Bad stripping can also expose wires to arcing, and that’s a fire hazard.
- Incompatible Switch Type: Trying to dim LEDs with a non-LED-compatible dimmer is a fast way to get flickering. Some plain on/off switches can act up too if they’re not designed for LED drivers.
- Faulty Switch: Sometimes the new switch is just junk. If you’ve checked everything else twice, the switch itself might be bad. Happens more than you’d think.
Common Mistakes
- Skipping the Voltage Tester: Thinking the breaker is off is one thing; knowing it’s off with a tester is another. Don’t skip this safety step. I can’t say that enough.
- Using Backstab Connections: They’re convenient, sure, but those spring clips are known to loosen over time and cause intermittent problems. Use the screw terminals instead; they hold up better.
- Over-Stripping Wires: Too much bare copper leaves unsafe live wire in the box and raises the risk of accidental contact or a short. Aim for about 3/4 of an inch.
- Under-Stripping Wires: Not stripping enough insulation means the screw clamps down on the jacket, not the conductor, so you get a bad connection or none at all.
- Ignoring Wire Gauge: Less common with light switches, but still possible. A wire that’s too thick for the terminal, or mixing gauges the wrong way, can give you grief. Most residential lighting circuits are 14-gauge wire.
- Not Wrapping Wires Clockwise: When you loop a wire around a screw terminal, wrap it clockwise. That way, tightening the screw pulls the wire into the terminal. Wrap it the other way and the screw can push the wire out.
Cost & Time Breakdown
| Task | DIY Cost | Pro Cost | Time |
|---|---|---|---|
| Purchase New Switch (if needed) | $5–$25 | $5–$25 (parts) | N/A |
| Troubleshooting/Re-wiring | $0 | $75–$150 | 15–45 minutes |
| Call an Electrician | N/A | $150–$300+ | 1–3 hours |
Tips & Prevention
- Take a Picture: Before you disconnect any wires from an existing switch, snap a clear photo with your phone. That picture can save you from a miswire headache later.
- Use Proper Tools: Good wire strippers make a huge difference. Don’t use pliers to strip wires; you’ll nick them and weaken the conductor. A decent voltage tester is another must-have.
- Read the Switch's Instructions: New switches, especially dimmers or smart switches, come with their own wiring diagrams. Don’t assume it’s the same as the old one. Read the directions.
- Understand Your Wiring: Know whether you’re dealing with a single-pole, three-way, or even a four-way switch. They each have different wiring rules. Check your old switch; if it only has two screws (plus ground), it’s a single-pole. More than that, you’re probably dealing with a multi-location setup.
- Upgrade to Quality: A cheap switch might save a few bucks today, but a better one usually has stronger terminals and better internal parts, which cuts down on trouble after installation.
When to Call a Professional
If you’ve gone through all these steps, checked and re-checked your connections, verified compatibility, and you’re still getting flickering lights, it’s time to call a licensed electrician. That’s especially true if the flickering affects more than one light or outlet, or if you smell burning, see scorch marks around the switch, or hear buzzing from inside the electrical box. Those can point to a bigger problem like a loose connection in the wall, an overloaded circuit, or a failing part in your home’s electrical system, and that’s well outside DIY territory. Don’t fool around with anything that feels beyond your comfort zone or skill level; electricity isn’t something to gamble with. A pro can track down stubborn problems fast and make sure your wiring is safe and up to code.
FAQ
Q: Why are my new LED lights flickering after installing a new switch?
A: This happens all the time. Most often, the new switch, especially if it’s a dimmer, isn’t compatible with LED bulbs. LEDs draw very little power, and older dimmers or even some plain switches weren’t built for that low load, so they get unstable and start flickering. Look for switches specifically rated for LED compatibility.
Q: Can a loose ground wire cause flickering lights?
A: A loose ground wire is mainly a safety issue, since it gives fault current a path to travel. But if it’s touching another live wire or the metal box intermittently, it could indirectly lead to unstable power and flickering. Still, the hot or neutral connections are a lot more likely to be the problem.
Q: I hear a buzzing noise from my new light switch. Is that normal?
A: A little hum can happen with some dimmer switches, especially with LED or fluorescent lights. But a loud or steady buzzing, especially from a standard on/off switch, isn’t normal and usually points to a loose connection or an overloaded switch. That’s the kind of thing you don’t ignore, because it can turn into a fire hazard.
Q: Do I need to use electrical tape on the screw terminals after connecting wires?
A: It’s not strictly required if the connections are solid and the wire insulation is in good shape, but a lot of pros, myself included, will wrap two layers of good electrical tape around the switch body and over the terminals once it’s wired. It adds a little extra insulation and helps keep you from bumping into the metal box or other wires when you shove the switch back in. Cheap insurance.
Q: What's the difference between a single-pole and a 3-way switch?
A: A single-pole switch controls a light from one spot and has two screw terminals (plus ground). A 3-way switch controls a light from two separate locations and has three screw terminals (plus ground): one "common" terminal and two "traveler" terminals. You can’t swap them without reworking the circuit completely.
Q: Can I use any wire nut for connecting wires in a switch box?
A: Not any wire nut will do. You need one that matches the gauge and number of wires you’re joining. Most wire nuts list a range on the packaging that tells you the minimum and maximum number and size of wires they can safely handle. Use one that’s too small or too large and you’ll end up with a sloppy connection. Twist the wires together before you put the wire nut on for the best splice.
Q: My lights flicker only occasionally, not all the time. What could cause that?
A: Intermittent flickering usually means a connection is just barely hanging on. Temperature swings can make wires expand and contract a little, or vibrations from walking around can break and remake contact for a second. That’s classic loose screw-terminal behavior, or a backstab that’s starting to fail.
Q: How do I know which wire is the 'hot' wire when installing a switch?
A: With the power off, you can’t identify it with a non-contact tester. Once you’ve killed the power at the breaker, you’d normally look for the wire coming from the power source (breaker panel) as the incoming "hot" or "line" wire. In some setups, it might be the wire that was on the black screw terminal on the old switch. An electrician uses a voltage meter to identify the hot wire before disconnecting anything, but for DIY, matching the old setup or following a clear labeled drawing of a single-pole switch usually gets the job done. Always assume every wire is hot until proven dead. For anything more complicated, a meter is the right tool. For a simple on/off switch, though, as long as the ground is connected and the other two wires are firmly on the switch terminals, it usually doesn’t matter which goes where, since all it’s doing is opening and closing the circuit. The key is solid connections.
Related Articles
Keep troubleshooting with these hand-picked guides from FixlyGuide:
- The Single Most Common Reason Half Your Outlet Dies (and How to Fix It in 15 Minutes) — Before you call an electrician for a half-dead outlet, check this common culprit that's often a simple DIY fix.
- Why is Your Light Switch Hot? (The Hidden Danger Most Homeowners Miss) — A hot light switch isn't just uncomfortable; it's a critical warning sign of electrical issues that should never be ignored due to fire ris…
- The Secret Reason Half Your Wall Outlet Dies (And It's Not What You Think) — Discover why only half of your electrical outlet might be working and how to diagnose and fix the common culprit, saving you from a costly…
- The #1 Mistake Homeowners Make Replacing a Light Switch (And How to Avoid It) — Avoid the most common — and dangerous — DIY light switch replacement mistake with this step-by-step guide.
- Why Does Only One Room Have Flickering Lights? The Real Culprit — Flickering lights in a single room often point to a localized electrical issue, most commonly a loose connection within the circuit.
- The Hidden Reason Your GFCI Trips (It's Not Always a Faulty Outlet) — A continuously tripping GFCI outlet is a critical safety warning, often indicating moisture, a faulty appliance, or a wiring problem that r…
Repair or replace this system?
Plug in four numbers and see which choice holds up financially.
Free and instant. Educational guidance only — not a quote, inspection, or professional diagnosis.
Questions to ask before you sign
Ask every contractor the same questions and the cheapest bid stops looking cheapest. Check them off as you go — your progress is saved on this device.
Free, no signup. Bring this to every walkthrough so you compare bids on the same terms.
What should this project cost?
Enter your project details for a realistic cost range before you call anyone.
Outlet and switch work usually $150–$400; panel upgrades commonly $1,800–$4,200.
- Regional adjustment
- National average
- Labor share (typical)
- ~$709
- Quotes to collect
- 3 written estimates
Educational estimate based on national averages — not a binding quote. Always confirm with written local estimates.
Fixly Project Decision Box
- DIY difficulty
- Professional Recommended
- Estimated time
- Diagnosis 1–2 hours
- Cost level
- Moderate
Main tools / materials
- Non-contact voltage tester
- Outlet tester
- Flashlight
When to stop and call a pro
- Burning smell, scorch marks, or a warm outlet or switch plate
- A breaker that trips again right after being reset
- Any work inside the service panel
- Aluminum wiring or cloth-insulated wiring
Need professional help?
Talk to a Licensed ElectricianRepair or replace?
Run the age, cost ratio, and repair history through the calculator before you commit.
- Estimate this projectGet a cost range for your scope and ZIP before you call anyone.Open
- Get local estimatesSend one request and compare written estimates from vetted pros.Open
Free, no signup required. Estimates are educational guidance, not a quote or an inspection.
Frequently asked questions
Why are my new LED lights flickering after installing a new switch?+
This is extremely common. Most often, it's because the new switch, especially if it's a dimmer, isn't compatible with LED bulbs. LEDs draw very little power, and older dimmers or even some standard switches aren't designed for this low load, leading to instability and flickering. Look for switches specifically rated for LED compatibility.
Can a loose ground wire cause flickering lights?+
While a loose ground wire primarily serves as a safety feature, providing a path for fault current, if it's making intermittent contact with another live wire or the metal box, it *could* indirectly contribute to unstable power delivery and flickering. However, it's far more likely the issue is with the hot or neutral connections.
I hear a buzzing noise from my new light switch. Is that normal?+
A slight hum can sometimes occur with certain dimmer switches, especially with LED or fluorescent lights. However, a loud or consistent buzzing, especially from a standard on/off switch, is not normal and often indicates a loose connection or an overloaded switch. It's a sign that the components aren't happy and should be investigated immediately, as it can be a fire hazard.
Do I need to use electrical tape on the screw terminals after connecting wires?+
While not strictly required if the connections are solid and the wire insulation is intact, many pros (including myself) will wrap two layers of high-quality electrical tape around the switch body, covering the terminals, once it's wired. This adds an extra layer of insulation and helps prevent accidental contact with the metal box or other wires when pushing the switch back in. It's cheap insurance.
What's the difference between a single-pole and a 3-way switch?+
A single-pole switch controls a light from one location and has two screw terminals (plus ground). A 3-way switch controls a light from two separate locations and has three screw terminals (plus ground): one "common" terminal and two "traveler" terminals. You cannot interchange them without completely re-wiring the circuit.
Can I use any wire nut for connecting wires in a switch box?+
Not just any wire nut. You need to use wire nuts appropriate for the gauge and number of wires you're connecting. Most wire nuts have a range printed on the packaging, indicating the minimum and maximum number/gauge of wires they can safely connect. Using one too small or too large creates a poor connection. Always twist the wires together *before* applying the wire nut for the most secure splice.
My lights flicker only occasionally, not all the time. What could cause that?+
Intermittent flickering often points to a connection that's *just* on the verge of being loose. Temperature changes can cause wires to expand and contract ever so slightly, or vibrations from walking across the floor can temporarily break and remake contact. This is a classic symptom of a not-quite-tight screw terminal or a failing backstab connection.
How do I know which wire is the 'hot' wire when installing a switch?+
With the power *off*, you can't tell using a non-contact tester. Once the power is safely killed at the breaker, you'd typically look for the wire coming *from* the power source (breaker panel) as your incoming "hot" or "line" wire. In some systems, it might be the wire that was connected to a black screw terminal on the old switch. An electrician uses a voltage meter to identify the hot wire *before* disconnecting anything, but for DIY, consistency with the old setup or a clear, labeled drawing of a single-pole switch often suffices for replacement. Always assume all wires are hot until *proven* dead. For anything more complex, a meter is essential. However, for a simple on/off switch, as long as the ground is connected and the other two wires are securely connected to the switch terminals, it typically doesn't matter which goes where, as it just opens and closes the circuit. The critical part is *secure* connections.
Discussion
Loading comments…