- Prioritize Locations: If you can’t replace every two-prong outlet right away, start with the spots where water and electricity tend to meet: kitchens, bathrooms, and laundry rooms. Garages and basements belong high on the list too.
- Test GFCIs Regularly: Once they’re in, hit the "TEST" button every month, then reset them. It takes a few seconds and tells you the safety mechanism still works.
- Map Your Circuits: While you’re at it, make yourself a breaker map. Labeling which breaker feeds which room or outlet saves a pile of time later, especially when something quits on you.
- Consider Whole-House Surge Protection: If your older home has wiring that’s a little questionable, a whole-house surge protector at the main panel can help shield sensitive electronics from voltage spikes coming off the grid.
- Check Cord and Plug Condition: Look over appliance cords and plugs now and then. A frayed cord or busted plug can undo a lot of the protection you’ve got at the wall.
Electrical · Panel or service upgrade
| Project category | Electrical |
|---|---|
| Problem type | Panel or service upgrade |
| Trade required | Electrical |
| Urgency | Planned project |
| Safety risk | High safety risk |
| DIY suitability | Licensed pro only |
| Cost category | High cost |
| Typical timeline | Permit plus utility scheduling, commonly 2–6 weeks |
| Contractor type | Licensed electrician |
Repair option
Add a subpanel when the main service is adequate.
Replacement option
Full service upgrade with utility coordination and permits.
Common causes
- Obsolete or recalled panel brands
- Service capacity too small for added loads
- No room for required AFCI/GFCI breakers
Relevant tools:project cost estimatorcompare quotes
Published October 13, 2026Last updated October 13, 2026
Tools & materials you'll need
Affiliate links- AmazonGFCI Receptacle
As an Amazon Associate FixlyGuide earns from qualifying purchases — at no extra cost to you. Prices and availability are accurate as of publication and subject to change.
Quick Answer
Yes, you can and should replace old two-prong outlets, but it’s not a simple one-for-one swap. The real issue is the missing ground wire in the wall. To do it right, your best bet is putting in a GFCI (Ground-Fault Circuit Interrupter) outlet in the first spot on the circuit. That gives you solid shock protection even without a ground wire, and it lets you use three-prong plugs. Your other choices are running a new ground wire back to the main electrical panel — and that’s a much bigger job — or leaving it as another two-prong outlet. Don’t just slap in a three-prong outlet and leave the ground screw floating. That thing’s a hidden hazard.
The Problem
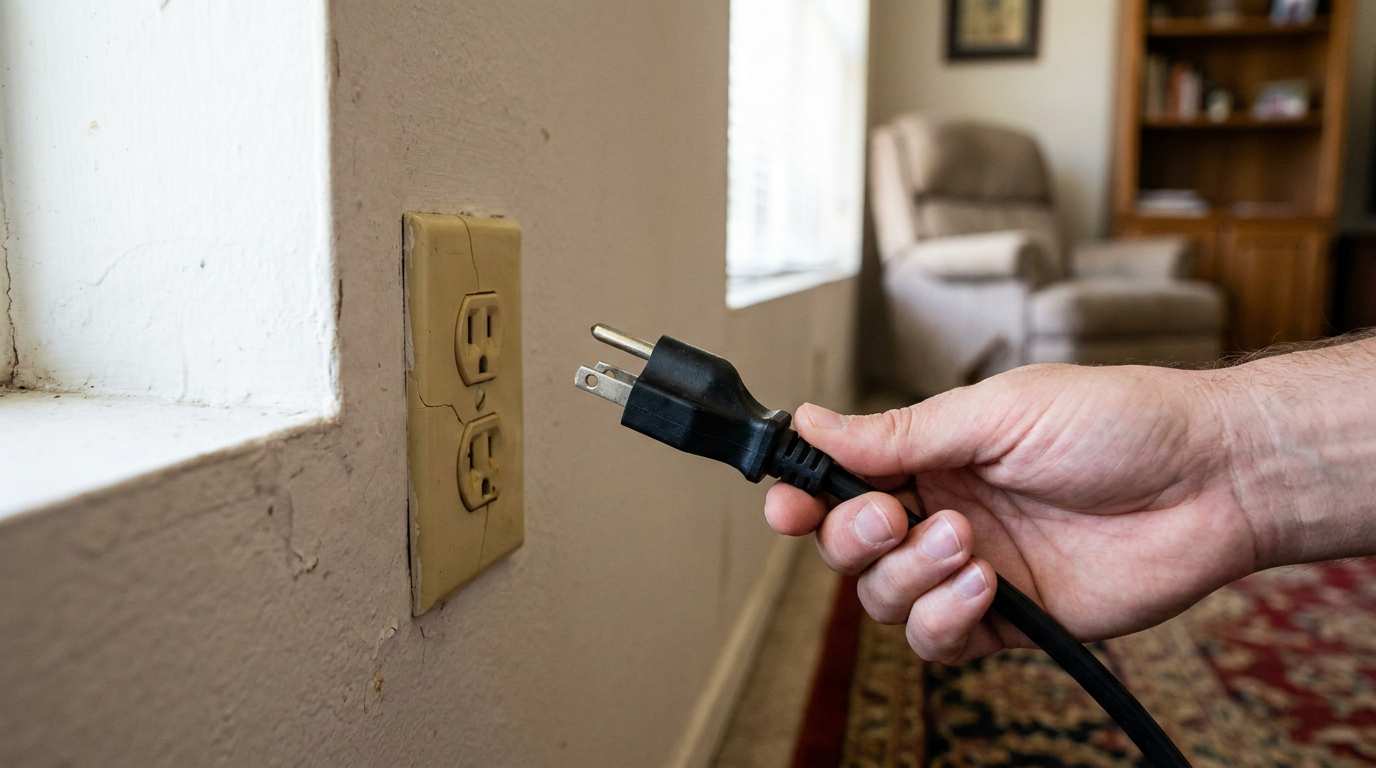
If your home was built before the 1960s, you probably know these old two-prong outlets all too well. They’ve got two vertical slots and won’t accept any modern appliance plug with that third round grounding pin. That’s not just annoying. That third pin is a safety feature, plain and simple. It helps protect you from shock and helps protect your electronics from damage.
The grounding system in a modern home gives stray electricity a safe road out to the earth if something goes wrong — say a frayed toaster wire touches the metal case. Without that path, the metal body can get energized and sit there waiting for you to touch it. That’s how somebody gets bit. No dice.
I’ve pulled more than one old receptacle out of a wall and found the homeowner had been living with a mystery fix for years. Last month, I swapped one in a little bungalow where the “ground” was nothing but wishful thinking. That’s not a repair. That’s a gamble.
Using "cheater" adapters — those little plugs that let a three-prong cord fit into a two-prong outlet — is only a temporary workaround, and it’s often unsafe. Most of the time, that adapter’s ground tab isn’t tied to a real ground at all, so it just gives you a false sense of security. If you want a permanent, safe fix, you’ve got to upgrade the outlet itself.
How It Works
A modern electrical circuit is a three-wire setup. You’ve got a hot wire, usually black, that brings the 120-volt power from the panel. Then there’s the neutral wire, usually white, which brings the current back. And then there’s the ground wire, bare copper or green, which acts like a safety line. That ground wire connects to the metal chassis of your appliances through the third prong on the plug. It’s also tied to the metal electrical box in the wall and runs back to your main service panel, where it’s physically connected to a grounding rod driven into the earth.
Most of the time, the ground wire just sits there and does nothing. That’s the whole point. But if the hot wire inside an appliance touches the metal frame, you get a big burst of current — a ground fault. That surge runs through the ground wire, trips the breaker, and kills the power in milliseconds. That’s what keeps a bad fault from turning into a nasty shock. Two-prong wiring doesn’t have that dedicated path. You just have hot and neutral. If something faults, there’s nowhere safe for that electricity to go, and the metal case of the appliance can sit there at 120 volts. That’s a serious electrocution risk.
Step-by-Step Fix
This covers the most common NEC-compliant fix for DIYers: swapping a two-prong outlet for a GFCI outlet. You’ll end up with a safe, modern outlet without having to tear open walls and run new cable.
Safety First: Always turn off the power to the outlet at your home's main electrical panel before you begin. Use a voltage tester to confirm the power is off at the outlet. If you are unsure about any step, call a licensed electrician.
-
Turn Off the Power. Find your main electrical panel — garage, basement, utility closet, wherever they tucked it. Flip the breaker for the outlet you’re working on to the "OFF" position. I always tell folks to tape a note on the panel too, because somebody will wander by and try to be helpful at the worst possible time.
-
Test for Power. Plug in a lamp if that’s all you’ve got, or better yet use a non-contact voltage tester. Check the receptacle and make sure there’s absolutely no power there. If the tester beeps or lights up, stop. Wrong breaker. Go find the right one.
-
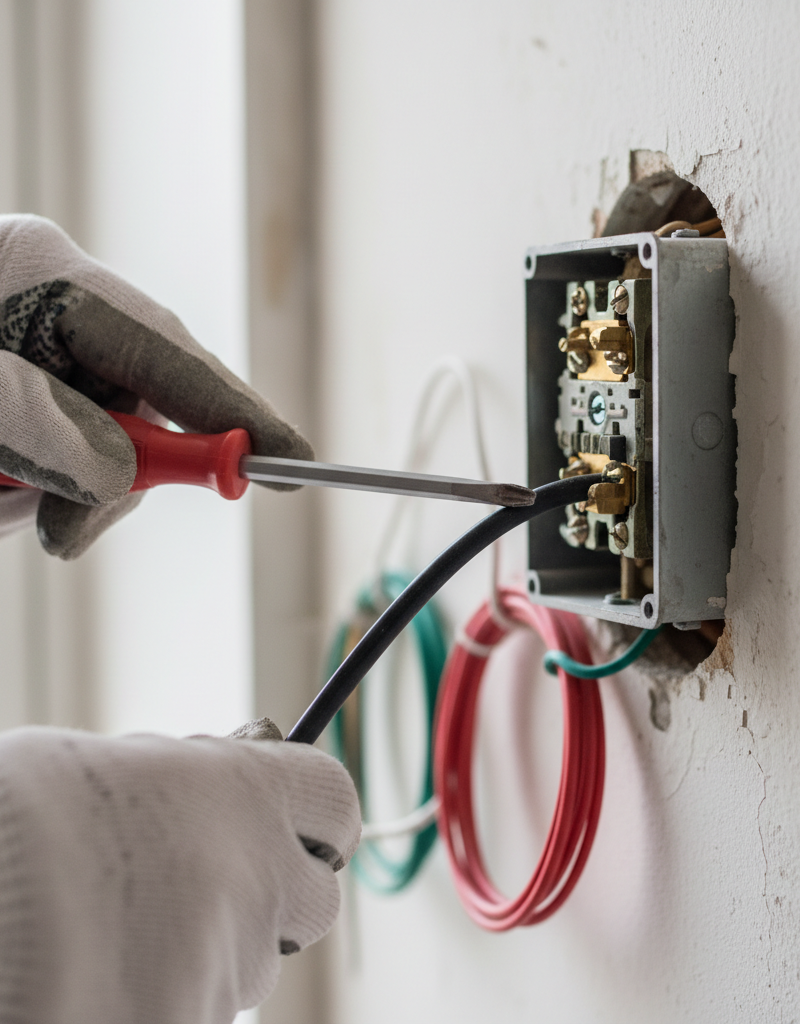
Remove the Old Outlet. Take out the faceplate screw, pull the plate off, then remove the two long screws holding the outlet to the box. Ease the outlet out straight. Don’t yank it. The wires are usually stiff and old, and they don’t always want to cooperate.
-
Inspect the Wiring. You should see two wires on the old outlet. One’s the hot wire, usually black or red. The other’s the neutral, usually white or gray. Take a minute to see which side each one’s on. Hot usually lands on the brass-colored screws, neutral on the silver-colored screws. If you’ve got an older metal box, you might be dealing with armored cable (BX), and that metal jacket sometimes acts like a ground path. An electrician can test it, but I wouldn’t call that a reliable DIY ground.
-
Disconnect the Wires. Loosen the terminal screws and pull the wires free. If they’re shoved into back holes — those “back-stab” connections — you can usually release them with a small screwdriver in the little slot next to the wire hole.
-
Identify the LINE and LOAD Terminals. Flip the new GFCI around and look at the back. You’ll see two sets of screws. One pair is marked "LINE" and the other is marked "LOAD." LINE is for power coming in from the breaker panel. LOAD is for protecting outlets farther down the same circuit. For this job, you’re only using the LINE terminals. The LOAD side should already have yellow tape on it from the factory — leave that tape alone.
-
Connect the Wires to the GFCI. Hook the hot wire from the wall to the brass-colored LINE screw on the GFCI. Hook the neutral wire to the silver-colored LINE screw. Hot to brass/dark, neutral to silver/light. Simple enough. Give each wire a firm tug after tightening. If it slips, fix it now, not after the cover’s back on.
-
Install the New GFCI Outlet. Fold the wires neatly back into the box. Slide the GFCI into place and make sure it sits flush. Use the two mounting screws to fasten it. Don’t crank down like you’re tightening lug nuts — you can crack the plastic housing if you go too far.
-
Attach the Faceplate and Apply the Sticker. Put on the new faceplate that came with the GFCI. You’ll also get a little sticker that says "No Equipment Ground." The National Electrical Code wants that sticker on the faceplate so anybody coming along later knows the outlet has GFCI protection, but no dedicated ground wire.
-
Turn the Power Back On. Head back to the panel and flip the breaker to the "ON" position.
-
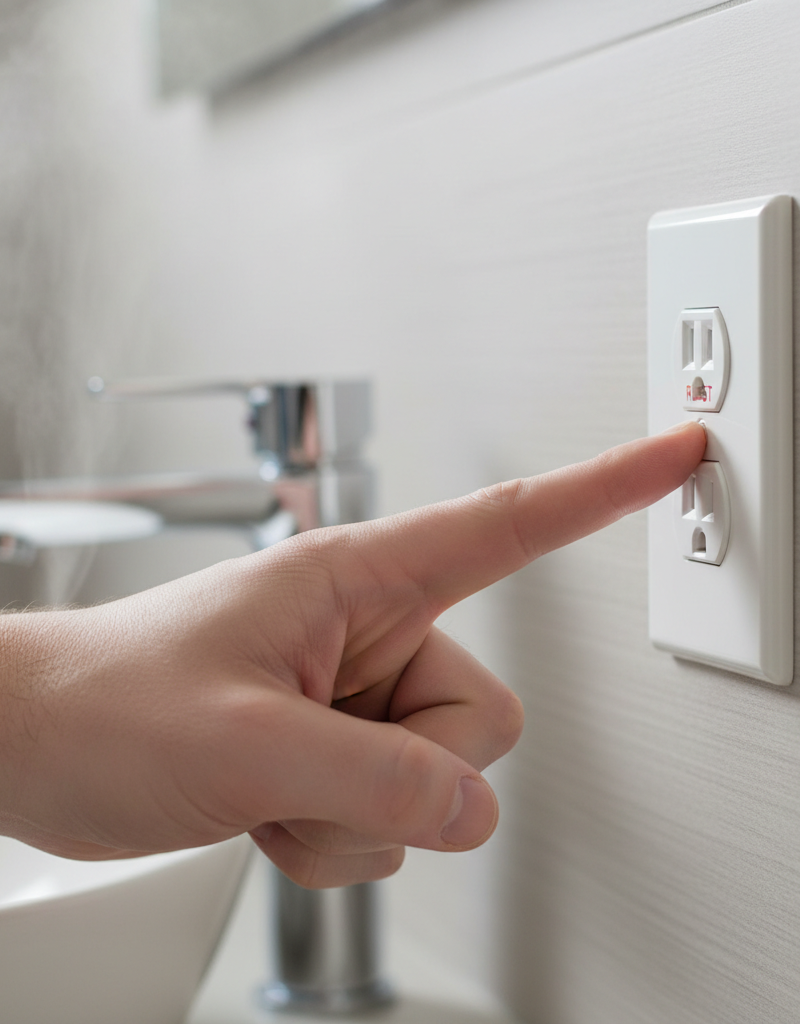
Test the GFCI. The outlet should have a small status light, usually green. Hit the "TEST" button. You should hear a click, and the "RESET" button should pop out. The light goes out, and whatever’s plugged in loses power. That tells you the shutoff works. Press "RESET" and you’re back in business. Call it a day.
Common Causes
The main reason you find two-prong outlets is age. Before the National Electrical Code (NEC) started requiring grounded receptacles in most places in the 1960s, two-wire systems — hot and neutral only — were the norm in residential construction.
- Original Construction (Pre-1962): Homes built in the 1950s and earlier were usually wired this way. It wasn’t some half-baked shortcut. It was just how the job got done back then.
- Outdated Renovations: Sometimes an older house got remodeled, or an addition went on before grounding rules were enforced everywhere. I’ve seen a 1970s kitchen with grounded circuits and bedrooms still stuck with the original wiring from the 1950s.
- Missed during Upgrades: A previous owner may have upgraded the service panel and stopped there. Rewiring the whole house costs real money, so the old ungrounded branch circuits got left behind.
- Knob-and-Tube Wiring: In very old homes, usually pre-1940s, you might run into knob-and-tube wiring. That system has no ground by design and needs an electrician to evaluate it for replacement, because decades of patchwork changes and added insulation can make it a mess.
Common Mistakes
People get into trouble fast with two-prong outlets. Don’t make one of these “fixes” — they’re the kind of shortcut that comes back to bite you.
- Just Swapping in a Three-Prong Outlet: This is the big one. Somebody buys a standard three-prong outlet, wires it in, and leaves the ground screw disconnected. The plug works, sure, but the safety ground is still missing. That’s a fake fix, and it can be downright dangerous.
- Using a "Cheater" Adapter Incorrectly: Those three-to-two prong adapters have a little metal tab or green wire. The idea is to attach it to the screw on the faceplate, which is supposed to be grounded. In most homes with two-prong outlets, that screw isn’t grounded at all, so the adapter doesn’t do much for safety.
- Connecting the Ground Screw to the Neutral Screw: That’s a “bootleg ground,” and it’s a serious code violation. If the neutral has a problem, it can energize the appliance housing. That’s not a small mistake.
- Ignoring the Problem: Leaving the old outlets in place means you can’t safely use a lot of modern electronics that expect grounding, and you lose a key layer of shock protection.
- Not Using the "No Equipment Ground" Sticker: The NEC requires that sticker on a GFCI-protected but ungrounded outlet for a reason. It tells the next person, or an inspector, that there’s shock protection but no real ground path for certain surge protectors or equipment that needs one.
Cost & Time Breakdown
Swapping one two-prong outlet over to a GFCI is a pretty cheap, quick DIY job. Rewiring an entire house? That’s a whole different animal.
| Task | DIY Cost | Pro Cost (per outlet) | Time (per outlet) |
|---|---|---|---|
| Replace one outlet with a GFCI | $15–$25 | $75–$150 | 20–30 minutes |
| Replace with another two-prong outlet | $2–$5 | $60–$120 | 15–20 minutes |
| Run a new ground wire to one outlet | $50–$100 (materials) | $200–$400+ | 2–4 hours |
| Rewire entire home (per sq. ft.) | Not a DIY job | $8–$15 per sq. ft. | 1–2 weeks |
Tips & Prevention
- Prioritize Locations: If you can’t replace every two-prong outlet right away, start with the spots where water and electricity tend to meet: kitchens, bathrooms, and laundry rooms. Garages and basements belong high on the list too.
- Test GFCIs Regularly: Once they’re in, hit the "TEST" button every month, then reset them. It takes a few seconds and tells you the safety mechanism still works.
- Map Your Circuits: While you’re at it, make yourself a breaker map. Labeling which breaker feeds which room or outlet saves a pile of time later, especially when something quits on you.
- Consider Whole-House Surge Protection: If your older home has wiring that’s a little questionable, a whole-house surge protector at the main panel can help shield sensitive electronics from voltage spikes coming off the grid.
- Check Cord and Plug Condition: Look over appliance cords and plugs now and then. A frayed cord or busted plug can undo a lot of the protection you’ve got at the wall.
When to Call a Professional
This is a manageable DIY for a lot of folks, but electricity isn’t something to wing. Stop and call a licensed electrician if you open the box and find crumbly fabric-covered insulation, see melting or scorch marks on the outlet or wires, notice aluminum wiring instead of copper, or just plain feel unsure about any step. If you’re looking to run a new dedicated ground wire or rewire part of the house, that’s not a weekend project. You’re working inside the main electrical panel and fishing cable through walls, and that should stay in a pro’s hands.
Related Articles
Keep troubleshooting with these hand-picked guides from FixlyGuide:
- The Surprising Reason Your Ceiling Fan Wobbles (It's Not Always the Blades) — A wobbly ceiling fan isn't just annoying—it can be a safety hazard. I'll show you how to diagnose and fix the common culprits.
- The Sneaky Reason Your Extension Cord Keeps Tripping the Breaker — Don't just reset that breaker again! Discover why your extension cord keeps tripping your circuit and how to fix it right.
- Why Your Smoke Alarm Won't Stop Blaring (When There's No Fire!) — False alarms from your smoke detector are more than just annoying; they can make you ignore real emergencies. Learn why they happen and how…
- The Real Reason Your Smoke Alarm Chirps Every 30 Seconds (It's Not Always the Battery) — Don't just swap batteries; a smoke detector chirping every 30 seconds can signal various issues, from dust to improper installation, demand…
- The Buzzing Outlet: Your Walls Are Warning You of a Fire Hazard — That faint buzzing from your outlet isn't just annoying; it's a critical warning sign that electrical connections inside your walls are loo…
- The Mystery of the Loose Siding Panel: Why It Flaps and How to Fix It Right — Loose siding panels aren't just an eyesore; they can lead to serious water damage if not addressed quickly. Learn why your siding is flappi…
Should you do this yourself?
Answer five quick questions before you start. Safety outranks savings every time.
Your experience with work like this
How high do you have to work?
Does the job involve any of these?
Will it need a permit?
Specialty tools
Free and instant. Educational guidance only — not a quote, inspection, or professional diagnosis.
What should this project cost?
Enter your project details for a realistic cost range before you call anyone.
Outlet and switch work usually $150–$400; panel upgrades commonly $1,800–$4,200.
- Regional adjustment
- National average
- Labor share (typical)
- ~$709
- Quotes to collect
- 3 written estimates
Educational estimate based on national averages — not a binding quote. Always confirm with written local estimates.
Fixly Project Decision Box
- DIY difficulty
- Professional Recommended
- Estimated time
- Diagnosis 1–2 hours
- Cost level
- Moderate
Main tools / materials
- Non-contact voltage tester
- Outlet tester
- Flashlight
When to stop and call a pro
- Burning smell, scorch marks, or a warm outlet or switch plate
- A breaker that trips again right after being reset
- Any work inside the service panel
- Aluminum wiring or cloth-insulated wiring
Need professional help?
Talk to a Licensed ElectricianGet the print-ready PDF of this guide
A clean, ad-free, printable version you can keep on your phone or pin to the workshop wall. Free with a FixlyGuide account.
- Print-optimized layout
- Tools, materials & every step included
- Saved to your account
Frequently asked questions
Are two-prong outlets a fire hazard?+
Not inherently, but they are a safety risk. The lack of a ground wire means they can't protect you or your appliances from electrical faults, which increases the risk of shock and, in some cases, can lead to fire if a fault occurs in a device.
Can I just use a three-prong adapter on a two-prong outlet?+
You can, but it's often unsafe. These 'cheater' adapters are only effective if the outlet's faceplate screw is actually connected to a ground path, which is rare in homes with two-prong outlets. Using one without a proper ground gives you a false sense of security.
Is it expensive to replace all two-prong outlets in a house?+
It can be. If you're just swapping them for GFCI outlets, the cost is mainly for the devices ($15-$25 each) and labor. If you need to run new wiring to ground every outlet, the cost can easily run into several thousand dollars, as it's a very labor-intensive job.
Why do my lamps work in a two-prong outlet if it's unsafe?+
A lamp or many simple devices only need a hot and a neutral wire to complete a circuit and function. The ground wire is a safety feature that is only used when something goes wrong inside the device. The device will work, but the safety protection is missing.
What's the difference between a grounded outlet and a GFCI outlet?+
A grounded outlet has a physical wire that provides a path for fault current to the earth, tripping a breaker. A GFCI outlet electronically monitors the flow of current in the hot and neutral wires. If it detects an imbalance (meaning electricity is leaking out, possibly through a person), it shuts the power off in milliseconds. A GFCI provides personal shock protection even without a ground wire.
My house has a mix of two-prong and three-prong outlets. Is that normal?+
Yes, this is very common in older homes that have been partially renovated. A previous owner may have updated the wiring in the kitchen or a new addition, but left the original two-prong outlets in bedrooms or living rooms to save money.
Can I plug a surge protector into a GFCI outlet that has no ground?+
You can, and the GFCI will provide shock protection. However, the surge protection feature that relies on shunting excess voltage to the ground wire will not function. You need a physical ground wire for a surge protector to work as designed.
How do I know if my electrical box is grounded?+
The safest way is to use a multimeter. A professional can also use a circuit tester. If you see a bare copper or green wire inside the box connected to a screw, that's a great sign. If the box is metal and the wiring is in metal conduit, the conduit itself might serve as the ground, but this must be tested to be sure.
Discussion
Loading comments…