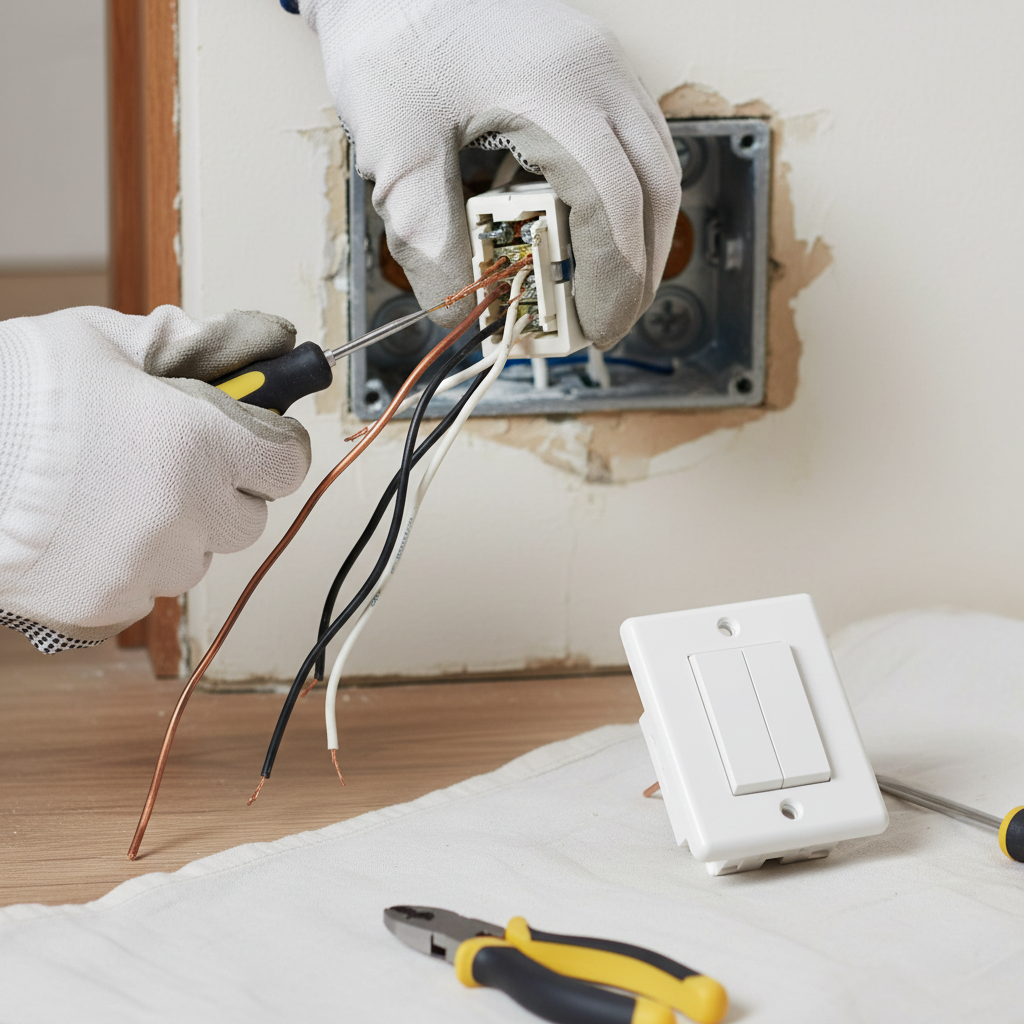
- Worn Internal Contacts: Over years of use, the metal contacts inside the switch can wear down, corrode, or pit, leading to poor electrical conductivity and intermittent connections.
- Loose Wire Connections: Vibrations, temperature changes, or even initial improper installation can cause wire terminals to loosen over time, creating resistance and arcing, which results in flickering or loss of power.
- Back-Stab Wiring: Many older switches use
Electrical · Outlet or lights not working
| Project category | Electrical |
|---|---|
| Problem type | Outlet or lights not working |
| Trade required | Electrical |
| Urgency | Soon — within weeks |
| Safety risk | Moderate safety risk |
| DIY suitability | DIY for experienced homeowners |
| Cost category | Low cost |
| Typical timeline | Often under an hour once the cause is found |
| Contractor type | Licensed electrician |
Repair option
Reset the upstream GFCI first, then replace the failed device.
Replacement option
Rewire the circuit when connections are failing in multiple boxes.
Common causes
- Tripped GFCI upstream on the same circuit
- Loose neutral in a daisy-chained run
- Failed switch or receptacle
Relevant tools:diy difficultydiy or hire a pro
Published July 23, 2026Last updated August 17, 2026
Tools & materials you'll need
Affiliate linksAs an Amazon Associate FixlyGuide earns from qualifying purchases — at no extra cost to you. Prices and availability are accurate as of publication and subject to change.
Quick Answer
Flickering lights, intermittent power to a connected outlet, or a light switch that feels loose or unresponsive often indicates a failing light switch. Fortunately, replacing a standard light switch is a common and relatively easy DIY electrical repair. By carefully following safety precautions and step-by-step instructions, most homeowners can replace a faulty switch in under an hour for less than $10, restoring proper function to their lighting or outlets.
The Problem
You flip a light switch, and nothing happens, or worse, the light flickers erratically, humming faintly. Perhaps a wall outlet controlled by the switch has mysteriously stopped working, leaving your lamp or device without power. These aren't just minor inconveniences; they can be signs of a deteriorating electrical connection, a worn-out switch mechanism, or even an improperly wired switch. Left unaddressed, a faulty switch can be annoying, but in rare cases, could pose a minor fire risk if it's consistently overheating due to a poor connection. Understanding how a switch fails and how to correctly replace it is key to restoring peace and safety to your home's electrical system.
How It Works
At its core, a light switch is a simple mechanical device designed to complete or break an electrical circuit. When you flip the toggle, you're physically moving a conductor inside the switch that either connects two terminals (allowing electricity to flow) or disconnects them (stopping the flow). This action controls the power to the light fixture or outlet it serves. Most residential light switches are single-pole switches, meaning they control one device from one location. They have two screw terminals for the 'hot' wires (one incoming from the power source, one outgoing to the load) and often a green or bare copper grounding screw. Electricity flows from your home's breaker panel, through the circuit wiring, into the switch, and then out to the light or outlet. When the switch is 'on,' it completes this path, allowing 120 volts of alternating current (AC) to energize the device. When it's 'off,' the path is broken, interrupting the flow of electricity. Over time, the internal contacts can wear out, corrode, or get loose, leading to intermittent connections, resistance build-up, and the symptoms you're experiencing. The spring mechanism can also weaken, making the switch feel loose or preventing it from staying in position.
Step-by-Step Fix
1. Prioritize Safety — Turn off the power at the breaker.
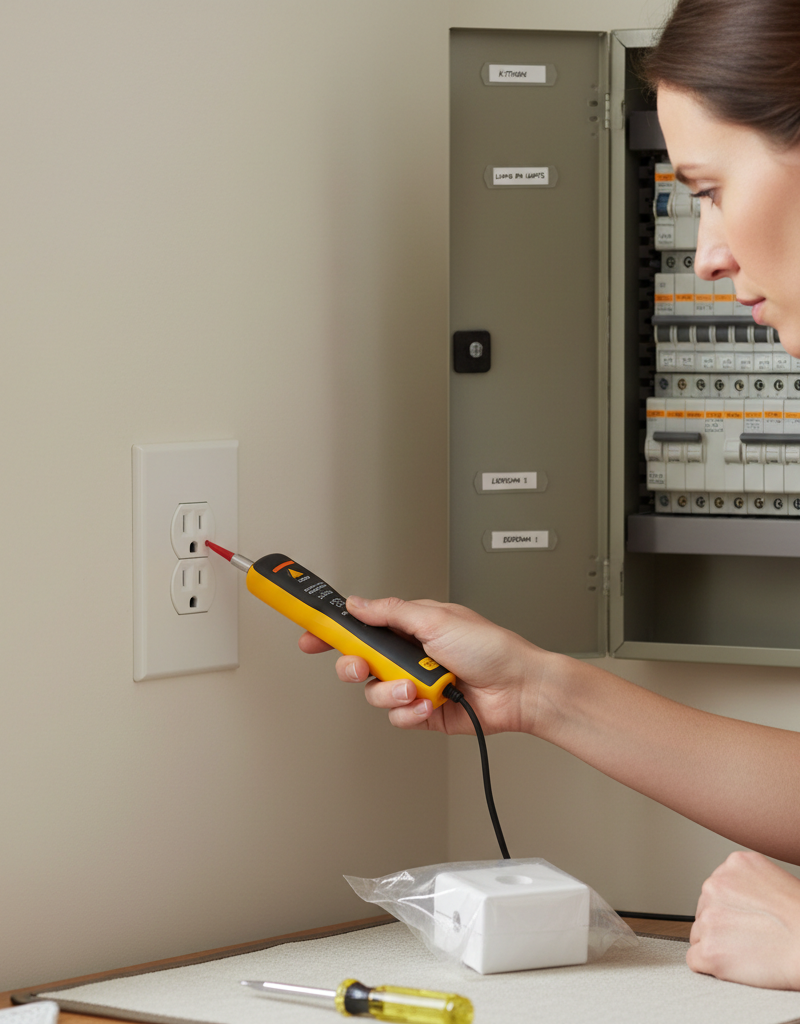
*   Go to your main electrical panel and locate the breaker that controls the room or specific circuit where the switch is located. Flip it to the 'OFF' position. If unsure, turn off the main breaker for your entire home – better safe than sorry.
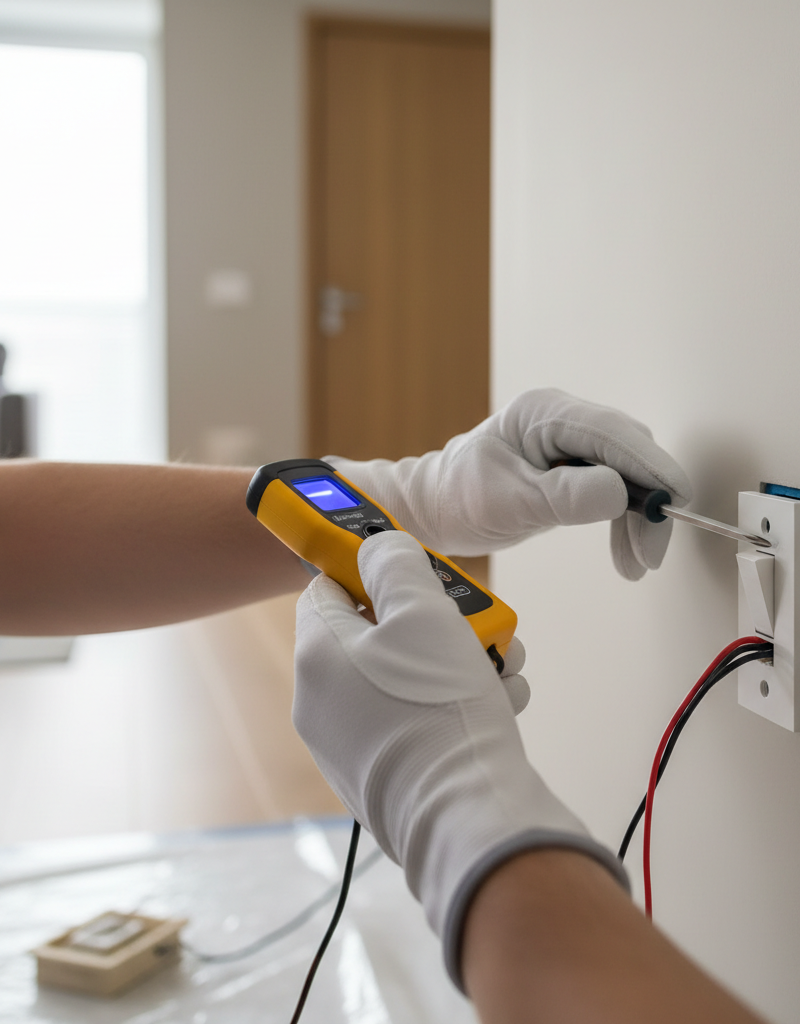
*   **Safety Tip:** Use a non-contact voltage tester to confirm the power is off at the switch before proceeding. Press the tip of the tester against the switch and then into the outlet you believe is controlled by it. No beep or light means no power. Place a piece of electrical tape over the 'OFF' breaker to prevent someone from accidentally turning it back on.
2. Remove the Wall Plate and Old Switch — Uncover the wiring.
*   With the power confirmed off, use a flat-head screwdriver to remove the screws holding the cover plate in place. Carefully pull the cover plate away.
*   Next, use a Phillips-head or flat-head screwdriver (depending on the screw type) to remove the two screws holding the switch yoke (the metal frame) to the electrical box. Gently pull the switch out of the box, being careful not to tug too hard on the wires.
3. Inspect and Disconnect Wires — Note the wiring configuration.
*   Before disconnecting anything, take a clear photo of how the wires are connected to the old switch. This is crucial for correct re-installation.
*   Single-pole switches typically have two insulated 'hot' wires connected to the screw terminals (usually brass or silver), and a bare copper or green insulated 'ground' wire connected to a green screw.
*   Carefully loosen the terminal screws and remove the wires. If the wires are pushed into back-stab holes, you'll need to insert a small flat-head screwdriver into the release slot next to each wire to free it. I recommend stripping the wire slighly (if needed) and connecting to the screw terminals on the new switch, as back-stabbing can lead to poor connections over time.
4. Prepare the New Switch — Adjust wiring and orient.
*   If your new switch is a different style or you removed a back-stabbed wire, you may need to bend the wire ends into a small 'J' shape clockwise, ready to hook around the new switch's screw terminals. Ensure about 3/4 inch of insulation is stripped from each wire.
*   Orient the new switch so the 'TOP' indicator (if present) is at the top, or the text is readable right-side up.
5. Connect the Wires to the New Switch — Securely fasten all connections.
*   First, connect the bare copper or green insulated ground wire to the green grounding screw on the new switch. Tighten it securely. This is a critical safety connection.
*   Next, connect the 'hot' wires to the brass (or silver) screw terminals. Typically, one wire comes from the power source and one goes to the light/outlet. It usually doesn't matter which 'hot' wire goes to which brass terminal on a standard single-pole switch, but match your photo if you want to replicate the original setup. Ensure the 'J' hook is snug around the screw and tighten it firmly without over-tightening.
*   **If this doesn't work:** Double-check that all wire insulation is stripped correctly (no bare wire exposed beyond the terminal, but enough to make a good connection). Ensure screws are tight. If you have a three-way switch (controlling a light from two locations), you'll need a different type of switch and different wiring instructions. This guide is for single-pole switches only.
6. Mount the New Switch — Carefully push into the box.
*   Gently fold the wires back into the electrical box, being careful not to pinch them or dislodge any connections.
*   Align the switch yoke with the screw holes in the electrical box and secure it with the mounting screws. Don't overtighten; just make it snug and flush with the wall.
7. Reattach the Cover Plate — Final cosmetic touch.
* Place the new cover plate over the switch and secure it with its screws. Be gentle; plastic cover plates can crack easily if overtightened.
8. Restore Power and Test — Confirm the fix.
*   Go back to your electrical panel and flip the breaker back to the 'ON' position.
*   Return to the switch and test its operation. The light should turn on and off reliably, or the outlet should now have power. If the switch doesn't work, immediately turn off the power at the breaker and re-check your connections against your photo and the steps.
Common Causes
- Worn Internal Contacts: Over years of use, the metal contacts inside the switch can wear down, corrode, or pit, leading to poor electrical conductivity and intermittent connections.
- Loose Wire Connections: Vibrations, temperature changes, or even initial improper installation can cause wire terminals to loosen over time, creating resistance and arcing, which results in flickering or loss of power.
- Back-Stab Wiring: Many older switches use
Related Articles
Keep troubleshooting with these hand-picked guides from FixlyGuide:
- Backstabbed Outlets: The Ticking Time Bomb in Your Walls — Flickering lights or dead outlets? The cause is often cheap, unreliable backstabbed outlets. Learn why these connections fail and how a sim…
- Why Does Only One Room Have Flickering Lights? The Real Culprit — Flickering lights in a single room often point to loose connections, an overloaded circuit, or a failing light fixture, rather than a whole…
- Why Does Only One Room Have Flickering Lights? The Real Culprit — Flickering lights in a single room often point to a localized electrical issue, frequently a loose connection in a light fixture or switch.
- Why Does Only One Room Have Flickering Lights? The Real Culprit Isn't Always the Bulb — Flickering lights in a single room often point to a localized issue, ranging from a loose bulb to a faulty switch or wiring problem.
- Why Does Only One Room Have Flickering Lights? The Real Culprit — Flickering lights in a single room often point to a localized electrical issue, ranging from a loose bulb to a faulty switch or fixture, ra…
- The Secret Culprit Behind Your Leaking Washer (and the $10 Fix) — A leaking washing machine can cause significant damage, but often the culprit is a simple, inexpensive part that homeowners can replace the…
Should you do this yourself?
Answer five quick questions before you start. Safety outranks savings every time.
Your experience with work like this
How high do you have to work?
Does the job involve any of these?
Will it need a permit?
Specialty tools
Free and instant. Educational guidance only — not a quote, inspection, or professional diagnosis.
What should this project cost?
Enter your project details for a realistic cost range before you call anyone.
Outlet and switch work usually $150–$400; panel upgrades commonly $1,800–$4,200.
- Regional adjustment
- National average
- Labor share (typical)
- ~$709
- Quotes to collect
- 3 written estimates
Educational estimate based on national averages — not a binding quote. Always confirm with written local estimates.
Fixly Project Decision Box
- DIY difficulty
- Professional Recommended
- Estimated time
- Diagnosis 1–2 hours
- Cost level
- Moderate
Main tools / materials
- Non-contact voltage tester
- Outlet tester
- Flashlight
When to stop and call a pro
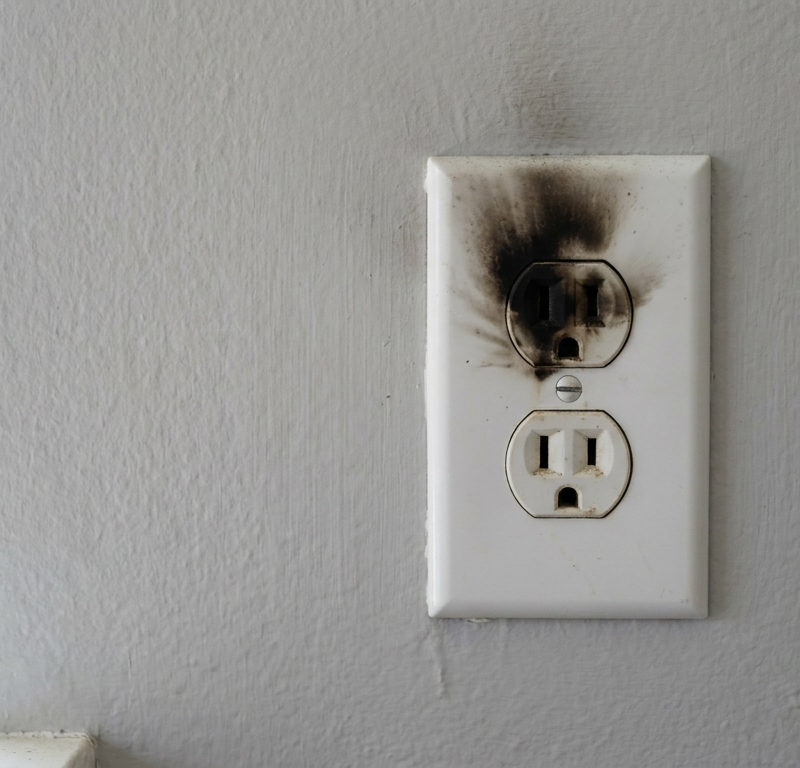
- Burning smell, scorch marks, or a warm outlet or switch plate
- A breaker that trips again right after being reset
- Any work inside the service panel
- Aluminum wiring or cloth-insulated wiring
Need professional help?
Talk to a Licensed ElectricianFrequently asked questions
How do I know if my light switch is bad?+
Signs of a bad light switch include inconsistent operation (sometimes it works, sometimes it doesn't), lights flickering, the switch feeling loose or 'mushy' when you flip it, or an unusual buzzing sound coming from the switch. If an outlet controlled by the switch isn't working, that's another clear indicator. Always rule out a bad light bulb first.
Can a bad light switch cause flickering lights?+
Yes, absolutely. A common cause of flickering lights is a failing light switch with worn internal contacts or loose wire connections. As the contacts degrade, they create an inconsistent electrical path, leading to the light bulb receiving intermittent power and appearing to flicker.
Is it easy to replace a light switch?+
For a standard single-pole light switch, replacement is considered an easy-to-moderate DIY task for most homeowners. It primarily involves safely turning off power, disconnecting two to three wires, and reconnecting them to a new switch. No special tools are usually required beyond basic screwdrivers and a voltage tester.
Do I need to turn off the main breaker to change a light switch?+
While you can often turn off just the specific circuit breaker controlling the switch, it's always safest to turn off the main breaker for your entire home if you are unsure which breaker controls the circuit. This eliminates any possibility of accidental electrocution, especially if the circuit isn't clearly labeled.
Discussion
Loading comments…