- Verify zero voltage with a non-contact tester — Bring a good non-contact voltage tester up to both slots of the receptacle, and insert the probe tip carefully. It should stay quiet and dark.
- Tool required: Cat III / Cat IV rated non-contact voltage tester.
- Pro tip: Test the tester on a known live circuit first, check the dead circuit, then test the live circuit again so you know the tool didn’t go belly-up on you.
Electrical · Panel or service upgrade
| Project category | Electrical |
|---|---|
| Problem type | Panel or service upgrade |
| Trade required | Electrical |
| Urgency | Planned project |
| Safety risk | High safety risk |
| DIY suitability | Licensed pro only |
| Cost category | High cost |
| Typical timeline | Permit plus utility scheduling, commonly 2–6 weeks |
| Contractor type | Licensed electrician |
Repair option
Add a subpanel when the main service is adequate.
Replacement option
Full service upgrade with utility coordination and permits.
Common causes
- Obsolete or recalled panel brands
- Service capacity too small for added loads
- No room for required AFCI/GFCI breakers
Relevant tools:project cost estimatorcompare quotes
Published October 20, 2026Last updated October 20, 2026
Tools & materials you'll need
Affiliate links- AmazonNon-contact voltage tester1 · Cat III/IV rated for safety
- AmazonDigital multimeter1 · To confirm 0.0V across all terminals
- AmazonWire strippers and cutter1 · 12-14 AWG sizing notches
- AmazonMulti-bit screwdriver1 · Standard flathead and #2 Phillips
- AmazonThree-prong receptacle tester1 · To check polarity and grounding after install
As an Amazon Associate FixlyGuide earns from qualifying purchases — at no extra cost to you. Prices and availability are accurate as of publication and subject to change.
Quick Answer
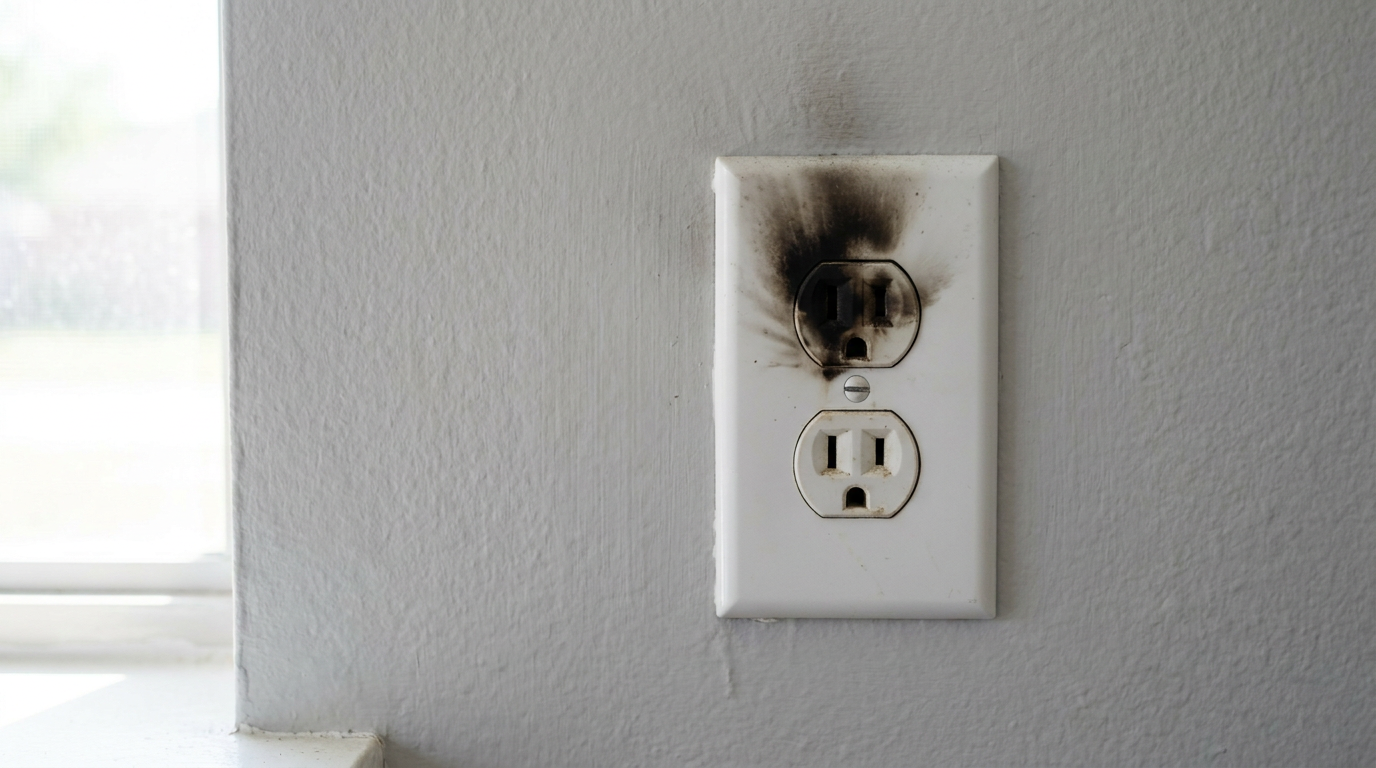
A sparking outlet usually means one of two things: either it’s a normal little micro-arc when an appliance pulls a sudden load, or you’ve got real trouble from loose terminal screws, worn-out internal spring contacts, or water sneaking into the box. If the spark is yellow or orange, pops loud, smells like burnt plastic, leaves black scorch marks, or keeps sparking every time you plug something in, kill the power at the breaker panel right away. Swapping a damaged receptacle usually takes about 20 to 30 minutes, but if you’re seeing widespread arcing, warm wall plates, or aluminum wiring, that’s electrician territory.
The Problem
You go to plug in a vacuum cleaner or toaster, and snap—a flash jumps out from behind the cover plate.
Sometimes it’s just a tiny blue pinprick, silent and gone in a blink. Other times, it’s a nasty orange pop with that burnt-vinyl smell that makes you wrinkle your nose and step back. Either way, it’ll get your attention. And yeah, for good reason—electrical arcing is one of the big causes of house fires in residential homes.
Not every spark means your place is about to go up. Electricity wants a path, and air will conduct under the right conditions. But once the sparks start happening often, or they turn dark, hot, or violent enough to char plastic, that outlet’s gone from useful to dangerous. Knowing the difference between a harmless plug-in spark and failing wiring can save your house—and save you from paying an emergency fee for something that should’ve been a simple repair.
How It Works
To make sense of why outlets spark, you’ve got to picture the 120-volt alternating current (AC) circuit hiding in the walls. Inside standard residential Romex cable, there’s a hot wire (black insulation, carrying 120 volts relative to ground), a neutral wire (white insulation, completing the circuit back to the panel), and a bare copper ground wire.
At the receptacle, those conductors land on terminal screws or spring-loaded push-in terminals. Inside the face of the outlet, behind those skinny vertical slots, are brass or copper wiper contacts. When you push a two- or three-prong plug into the wall, those internal wipers spread a bit and clamp down on the prongs with spring tension so you get a solid metal connection.
Electricity flows at 60 cycles per second (60 Hz). If the appliance is already switched "on" before you plug it in, current can jump a microscopic gap between the plug prong and the internal wiper blade before full contact is made. That tiny jump ionizes the air and gives you a quick blue flash—normal stuff. But if those wipers are worn, loose, or corroded, they don’t clamp worth a darn. Then the current stutters and jumps across air gaps while the appliance is running. That’s when you start making heat—serious heat, often over 1,000°F locally—which melts insulation, turns plastic into conductive carbon, and sets up a fire hazard.
I pulled a water heater in Frisco last month that had exactly this kind of cooked receptacle behind it—looked fine from the front, but the back side was blacker than a skillet.
Step-by-Step Fix
If your outlet sparked hard, shows scorch marks, or holds plugs so loosely they practically fall out, stop using it. Do this safe inspection and replacement routine.
-
Kill the circuit breaker immediately — Go to your main panel, find the breaker feeding that room or circuit, and snap it firmly to OFF. If the panel schedule is junk and you can’t trust the labels, turn on a lamp plugged into the suspect outlet (if it’s safe to do that) and flip breakers until it dies, or shut off power to the whole room.
- Safety check: Don’t count on a wall switch to kill power to an outlet box; most switches don’t break every hot path in a multi-gang or daisy-chained setup.
- If the breaker trips again the second you reset it, leave it alone—call an electrician.
-
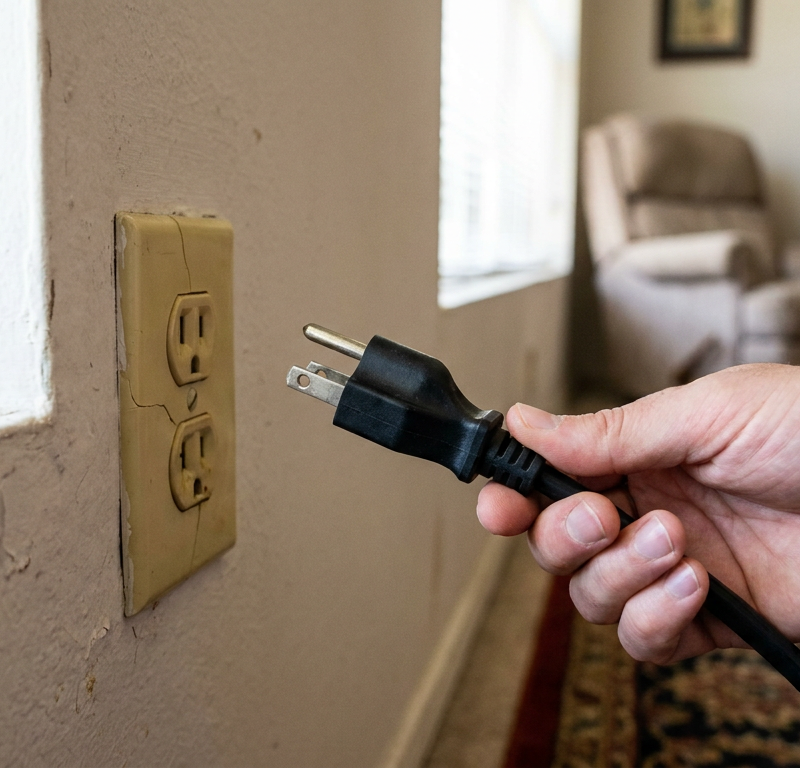
Verify zero voltage with a non-contact tester — Bring a good non-contact voltage tester up to both slots of the receptacle, and insert the probe tip carefully. It should stay quiet and dark.
- Tool required: Cat III / Cat IV rated non-contact voltage tester.
- Pro tip: Test the tester on a known live circuit first, check the dead circuit, then test the live circuit again so you know the tool didn’t go belly-up on you.
-
Remove the wall plate and inspect for heat damage — Back out the faceplate with a standard flathead or Phillips screwdriver. Shine a flashlight into the box before you touch anything.
- Look for melted faceplate plastic, bubbling paint, or black soot around the mounting yoke.
- If you smell fishy, sulfurous, or burnt synthetic odors, that’s sustained arcing, not some harmless little plug spark.
-
Extract the receptacle from the junction box — Remove the top and bottom 6-32 mounting screws holding the outlet ears to the junction box. Pull the receptacle out gently by the metal yoke and let the wires follow, sort of like an accordion.
- Don’t bend old, stiff copper hard against the sharp metal edges of the box.
- Safety check: Keep your fingers on the metal mounting tabs; don’t go poking at the bare brass or silver side terminal screws yet.
-
Double-check with a contact multimeter — Set your digital multimeter to AC Volts (at least 200V range). Put the black probe on the bare copper ground wire and touch the red probe to the brass screws (hot side), then the silver screws (neutral side).
- Both readings must show absolute zero (0.0V).
- If you get anything above 2-3 volts, you may be dealing with shared neutrals or phantom voltage from another live circuit in the box. Stop and find the secondary circuit before you keep going.
-
Inspect the wire conductors and terminals — Look closely at how the wires are attached to the device. See whether they’re wrapped around side screws or jammed into tiny rear holes ("back-stabbed").
- Back-stabbed push-in connections loosen up all the time and cause high-resistance connections and sparking under load.
- Check the insulation: if the black or white jacket is brittle, charred, or stripped back more than 5/8 inch, trim that damaged section off before you put in a replacement.
-
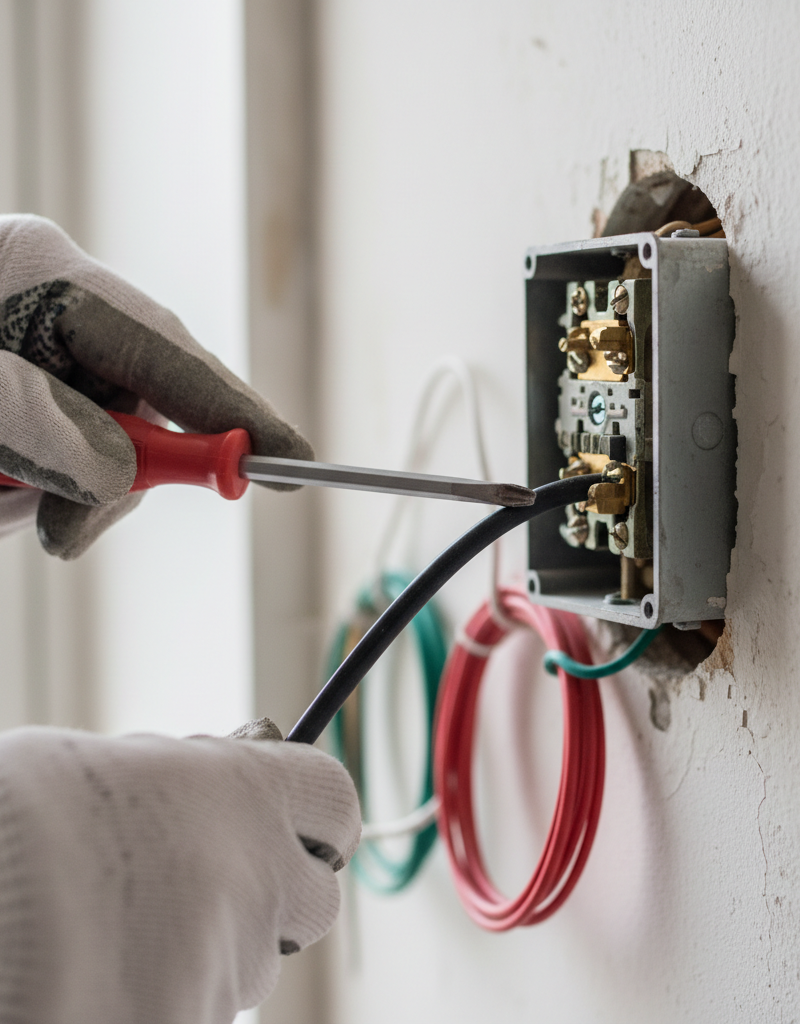
Disconnect the old receptacle — Loosen the brass terminal screws (hot), silver screws (neutral), and green screw (ground). Carefully unhook each wire loop from the terminal.
- If the wires were back-stabbed and won’t let go, stick a small terminal screwdriver into the release slot next to the hole, or cut the wire clean as close to the old device as you can.
- Snap a quick photo with your phone before you disconnect anything. Saves a headache later when you’re sorting line/load or daisy-chain wiring.
-
Prep fresh wire ends — Check the bare copper ends. If they’re nicked or discolored, cut back to clean copper with wire strippers. Strip exactly 5/8 to 3/4 inch of outer insulation using the right gauge notch (14 AWG for 15-amp circuits, 12 AWG for 20-amp circuits).
- Don’t nick the solid copper core; those little cuts turn into weak spots where the wire can snap when you shove it back into the wall.
- Use the looping hole on your strippers to bend a clean, tight "J-hook" into the end of each bare conductor.
-
Wire the new commercial-grade outlet — Hook each wire clockwise around its proper terminal screw: bare copper or green wire to the green grounding screw, white wire to the silver screws (neutral), and black wire to the brass screws (hot).
- Direction matters: clockwise lets the screw tighten the copper down instead of spitting it out.
- Torque the terminal screws to about 12 to 14 in-lbs. You want the wire clamped flat, with no stray strands sticking out from under the screw head.
-
Fold wires neatly and secure the device — Accordion-fold the conductors gently back into the rear of the junction box, keeping the bare ground tucked away from the hot brass side terminals. Drive the mounting screws in until the outlet yoke sits flush and square with the drywall.
- Don’t crank down the mounting screws into plastic boxes or you’ll strip the threads.
- Put the wall plate back on.
-
Restore power and run a receptacle test — Head back to the main breaker panel and flip the circuit breaker back to ON. Plug a three-prong receptacle tester into the new outlet.
- You’re looking for two amber lights (indicating "Correct Wiring").
- If you get an open ground, reversed polarity, or an open neutral, shut the breaker off right away and check your connections again.
Common Causes
Why do outlets spark in the first place? In my experience, five mechanical and electrical failures cover just about all of it in a standard house.
- Normal System Draw (Capacitive Arc): When you plug in an appliance with internal capacitors or a power switch already set to "ON"—like a vacuum, space heater, or laptop power brick—electrons can jump the tiny air gap just before the prongs make full contact. These sparks are tiny, blue, silent, and over in a flash. No damage.
- Worn Internal Contact Fingers: Outlets have internal brass clips that squeeze the plug prongs. Over 10 to 20 years of plugging and unplugging, that spring steel gets tired. Once the tension drops, the plug fits loose. Loose metal contact means micro-arcing behind the plastic while the appliance runs, and that makes heat fast.
- Loose Terminal Screws or Failed Back-Stabs: House wiring heats up under load and cools back down later. That constant expansion and contraction loosens terminal screws over time. Push-in back-stab connections are notorious for losing their grip, which creates high-resistance hot spots that arc inside the wall cavity whenever the circuit sees a heavy draw.
- Moisture and Water Intrusion: Kitchens, bathrooms, and exterior walls get hit with moisture. Water, pipe condensation, or roof leaks getting into a junction box can bridge the hot and neutral terminals. Water arcing is ugly—often loud sizzling, steady sparking, and tripped breakers.
- Short Circuits Behind the Box: If the bare copper ground wire touches a hot brass terminal screw inside a cramped junction box—usually because somebody shoved the wiring back too hard during install—you get a hard direct short. That means a sudden flash and a bang.
Common Mistakes
Don’t make these four homeowner mistakes with a sparking outlet:
- Ignoring loose plug prongs: If a plug falls out of an outlet or droops when it’s plugged in, folks usually shrug it off or bend the prongs outward. Bad move. A loose plug means weak internal wipers, and that leads to continuous micro-arcing. Replace the receptacle.
- Buying the cheapest 50-cent residential outlets: Those bargain-bin contractor-grade outlets in multi-packs use thin stamped brass contacts that lose grip in just a few years. Spend the extra $3 on a heavy-duty "commercial-grade" or "specification-grade" receptacle. They’ve got beefier brass contacts and screw-clamp back-wiring plates that hold wire a whole lot better.
- Re-energizing a breaker after a loud pop without inspecting: If the breaker tripped with a pop and flash at the outlet, resetting it without opening the box to look for the short is just asking for trouble. You’re pushing current through a compromised circuit and risking an in-wall fire.
- Wrapping standard electrical tape around damaged wire insulation: Electrical tape dries out, turns gummy, and peels loose in warm Texas wall cavities. If the insulation is melted or singed from an arc, don’t just cover it with tape. Cut back to clean undamaged wire and strip fresh copper, or pigtail a new lead with a wire nut or WAGO connector.
Cost & Time Breakdown
| Task | DIY Cost | Pro Cost | Time |
|---|---|---|---|
| Single Receptacle Replacement (Standard) | $3 – $8 | $150 – $225 | 20 – 30 min |
| Commercial-Grade / Tamper-Resistant Upgrade | $5 – $12 | $150 – $250 | 25 – 35 min |
| GFCI Receptacle Replacement | $15 – $25 | $175 – $275 | 30 – 45 min |
| Trimming Charred Wires & Pigtailing | $5 – $10 | $175 – $300 | 45 – 60 min |
| Replacing Damaged Junction Box | $10 – $20 | $225 – $400 | 1 – 2 hours |
Tips & Prevention
- Turn devices off before plugging them in: You can get rid of nearly all normal, harmless blue sparks by making sure appliances (especially vacuums, hair dryers, and blenders) are switched to "OFF" before you push the prongs into the receptacle.
- Check plug retention annually: Walk the house once a year with a plain two-prong lamp plug. Plug it into every receptacle. If it slides out with no resistance or sags under its own cord weight, mark that outlet for replacement.
- Upgrade to AFCI breakers: Standard breakers protect against major overloads and direct short circuits. Arc-Fault Circuit Interrupters (AFCIs) pick up the electrical frequency signatures of dangerous in-wall micro-arcing and shut power off milliseconds before a fire gets started.
- Never plug high-draw space heaters into power strips or worn outlets: Portable space heaters draw 1,500 watts continuously (12.5 amps). If the outlet has even a little looseness, that steady load will cook the box fast, carbonize the plastic, and cause violent arcing.
When to Call a Professional
Replacing a single worn-out 15-amp receptacle is something a handy homeowner can usually handle, but some signs tell you the sparking is part of a bigger, uglier problem.
Call a licensed electrician immediately if you pull the outlet and find silver-colored aluminum wiring from the late 1960s to mid-1970s. Aluminum expands a lot faster than copper, needs specialized dual-rated CO/ALR devices or Copalum crimping, and turns into a serious fire risk if you treat it like regular copper.
Back away too if the copper wires inside the junction box are melted back so far there’s no slack left to splice a new lead—you need at least 3 inches of free conductor extending outside the box face. If multiple outlets on the same circuit are warm to the touch, if you hear buzzing in the walls when appliances kick on somewhere else in the room, or if the main breaker keeps tripping the second you turn it on, stop digging. Those signs point to an open neutral, high-resistance faults inside hidden junction boxes, or main panel bus bar damage that needs proper diagnostic gear.
Frequently Asked Questions
Is it normal for an outlet to spark when I plug something in?
A tiny blue spark that appears and disappears instantly is normal when you plug in an appliance that starts drawing power right away, like a vacuum with the switch left on or a laptop power brick with big internal capacitors. But big yellow or orange sparks, sparks with a loud pop, or sparks that shoot out onto the floor are dangerous and point to bad contacts or short circuits.
What is the difference between a blue spark and a yellow spark?
A blue spark is a low-energy arc that lasts only a moment as the air gap between conductors closes during normal connection. A yellow, orange, or white spark carries a lot more heat and energy, and that usually means high resistance, loose wiring connections, short circuits, or carbon tracks that are actively burning nearby materials.
Can a sparking outlet cause a fire if nothing is plugged in?
Yes. If an outlet has loose terminal screws or failing internal wiring feeding downstream outlets on a daisy-chained circuit, electricity is still flowing across those terminals whenever appliances run farther down the line. That current can keep an internal arc going inside the electrical box even if the front slots are empty.
Why does my outlet spark only when I unplug a cord?
When current is flowing through a running appliance and you yank the cord out, the sudden break in current causes a momentary inductive kick or arc across the separating prongs. You can cut down on that wear by turning the appliance off before pulling the plug from the wall.
Why does my outlet make a crackling or buzzing sound?
Crackling, sizzling, or buzzing means continuous, active arcing behind the wall plate. That usually happens when internal contact fingers have lost their spring tension or a terminal screw has backed out. Shut off the breaker immediately; continuous arcing makes enough heat to ignite framing or insulation.
How long does a standard wall outlet typically last?
Most standard residential receptacles last between 15 and 25 years, depending on use. Outlets in high-traffic spots—like kitchen counters, bathrooms, and hallways where people vacuum a lot—wear out faster because all that plugging and unplugging beats up the internal brass wiper clips.
Can I just wrap the sides of my outlet with electrical tape to stop sparking?
No. Electrical tape around the terminal screws is a common trick electricians use to keep terminal screws from touching metal boxes during installation, but it won’t fix loose connections or worn internal contact wipers. Wrapping tape over an active arc just gives the fire more fuel once the tape melts.
What causes an outlet to spark and trip the breaker immediately?
That’s a dead short circuit. A hot wire is making direct contact with either the neutral wire, the bare ground wire, or a grounded metal box. The circuit breaker sees that huge, instant amperage spike and opens the circuit in a split second so the wiring in your walls doesn’t melt.
Related Articles
Keep troubleshooting with these hand-picked guides from FixlyGuide:
- Why One Room Has No Power (But the Breaker Isn't Tripped) — Discover why a whole room might suddenly lose power even when your circuit breaker stays stubbornly on, and learn how to safely troubleshoo…
- The Hidden Reason Your Extension Cord Keeps Tripping the Breaker (and What to Do) — Discover why your extension cord might be tripping a circuit breaker and learn how to diagnose and fix common electrical issues safely.
- Why Your Extension Cord Keeps Tripping the Breaker (And the Simple Test to Find the Hidden Cause) — Discover why your extension cord keeps tripping the circuit breaker and learn how to safely diagnose and fix the real problem with a simple…
- The Secret Reason Half Your Wall Outlet Dies (And It's Not What You Think) — Discover why only half of your electrical outlet might be working and how to diagnose and fix the common culprit, saving you from a costly…
- The Hidden Reason Your GFCI Won't Reset (And It's Not Always a Short) — Discover the often-overlooked culprits behind a GFCI outlet that refuses to reset and learn how to safely diagnose and fix the issue yourse…
- Kitchen Faucet Leaking Under the Sink When Sprayer Runs? 5 Causes and the Step-by-Step Fix — Fix that hidden water leak under your kitchen sink. Step-by-step diagnostic and repair instructions for leaking pull-out hoses, bad O-rings…
Should you do this yourself?
Answer five quick questions before you start. Safety outranks savings every time.
Your experience with work like this
How high do you have to work?
Does the job involve any of these?
Will it need a permit?
Specialty tools
Free and instant. Educational guidance only — not a quote, inspection, or professional diagnosis.
What should this project cost?
Enter your project details for a realistic cost range before you call anyone.
Outlet and switch work usually $150–$400; panel upgrades commonly $1,800–$4,200.
- Regional adjustment
- National average
- Labor share (typical)
- ~$709
- Quotes to collect
- 3 written estimates
Educational estimate based on national averages — not a binding quote. Always confirm with written local estimates.
Fixly Project Decision Box
- DIY difficulty
- Professional Recommended
- Estimated time
- Diagnosis 1–2 hours
- Cost level
- Moderate
Main tools / materials
- Non-contact voltage tester
- Outlet tester
- Flashlight
When to stop and call a pro
- Burning smell, scorch marks, or a warm outlet or switch plate
- A breaker that trips again right after being reset
- Any work inside the service panel
- Aluminum wiring or cloth-insulated wiring
Need professional help?
Talk to a Licensed ElectricianGet the print-ready PDF of this guide
A clean, ad-free, printable version you can keep on your phone or pin to the workshop wall. Free with a FixlyGuide account.
- Print-optimized layout
- Tools, materials & every step included
- Saved to your account
Frequently asked questions
Is it normal for an outlet to spark when I plug something in?+
A tiny, instantaneous blue spark is completely normal when plugging in an appliance that draws power immediately, such as a vacuum with the switch left on or a laptop power brick with large internal capacitors. However, large yellow or orange sparks, sparks accompanied by a loud pop, or sparks that fly out onto the floor are dangerous and indicate bad contacts or short circuits.
What is the difference between a blue spark and a yellow spark?+
A blue spark is a low-energy arc that occurs momentarily as the air gap between conductors collapses during normal connection. A yellow, orange, or white spark carries substantially more heat and energy, usually indicating high resistance, loose wiring connections, short circuits, or carbon tracks that are actively burning the surrounding materials.
Can a sparking outlet cause a fire if nothing is plugged in?+
Yes. If an outlet has loose terminal screws or failing internal wiring that connects downstream outlets on a daisy-chained circuit, electricity is still flowing across those terminals whenever appliances run further down the line. That current can sustain an internal arc inside the electrical box even if the outlet's front slots are completely empty.
Why does my outlet spark only when I unplug a cord?+
When current is flowing through an active appliance and you yank the cord out, the sudden disruption of current causes a momentary inductive kick or arc across the separating prongs. You can prevent this wear and tear by turning the appliance power switch off before pulling the plug from the wall.
Why does my outlet make a crackling or buzzing sound?+
Crackling, sizzling, or buzzing indicates continuous, active arcing behind the wall plate. This happens when internal contact fingers have lost their spring tension or a terminal screw has backed out. Shut off the circuit breaker immediately; continuous arcing generates extreme heat that can ignite the framing studs or insulation.
How long does a standard wall outlet typically last?+
Most standard residential receptacles last between 15 and 25 years, depending on frequency of use. Outlets in high-traffic zones—like kitchen counters, bathrooms, and hallways used for vacuuming—wear out much faster because repeated physical insertion weakens the internal brass wiper clips.
Can I just wrap the sides of my outlet with electrical tape to stop sparking?+
No. Electrical tape around the terminal screws is a common trick used by electricians to prevent terminal screws from touching metal boxes during installation, but it does not fix loose connections or worn internal contact wipers. Wrapping tape over an active arc will only provide fuel for the fire once the tape melts.
What causes an outlet to spark and trip the breaker immediately?+
That is a dead short circuit. A hot wire is making direct physical contact with either the neutral wire, the bare ground wire, or a grounded metal box. The circuit breaker detects this massive, instantaneous spike in amperage and opens the circuit within fractions of a second to prevent the wiring inside your walls from melting.
Discussion
Loading comments…