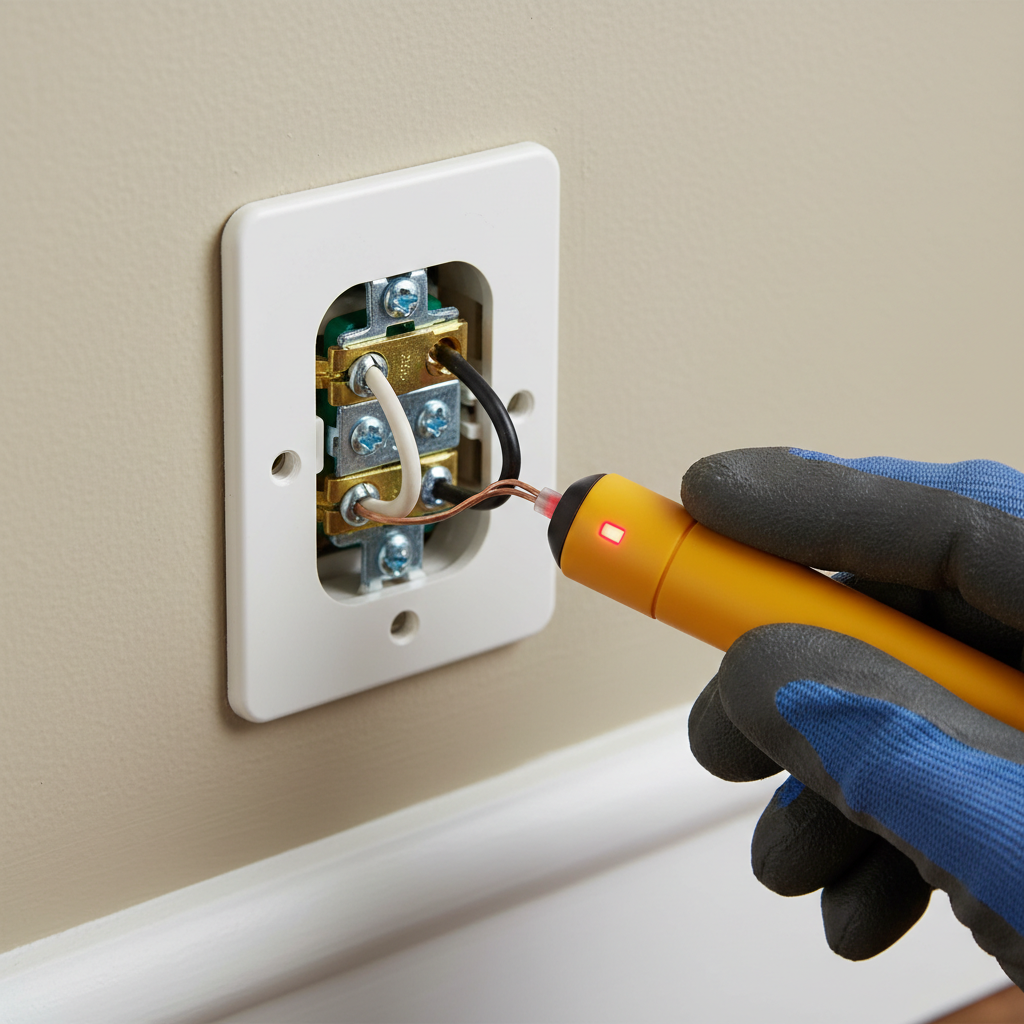
- Tool Tip: A good non-contact voltage tester is worth its weight in gold. Don't skimp here.
- Safety Note: If you're unsure which breaker it is, or if flipping one doesn't kill the power to the buzzing outlet, flip the main breaker to kill all power to the house. Better safe than sorry.
- Unscrew the Outlet Cover Plate — Using a flathead screwdriver, carefully remove the faceplate screws and pull the cover off. Set it aside.
- Pull the Outlet Out — There are usually two screws, top and bottom, holding the outlet to the electrical box. Unscrew these. Gently pull the outlet straight out of the box. Be careful; the wires are still attached.
- Watch Out For: If it feels stuck, don't yank it. The wires might be tightly bundled. Wiggle it gently.
Electrical · Panel or service upgrade
| Project category | Electrical |
|---|---|
| Problem type | Panel or service upgrade |
| Trade required | Electrical |
| Urgency | Planned project |
| Safety risk | High safety risk |
| DIY suitability | Licensed pro only |
| Cost category | High cost |
| Typical timeline | Permit plus utility scheduling, commonly 2–6 weeks |
| Contractor type | Licensed electrician |
Repair option
Add a subpanel when the main service is adequate.
Replacement option
Full service upgrade with utility coordination and permits.
Common causes
- Obsolete or recalled panel brands
- Service capacity too small for added loads
- No room for required AFCI/GFCI breakers
Relevant tools:project cost estimatorcompare quotes
Published September 28, 2026Last updated September 28, 2026
Tools & materials you'll need
Affiliate linksAs an Amazon Associate FixlyGuide earns from qualifying purchases — at no extra cost to you. Prices and availability are accurate as of publication and subject to change.
Quick Answer
That persistent, faint buzzing sound coming from an electrical outlet isn't just background noise; it's your electrical system trying to tell you something's seriously wrong. Most times, a buzzing outlet means you've got a loose connection somewhere in the wiring. This could be right at the outlet, further back in the wall, or even in the electrical box. Loose connections cause resistance, resistance creates heat, and that heat is what makes the components vibrate and hum – and it's also what can start an electrical fire. You've gotta get this checked out, and quick.
The Problem
I've seen my share of strange noises in houses over the decades, but a buzzing outlet? That's one I never ignore, and neither should you. It's not just a nuisance; it's a red flag waving in your face, indicating a potential fire hazard. Think about it: electricity flowing through wires should be a silent, smooth operation. When you hear a buzz, it means something's disrupting that flow. Usually, it's a loose screw terminal on the outlet, a wire nut that's come unwound a bit, or even a damaged wire itself. These loose points become hot spots, literally. They can heat up to hundreds of degrees Fahrenheit, melting the plastic insulation off wires, scorching the sheetrock behind your wall, and eventually, if left unattended, igniting surrounding materials. Don't shrug this off – it's one of those "call it a day and fix it now" kind of problems.
How It Works
Alright, let's talk a bit about what's going on inside your walls when you hear that buzz. Your home's electrical system is a closed loop, right? Power comes from the utility pole, through your main panel, and then out to all your outlets, lights, and appliances. For this to work safely, every connection point – every wire nut, every screw terminal, every splice – needs to be rock-solid tight. When a connection isn't tight, what happens is a bit of an electrical dance. The current tries to jump that tiny gap, creating what we call "arcing." This arcing isn't a constant, steady thing; it's happening in rapid, microscopic bursts. Each burst generates heat, and that heat causes the metal components to expand and contract, vibrating at the same frequency as the alternating current (which is 60 Hz here in the States). That vibration? That's the buzz you're hearing.
Imagine a garden hose with a tiny leak. The water pressure drops, right? Same idea, but with electrons. That resistance at the loose connection makes the electrons work harder, generating heat as a byproduct. This heat is the real danger. It doesn't just stay localized; it transfers to the wire insulation, the plastic of the outlet, and the surrounding framing. PVC insulation, common in modern wiring, starts to soften around 160°F and can melt entirely around 400°F. Once that insulation is gone, you've got bare copper wires. If those bare wires touch anything conductive – like another wire, a metal box, or even a stray nail – you get a short circuit, and that's when breakers trip. Worse, if they touch flammable materials before the breaker trips, you've got a fire. I once saw a charred stud behind an outlet in an old Victorian in Newton that had been buzzing for months. The homeowner thought it was just "old house noises." Nope, it was a near-miss, the kind that makes you lose sleep.
Step-by-Step Fix
Okay, so you've got a buzzing outlet. Here's how we're going to track down the culprit and fix it right.
- Safety First: Kill the Power — This ain't optional, folks. Find your main electrical panel. Locate the breaker that controls the buzzing outlet. If it's not labeled, you'll have to flip breakers until the power to that outlet is off. Always double-check with a non-contact voltage tester at the outlet before you touch anything.
- Tool Tip: A good non-contact voltage tester is worth its weight in gold. Don't skimp here.
- Safety Note: If you're unsure which breaker it is, or if flipping one doesn't kill the power to the buzzing outlet, flip the main breaker to kill all power to the house. Better safe than sorry.
- Unscrew the Outlet Cover Plate — Using a flathead screwdriver, carefully remove the faceplate screws and pull the cover off. Set it aside.
- Pull the Outlet Out — There are usually two screws, top and bottom, holding the outlet to the electrical box. Unscrew these. Gently pull the outlet straight out of the box. Be careful; the wires are still attached.
- Watch Out For: If it feels stuck, don't yank it. The wires might be tightly bundled. Wiggle it gently.
- Inspect All Connections — Now's the time to play detective. Look closely at every single wire connected to the outlet. You're checking for:
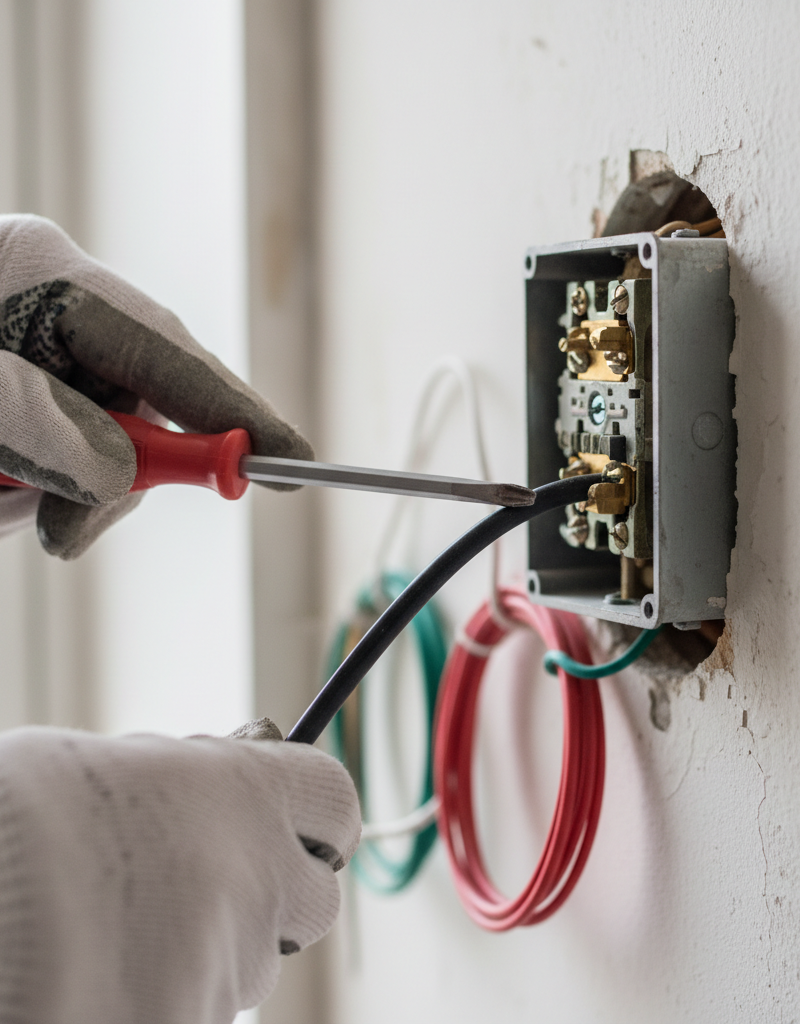
- Loose Screws: The black "hot" wires connect to the brass screws, white "neutral" wires to the silver screws, and the bare copper or green "ground" wire to the green screw. Use a Phillips or flathead screwdriver (depending on the screw type) and try to tighten every screw terminal on the side of the outlet. If one turns a quarter-turn or more, that was likely your problem. Make 'em snug – don't overtighten, but no wobbles either.
- Back-stabbed Wires: These are wires pushed into little holes on the back of the outlet instead of wrapped around screw terminals. These are notorious for coming loose and buzzing. If you see any, gently pull on them. If they come out easily, that's a big problem. We'll address this in the next step.
- Damaged Wires: Look for any frayed insulation, scorch marks, or wires that look kinked or cut. If you find any, you'll need to trim the damaged section and restrip the wire.
- Address Loose or Back-stabbed Wires — This is often the fix.
- For Loose Screw Connections: If a screw terminal was loose, just tighten it down firmly. Ensure the wire is properly wrapped clockwise around the screw so it tightens as you turn.
- For Back-stabbed Wires: Never re-insert a back-stabbed wire. They're unreliable. For each back-stabbed wire, cut off the existing stripped end. Strip about 3/4 inch of fresh insulation. Form a shepherd's hook (a small loop) in the end of the wire. Loosen the corresponding screw terminal on the side of the outlet and hook the wire around it clockwise. Tighten the screw firmly. You're much better off with a proper screw terminal connection.
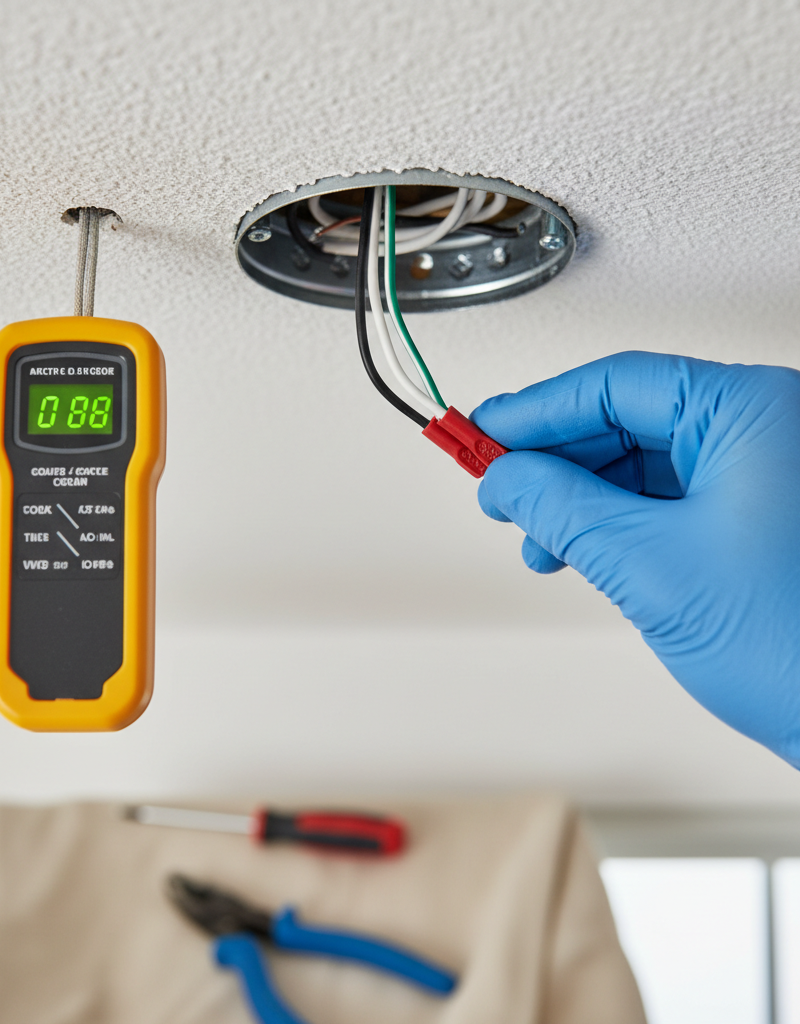
- Inspect Wire Nuts (If Applicable) — If there are multiple wires spliced together with wire nuts inside the box (especially for outlets in the middle of a circuit run), gently tug on each wire coming out of the wire nut. If any are loose, remove the wire nut, twist the wires together tightly with lineman's pliers, and re-cap them with a new, properly sized wire nut. Make sure no bare copper is showing below the wire nut.
- Check the Electrical Box — Make sure the box itself isn't loose in the wall, and that there are no sharp edges that could cut wires. If it's a metal box, ensure the ground wire is also connected to it, usually via a pigtail.
- Wrap the Outlet — Once all connections are secure, wrap a layer or two of electrical tape around the sides of the outlet. This adds an extra layer of insulation between the outlet terminals and the metal box or other wires, preventing accidental shorts when you push it back in. This is a pro trick that takes 30 seconds and can save you headaches.
- Carefully Push the Outlet Back In — Gently fold the wires into the electrical box. You want them to be neat, not crammed. Don't force it. The wires should sit comfortably without excessive pressure.
- Reattach the Outlet and Cover Plate — Screw the outlet back into the box, making sure it's straight. Don't overtighten the screws. Then, reattach the cover plate.
- Restore Power and Test — Head back to your panel and flip the breaker back on. Listen carefully. Is the buzzing gone? Plug in a lamp or small appliance to test the outlet's function. If the buzzing persists, or if you smell smoke or see sparks, kill the power immediately and call a licensed electrician.
Common Causes
- Loose Terminal Screws: This is the big one. Over time, due to vibration, temperature changes, or simply not being tightened enough during installation, the screws holding wires to the outlet terminals can loosen. My old man always drilled it into me: "Tight connections are happy connections."
- Back-stabbed Connections: Many cheaper outlets have small holes in the back where wires can be pushed in. These "back-stab" connections are quick for installers but are notorious for loosening up, arcing, and creating fire hazards. I've replaced hundreds of outlets where this was the sole cause of the buzz.
- Overloaded Circuit: If you've got too many high-draw appliances plugged into a single circuit, the increased current can cause components to heat up and buzz, even if the connections are tight. This is a sign you need to redistribute your load or consider a dedicated circuit.
- Faulty Outlet Itself: Sometimes, the internal components of the outlet — the spring clips that hold the plug, or the contacts inside — can wear out, loosen, or become defective, leading to arcing and buzzing. If all your connections are tight and the buzzing continues, the outlet itself might be toast.
- Wire Damage: Less common, but a wire with damaged insulation or a partially cut conductor within the wall can cause resistance and buzzing. This is tougher to diagnose without opening up the wall.
Common Mistakes
- Ignoring the Buzz: The absolute worst thing you can do. A buzzing outlet isn't just annoying; it's a literal warning sign of an electrical hazard. Don't put it on the back burner.
- Not Shutting Off Power: Trying to fix an outlet with live power is just asking for a shock. Always, always verify power is off with a voltage tester before touching any wires.
- Re-using Back-stab Connections: If you pull a wire out of a back-stab hole, don't just shove it back in. Always transition to the screw terminals. They're far more reliable and safer.
- Overtightening Screws: While you want connections snug, cranking down on the terminal screws can strip them, damage the wire, or crack the outlet body. Snug is good; Herculean is bad.
- Leaving Bare Copper Exposed: Any bare copper wire sticking out from under a screw terminal or past a wire nut is a potential short circuit waiting to happen. Trim or re-wrap wires so only insulated wire enters the box, and no bare copper is visible outside the connection.
- Cramming Wires: Shoving a wad of wires back into the box can loosen connections or pinch insulation. Take your time, fold them neatly, and ensure there's enough space.
Cost & Time Breakdown
Here's a rough idea of what you're looking at for this kind of fix.
| Task | DIY Cost | Pro Cost | Time |
|---|---|---|---|
| Basic Outlet Replacement | $2–$10 | $100–$250 | 15–30 minutes |
| Advanced Outlet (GFCI/TR) | $15–$30 | $150–$350 | 20–45 minutes |
| Diagnosing Loose Wires | $0 (if you own tools) | $100–$200 | 15–60 minutes |
| Circuit Overload Fix | $0–$100 (for new appliances/strips) | $200–$500 (for new circuit) | Varies |
| Rewiring Damaged Segment | $5–$50 | $250–$700+ | 30 min – 2 hours+ |
Tips & Prevention
- Regular Inspections: Periodically, pull off an outlet cover plate and give the outlet a gentle wiggle. If it feels loose in the wall, tighten the mounting screws. Don't mess with the wiring unless the power's off.
- Tighten Connections: If you're ever replacing an old outlet, take the extra minute to make sure all screw terminals are tight, even the ones not being used. Factory-tight doesn't always mean tight enough.
- Upgrade Old Outlets: If your home has very old, two-prong outlets, or outlets where the plugs feel really loose when inserted, it's time for an upgrade to modern, three-prong, tamper-resistant receptacles. They're safer overall.
- Mind Your Load: Don't daisy-chain power strips or plug multiple high-wattage appliances into a single outlet or circuit. Spread the load out or get dedicated circuits installed for things like space heaters, microwaves, or large treadmills.
- Listen to Your House: Your home often gives you subtle cues. Don't dismiss strange smells (like burning plastic), flickering lights, or persistent buzzing from outlets or switches. These are usually early warnings.
- Invest in Quality: When replacing an outlet, spend a few extra bucks on a commercial-grade or spec-grade receptacle. They have sturdier internal components and better screw terminals that hold wires more securely than builder-grade ones.
When to Call a Professional
Look, I'm all for DIY, but there are definite lines in the sand, especially with electrical work. If you kill the power, pull the outlet, tighten everything up, and that buzzing still persists, you've got a deeper problem. It could be a connection further up the line in a junction box you can't access easily, or even damaged wiring deeper inside the wall. Any signs of scorching, melted wires, or a burning smell that doesn't go away after the fix means you need a pro immediately. If you're uncomfortable at any point, or if you're dealing with aluminum wiring (which looks like silver-gray wire instead of copper) – stop what you're doing and call a licensed electrician. Aluminum wiring requires special connectors and handling, and it's not a DIY job. This ain't the place to play hero; your family's safety isn't worth the risk.
Related Articles
Keep troubleshooting with these hand-picked guides from FixlyGuide:
- Why Your Wall Switch Feels Hot: The Hidden Danger Most Homeowners Miss — A hot light switch isn't just uncomfortable; it's a critical warning sign of potential electrical hazards that demand immediate attention.
- Why is Your Light Switch Hot? (The Hidden Danger Most Homeowners Miss) — A hot light switch isn't just uncomfortable; it's a critical warning sign of electrical issues that should never be ignored due to fire ris…
- That One Warm Breaker Is Trying to Tell You Something — A single warm circuit breaker is not normal; it's a critical warning sign of an electrical issue, often an overload or a dangerous loose co…
- The Surprising Reason Your Ceiling Fan Wobbles (It's Not Always the Blades) — A wobbly ceiling fan isn't just annoying—it can be a safety hazard. I'll show you how to diagnose and fix the common culprits.
- The Flickering Light Switch Fix Plumbers Don't Want You to Know (Because They Can't Help) — Don't live with flickering lights or a switch that feels loose. I'll walk you through diagnosing and replacing a faulty light switch safely…
- The Buzzing Microwave: Is It a Symptom or a Fire Hazard? — A buzzing microwave can be more than just annoying; it might signal a serious issue that needs immediate attention, from a faulty magnetron…
Should you do this yourself?
Answer five quick questions before you start. Safety outranks savings every time.
Your experience with work like this
How high do you have to work?
Does the job involve any of these?
Will it need a permit?
Specialty tools
Free and instant. Educational guidance only — not a quote, inspection, or professional diagnosis.
What should this project cost?
Enter your project details for a realistic cost range before you call anyone.
Outlet and switch work usually $150–$400; panel upgrades commonly $1,800–$4,200.
- Regional adjustment
- National average
- Labor share (typical)
- ~$709
- Quotes to collect
- 3 written estimates
Educational estimate based on national averages — not a binding quote. Always confirm with written local estimates.
Fixly Project Decision Box
- DIY difficulty
- Professional Recommended
- Estimated time
- Diagnosis 1–2 hours
- Cost level
- Moderate
Main tools / materials
- Non-contact voltage tester
- Outlet tester
- Flashlight
When to stop and call a pro
- Burning smell, scorch marks, or a warm outlet or switch plate
- A breaker that trips again right after being reset
- Any work inside the service panel
- Aluminum wiring or cloth-insulated wiring
Need professional help?
Talk to a Licensed ElectricianBefore you start
Check the difficulty, permits, and safety risk — then decide whether to call a pro.
- Estimate this projectGet a cost range for your scope and ZIP before you call anyone.Open
- Get local estimatesSend one request and compare written estimates from vetted pros.Open
Free, no signup required. Estimates are educational guidance, not a quote or an inspection.
Get the print-ready PDF of this guide
A clean, ad-free, printable version you can keep on your phone or pin to the workshop wall. Free with a FixlyGuide account.
- Print-optimized layout
- Tools, materials & every step included
- Saved to your account
Frequently asked questions
Why is my electrical outlet making a buzzing noise?+
A buzzing noise from an electrical outlet usually indicates a loose electrical connection. This could be at the outlet itself, in the wiring leading to it, or within the electrical box. The loose connection causes resistance, generating heat and a vibrational hum as electricity tries to bridge the gap.
Is a buzzing outlet dangerous?+
Yes, absolutely. A buzzing outlet is a serious fire hazard. The heat generated by loose connections can melt wire insulation, damage components, and eventually ignite surrounding flammable materials like wood framing or insulation. It requires immediate attention.
Can I fix a buzzing outlet myself?+
For basic loose connections on the outlet terminals, yes, a capable DIYer can often fix it by tightening screws after shutting off power. However, if the buzzing persists, you find damaged wiring, or you're uncomfortable, you should always call a licensed electrician.
What tools do I need to fix a buzzing outlet?+
You'll need a flathead and Phillips screwdriver, a non-contact voltage tester for safety, electrical tape, and potentially new wire nuts or a replacement outlet. Safety glasses and work gloves are also highly recommended.
What if the buzzing continues after I tighten all connections?+
If the buzzing persists after you've tightened all visible connections, it suggests a deeper issue. This could be a loose connection in an inaccessible junction box, wire damage further down the line, or an internal fault with the outlet itself. At this point, it's best to consult a licensed electrician.
Are back-stabbed outlets prone to buzzing?+
Yes, back-stabbed outlets are notorious for developing loose connections and causing buzzing sounds. The spring clips that hold the wires can weaken over time, leading to arcing and overheating. It's always best to use the screw terminals for a more secure connection.
Can an overloaded circuit cause an outlet to buzz?+
An overloaded circuit can indeed cause an outlet to buzz. When too much current flows through a circuit, the components can heat up excessively, leading to expansion, contraction, and audible vibrations. This also presents a significant fire risk.
How can I prevent buzzing outlets in the future?+
Regularly check outlets for looseness, ensure all electrical connections are properly tightened during installation or replacement, avoid overloading circuits, and upgrade older, lower-quality outlets to newer, sturdier models that use screw terminals rather than back-stabs.
Should I replace the outlet if it's buzzing?+
If, after checking and tightening all connections, the buzzing continues, replacing the outlet is a good next step. The internal components of the outlet itself might be failing. Make sure the power is off before attempting a replacement.
Discussion
Loading comments…