- Examine the Upstream Splice Cluster — Trace the bare grounding wire from the green screw back into the bundle inside the box. Unscrew the wire nut or inspect the copper crimp sleeve connecting all bare grounds together.
- Look for loose or cut conductors: a ground wire that snapped off flush inside a wire nut breaks continuity for that box and everything downstream.
- If you have multiple Romex cables entering the box, every bare ground must be twisted together with a pigtail leading to the receptacle, plus a second pigtail to the metal box if it’s steel.
Electrical · Panel or service upgrade
| Project category | Electrical |
|---|---|
| Problem type | Panel or service upgrade |
| Trade required | Electrical |
| Urgency | Planned project |
| Safety risk | High safety risk |
| DIY suitability | Licensed pro only |
| Cost category | High cost |
| Typical timeline | Permit plus utility scheduling, commonly 2–6 weeks |
| Contractor type | Licensed electrician |
Repair option
Add a subpanel when the main service is adequate.
Replacement option
Full service upgrade with utility coordination and permits.
Common causes
- Obsolete or recalled panel brands
- Service capacity too small for added loads
- No room for required AFCI/GFCI breakers
Relevant tools:project cost estimatorcompare quotes
Published October 31, 2026Last updated October 31, 2026
Tools & materials you'll need
Affiliate links- Amazon14 AWG or 12 AWG solid copper wire2 ft · For ground pigtails (match circuit wire gauge)
- AmazonUL-listed twist-on wire nuts1 box · Green ground nuts or tan/red wire connectors
- Amazon10-32 green grounding screws1 pack · For threaded metal junction boxes
- AmazonGFCI receptacle (15A or 20A)1 · Required if your home lacks an equipment ground wire
As an Amazon Associate FixlyGuide earns from qualifying purchases — at no extra cost to you. Prices and availability are accurate as of publication and subject to change.
Quick Answer
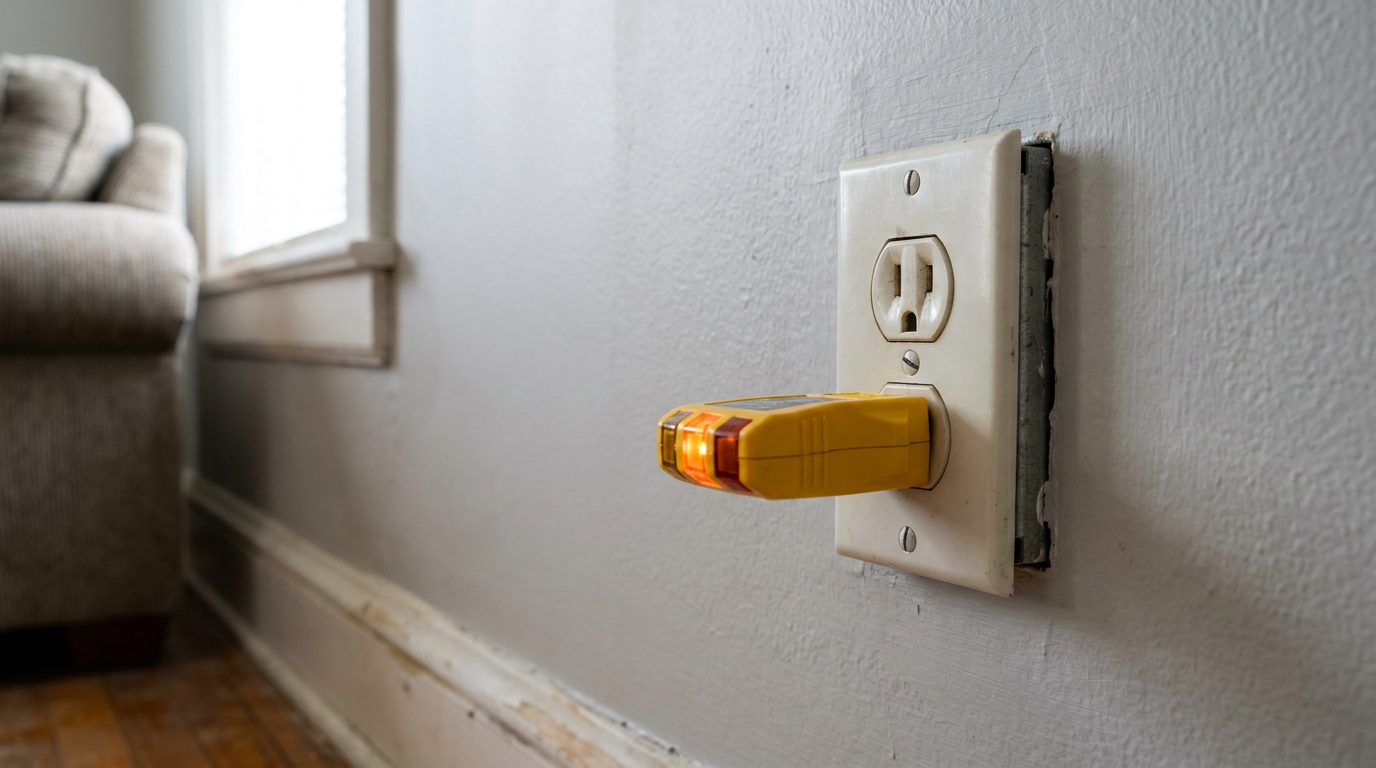
An open ground means your outlet’s got a hot and neutral that still work, but there’s no continuous return path to earth. Cheap plug-in testers catch it as an unlit center bulb, and yeah, the device still runs. That’s the sneaky part. But your surge protectors are basically along for the ride, and a metal appliance chassis can bite you if a fault hits.
You can fix an open ground by tightening loose terminal screws or pigtails in the box, repairing a broken ground path in upstream outlets, or putting in a GFCI receptacle labeled "No Equipment Ground" if the old cable doesn’t have a bare copper grounding wire.
The Problem
You plug a cheap three-prong tester into a bedroom or living room receptacle, and the middle light stays dark. The tester screams "OPEN GROUND."
Everything plugged into that wall still runs fine. The television turns on, your laptop charges, and the floor lamp shines bright. That’s what makes this one so deceptive. Folks ignore it for years because power’s there and nothing pops.
Here’s the deal: your electrical system is running without a safety net. The grounding wire carries zero current during normal operation. Its whole job is to sit there waiting for a bad failure—like a live 120V wire loosening up and hitting the metal frame of your toaster, microwave, or computer chassis. Without a low-resistance path back to the breaker panel, current can’t flow hard enough to trip the breaker. So that metal shell stays live, waiting for your hand to finish the circuit to earth.
And it’s not just shock risk. Modern surge protector power strips can’t dump transient voltage spikes without a solid ground path. In North Texas, where spring storms can hammer the power grid hard, an open ground leaves your expensive electronics wide open. No dice.
How It Works
Every branch circuit feeding standard 120V convenience receptacles relies on three conductors: hot (black, carrying 120V RMS alternating current), neutral (white, completing the circuit back to the panel source), and equipment ground (bare copper or green insulated wire).
Normal Path:
[Breaker Panel (120V Hot)] ----> [Appliance Load] ----> [Neutral Return (0V)]

Fault Condition (Short Circuit to Metal Chassis):
[Loose Hot Wire] ----> [Metal Shell] ----> [Ground Wire (Low Resistance)] ----> [Panel Ground Bar]
                                                                                     |
                                                                              (Instant High Amps)
                                                                                     |
                                                                           [Breaker Trips Off in <0.05s]

Open Ground Fault (DANGEROUS):
[Loose Hot Wire] ----> [Metal Shell] ----> [NO Ground Path] ----> [YOU Touch Shell] ----> [Earth (SHOCK)]
The National Electrical Code (NEC) wants equipment grounding because electricity doesn’t just take the "path of least resistance" like folks say at the coffee shop. It takes all paths to ground in proportion to resistance. Copper wire offers almost zero resistance (less than 0.1 ohm over short runs). When a hot wire touches a grounded metal box or appliance enclosure, that near-zero resistance kicks off an immediate current spike—often over 100 to 200 amps for a split second. That surge forces the thermal-magnetic 15-amp or 20-amp breaker to trip open in less than 50 milliseconds, cutting power before you’ve got a fire or a shock problem.
When the ground is open, that escape route’s gone. Current has nowhere to dump. If a fault shows up, the metal casing becomes a live conductor at 120 volts relative to ground. Touch it while you’re barefoot on a concrete slab or leaning on a grounded faucet, and your body becomes the missing path. That’s how people get hurt.
Step-by-Step Fix
Before you touch a tool, get your personal protective equipment on. You’re inside electrical enclosures now. Treat every conductor like it’s live until your tester proves otherwise.
-
Map the Dead Ground and Identify the Circuit Breaker — Plug your three-prong receptacle tester into the failing outlet, verify the "Open Ground" code (typically one amber light lit on the right, center and left unlit), and check adjacent outlets in the room. Have a helper stand by the panel and flip breakers until the tester lights turn completely dark.
- Note the breaker rating: 15-amp breakers require 14 AWG wire; 20-amp breakers require 12 AWG wire.
- Test every outlet in the room to figure out if the open ground is just one bad spot or the whole daisy-chained branch.
-
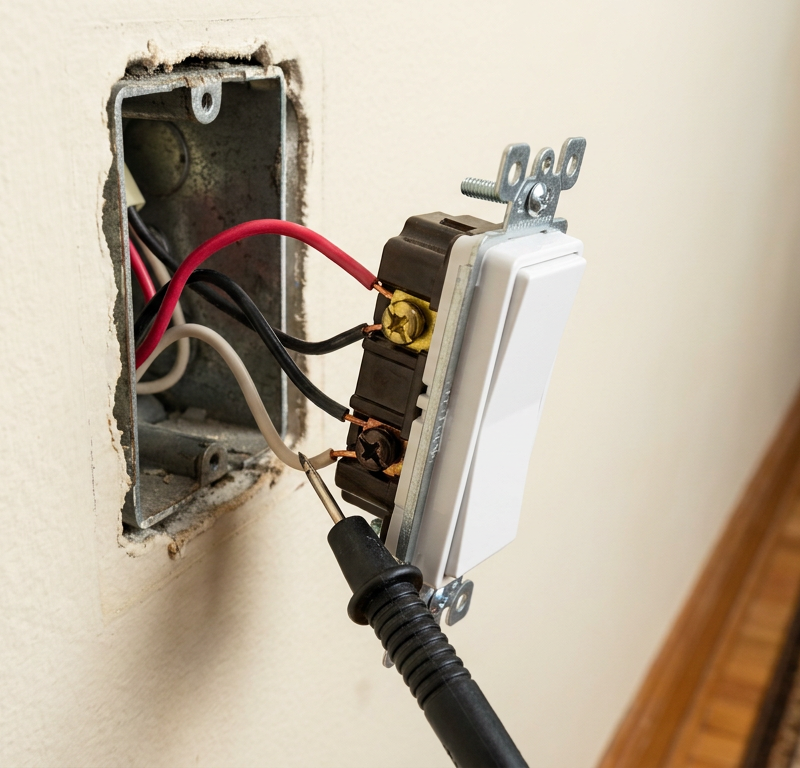
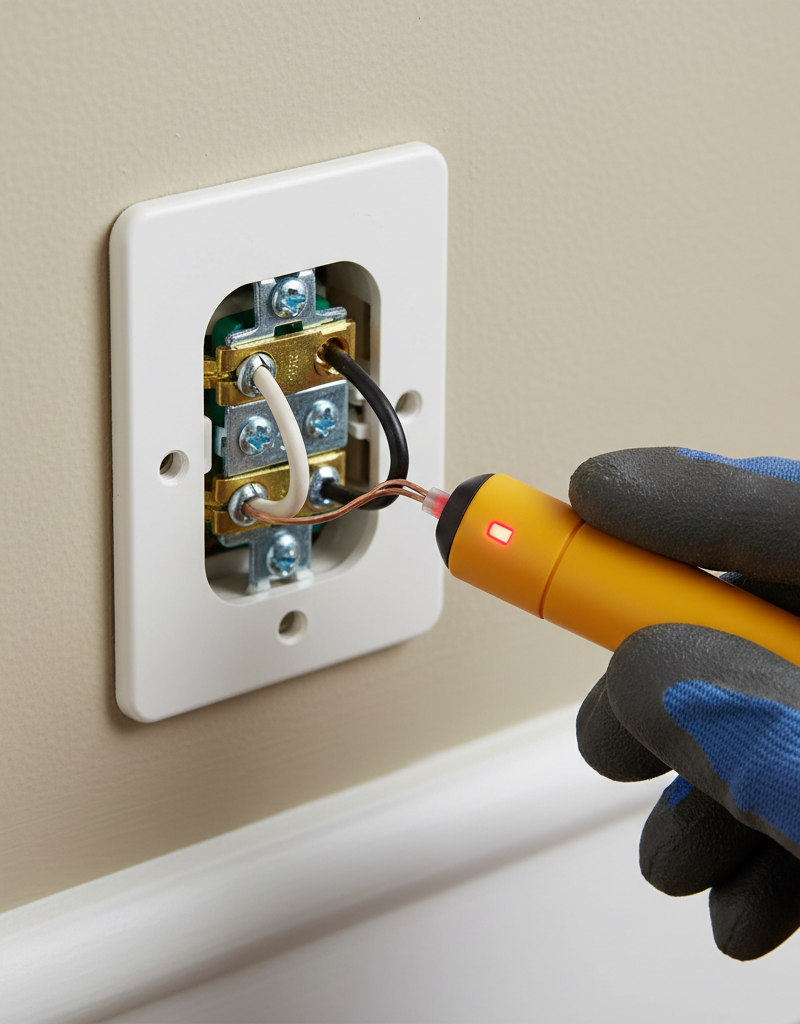
Verify Zero Voltage with a Multimeter or Reliable Tester — Remove the outlet faceplate screw using a flathead screwdriver and set the plate aside. Hold a non-contact voltage tester probe directly against both the hot and neutral terminal screws on the receptacle body.
- Follow up with a digital multimeter set to AC volts: place one lead on the brass hot screw and one on the silver neutral screw. You must read 0.0V.
- Don’t trust visual switch positions at your main panel; older breakers can stick internally while the toggle looks "off."
-
Extract the Receptacle from the Wall Box — Back out the two 6-32 mounting screws holding the receptacle yoke to the electrical box using a #1 or #2 square-drive (Robertson) or Phillips screwdriver. Firmly pull the receptacle straight out into the room by its metal mounting straps, keeping your fingers clear of the side terminals.
- Fold the conductors outward gently; 30-year-old solid copper wire can work-harden and snap if you bend it back and forth too hard.
- Inspect the interior: note whether the electrical box is plastic (non-metallic) or stamped steel.
-
Inspect the Physical Ground Wire Connection — Look closely at the green hexagonal grounding screw located at the bottom corner of the outlet yoke. Check whether a bare copper conductor is wrapped around it, and see if that wire connects back into the box via a wire nut or leads out into the wall.
- If the screw is empty, search deep inside the box. In older builds, lazy installers pushed the bare copper back against the box wall without terminating it.
- If the wire is present under the green screw, check for tightness. Loose ground screws cause high resistance that trips up digital plug-in testers.
-
Examine the Upstream Splice Cluster — Trace the bare grounding wire from the green screw back into the bundle inside the box. Unscrew the wire nut or inspect the copper crimp sleeve connecting all bare grounds together.
- Look for loose or cut conductors: a ground wire that snapped off flush inside a wire nut breaks continuity for that box and everything downstream.
- If you have multiple Romex cables entering the box, every bare ground must be twisted together with a pigtail leading to the receptacle, plus a second pigtail to the metal box if it’s steel.
-
Test for Cable-Shield or Conduit Grounding (Steel Boxes Only) — If you’ve got an older house with flexible armored cable (BX or AC) or EMT metal conduit and no bare wire inside, test the metal box itself for ground continuity. Turn the breaker back on temporarily, set your multimeter to AC Volts, place one probe on the brass hot screw (120V) and the other directly on the bare metal wall of the box.
- If the multimeter reads ~120V, the box itself is grounded through the conduit or armor sheath. Turn the breaker back off.
- Install a 6-inch bare 14 AWG or 12 AWG copper pigtail directly to the threaded 10-32 hole in the back of the steel box using a green ground screw, then connect the other end to the receptacle's green grounding terminal.
-
Check the Upstream Receptacle on the Run — If the ground wire is properly tied into the box but still registers open, the break is located physically upstream toward the electrical panel. Move one outlet closer to the breaker box on the same circuit and pull that receptacle out following Steps 1 through 5.
- A disconnected grounding pigtail in an upstream outlet breaks ground for every downstream device on that run.
- Resecure all ground wires under a properly sized wire nut (such as an Ideal Tan Twister or red wire connector), twisting the bare conductors clockwise with linesman pliers before capping.
-
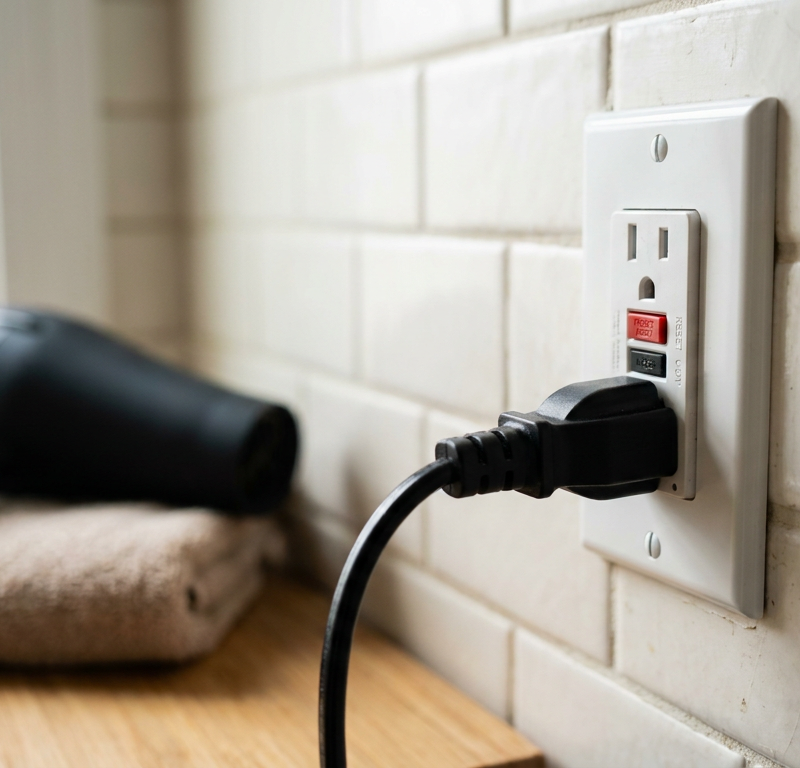
Execute the Code-Compliant GFCI Fix (For Ungrounded 2-Wire Systems) — If you open the wall box and find only two conductors—one black and one white, wrapped in cloth or old NM cable with NO bare ground wire anywhere in the sheath—you cannot magically create a copper ground without tearing out drywall to fish new Romex. Instead, install a GFCI receptacle per NEC 406.4(D)(2).
- Wire the hot wire to the brass "LINE" terminal and the neutral to the silver "LINE" terminal on the new GFCI receptacle.
- Leave the green ground screw on the GFCI empty.
- Peel the little blue stickers out of the GFCI package and stick both "GFCI PROTECTED" and "NO EQUIPMENT GROUND" directly onto the wall plate. This setup protects human life against lethal shocks even though an equipment ground does not exist.
-
Pack the Wires and Mount the Outlet Securely — Fold the conductors back into the box in an accordion-style "S" shape, keeping the bare ground wires pushed away from the hot brass side terminals. Drive the 6-32 mounting screws back into the box ears until the yoke sits flush against the drywall or box edge.
- Apply approximately 12 to 14 in-lbs of torque to the terminal screws to keep connections rock solid.
- Wrap UL-listed electrical tape two times around the perimeter of the outlet body covering the side terminal screws if you’re installing into a narrow metal box.
-
Energize and Verify the Final Circuit — Return to your service panel and switch the circuit breaker back to the "ON" position. Insert your three-prong receptacle tester into the outlet.
- If you restored the copper path, the tester should illuminate two amber lights (Correct Wiring).
- If you installed an ungrounded GFCI, the tester will still read "Open Ground" (which is expected), but pressing the test button on the GFCI face must instantly trip the device with an audible click and shut off power.
Common Causes
- The Skipped Pigtail: A previous homeowner or rushed electrician replaced an old two-prong outlet with a modern three-prong receptacle, but left the green ground screw bare because there was no ground wire in the box.
- Upstream Wire Nut Failure: Ground wires were shoved loosely into a plastic wire nut without being pre-twisted. Over decades of thermal expansion, the ground wire backed out, killing the ground path to every downstream outlet on the circuit.
- Snapped Copper Inside the Sheath: During rough-in, the cable sheathing was scored with a utility knife too aggressively. The bare copper ground wire was nicked, creating a stress point that snapped when the wires were shoved into the box.
- Non-Grounded Metal Box Replacement: A steel junction box was swapped out for a PVC work box, but the installer forgot to bond the incoming and outgoing ground wires together inside the new plastic box.
- Painted-Over Ground Screws: In older conduit systems relying on the metal box and outlet yoke for ground continuity, thick layers of interior paint between the outlet mounting ears and the metal box face isolate the receptacle from ground.
Common Mistakes
- Bootleg Grounding (The Most Dangerous Cheat): Running a short jumper wire from the silver neutral screw to the green ground screw fools cheap plug-in testers into showing two amber lights ("Correct"). But if the neutral line ever breaks upstream, every single metal chassis plugged into that circuit becomes energized to 120 volts. It’s an extreme shock hazard and a direct NEC code violation.
- Connecting Grounds to Plumbing Lines Randomly: Homeowners sometimes run a lone copper wire from an outlet down through the subfloor and clamp it to the nearest copper water pipe. If that plumbing line gets interrupted by PEX plastic tubing anywhere upstream, your ground path is dead and you might energize your bathroom plumbing during a fault.
- Relying Solely on a Non-Contact Pen Tester: Non-contact voltage pens detect electrical fields; they can’t test circuit integrity or verify an open ground. You need a 3-light plug-in tester or a digital multimeter to see what the ground conductor is actually doing.
- Over-Torquing or Stripping 6-32 Device Screws: Cranking down on the tiny mounting screws into plastic boxes strips the soft threads instantly. Hand-tighten until the yoke rests firm and level against the drywall surface.
- Mixing Wire Gauges on Ground Pigtails: Using thin 18 AWG bell wire or scrap speaker wire as a grounding pigtail. Your ground conductor must match the circuit ampacity: 14 AWG copper minimum for 15-amp circuits, 12 AWG copper minimum for 20-amp circuits.
Cost & Time Breakdown
| Task | DIY Cost | Pro Cost | Time |
|---|---|---|---|
| Tighten / Re-terminate Loose Ground Wire | $0–$5 (wire nuts) | $125–$225 (service call) | 20–30 minutes |
| Install Ground Pigtail to Existing Metal Conduit Box | $5–$8 (pigtails, screws) | $125–$250 | 25–40 minutes |
| Replace Ungrounded Receptacle with GFCI | $18–$28 (GFCI unit) | $150–$300 | 30–45 minutes |
| Trace and Fix Broken Upstream Ground Splice | $5–$12 (supplies) | $175–$350 | 1–2 hours |
| Pull New 12/2 or 14/2 Romex Cable (Per Circuit) | $60–$120 (cable, clips) | $450–$1,000 | 3–6 hours |
Tips & Prevention
- Test Outlets After Moving In: Spend $10 on a standard receptacle tester with a GFCI trip button. Walk every room of a newly purchased house and test every single socket—especially in renovated basements and garages where unpermitted DIY work runs rampant.
- Pre-Twist Ground Bundles: When joining solid copper ground conductors, clamp the ends with your linesman pliers and twist them clockwise 3 to 4 full revolutions before screwing on the wire nut. Friction alone inside the nut is not enough for long-term stability.
- Use Self-Grounding Outlets in Metal Boxes: If your home features steel boxes fed by EMT conduit or armored cable, buy commercial-spec "self-grounding" receptacles. They feature a tiny brass spring clip over the mounting screw that maintains continuous ground contact with the box without an extra pigtail wire.
- Label GFCI-Protected Two-Wire Outlets Immediately: Whenever you install a GFCI on an older 2-wire system with no equipment ground, use the supplied stickers. Future home inspectors and electricians need to know right away why a plug-in tester shows an open ground on an otherwise safe, protected circuit.
When to Call a Professional
If you open the electrical box and discover brittle, crumbling cloth insulation that sheds down to bare wire when touched, stop immediately. Disturbed vintage insulation can cause internal arc faults inside the wall cavity that you won’t see until smoke rolls out.
Call a licensed electrician if your breaker trips the instant you reconnect a ground wire. That immediate trip means an existing hot-to-ground fault has been lurking inside your walls the entire time, and reconnecting the ground finally completed the short circuit.
If your home still runs on a vintage fuse box, has ungrounded knob-and-tube wiring branching through the attic, or you find aluminum branch circuit wiring (common in homes built between 1965 and 1973), call an electrical contractor. Aluminum wire needs specialized dual-rated CO/ALR devices, special anti-oxidant pastes, and specific torque ratings to keep you out of fire trouble.
Frequently Asked Questions
Can I just leave an open ground alone if everything works?
No, leaving it alone puts your home and safety at risk. While standard appliances with non-conductive plastic housings might operate normally, any device featuring a three-prong plug—like a refrigerator, computer, or power tool—relies on that third prong to ground exposed metal frames during a short circuit. An open ground also disables the surge protection circuitry in power strips, leaving your sensitive electronics vulnerable to voltage spikes.
Why does my tester show open ground when a bare wire is attached to the screw?
A physical wire attached to the green terminal does not guarantee a continuous electrical circuit back to the earth. The wire could be broken inside the wall, disconnected inside an upstream junction box, or severed at the main service panel. Digital plug-in testers measure actual electrical continuity back to the ground source; if that path is broken anywhere along the run, the tester shows "Open Ground."
What is a bootleg ground, and why is it dangerous?
A bootleg ground occurs when someone connects a jumper wire between the silver neutral terminal and the green ground screw on an outlet. This tricks basic three-prong testers into showing a "correct" grounding reading. However, if the neutral wire ever loosens or breaks upstream, all current returning from connected appliances flows onto the ground path, immediately electrifying the exposed metal shells of every appliance plugged into that branch.
Can I fix an open ground by installing a GFCI receptacle?
Yes, the National Electrical Code (NEC 406.4(D)(2)) explicitly permits replacing an ungrounded two-prong outlet with a GFCI receptacle, even if there is no equipment ground wire present. While the GFCI cannot provide a true ground path for surge protectors, its internal sensor detects microscopic current imbalances (4 to 6 milliamps) and trips power within 25 milliseconds, protecting humans from lethal electrical shock. You must label the plate "No Equipment Ground."
Will a surge protector work on an outlet with an open ground?
No. Standard surge protectors use Metal Oxide Varistors (MOVs) to shunt excess voltage spikes away from your delicate computer or entertainment hardware directly down the equipment ground wire. On an open ground circuit, those transient spikes have nowhere safe to discharge. The surge protector's "Protected" status light will usually remain dark, and your connected electronics absorb the brunt of the electrical surge.
Why do some outlets on the same circuit have grounds while others show open?
Branch circuits are wired in a daisy-chain configuration, running from the breaker box to outlet A, then outlet B, then outlet C. If the grounding wire between outlet A and outlet B slips out of its wire nut or snaps off, outlet A will test correctly with a solid ground, while outlets B, C, and D downstream will all display an open ground condition.
How do I fix an open ground if my house only has two wires?
You have two code-compliant choices. The gold-standard solution is hiring an electrician to fish modern three-wire Romex cable (hot, neutral, and ground) from your breaker panel to the room. The cost-effective alternative is installing a GFCI receptacle at the front of the circuit or swapping the standard circuit breaker at the main panel for a GFCI breaker, which protects the entire run against ground faults without tearing up drywall.
Is an open ground considered a code violation?
In new construction and modern renovations, yes—the National Electrical Code requires continuous equipment grounding on all 15-amp and 20-amp, 120-volt circuits. However, older homes built before the mid-1960s were wired under legacy codes that did not mandate equipment grounds. Those systems are generally grandfathered in, provided you do not replace two-prong receptacles with standard three-prong grounded outlets without GFCI protection.
Related Articles
Keep troubleshooting with these hand-picked guides from FixlyGuide:
- Why Your Outlet Died (Even If the Breaker's ON): The Hidden Causes Everyone Misses — Discover the surprising reasons why an electrical outlet might stop working even when the circuit breaker appears to be on, and learn how t…
- The 7 Head-Scratching Reasons Your Outlet Died (Even With The Breaker On) — Discover the surprising reasons why an electrical outlet might stop working even when its circuit breaker is fully engaged, and how to safe…
- Buzzing Outlet? 6 Causes and the Complete Step-by-Step Fix — Stop electrical outlet buzzing safely. Learn what causes dangerous 60 Hz hums and arcing, how to swap the receptacle step-by-step, and when…
- How to Safely Replace a Light Switch: 12 Steps to a Safe DIY Install — Step-by-step guide to safely replacing a standard single-pole light switch, from testing for zero voltage to wiring terminal screws and avo…
- Three-Way Switch Not Working? 11 Steps to Fix Crossed Common and Traveler Wires — Fix a three-way switch that only works half the time or works backward by learning how to identify the line, load, and traveler wires with…
- The Hidden Reason Your GFCI Trips (It’s Not Always a Bad Outlet) — A tripping GFCI outlet is a safety mechanism doing its job, often indicating a problem like moisture, a faulty appliance, or a wiring issue…
Should you do this yourself?
Answer five quick questions before you start. Safety outranks savings every time.
Your experience with work like this
How high do you have to work?
Does the job involve any of these?
Will it need a permit?
Specialty tools
Free and instant. Educational guidance only — not a quote, inspection, or professional diagnosis.
What should this project cost?
Enter your project details for a realistic cost range before you call anyone.
Outlet and switch work usually $150–$400; panel upgrades commonly $1,800–$4,200.
- Regional adjustment
- National average
- Labor share (typical)
- ~$709
- Quotes to collect
- 3 written estimates
Educational estimate based on national averages — not a binding quote. Always confirm with written local estimates.
Fixly Project Decision Box
- DIY difficulty
- Professional Recommended
- Estimated time
- Diagnosis 1–2 hours
- Cost level
- Moderate
Main tools / materials
- Non-contact voltage tester
- Outlet tester
- Flashlight
When to stop and call a pro
- Burning smell, scorch marks, or a warm outlet or switch plate
- A breaker that trips again right after being reset
- Any work inside the service panel
- Aluminum wiring or cloth-insulated wiring
Need professional help?
Talk to a Licensed ElectricianGet the print-ready PDF of this guide
A clean, ad-free, printable version you can keep on your phone or pin to the workshop wall. Free with a FixlyGuide account.
- Print-optimized layout
- Tools, materials & every step included
- Saved to your account
Frequently asked questions
Can I just leave an open ground alone if everything works?+
No, leaving it alone puts your home and safety at risk. While standard appliances with non-conductive plastic housings might operate normally, any device featuring a three-prong plug relies on that third prong to ground exposed metal frames during a short circuit. An open ground also disables the surge protection circuitry in power strips, leaving your sensitive electronics vulnerable to voltage spikes.
Why does my tester show open ground when a bare wire is attached to the screw?+
A physical wire attached to the green terminal does not guarantee a continuous electrical circuit back to the earth. The wire could be broken inside the wall, disconnected inside an upstream junction box, or severed at the main service panel. Plug-in testers measure actual electrical continuity back to the ground source; if that path is broken anywhere along the run, the tester shows an open ground.
What is a bootleg ground, and why is it dangerous?+
A bootleg ground occurs when someone connects a jumper wire between the silver neutral terminal and the green ground screw on an outlet. This tricks basic three-prong testers into showing a correct reading. However, if the neutral wire ever loosens or breaks upstream, returning current flows onto the ground path, immediately electrifying the exposed metal shells of every appliance plugged into that branch.
Can I fix an open ground by installing a GFCI receptacle?+
Yes, the National Electrical Code (NEC 406.4(D)(2)) explicitly permits replacing an ungrounded two-prong outlet with a GFCI receptacle, even if there is no equipment ground wire present. While the GFCI cannot provide a true ground path for surge protectors, its internal sensor detects microscopic current imbalances and trips power within 25 milliseconds, protecting humans from lethal electrical shock. You must label the plate No Equipment Ground.
Will a surge protector work on an outlet with an open ground?+
No. Standard surge protectors use Metal Oxide Varistors (MOVs) to shunt excess voltage spikes away from your delicate hardware directly down the equipment ground wire. On an open ground circuit, those transient spikes have nowhere safe to discharge. The surge protector's indicator light will usually remain dark, and your connected electronics absorb the brunt of the surge.
Why do some outlets on the same circuit have grounds while others show open?+
Branch circuits are wired in a daisy-chain configuration, running from the breaker box to outlet A, then outlet B, then outlet C. If the grounding wire between outlet A and outlet B slips out of its wire nut or snaps off, outlet A will test correctly with a solid ground, while outlets B, C, and D downstream will all display an open ground condition.
How do I fix an open ground if my house only has two wires?+
You have two code-compliant choices. The permanent solution is fishing modern three-wire NM-B Romex cable from your breaker panel to the room. The practical, cost-effective alternative is installing a GFCI receptacle at the front of the circuit or swapping the breaker at the panel for a GFCI breaker, which protects the entire run against shock hazards without tearing up drywall.
Is an open ground considered a code violation?+
In new construction and modern additions, yes—the National Electrical Code requires continuous equipment grounding on all convenience branch circuits. However, older homes built before the mid-1960s were wired under legacy codes that did not mandate equipment grounds. Those systems are grandfathered in, provided you do not replace two-prong receptacles with standard three-prong outlets without adding GFCI protection.
Discussion
Loading comments…