- Three-Way Switch Not Working? 11 Steps to Fix Crossed Common and Traveler Wires — Fix a three-way switch that only works half the time or works backward by learning how to identify the line, load, and traveler wires with…
- Why One Room Has No Power (But the Breaker Isn't Tripped) — Discover why a whole room might suddenly lose power even when your circuit breaker stays stubbornly on, and learn how to safely troubleshoo…
- Loose Electrical Outlet? Why Plugs Fall Out and the Step-by-Step Fix — Plugs falling out of your wall outlet? Loose internal contacts cause arcing, resistance, and fire hazards. Here is how to replace a worn re…
- Outlet Sparks When Plugging In? 5 Causes and the Step-by-Step Fix — Learn why outlets spark, how to tell harmless micro-arcs from serious fire hazards, and the step-by-step method to safely test and replace…
- The Hidden Reason Your GFCI Won't Reset (And It's Not Always a Short) — Discover the often-overlooked culprits behind a GFCI outlet that refuses to reset and learn how to safely diagnose and fix the issue yourse…
Electrical · Panel or service upgrade
| Project category | Electrical |
|---|---|
| Problem type | Panel or service upgrade |
| Trade required | Electrical |
| Urgency | Planned project |
| Safety risk | High safety risk |
| DIY suitability | Licensed pro only |
| Cost category | High cost |
| Typical timeline | Permit plus utility scheduling, commonly 2–6 weeks |
| Contractor type | Licensed electrician |
Repair option
Add a subpanel when the main service is adequate.
Replacement option
Full service upgrade with utility coordination and permits.
Common causes
- Obsolete or recalled panel brands
- Service capacity too small for added loads
- No room for required AFCI/GFCI breakers
Relevant tools:project cost estimatorcompare quotes
Published October 29, 2026Last updated October 29, 2026
Tools & materials you'll need
Affiliate links- AmazonNon-contact voltage testerEssential for checking dead circuit
- AmazonWire strippers and cuttersWith 12 AWG and 14 AWG stripping notches
- AmazonSlotted and Phillips screwdrivers#2 Phillips and 3/16-inch cabinet flathead
- AmazonNeedle-nose pliersFor bending wire J-hooks if strippers lack looping hole
As an Amazon Associate FixlyGuide earns from qualifying purchases — at no extra cost to you. Prices and availability are accurate as of publication and subject to change.
Quick Answer
To swap out a light switch without getting yourself shocked, shut off power at the main breaker panel and prove the circuit’s dead with a good non-contact voltage tester right against every wire in the electrical box. Label your hot, load, and ground leads, pull the old switch, and wrap the bare conductor ends clockwise around the screw terminals on a matching new 15-amp or 20-amp single-pole switch. Snug the terminal screws down hard to roughly 12 to 14 inch-pounds, fold the wires accordion-style back into the junction box, and screw the switch and faceplate back on the wall.
The Problem
Light switches take more abuse than just about any mechanical part in your house. You flip them a dozen times a day for years, never thinking twice, until one day the toggle feels sloppy, you hear a faint sizzling hiss inside the wall, or the overhead light starts flickering like it can’t make up its mind.
A bad switch isn’t just annoying—it’s a fire risk sitting there in your drywall. When the internal copper contact points wear out or oxidize, resistance goes up. That makes heat inside the wall cavity. And DIY folks run into confusing junction boxes all the time: three black wires tied together, a couple mystery red conductors, or older homes with no real grounding wire at all. Open that box without understanding the path current’s taking, and a 15-minute swap can turn into a real mess. No dice.
How It Works
Residential lighting in North Texas and across North America runs on standard 120-volt alternating current (AC). A standard single-pole switch works like a gate on the ungrounded "hot" conductor, which usually has black insulation. Power leaves your service panel, runs through a 15-amp or 20-amp circuit breaker, travels on the hot wire to your wall switch, passes through the switch’s internal mechanical contacts when you flip it on, and then heads up the switch leg (load wire) to the light fixture.
From there, the current returns on the grounded "neutral" wire (white insulation) back to the panel bus bar and closes the loop. A standard single-pole switch doesn’t interrupt the neutral wire or hook to it; the neutral wires usually bypass the switch completely and get tucked into the back of the box with a wire nut.
The bare copper or green wire is your equipment grounding conductor. It doesn’t carry current during normal operation. It’s there as a backup path: if a live wire shakes loose and touches a metal switch yoke or steel junction box, the ground wire sends that current straight back to the breaker, and it trips before the wall plate can turn into a shock hazard.
Step-by-Step Fix
Follow these steps exactly. Electrical work leaves no room for sloppy guesses.
-
Shut off power at the main breaker — Go to your electrical service panel, find the branch breaker that feeds the room’s lighting circuit, and flip it firmly into the full "OFF" position. Don’t trust some faded panel label from 1998, because folks change circuits all the time. If the panel isn’t labeled well, turn on the light you’re replacing, flip breakers until it goes out, and then leave that breaker all the way off.
- Safety check: Tape a strip of bright blue painter’s tape across the breaker handle so nobody in the house flips it back on while you’re working.
-
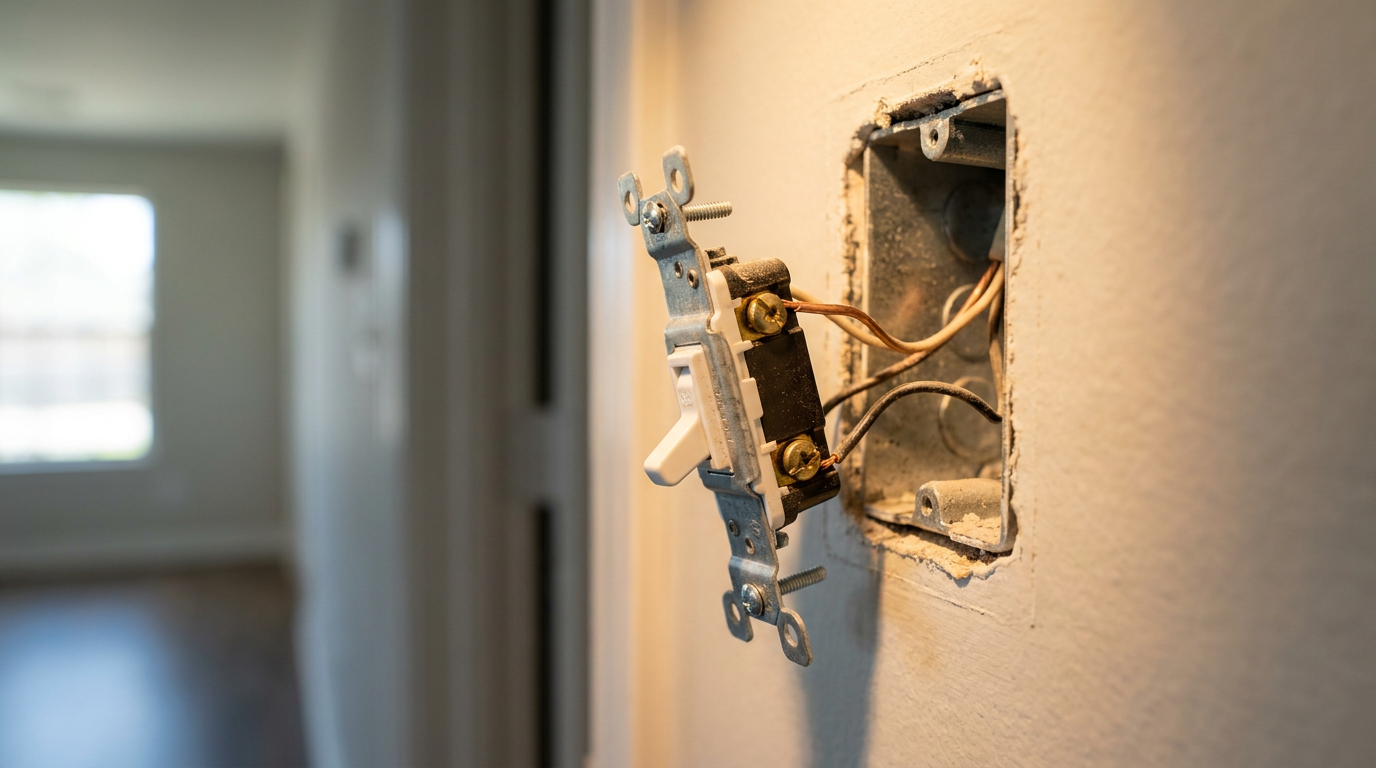
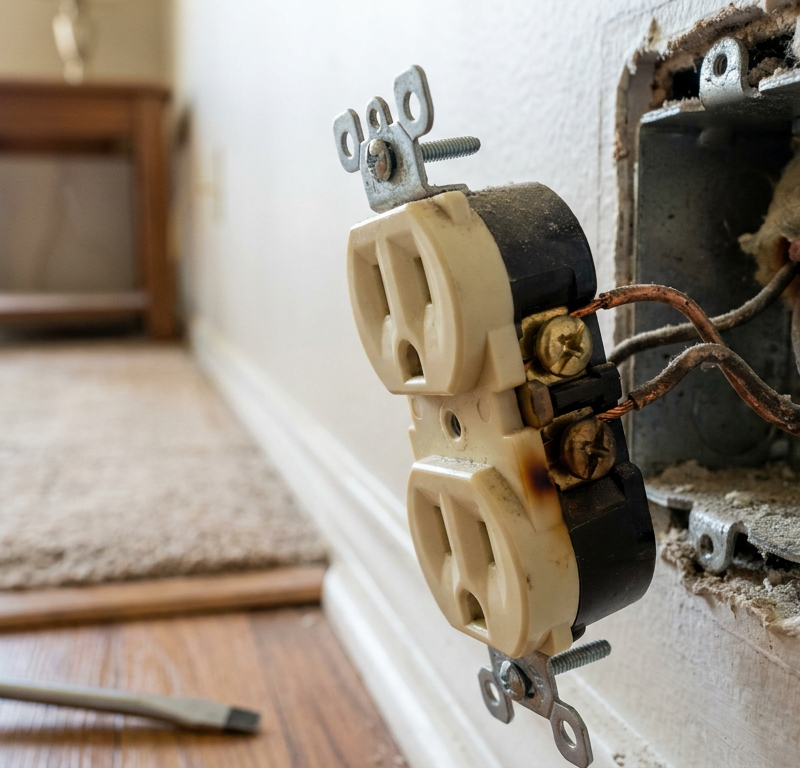
Remove the faceplate and inspect the cavity — Back out the two small slotted screws holding the cover plate to the wall with a flathead screwdriver. Set the faceplate and screws in a dish so they don’t vanish. Shine a work light or headlamp into the box and take a look at the drywall edge for any signs of heat, melted plastic, or scorched insulation.
- Tools required: 3/16-inch slotted cabinet screwdriver, portable work light or LED headlamp.
-
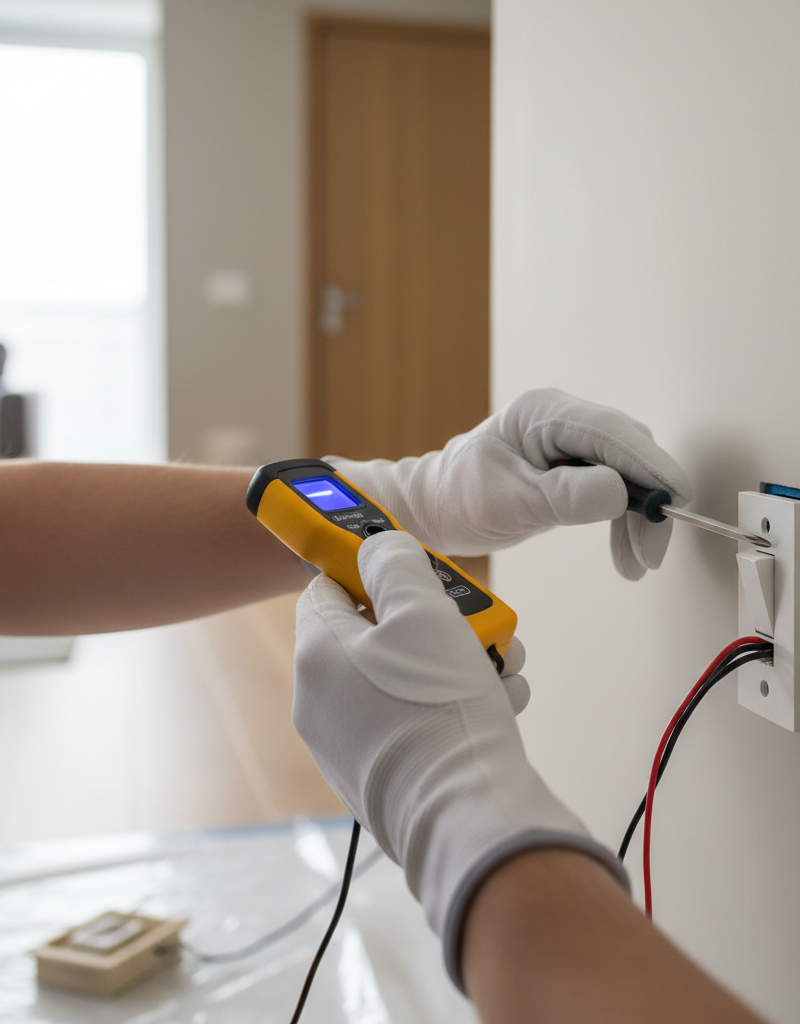
Verify the circuit is dead with a voltage tester — Hold the tip of a non-contact voltage tester within 1/2 inch of both side screw terminals without touching the bare metal leads with your fingers. The tester should stay quiet and show no light. Then pull it away and check it against a known live outlet or cord to make sure the battery’s good, then test the switch terminals a second time. That three-point check keeps you from trusting a bad tool.
- If the tester chirps: Stop right there. You shut off the wrong breaker, or there’s a second feed in that box.
-
Unfasten the switch mounting yoke — Back out the two 6-32 mounting screws holding the metal switch bracket (the yoke) to the top and bottom of the junction box with a #2 Phillips or flathead screwdriver. Once the threads clear the box ears, grab the top and bottom of the metal yoke with your fingers. Ease the switch body straight out toward you, pulling the wires out 3 to 4 inches so you’ve got room to work.
- Caution: Don’t yank on the toggle or the terminal wires themselves.
-
Map and label every wire connection — Study how the wires land on the old switch before you loosen a single screw. On a standard single-pole switch, you’ll see two brass or black side screws (one hot feed, one fixture load) plus a green grounding screw on the top or bottom. Wrap a little blue masking tape around the wire feeding the top screw and mark it "LOAD" or "LINE" with a marker, and identify your bare ground wire.
- Branch issue: If you see three active screw terminals plus a ground screw, you’re looking at a three-way switch, not a single-pole switch. Stop and grab a three-way replacement instead.
-
Disconnect the old switch terminals — Loosen the terminal screws counterclockwise until the wire loops slide off the screw shanks. If the last installer used back-wire push-in holes instead of side screws, don’t try to rip the wires out. Slip a tiny flat precision screwdriver or stiff finish nail into the release slot beside the hole to pop the spring clamp, or cut the wire as close to the switch body as you can with wire strippers.
- Tools required: Wire strippers with cutter, precision flathead screwdriver.
-
Inspect and prep the copper wire ends — Check the exposed copper ends. If they’re nicked, kinked, or ugly with oxidation, cut off the damaged section with the cutting jaw on your wire strippers. Strip back exactly 5/8 to 3/4 inch of insulation from each conductor using the matching gauge notch (14 AWG for 15-amp circuits, 12 AWG for 20-amp circuits). Use the looping hole on the jaws to form a clean, smooth, semi-circular "J-hook" at the bare tip of each wire.
- Tip: The hook should wrap at least three-quarters of the way around a 6-32 or 8-32 screw shank.
-
Attach the ground wire first — Hook the bare copper (or green insulated) ground wire loop around the green grounding screw on the new switch body. Make sure the open mouth of your copper "J-hook" faces clockwise—the same direction the screw turns when you tighten it. Tighten the green screw down firm so the copper seats flat under the screw head and doesn’t slip out or overlap.
- Safety note: In a metal junction box, the ground wire also has to bond to the metal box with a green grounding screw or an approved ground clip.
-
Connect the line and load conductors — Hang the loop of the incoming hot line wire onto one brass side terminal screw, facing clockwise, and tighten it down firm. Do the same with the switched load wire on the opposite brass terminal screw. On a basic single-pole switch, those two brass terminals are interchangeable; it doesn’t matter which hot wire goes to the top or bottom brass terminal. Torque both screws to approximately 12 to 14 inch-pounds so the wire won’t wiggle loose from heat cycling.
- What to avoid: Don’t use push-in stab connections on the rear housing; side-screw connections give you roughly triple the surface contact area and stay tight for decades.
-
Insulate the switch body and fold the wires — Wrap two complete passes of heavy-duty black vinyl electrical tape around the perimeter of the switch housing, covering all exposed brass and green terminal screw heads. Next, fold the heavy electrical conductors gently back into the junction box in an accordion or "Z-fold" pattern. Don’t just shove the switch in there or jam it hard, or you’ll kink the copper or pinch insulation against the sharp metal edges.
- Check: Make sure the bare ground conductor can’t touch the brass line terminals as you push the assembly flush.
- Mount the switch and reinstall the trim plate — Line up the switch yoke with the box mounting holes. Drive the top and bottom 6-32 machine screws in until the yoke sits flat, plumb, and flush against the finished drywall surface. If the switch sits crooked or recessed, slip a plastic switch shim behind the screw ears. Put the wall plate back on and tighten the small painted screws by hand—lean on them too hard and you’ll crack brittle nylon or plastic faceplates in a heartbeat.
- Alignment tip: Back out one screw a touch to adjust vertical plumb with a small torpedo level before you lock down the cover.
- Restore power and test operation — Head back to the electrical panel, pull off the blue lockout tape, and push the breaker handle firmly to the "ON" position. Walk back to the room and flip the switch up; the light should come on right away with no delay, popping noise, or arcing spark. Flip it off and on three times in a row to make sure it’s smooth and quiet.
Common Causes
Why do light switches fail in the first place? Here are the usual suspects:
- Worn mechanical springs and internal contact arcing: Every time a switch flips, a spring snaps tiny metal contacts together. After 10,000+ cycles, the internal spring loses tension, the contacts start bouncing, and you get micro-arcs of electricity that pit and scorch the metal.
- Overheated back-stabbed connections: Push-in terminals depend on tiny internal spring-steel leaves that pinch the copper wire. Over years of heat cycling—warming up when the circuit’s on, cooling down when it’s off—those clips relax and lose grip, which leads to high resistance and intermittent power loss.
- Incorrect amperage ratings: Putting a basic 15-amp switch on a 20-amp circuit protected by a 20-amp breaker violates code and creates a thermal weak spot if heavy wattage runs through that branch.
- Physical impact or box shifting: Slamming doors, moving furniture, and shifting drywall in active soils (like North Texas clay) crack the phenolic resin or thermoplastic bodies of older switches and loosen the terminal screws.
Common Mistakes
- Relying on back-stabbed push-in terminals. Builders like them because they go in fast. DIYers copy that shortcut. Don’t. Push-in connections fail at more than five times the rate of screw terminals because they barely touch the wire. Always bend a clean hook and clamp the wire under the screw head.
- Hooking the wire counterclockwise around the screw. When you turn the terminal screw clockwise to tighten it, a counterclockwise hook opens up and squirts right out from under the head. Always face the open end of the hook clockwise so the screw’s turning action pulls the copper tighter around the shank.
- Stripping off too much insulation. Leaving an inch or more of bare copper behind the terminal means live metal’s hanging out in the breeze. If that bare copper shifts and brushes the grounded metal box or a bare ground wire, you’ll get an immediate dead short. Strip exactly 5/8 to 3/4 inch.
- Assuming black is always hot and white is always neutral. In older switch-loop setups, where power goes to the light fixture first and a two-wire Romex drops down to the switch, that white wire is actually carrying hot 120-volt current to the switch toggle. If you tie that white switch-loop wire into a bundle of true neutral wires, you’ll pop the breaker the second you flip the toggle.
- Neglecting to insulate the switch perimeter. In cramped single-gang boxes—especially old metal conduit boxes—it only takes an eighth-inch shift for a brass side terminal to arc against the metal box wall. Two wraps of quality 33+ vinyl electrical tape over the screw heads keeps you from creating a nasty short during final mounting.
Cost & Time Breakdown
| Task | DIY Cost | Pro Cost | Time |
|---|---|---|---|
| Basic Single-Pole Switch Replacement | $3–$8 (parts only) | $125–$225 | 15–25 minutes |
| Replace Worn Switch with Heavy-Duty Commercial Spec | $7–$15 | $140–$250 | 20–30 minutes |
| Convert Standard Toggle to Rocker/Decora Style | $5–$12 | $130–$230 | 20–30 minutes |
| Add Ground Pigtail to Unbonded Metal Box | $4–$10 | $150–$260 | 30–45 minutes |
| Troubleshoot Mislabeled Switch Loop / Multi-Gang Box | $10–$20 | $175–$350 | 45–75 minutes |
Tips & Prevention
- Feel for switch heat during your seasonal home check. Every three months or so, put your hand on your home’s switch plates while the lights are on. A switch plate running normal LED or incandescent loads should feel room temperature. If a standard switch feels warm or hot to the touch—anything over 100°F—replace it right away. (Dimmer switches do make a little heat by design, but standard toggle switches shouldn’t feel warm.)
- Standardize on commercial-grade switches. Spend $4 on a commercial-spec switch instead of grabbing the $0.79 contractor-pack bargain stuff. Commercial switches have nylon bodies that don’t crack under torque, heavy brass terminal screws, and internal contacts rated for 20 amps.
- Listen for switch "bizzing." A healthy switch makes a clean, sharp mechanical click. If you flip the toggle and hear a buzz, sizzle, or hiss that hangs around even for a split second, the internal contacts are pitted and arcing. Swap it out before it blackens the inside of the wall. I pulled a water heater in Frisco last month that had exactly this kind of crispy connection nearby, and you could smell it before you saw it.
- Leave generous wire lengths when repairing. If you need to trim back damaged or scorched copper conductors, make sure you still have at least 3 inches of usable wire sticking out past the face of the drywall box. If the wires end up too short, splice on a 6-inch copper pigtail with an approved wire nut or lever-actuated connector instead of yanking a stubby lead tight to the screw terminal.
When to Call a Professional
Swapping an identical single-pole switch is one of the simpler DIY jobs in the house, but you still need to know where the line is. If you pop off the wall plate and find cloth-wrapped wiring with no equipment ground, crumbly rubber insulation that falls apart in your fingers, or silver-colored aluminum branch wiring (common in homes built between 1965 and 1973), stop right there. Aluminum wiring needs specialized CO/ALR rated devices, anti-oxidant paste, and exact torque specs; regular copper switches on aluminum wires are a serious fire hazard.
Don’t push it if you pull the switch and find melted terminal blocks, charred box interiors, or more than four wire bundles stuffed into a cramped box where you can’t clearly trace the circuit path. If you flip the breaker back on and it trips instantly even after careful wiring, you’re dealing with an upstream ground fault or short that calls for a pro’s multimeter and insulation-resistance testing.
Frequently Asked Questions
Can I replace a 15-amp light switch with a 20-amp switch?
Yes, you can safely install a 20-amp rated switch on a 15-amp lighting circuit. The 20-amp switch just has heavier internal contacts and thicker terminal hardware that can handle the lighter 15-amp load with no trouble. You can’t do it the other way around, though: never put a 15-amp switch on a 20-amp circuit breaker branch if that circuit serves high-wattage equipment or combined receptacle loads above 15 amps. Check your breaker size—it’ll have a "15" or "20" stamped right on the handle—before you buy the replacement.
Does it matter which wire goes to which screw on a single-pole switch?
On a standard single-pole switch with two brass side screws, it doesn’t matter which hot wire lands on the top screw and which one goes on the bottom. The switch is just a mechanical break in the hot line. When the toggle is open (OFF), current stops at the incoming terminal; when you flip it closed (ON), current bridges over to the outgoing load terminal. Keep the bare ground wire on the green screw and stay away from the neutral wires, and the switch works the same either way.
Why does my new light switch feel warm to the touch?
A standard on/off toggle or rocker switch should never feel warm. If a standard switch feels warm, you’ve got a loose terminal screw making resistance, an overloaded circuit pulling too much amperage, or pitted internal contacts arcing inside the casing. Shut off the breaker and check the connections right away. The only exception is an electronic dimmer switch: dimmers are built to dump extra line voltage as heat through the aluminum heat-sink plate, so feeling a little warm—up to roughly 120°F under moderate load—is normal for dimmers.
What should I do if there is no ground wire inside the electrical switch box?
In older homes built before the mid-1960s, branch circuits were often wired with two-conductor Romex and no grounding wire. If your home has rigid metal conduit or flexible armored BX cable, the metal box itself may already be grounded back to the panel. You can test that with a multimeter between the hot terminal and the metal box. If the box is ungrounded plastic or an unbonded metal box with no ground path, code allows you to install a switch without a ground wire attached, as long as you use non-metallic, non-conductive faceplates secured with nylon screws, or protect the circuit with an upstream Ground Fault Circuit Interrupter (GFCI) breaker.
Why are there three black wires connected to my single-pole switch?
In plenty of tract homes, electricians use the light switch box as a junction point to feed power downline to other fixtures or wall receptacles. If you see two black wires spliced together under one terminal or pigtailed with a wire nut to feed the switch, one is incoming line power, one is outgoing continuous power to another part of the room, and the third is the switched load wire going up to the light fixture. If your old switch used one screw terminal and one push-in back-stab on the same side to daisy-chain power, cut a 6-inch black pigtail wire, join all three hot wires together with a wire nut, and land the single pigtail lead on your new switch terminal.
What is the difference between single-pole, three-way, and four-way switches?
A single-pole switch controls a light fixture from exactly one wall location and has two brass side terminals plus a green ground screw. A three-way switch controls a light fixture from two separate wall locations, like the top and bottom of a staircase, and has three active terminals: one dark "common" screw and two brass "traveler" screws. A four-way switch works with two three-way switches to control lights from three or more locations, like a long hallway, and has four terminal screws. You can’t swap a single-pole switch into a three-way setup without losing multi-location control.
Can I use the push-in back-stab holes instead of the screw terminals?
You should never use back-stab push-in connections on the back of a switch, even though the manufacturer puts them there. Back-stab holes rely on tiny spring-metal teeth that grip the copper wire with very little contact. Over years of heating and cooling, those clips loosen up and lose clamping force, which creates high resistance, intermittent power dropouts, and dangerous heat. Wrapping the wire clockwise around the outside screw terminals gives you a tough, high-torque mechanical bond that’ll last the life of the house.
Why did my circuit breaker trip the moment I flipped on my newly installed switch?
If the breaker trips instantly when you flip the switch to the "ON" position, you’ve made a dead short circuit. The most common cause is the bare copper ground wire touching an uninsulated brass hot screw terminal when the switch gets shoved back into the junction box. Another common mistake is misreading an old switch-loop white wire as a true neutral and tying it into a bundle of white neutral wires in the box. Pull the switch back out, make sure black tape is covering the screw heads, check wire clearance, and verify that no hot conductor is touching any grounded metal surface.
Related Articles
Keep troubleshooting with these hand-picked guides from FixlyGuide:
- Three-Way Switch Not Working? 11 Steps to Fix Crossed Common and Traveler Wires — Fix a three-way switch that only works half the time or works backward by learning how to identify the line, load, and traveler wires with…
- Why One Room Has No Power (But the Breaker Isn't Tripped) — Discover why a whole room might suddenly lose power even when your circuit breaker stays stubbornly on, and learn how to safely troubleshoo…
- Loose Electrical Outlet? Why Plugs Fall Out and the Step-by-Step Fix — Plugs falling out of your wall outlet? Loose internal contacts cause arcing, resistance, and fire hazards. Here is how to replace a worn re…
- Outlet Sparks When Plugging In? 5 Causes and the Step-by-Step Fix — Learn why outlets spark, how to tell harmless micro-arcs from serious fire hazards, and the step-by-step method to safely test and replace…
- The Hidden Reason Your GFCI Won't Reset (And It's Not Always a Short) — Discover the often-overlooked culprits behind a GFCI outlet that refuses to reset and learn how to safely diagnose and fix the issue yourse…
- The #1 Reason Your AC Blows Warm Air (And It's Not What You Think) — A dirty air filter is often the overlooked culprit behind an air conditioner blowing warm air, hindering its ability to cool your home effi…
Repair or replace this system?
Plug in four numbers and see which choice holds up financially.
Free and instant. Educational guidance only — not a quote, inspection, or professional diagnosis.
Questions to ask before you sign
Ask every contractor the same questions and the cheapest bid stops looking cheapest. Check them off as you go — your progress is saved on this device.
Free, no signup. Bring this to every walkthrough so you compare bids on the same terms.
What should this project cost?
Enter your project details for a realistic cost range before you call anyone.
Outlet and switch work usually $150–$400; panel upgrades commonly $1,800–$4,200.
- Regional adjustment
- National average
- Labor share (typical)
- ~$709
- Quotes to collect
- 3 written estimates
Educational estimate based on national averages — not a binding quote. Always confirm with written local estimates.
Fixly Project Decision Box
- DIY difficulty
- Professional Recommended
- Estimated time
- Diagnosis 1–2 hours
- Cost level
- Moderate
Main tools / materials
- Non-contact voltage tester
- Outlet tester
- Flashlight
When to stop and call a pro
- Burning smell, scorch marks, or a warm outlet or switch plate
- A breaker that trips again right after being reset
- Any work inside the service panel
- Aluminum wiring or cloth-insulated wiring
Need professional help?
Talk to a Licensed ElectricianRepair or replace?
Run the age, cost ratio, and repair history through the calculator before you commit.
- Estimate this projectGet a cost range for your scope and ZIP before you call anyone.Open
- Get local estimatesSend one request and compare written estimates from vetted pros.Open
Free, no signup required. Estimates are educational guidance, not a quote or an inspection.
Get the print-ready PDF of this guide
A clean, ad-free, printable version you can keep on your phone or pin to the workshop wall. Free with a FixlyGuide account.
- Print-optimized layout
- Tools, materials & every step included
- Saved to your account
Frequently asked questions
Can I replace a 15-amp light switch with a 20-amp switch?+
Yes, you can safely install a 20-amp rated switch on a 15-amp lighting circuit. The 20-amp switch features heavier internal contacts that handle the lighter 15-amp load with ease. However, you can never install a 15-amp switch on a 20-amp circuit, as that creates an overload hazard.
Does it matter which wire goes to which screw on a single-pole switch?+
On a standard single-pole switch with two brass side screws, it does not matter which hot wire attaches to which screw. The switch acts as a simple mechanical gate on the hot conductor. As long as you connect the ground wire to the green screw, the switch functions identically.
Why does my new light switch feel warm to the touch?+
A standard toggle switch should never feel warm; warmth indicates loose terminal screws, worn contacts, or an overloaded circuit. Dimmer switches, however, naturally radiate a small amount of heat through their faceplate to shed excess voltage, which is completely normal.
What should I do if there is no ground wire inside the electrical switch box?+
If metal conduit is present, the metal box itself may already provide ground continuity. For ungrounded Romex setups, the National Electrical Code permits installing a replacement switch without a ground connection provided you use a non-conductive plastic wall plate and nylon screws, or feed the circuit through an upstream GFCI.
Why are there three black wires connected to my single-pole switch?+
Electricians often use switch boxes to daisy-chain continuous power to downline outlets. In this setup, two black wires carry constant line voltage and a third carries switched load to the light. Combine the two line wires with a 6-inch pigtail using an approved wire nut, and run the pigtail to your switch terminal.
What is the difference between single-pole, three-way, and four-way switches?+
A single-pole switch operates a fixture from one wall position and has two brass screws. A three-way switch operates a light from two locations and has three screws (one common, two travelers). A four-way switch works in setups with three or more wall switches and has four terminal screws.
Can I use the push-in back-stab holes instead of the screw terminals?+
While allowed by manufacturing standards, back-stab holes rely on tiny spring tension clips that loosen over time due to thermal cycling. Loosened connections lead to arcing and switch failure. Always bend a J-hook and secure your conductors firmly under the side screw terminals instead.
Why did my circuit breaker trip the moment I flipped on my newly installed switch?+
A dead short occurred during reassembly. Most often, the bare copper ground wire shifts and touches one of the hot brass side terminals as the switch is pushed into the box. Wrapping the switch body with electrical tape and folding the wires accordion-style prevents this issue.
Discussion
Loading comments…