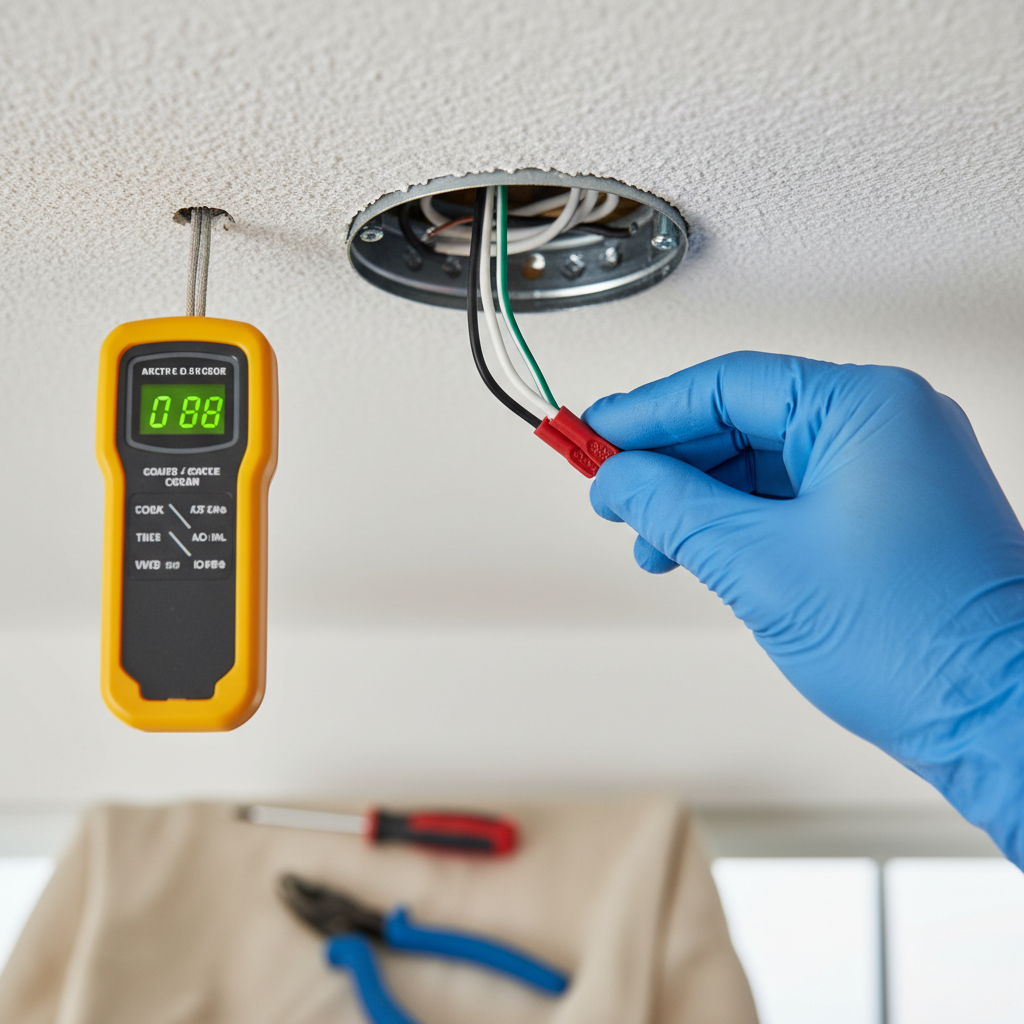
- Loose Bulb: Easiest fix, but folks overlook it all the time. Simple physics — bad contact means bad power flow.
- Loose Wiring at Fixture: Vibration or a sloppy original install can loosen wire nuts or screw terminals over time.
- Loose Wiring at Switch: Same story as the fixture. These connections can wear out, and backstabs are especially prone to it.
- Faulty Light Switch: The internal contacts or spring mechanism can wear out and cause intermittent connections.
- Loose Connections in a Junction Box: Hidden splices can be the source of the problem, especially in older homes where the wiring’s been modified.
Electrical · Panel or service upgrade
| Project category | Electrical |
|---|---|
| Problem type | Panel or service upgrade |
| Trade required | Electrical |
| Urgency | Planned project |
| Safety risk | High safety risk |
| DIY suitability | Licensed pro only |
| Cost category | High cost |
| Typical timeline | Permit plus utility scheduling, commonly 2–6 weeks |
| Contractor type | Licensed electrician |
Repair option
Add a subpanel when the main service is adequate.
Replacement option
Full service upgrade with utility coordination and permits.
Common causes
- Obsolete or recalled panel brands
- Service capacity too small for added loads
- No room for required AFCI/GFCI breakers
Relevant tools:project cost estimatorcompare quotes
Published September 4, 2026Last updated September 4, 2026
Tools & materials you'll need
Affiliate linksAs an Amazon Associate FixlyGuide earns from qualifying purchases — at no extra cost to you. Prices and availability are accurate as of publication and subject to change.
Quick Answer
Listen, I’ve seen this a thousand times. You’ve got a light flickering, so you swap out the bulb, right? Makes sense. But then the new bulb flickers too, and now you’re standing there with your hands on your hips wondering what gives. Most times, it ain’t the bulb. It’s usually a loose connection somewhere in the circuit — could be at the fixture, could be in the switch box. A lot of folks think they’re staring at some giant wiring disaster, but nine times out of ten it’s a pretty straightforward fix once you know where to poke around.
The Problem
You know the drill: your favorite lamp or ceiling light starts doing that annoying disco strobe thing. You tell yourself, “No biggie, just a dying bulb.” You unscrew the old one, pop in a brand-spanking-new LED, flip the switch, and… flicker, flicker, flicker. Drives you nuts, doesn’t it? I get it.
What’s happening here is the electrical connection isn’t solid. Electricity needs a clean, uninterrupted path to flow from your breaker panel, through your switch, to your light fixture, and back again. Even a tiny bit of resistance — a loose wire, a corroded contact — can mess with that flow and make the light dim, brighten, or just flat-out flicker. It’s like a kink in a garden hose; the water can’t get through right. And in wiring, that intermittent connection isn’t just annoying, it can make heat. That’s the part you don’t want hanging around.
How It Works
Let’s talk about how electricity actually gets to that light bulb, because knowing the path makes troubleshooting a whole lot easier. It starts at your service panel, that big metal box with all the breakers. A hot wire, usually black, runs from a breaker and carries 120 volts of alternating current (AC). That hot wire travels through your walls to your light switch. When you flip the switch “on,” you’re basically closing a circuit so that hot wire can connect to another wire that keeps heading to your light fixture.
At the fixture, the hot wire connects to the bulb socket. The electricity flows through the bulb’s filament — or through the LED drivers in modern bulbs — and that’s what makes the light. After it passes through the bulb, the electricity needs a path back to the service panel to finish the circuit. That’s where the neutral wire comes in, usually white, and it carries the current back. Then you’ve got the ground wire, bare copper or green, which is your safety net. If something goes sideways, it gives stray electricity a safe path away. So you’ve got a hot wire to the switch, a switched hot wire from the switch to the fixture, a neutral from the fixture back to the panel, and a ground wire along for the ride.
Anywhere along that path — the wire connections in the switch box, the connections inside the fixture, even the little contact tab in the bulb socket — a loose connection, corrosion, or a failing part can interrupt the flow. Then the bulb gets starved for steady power, and that’s when it starts flickering. It’s not getting enough juice, or it’s getting it off and on. Most household circuits run at 120V, and these connections are supposed to handle currents anywhere from 1.5 to 15 amps for a typical lighting circuit. If you’re seeing a flicker, something isn’t holding up its end of the bargain.
Step-by-Step Fix
1. Safety First – Cut the power at the breaker.
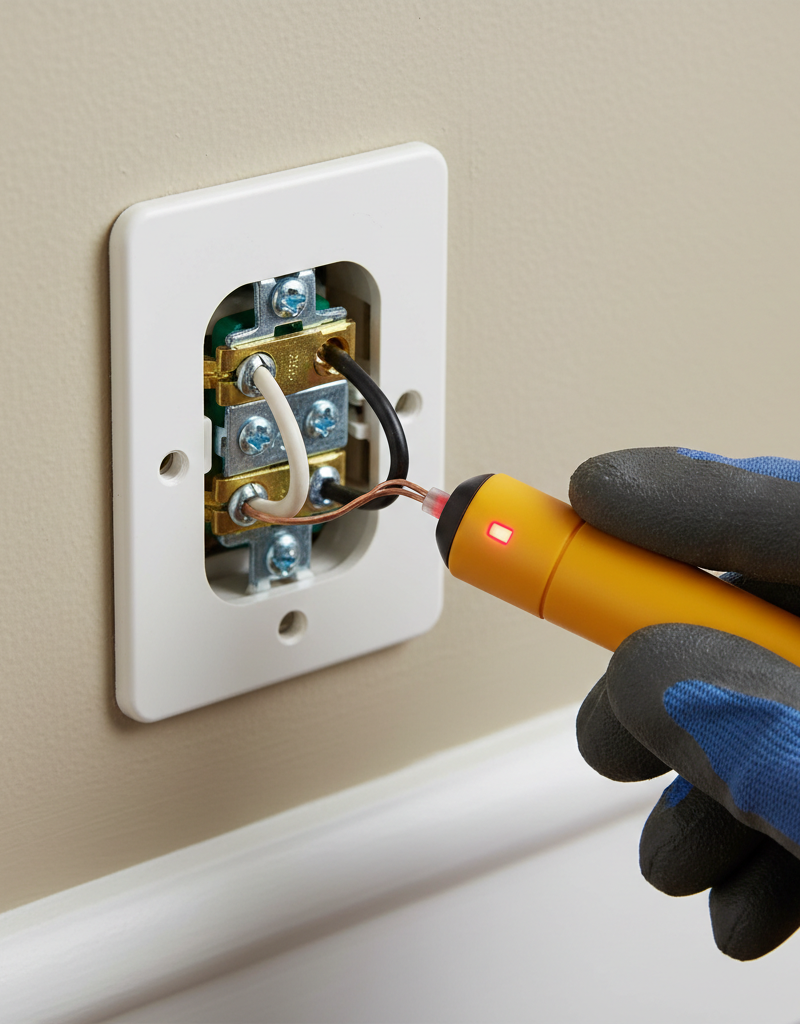
Before you touch anything, find the right breaker in your electrical panel and flip it to the “off” position. Don’t trust the wall switch alone. Test the light to make sure it’s dead. I had a guy in Newton Center who thought the switch was enough and got lit up for his trouble — no dice, that thing’s not a lockout. Confirm zero voltage with a non-contact voltage tester if you’ve got one. Good tool to keep in the bag.
2. Check the Bulb & Socket – Tighten ’er up.
Sometimes, it is just the bulb not screwed in tight enough. Unscrew the bulb, look down into the socket. You’ll see a small metal tab at the bottom. That’s the “hot” contact. With the power off, gently pry it up a hair with a small flathead screwdriver. That helps it make better contact with the bulb’s base. Also make sure the bulb’s metal base is clean. Corrosion can absolutely cause trouble.
3. Inspect the Light Fixture Wiring – Look for the loose ends.
Carefully remove the fixture’s canopy or cover from the ceiling or wall. You’ll see the wiring connections. Look for wire nuts — those plastic caps twisted onto wires. Give each wire nut a gentle twist to see if it’s loose. Then tug lightly on each wire coming out of the nut. If a wire slides out, you’ve found your culprit. Re-strip about 3/4-inch of insulation, twist the wires together clockwise with your pliers, and reseat the wire nut tightly. Make sure no bare copper is showing below the nut.
4. Examine the Switch Wiring – The other common offender.
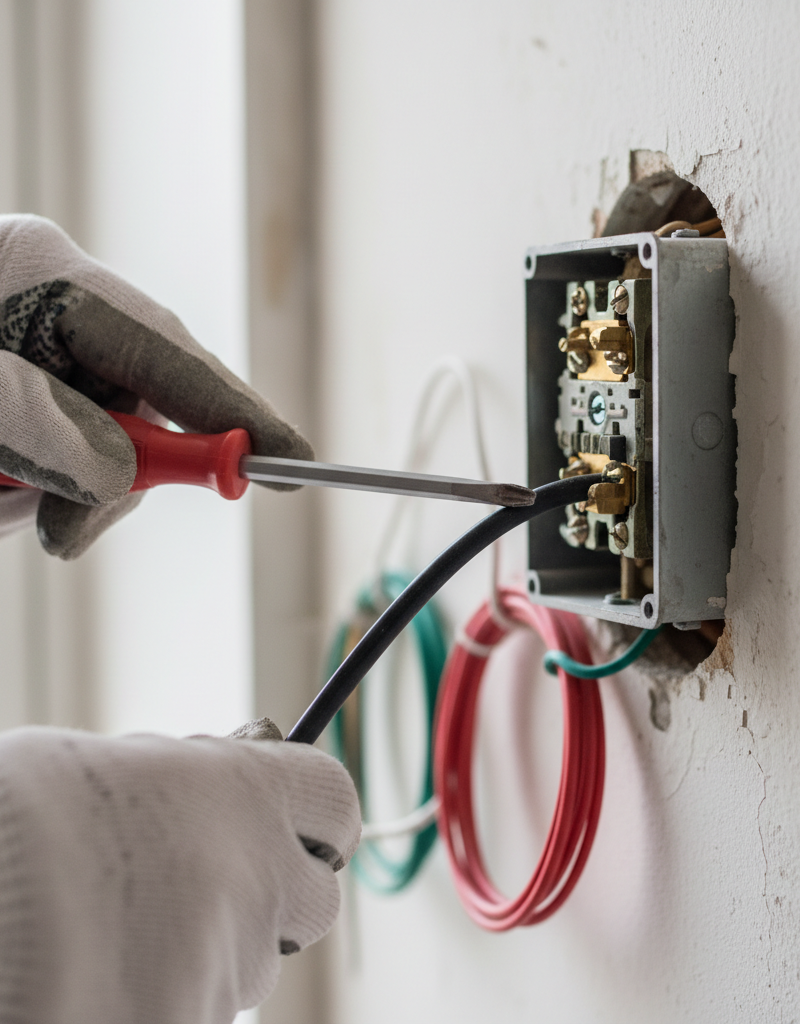
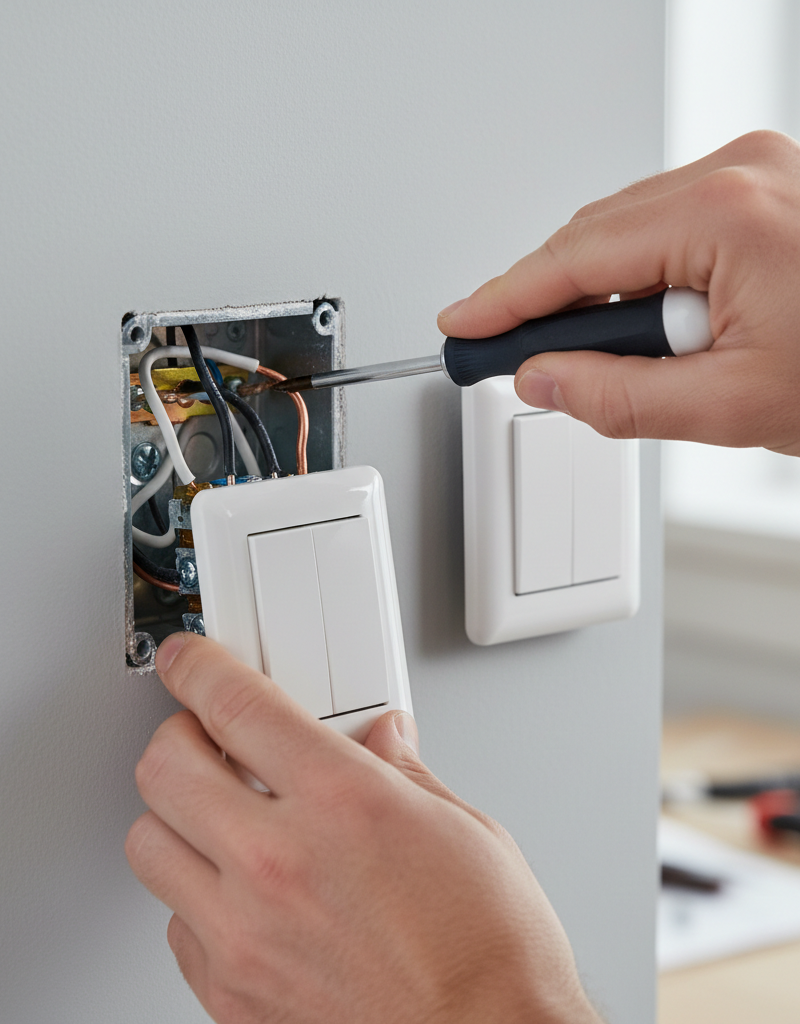
Go to the light switch. Using your screwdriver, carefully remove the faceplate, then unscrew the switch from the electrical box. Gently pull the switch out, but don’t disconnect any wires yet. Look at how the wires are connected. Are they wrapped around screw terminals, or are they “backstabbed” into little holes in the back of the switch? Backstab connections are famous for failing over time because they don’t hold the wire as securely. If you see backstabs, remove the wires by pushing a small screwdriver into the slot next to the wire, then connect them to the screw terminals instead. Wrap the wire clockwise around the screw terminal so it tightens as you turn the screw. Aim for at least 3/4 of the stripped wire to be under the screw head.
5. Test for a Faulty Switch – Sometimes, the switch itself is done.
Even if the wires are solid, the inside of the switch can wear out. If you’ve checked all the connections and the flickering keeps hanging around, you might have a bad switch. With the power off, disconnect the old switch. Connect the incoming hot wire (usually from the bottom screw or one side) directly to the switched hot wire (usually from the top screw or other side) with a wire nut. Wrap them together and cap ’em off. Turn the power back on. If the light comes on solid, your switch is bad. Time for a new one. A basic single-pole switch will run you about 5 bucks.
6. Check Recessed Lighting Contacts – Those clips can get weak.
For recessed lights (can lights), the bulb contacts are often spring-loaded clips. Over time, the tension can weaken, leading to poor contact. With the power off, remove the bulb. You might see two metal tabs on the sides of the socket that touch the bulb’s base. Gently bend them inwards slightly with a small screwdriver or needle-nose pliers to get better contact. Also check the center tab like you would with any other socket.
7. Look for Splices in Junction Boxes – Hidden connections.
Sometimes, the wiring for your light fixture makes a detour through a separate junction box in the attic or basement before it gets to the switch or fixture. If you’ve exhausted all other options, you might need to locate these boxes — always accessible, by code! — and check the wire connections inside, just like you did with the fixture. Again, power off before opening any junction box.
8. Call a Pro if Undetermined – Don’t mess with live wires.
If you’ve gone through all these steps and the flicker is still haunting you, or if you’re uncomfortable at any point, it’s time to call in a licensed electrician. There might be a deeper issue like a failing connection at the breaker, a nicked wire in the wall, or an overloaded circuit. Better safe than sorry, especially when you’re dealing with your home’s electrical system.
Common Causes
- Loose Bulb: Easiest fix, but folks overlook it all the time. Simple physics — bad contact means bad power flow.
- Loose Wiring at Fixture: Vibration or a sloppy original install can loosen wire nuts or screw terminals over time.
- Loose Wiring at Switch: Same story as the fixture. These connections can wear out, and backstabs are especially prone to it.
- Faulty Light Switch: The internal contacts or spring mechanism can wear out and cause intermittent connections.
- Loose Connections in a Junction Box: Hidden splices can be the source of the problem, especially in older homes where the wiring’s been modified.
- Corroded Contacts: Moisture or age can oxidize the metal contacts in the socket or switch and bump up resistance.
- Incompatible Bulb: Sometimes an older dimmer switch just won’t play nice with newer LED bulbs, and you’ll get flickering. Not a wiring issue, but don’t ignore it.
Common Mistakes
- Ignoring the problem: Flickering lights aren’t just irritating; they can point to a loose connection that’s making heat. That’s a fire hazard. Don’t kick the can down the road.
- Assuming it’s just the bulb: Like I said, that’s the first thing homeowners blame. Always keep digging if a new bulb doesn’t fix it.
- Not turning off the breaker: This isn’t a suggestion. It’s the rule. Working on live wires can hurt you bad. Test and confirm the power’s off.
- Using backstab connections: A lot of DIYers — and yeah, some lazy pros too — use these because they’re fast. But they’re less secure and fail more often than screw terminals. Use the screw terminals if you can.
- Not tightening wire nuts enough: A wire nut should be on tight enough that the wires are twisted together inside and you can’t pull any wire out without real force. If it’s loose, it’s a bad connection.
- Over-tightening screw terminals: You want them snug, sure, but cranking too hard can cut fine wire strands or strip the screw. Then you’ve made it worse.
- Forgetting about ground wires: Always make sure the ground wires are connected right, whether to a green screw on the fixture/switch or capped with the other grounds. It’s your home’s electrical safety net.
Cost & Time Breakdown
| Task | DIY Cost | Pro Cost | Time |
|---|---|---|---|
| Tighten bulb/socket tab | $0 | $100–$250 | 5–10 min |
| Check/tighten fixture wires | $0–$5 (new nuts) | $150–$350 | 20–45 min |
| Check/tighten switch wires | $0–$5 (new nuts) | $150–$350 | 20–45 min |
| Replace faulty light switch | $5–$25 | $180–$400 | 30–60 min |
| Check all junction box splices | $0–$10 (nuts) | $250–$500+ | 1–2 hours |
| Diagnose complex issue | N/A | $150–$250 (initial) | 1–2 hours |
Tips & Prevention
- Regularly check fixture connections: Every few years, when you’re cleaning, gently test those fixture wire nuts, especially in high-vibration spots like near doors or fans. A quick tug can save you a headache.
- Upgrade old switches: If your home’s got really old toggle switches, think about replacing them, especially if they feel “mushy” or make noise. New switches are cheap, and the internals are usually a lot more reliable.
- Use screw terminals: Whenever you’re installing a new switch or outlet, use the screw terminals. They give you a much more secure, dependable connection than the backstab method. A little extra work, sure — but it pays off.
- Inspect bulbs for corrosion: Before you screw in a new bulb, take a quick look at the metal base for corrosion or discoloration. Clean connection, better connection.
- Proper wire stripping: When you’re making connections, strip just enough insulation — about 3/4 inch for most devices. Too much bare wire is a shock hazard; too little gives you a weak connection.
- Don’t overload circuits: If you’re tripping breakers all the time, that’s not just annoying; it means the circuit’s overloaded. That can stress every connection on the line and make flickering more likely.
When to Call a Professional
Look, I’m all for homeowners tackling DIY projects, but there’s a line. If you’ve gone through all these steps — tightened everything, replaced the switch, checked the bulb — and that light is still flickering, or if you’re seeing scorch marks, smelling anything burning, or hearing buzzing from the electrical box, you need to stop. Right now. That’s when you pick up the phone and call a licensed electrician. They’ve got the right tools and the know-how to track down deeper problems, like a failing circuit breaker, a partially severed wire inside the wall, or an issue with your home’s main electrical service. Don’t fool around with those signs; electrical fires aren’t something you shrug off, and your safety — and your home’s safety — isn’t worth the gamble.
Related Articles
Keep troubleshooting with these hand-picked guides from FixlyGuide:
- Why Does Only One Room Have Flickering Lights? The Real Culprit — Flickering lights in a single room often point to a localized electrical issue, frequently a loose connection in a light fixture or switch.
- Why Does Only One Room Have Flickering Lights? The Real Culprit — Flickering lights in a single room often point to a localized electrical issue, ranging from a loose bulb to a faulty switch or wiring.
- Why Does Only One Room Have Flickering Lights? The Real Culprit — Flickering lights in a single room often point to a localized electrical issue, not a whole-home problem, making diagnosis and repair simpl…
- Why Does Only One Room Have Flickering Lights? The Real Culprit — Flickering lights in a single room often point to a localized electrical issue, frequently a loose connection, easily diagnosed and repaire…
- Why Does Only One Room Have Flickering Lights? The Real Culprit — Flickering lights in a single room often point to loose connections within that specific circuit, a quick diagnostic fix for most homeowner…
- The Hidden Culprit Behind Your Fuzzy Table Saw Cuts (It's Not Just the Blade!) — Fuzzy table saw cuts and tearout are frustrating, but often the problem isn't just your blade; hidden factors like feed rate, blade height,…
What should this project cost?
Enter your project details for a realistic cost range before you call anyone.
Outlet and switch work usually $150–$400; panel upgrades commonly $1,800–$4,200.
- Regional adjustment
- National average
- Labor share (typical)
- ~$709
- Quotes to collect
- 3 written estimates
Educational estimate based on national averages — not a binding quote. Always confirm with written local estimates.
Fixly Project Decision Box
- DIY difficulty
- Professional Recommended
- Estimated time
- Diagnosis 1–2 hours
- Cost level
- Moderate
Main tools / materials
- Non-contact voltage tester
- Outlet tester
- Flashlight
When to stop and call a pro
- Burning smell, scorch marks, or a warm outlet or switch plate
- A breaker that trips again right after being reset
- Any work inside the service panel
- Aluminum wiring or cloth-insulated wiring
Need professional help?
Talk to a Licensed ElectricianFrequently asked questions
Why would a brand new light bulb flicker?+
Even a brand new bulb can flicker if the electrical connection isn't solid. The problem is usually a loose wire at the light fixture or the wall switch, not an issue with the bulb itself. The bulb isn't getting consistent power, causing the flicker.
Can a bad light switch cause a light to flicker?+
Absolutely. Over time, the internal contacts in a light switch can wear out or corrode, leading to an intermittent connection. This inconsistent flow of electricity will definitely make your light flicker, even with a new bulb.
Is a flickering light dangerous?+
A flickering light is often a sign of a loose electrical connection. While not always immediately dangerous, loose connections can generate heat, which is a fire hazard if left unaddressed. It's best to troubleshoot and fix the issue promptly.
How do I check for a loose wire in my light fixture?+
First, cut power at the breaker. Then, remove the fixture's cover and gently tug on each wire where it enters the wire nuts. If any wire slides out easily, it's loose. Re-strip the wire, twist it securely with the others, and re-cap with a fresh wire nut.
Can I fix a flickering light myself?+
Many flickering light issues, like loose bulbs or simple wiring connections at the fixture or switch, are moderate DIY fixes. However, always ensure the power is off at the breaker and if you're uncomfortable or can't find the source, call a licensed electrician.
What's a 'backstab' connection and why is it bad?+
Backstab connections are wires pushed into small holes on the back of a switch or outlet. They're quick but notorious for not providing a secure connection, often loosening over time and leading to issues like flickering or arcing. Always prefer using the screw terminals.
What if my flickering light is also making a buzzing noise?+
A buzzing sound along with flickering often indicates a more serious issue, such as a loose connection creating an arc, or an overloaded circuit. This warrants immediate attention and possibly calling an electrician, as it could be a fire risk.
When should I call an electrician for a flickering light?+
Call an electrician if you've tried basic troubleshooting steps without success, if you notice burning smells, scorch marks, or buzzing sounds, or if you're uncomfortable working with electricity. Deeper problems require professional diagnosis and repair.
Can LED bulbs cause flickering?+
Sometimes, yes. Older dimmer switches or circuits not designed for the low wattage of LEDs can cause them to flicker. Also, cheap LED bulbs can sometimes flicker due to internal driver issues. However, if multiple bulbs flicker, the wiring is the more likely culprit.
Why does only one light flicker in my house?+
If only one light flickers, it usually means the problem is localized to that specific light's circuit path. This could be a loose connection in the fixture, the wall switch controlling it, or a specific wire run to that light, rather than a whole-house electrical issue.
Discussion
Loading comments…