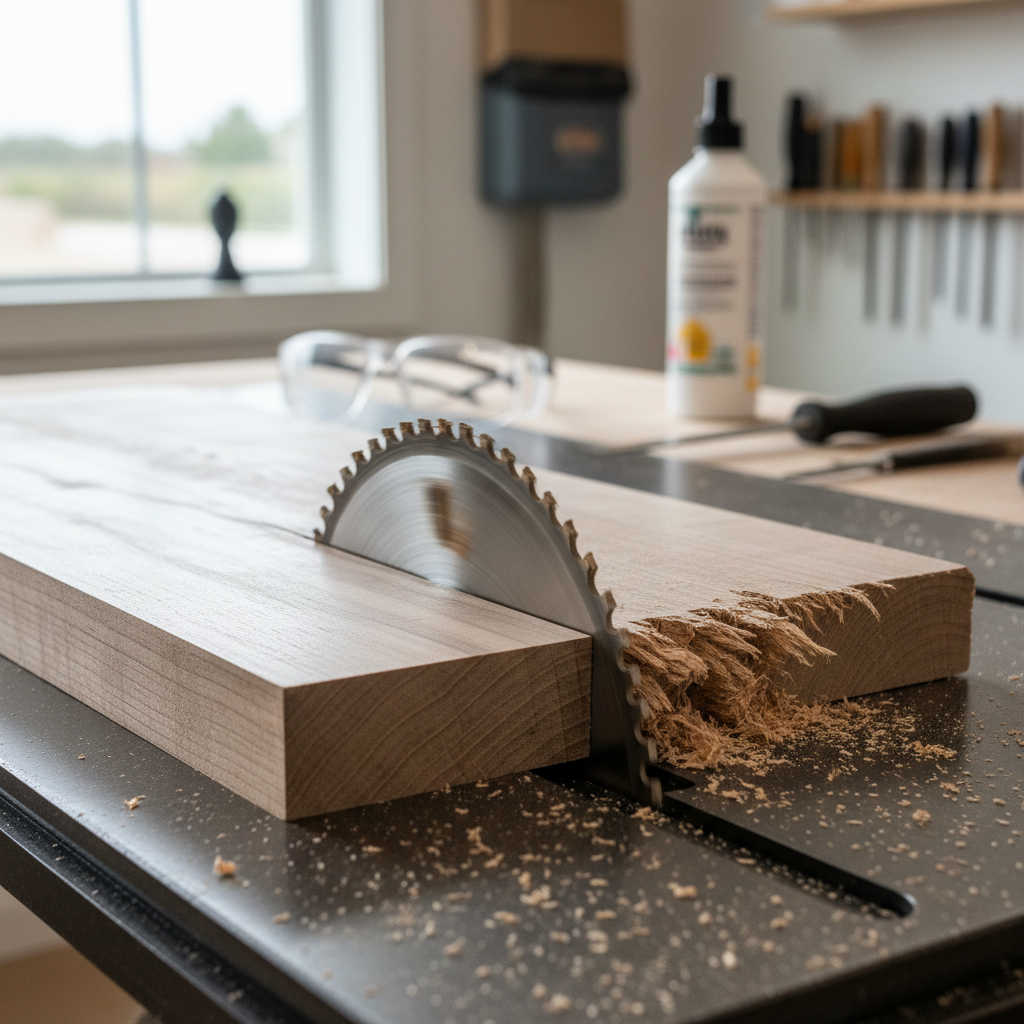
- Dull or Dirty Blade: Gummy buildup or worn carbide tips are the usual suspects. The blade’s not cutting clean; it’s ripping.
- Incorrect Blade Type: Using a coarse ripping blade for delicate crosscuts or sheet goods. You need the right tooth count and grind for the job.
- Improper Blade Height: Too low turns it into a scraping action; too high raises the tearout risk at the exit point.
- Too Fast Feed Rate: Pushing the stock faster than the blade can clear chips and slice the fibers cleanly.
- Lack of Workpiece Support: Sagging material or poor hold-down can cause vibration and lousy cuts.
General remodeling · Renovation planning
| Project category | General remodeling |
|---|---|
| Problem type | Renovation planning |
| Trade required | General contracting |
| Urgency | Planned project |
| Safety risk | Low safety risk |
| DIY suitability | Pro recommended |
| Cost category | Major investment |
| Typical timeline | Design and permitting often 2–4 months before work starts |
| Contractor type | General contractor |
Repair option
Phase the work and fix the building envelope first.
Replacement option
Full renovation with permits, design, and a general contractor.
Common causes
- Space no longer fits how the household lives
- Resale preparation
- Deferred maintenance stacking up
Relevant tools:project cost estimatorcompare quoteshome improvement material prices
Published August 25, 2026Last updated August 25, 2026
The shop list for this build
Hand-picked tools & materials — shop on Amazon, ships fast.
Hand tools & jigs
· Layout, joinery, and the everyday workbench essentials.- Shop on AmazonBrass Brush
- Shop on AmazonStraightedge or Dial Indicator
Why it's here: for fence alignment
- Shop on AmazonPush Stick/Push Block
- Shop on AmazonOutfeed Rollers/Stand
Why it's here: for long workpieces
- Shop on AmazonSafety Glasses
- Shop on AmazonHearing Protection
Materials & hardware
· Lumber, fasteners, glue, abrasives — the consumables.- Shop on AmazonTable Saw Blade Cleaner· 1 bottle
- Shop on AmazonCombination Table Saw Blade (40-60T)
Why it's here: if current blade is dull or incorrect
- Shop on AmazonCrosscut/Plywood Table Saw Blade (60-80T)
Why it's here: optional, for delicate cuts
- Shop on AmazonScrap Plywood/MDF
Why it's here: for zero-clearance inserts or sacrificial fence
Quick Answer
Fuzzy table saw cuts or extra tearout usually mean you’ve got a dull blade, or the wrong blade for the material. But that’s only half the story. Blade height, feed rate, and how well the workpiece is supported matter just as much. Fix those, and you can clean up your cuts fast — less sanding, less swearing.
The Problem
I’ve seen this one a hundred times. A homeowner calls me, aggravated, saying their brand-new table saw — or the old faithful one they’ve had forever — is leaving cuts that look like a beaver got after ’em. Fuzzy. Splintered. Bits of wood hanging on for dear life. They’ve swapped blades, maybe even splurged on a pricier one, and still no dice. They’re about ready to pitch the whole machine out the shop door. “What gives, pro?” they ask.
Usually? It’s not just one thing. It’s a few little things stacking up, and they gang up on you. Like trying to bake a cake and forgetting the baking powder, then setting the oven too low. You can fix one part and still wind up with junk.
How It Works
To figure out why your table saw leaves fuzzy cuts, you’ve gotta understand what that blade’s actually doing as it spins through the wood. Think of each tooth like a tiny chisel. As the blade turns, those chisels are supposed to shear the fibers cleanly.
On a typical 10-inch blade spinning at, say, 3,450 RPM, each tooth is flying. Fast enough to make your head spin. When everything’s dialed in — sharp blade, right tooth geometry for the material, steady feed — the fibers get cut. They don’t get ripped out.
There are two main moments here: the first bite, and the exit. Tearout, that splintering mess you hate seeing, usually shows up at the exit point. Most often on the underside of the workpiece, though tricky grain can make a mess on top too. The teeth lift and tear the fibers instead of slicing them cleanly. Add in the blade’s upward pull, and it can pry those fibers loose before they’re fully severed. If the blade’s dull, or just wrong for the job, those “chisels” turn into blunt little hammers. They crush instead of cut. If the blade isn’t high enough, the tooth angle goes bad and it starts scraping more than slicing. Push the stock too fast, and the blade can’t clear the waste. Then you get friction, burning, ugly edges. It’s a balancing act. Miss one setting and the whole cut goes sideways.
Step-by-Step Fix
Before you start blaming the saw or buying yet another blade, here’s how I handle it on a job.
-
Check the Blade's Condition – The most obvious culprit
- Kill the power and unplug the saw. Always. Then look at the blade. Is it dirty? Resin buildup from softwoods or sap can make a sharp blade act dull real quick. Clean it with a proper blade cleaner and a brass brush. I’ve seen gunk cut a blade’s performance by 30-40%. If the cut still comes out fuzzy, run your fingernail over the carbide tips. Feel any nicks or chips? Does it just feel tired? Then it’s time for sharpening or a replacement. Even the good blades wear out. For general ripping and crosscutting, a 40-tooth combination blade is a solid starting point for most homeowners, but more teeth usually means a cleaner cut on plywood or delicate stock.
-
Verify Blade Type and Tooth Count – Matching the tool to the task
- Using a ripping blade (fewer, larger teeth, typically 24-30T) for crosscutting plywood? Or a fine-toothed crosscut blade (60-80T) for thick hardwood ripping? That’s trouble. Each blade’s built for a different job. Ripping blades are aggressive and clear waste fast through long grain. Crosscut blades have more teeth, often with a different grind (like ATB – Alternate Top Bevel), so they score the fibers cleaner across the grain. Using the wrong one is like hammering a nail with a screwdriver. It might move it, but it sure won’t be pretty. If you’re cutting sheet goods like melamine or veneered plywood, a zero-clearance insert isn’t optional — it helps a ton with tearout. I keep an 80-tooth plywood blade on the truck for these jobs; makes a night-and-day difference.
-
Adjust Blade Height – Not too high, not too low, just right
- This is one a lot of folks miss. For most cuts, you want the blade set so the bottom of the gullet (the space between the teeth) sits just below the top of your workpiece. That means the tooth should clear the wood by about 1/8 to 1/4 inch — or about one full tooth above the surface. Why? Because that angle lets the tooth slice better and hits less material at once, which cuts down on tearout. Too low, and the blade scrapes instead of cuts. Too high, and you’ve got more blade exposed than you need, plus a bigger kickback risk. On my own saw, I mark the sweet spot on the adjustment so setup goes quicker.
-
Optimize Feed Rate – Let the blade do the work
- Are you hustling the cut? That’s a common mistake. If you shove the wood through too fast, the blade can’t keep up. You’ll hear the motor strain or the cut get louder — that’s your clue. Keep the feed smooth and steady. Softwoods can usually move a little quicker. Dense hardwoods need you to slow down and give the blade time. Think slicing bread, not chopping firewood. If you see burning on the edges, that usually means you’re feeding too slow and making friction, or the blade’s dull. You’ll find the right pace with a little practice. Last year I was helping a guy in Marietta with some cherry shelving, and he was feeding it like it was pine. We backed him off a bit, and the burning stopped right away.
-
Check Your Fence and Miter Gauge – Alignment is king
- If the fence isn’t dead parallel to the blade, you’ll get binding, friction, and fuzzy cuts. Check it with a dial indicator or a good straightedge. The fence should be parallel to the blade, or have a tiny bit of "toe-out" away from the exit side of the blade, maybe 0.002 to 0.005 inches, to keep it from pinching. Same deal with the miter gauge — make sure it’s set to 90 degrees, or whatever angle the cut calls for. Any little misalignment can shove the wood into the blade the wrong way and tear the fibers up. I check mine with a setup block every couple months, and anytime the saw takes a bump.
-
Support the Workpiece – Preventing sag and vibration
- Bad support causes all kinds of grief. If the board sags off the end of the table, it can twist or chatter as it goes through, and that gives you inconsistent pressure and fuzzy edges. Use outfeed supports for long boards. Make sure the front edge is flat on the table. For sheet goods, an outfeed table or rollers helps a lot. A zero-clearance insert can also cut tearout way down on the underside by backing up the fibers right at the blade. Simple fix. Big payoff. Especially on thin veneers.
-
Consider a Scoring Cut – For stubborn tearout
- Still getting tearout on delicate stuff, especially plywood or melamine? Try a scoring cut. Set the blade shallow, just barely nicking the surface — around 1/32 to 1/16 inch deep. Make the first pass. Then raise the blade to full cutting height and do the final pass. That first light cut scores the fibers so the main cut doesn’t rip them apart. Handy trick for crosscutting plywood on a table saw without a scoring blade.
-
Evaluate Your Wood – Grain patterns matter
- Sometimes the saw isn’t the problem. The wood is. Wild grain, burls, figured stock — that stuff can tear out no matter how careful you are. For those pieces, you might need a sacrificial fence, a backer board, or a different tool altogether, like a track saw or even a hand saw for the final cut. Take a second and look at the material before you cut. Work with the grain if you can. Against it? You’re asking for grief.
Common Causes
- Dull or Dirty Blade: Gummy buildup or worn carbide tips are the usual suspects. The blade’s not cutting clean; it’s ripping.
- Incorrect Blade Type: Using a coarse ripping blade for delicate crosscuts or sheet goods. You need the right tooth count and grind for the job.
- Improper Blade Height: Too low turns it into a scraping action; too high raises the tearout risk at the exit point.
- Too Fast Feed Rate: Pushing the stock faster than the blade can clear chips and slice the fibers cleanly.
- Lack of Workpiece Support: Sagging material or poor hold-down can cause vibration and lousy cuts.
- Misaligned Fence/Miter Gauge: If your guides aren’t true, the wood binds or twists, and that’s where tearout starts.
Common Mistakes
- Ignoring Blade Maintenance: A lot of DIYers run blades until they’re smoking. Clean them regularly, and get them sharpened when they start slipping. It’s a whole lot cheaper than burning through new blades all the time.
- One Blade for Everything: Thinking one combination blade should handle every cut on every material. It won’t. You want at least a decent ripping blade (24-40T) and a good crosscut/plywood blade (60-80T).
- Pushing Instead of Guiding: Forcing the wood through the blade. Let the motor and the blade do the work. Your hands are there to steer, not shove.
- No Outfeed Support: Letting long boards hang off the back of the saw unsupported. That’ll pinch the blade, bind the cut, and can even kick back. Use rollers or a stand.
- Skipping Setup Checks: Assuming the fence is always parallel or the miter gauge is always at 90 degrees. Give it 30 seconds before an important cut. Saves a pile of aggravation later.
- Underestimating Wood Movement: Not accounting for internal stress in the lumber, especially fresh stock, which can pinch the blade mid-cut and leave you with burning and tearout.
Cost & Time Breakdown
| Task | DIY Cost | Pro Cost (if applicable) | Time |
|---|---|---|---|
| Clean Blade | $5–$15 | N/A | 10–15 minutes |
| New Standard Blade (40T-60T) | $30–$70 | N/A | 5 minutes (install) |
| New Specialty Blade (80T Plywood) | $60–$120 | N/A | 5 minutes (install) |
| Professional Blade Sharpening | $15–$30/blade | N/A | 1–2 days (turnaround) |
| Zero-Clearance Insert (DIY) | $5–$20 (material) | N/A | 30–60 minutes |
| Table Saw Setup/Alignment | $0 | N/A | 30–60 minutes |
Tips & Prevention
- Clean Blades Regularly: A little blade cleaner and a brass brush after each big project keeps resin from building up and helps the blade stay sharp. It’ll add years to the life of the blade, plain and simple. Don’t let that gunk harden on there.
- Use Zero-Clearance Inserts: Especially for crosscuts and sheet goods. They back up the fibers right at the blade, which cuts tearout way down on the bottom side. You can make one from plywood or MDF for about $5.
- Invest in Quality Blades: A $30 blade from the big box store will cut. Sure. But a $70–$100 blade from a reputable brand (like Freud, Forrest, or Ridge Carbide) will cut better and stay sharp longer. Best money you can spend on clean cuts.
- Support Your Work: Outfeed table, rollers, a couple sawhorses — whatever you’ve got. Just don’t let long or wide pieces hang out there unsupported. It steadies the cut and helps prevent binding.
- Practice Good Technique: Keep the feed rate controlled. Don’t rush, and don’t stop halfway through unless you’ve got no choice. Let the saw come up to full speed before the wood hits the blade.
- Crosscut with a Sacrificial Fence: When you’re crosscutting delicate material with a miter gauge, clamp scrap to the face of the gauge and use it as a sacrificial fence. It supports the fibers at the exit of the cut and keeps tearout in check. Works like a charm.
When to Call a Professional
Look, I’m all for DIY, but sometimes you hit a wall. If you’ve cleaned the blade, put on a new one, dialed in the saw, adjusted your feed rate, and you’re still getting lousy results — especially burning or kickback — it might be time to bring in a pro. A qualified table saw technician can check deeper issues like a warped table, bent arbor, or worn bearings, and those are way outside most homeowners’ tools and know-how. These aren’t quick fixes. If you think the saw itself is the problem, don’t keep forcing it; you could get hurt or do more damage to the machine.
FAQ
Why does my table saw burn the wood instead of cutting cleanly?
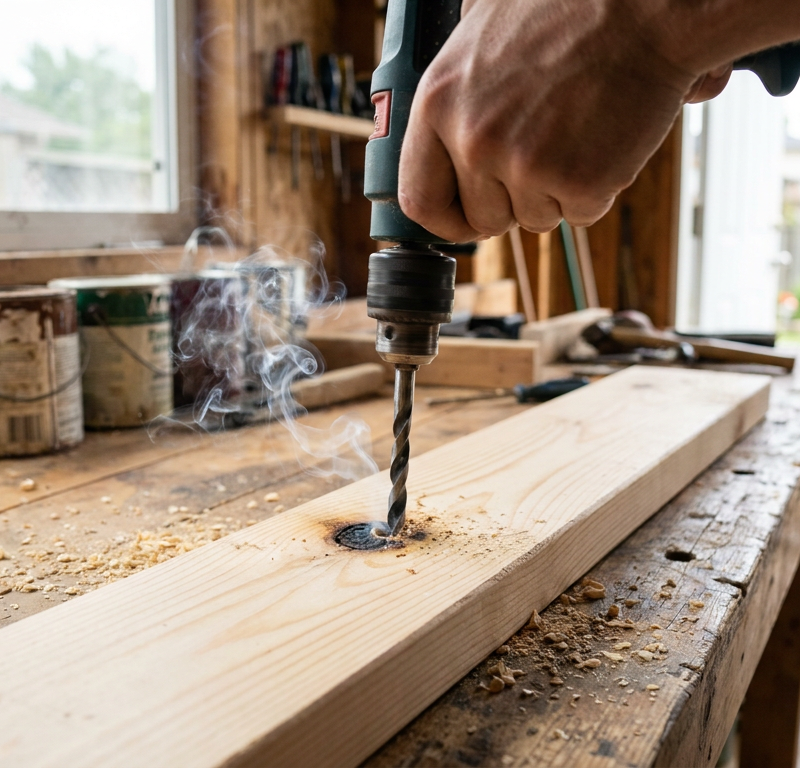
Burning usually means too much friction. That can come from a dull blade that isn’t clearing chips well, a feed rate that’s too slow and lets the blade rub, or a fence that’s out of line and pinching the wood against the blade. Start with blade sharpness and alignment.
How often should I sharpen my table saw blade?
It depends on how much you use it and what you’re cutting. For an average DIYer cutting hardwood a few times a month, a professional sharpening every 6-12 months might be enough. If you’re cutting a lot of resinous softwoods or sheet goods, you may need to clean it more often and sharpen every 3-6 months. Trust your eyes and ears: if the cuts are getting rougher or the motor sounds labored, it
Related Articles
Keep troubleshooting with these hand-picked guides from FixlyGuide:
- The 3 Tiny Screws That Keep Your Cabinet Doors From Closing — If your cabinet doors are crooked, sagging, or won't close, the problem isn't the wood—it's the three tiny, often-ignored adjustment screws…
- The #1 Mistake Homeowners Make Installing Floating Shelves (and How to Fix It) — Discover the most common error DIYers make installing floating shelves into drywall and how to ensure your shelves are secure and level.
- That New Grout Is Already Cracking? Here’s the Hidden Cause — Cracked grout weeks after a renovation is often a sign of a deeper issue with your subfloor or tile installation, not just a problem with t…
- The Giant Drywall Hole: 3 Hidden Mistakes That Make Fixing It Worse — Don’t just spackle over that huge drywall hole; learn the right way to repair it and avoid common mistakes that lead to an even bigger head…
- The #1 Mistake Homeowners Make Installing Floating Shelves (and How to Fix It) — Discover the crucial mistake most homeowners make when installing floating shelves into drywall, leading to sagging and damage, and learn t…
- The #1 Mistake Homeowners Make When Sealing a Deck (And How to Fix It) — Discover the crucial, often-missed step in deck sealing that prevents premature wear and water damage, ensuring your wood deck lasts for ye…
What should this project cost?
Enter your project details for a realistic cost range before you call anyone.
Cost depends heavily on which system turns out to be the source.
- Regional adjustment
- National average
- Labor share (typical)
- ~$1,620
- Quotes to collect
- 3 written estimates
Educational estimate based on national averages — not a binding quote. Always confirm with written local estimates.
Get the print-ready PDF of this guide
A clean, ad-free, printable version you can keep on your phone or pin to the workshop wall. Free with a FixlyGuide account.
- Print-optimized layout
- Tools, materials & every step included
- Saved to your account
Recommended for DIYers & woodworkers
Sponsored
The Top 20 Tools for Workshops of Any Budget
No stationary machines or power tools required — plus 3 fundamental tools that can't be bought at any price.
Get the free guide
Ted's Woodworking — The #1 Woodworking Resource
Detailed instructions, dimensioned drawings, materials & cutting lists, and 3D schematics for every skill level.
See the plansSponsored: links above are affiliate links. FixlyGuide may earn a commission on qualifying purchases — at no extra cost to you.
Frequently asked questions
Why does my table saw burn the wood instead of cutting cleanly?+
Burning usually indicates too much friction. This can be caused by a dull blade that isn't clearing chips effectively, a feed rate that's too slow causing the blade to rub, or a misaligned fence that's pinching the wood against the blade. Check blade sharpness and alignment first.
How often should I sharpen my table saw blade?+
It depends entirely on how much you use it and what you cut. For an average DIYer cutting hardwoods a few times a month, a professional sharpening every 6-12 months might be sufficient. If you cut a lot of resinous softwoods or sheet goods, you might need to clean it more often and sharpen every 3-6 months. Trust your eyes and ears: if the cuts are getting rougher or the motor sounds labored, it's time.
What is a zero-clearance insert and do I need one?+
A zero-clearance insert is a plate that fills the gap around your table saw blade, providing support right at the cut line. This dramatically reduces tearout on the bottom edge of your workpiece, especially important for plywood, melamine, and delicate crosscuts. I recommend them for anyone serious about clean cuts.
Can I use the same blade for ripping and crosscutting?+
While a good combination blade (around 40-50 teeth) can handle both, you'll get better results with dedicated blades. A ripping blade (24-30T) is faster for long grain, and a crosscut blade (60-80T) gives cleaner edges across the grain. If you do a lot of both, having two blades is a smart move.
How does blade height affect cut quality?+
Setting the blade height so one full tooth (or about 1/8 to 1/4 inch) clears the top of the workpiece optimizes the cutting angle. Too low, and the teeth scrape; too high, and you increase the risk of kickback and tearout at the exit point. It's a sweet spot for clean, safe cuts.
My table saw fence isn't parallel. How do I fix it?+
Most table saw fences have adjustment screws or bolts to allow for alignment. Consult your saw's manual; you'll typically loosen a few bolts, use a reliable straightedge or dial indicator to make it parallel to the miter slot (and thus the blade), then retighten. Small adjustments make a huge difference.
What's the best way to prevent kickback when cutting?+
Always use a push stick or push block, maintain firm and consistent downward pressure, keep your fence parallel, use a splitter or riving knife, and ensure proper blade height and feed rate. Never stand directly behind the workpiece, and always make sure you have solid footing. Don't rush, and stay focused.
Why do some woods tear out more than others?+
Woods with interlocking, wild, or highly figured grain (like cherry, maple burls, or some exotics) are naturally more prone to tearout because their fibers don't run in a straight, predictable direction. Even with perfect technique, you might need to use scoring cuts or different tools for these challenging materials. It's just their nature.
Does a faster blade RPM mean cleaner cuts?+
Not necessarily. While sufficient RPM is needed for the blade to perform, excessive speed without proper feed rate can lead to burning due to increased friction. The key is matching the blade's RPM, tooth count, and your feed rate to the specific wood type for optimal clean cutting.
Discussion
Loading comments…