
Tools & materials you'll need
Affiliate linksAs an Amazon Associate FixlyGuide earns from qualifying purchases — at no extra cost to you. Prices and availability are accurate as of publication and subject to change.
Quick Answer
The most common mistake homeowners make when sealing a wood deck is failing to properly clean and prepare the surface, leading to poor sealant adhesion and a short-lived finish. The key to a long-lasting deck seal is meticulous cleaning to remove dirt, mildew, and old, failing sealant, followed by thorough drying. Only then should a fresh coat of high-quality deck sealant be applied, ensuring deep penetration and robust protection against the elements.
The Problem
Your beautiful wood deck, a centerpiece for outdoor living, takes a constant beating from sun, rain, snow, and everyday foot traffic. Over time, this exposure breaks down the protective sealant, leaving the wood vulnerable. You might notice the wood turning gray, feeling rough to the touch, or absorbing water rather than beading it up. These are clear signs that the existing sealant has failed and your deck is unprotected. Ignoring these warnings can lead to serious issues like warping, rotting, splintering, and ultimately, costly repairs or premature deck replacement. Many homeowners rush to reapply sealant, only to find the new coat peeling or failing within a year because they skipped critical preparation steps — the very mistake we're here to help you avoid.
How It Works
Wood, at its core, is an organic material that naturally expands and contracts with changes in moisture and temperature. When unprotected, water penetrates the wood fibers, causing them to swell. As the wood dries, it shrinks. This constant cycle of swelling and shrinking stresses the wood, leading to cracks, splinters, and warping. Moreover, moisture creates an ideal environment for mold, mildew, and algae to thrive, further degrading the wood and making it slippery.
A deck sealant, whether it's a penetrating oil-based product or a film-forming water-based one, works by creating a barrier that repels water and UV radiation. Oil-based sealants typically soak into the wood pores, strengthening the fibers and resisting moisture from within, while often enhancing the natural wood grain. Water-based sealants usually form a protective film on the surface, offering excellent UV resistance and a more uniform finish. Both types aim to prevent water ingress, inhibit fungal growth, and block harmful UV rays that cause graying and breakdown of wood lignin.
The effectiveness of any sealant hinges entirely on its ability to bond with the wood. If dirt, grime, mildew, or deteriorated old sealant are present on the surface, the new sealant cannot properly adhere. It's like trying to paint over peeling paint without scraping it first – the new coat will only be as strong as the weakest layer beneath it. This is why thorough cleaning, and sometimes stripping, is not just recommended, but absolutely essential for a long-lasting, protective seal. It ensures the new sealant can penetrate deeply into clean, open wood pores or form a strong, uniform film on a pristine surface, maximizing its protective life and keeping your deck looking its best for years.
Step-by-Step Fix
Resealing your wood deck for lasting protection involves several critical steps, primarily focusing on meticulous preparation.
- Clear the Deck Completely — Remove everything.
- Take off all furniture, planters, grills, and any other items from your deck. This frees up the entire surface for cleaning and sealing, preventing uneven application.
- Inspect for Damage and Make Repairs — Address issues before sealing.
- Walk across your deck, checking for loose boards, protruding nails or screws, splinters, and rotten sections.
- Tighten loose fasteners, replace damaged boards (ensure they are the same wood type and adequately dried/aged), and sand down any large splinters.
- Safety Note: Wear gloves when handling wood and tools. If replacing large sections or structural components, consider a professional to ensure safety and integrity.
- Clean the Deck Thoroughly — The most crucial step.
- Sweep the deck vigorously to remove loose dirt, leaves, and debris.
- Mix a deck cleaner solution according to the manufacturer's instructions (often a bleach-free oxygenated cleaner for general cleaning, or a specific deck brightener).
- Wet the deck surface thoroughly with a garden hose.
- Apply the deck cleaner with a pump sprayer or a stiff-bristle brush, working on small sections at a time (e.g., 10x10 ft).
- Allow the cleaner to dwell for the recommended time (usually 10-15 minutes), but do not let it dry on the wood. Re-wet if necessary.
- Scrub the deck surface with a stiff-bristle brush, moving with the wood grain. Pay extra attention to areas with mildew or stubborn dirt.
- If this doesn't work: For stubborn old sealants or severe graying, consider using a chemical deck stripper. Follow all safety precautions, including wearing protective eyewear and gloves, and testing in an inconspicuous area first. Deck strippers are powerful and can damage plants, so cover nearby vegetation.
- Rinse the Deck Completely — Remove ALL cleaning residue.
- Rinse the cleaned section thoroughly with a garden hose or a pressure washer on a low setting (1000-1200 PSI max, holding wand 12-18 inches from the surface).
- Start rinsing from one end and move to the other, making sure no suds or cleaner residue remains. Residue can interfere with sealant adhesion.
- Rinse surrounding plants and surfaces that may have come into contact with the cleaner.
- Safety Note: Use a pressure washer carefully. Too high a pressure or holding it too close can damage wood fibers, leaving permanent marks. Avoid aiming directly at deck railings or house siding.
- Allow the Deck to Dry Fully — Patience is key.
- This is often overlooked! The deck must be bone dry before sealing. This can take 2-3 days, depending on humidity, temperature, and sun exposure.
- Perform a "splash test": Sprinkle a few drops of water on different parts of the deck. If the water beads up, the old sealant is still present or the wood isn't dry enough. If it soaks in, the deck is ready.
- Ensure no rain is expected for at least 24-48 hours after the final sealant application.
- Tape Off Adjacent Surfaces — Protect your home.
- Use painter's tape and plastic sheeting to protect siding, trim, plants, and any other surfaces adjacent to the deck that you don't want to get sealant on.
- Apply the First Coat of Sealant — Work in manageable sections.
- Choose a high-quality deck sealant (oil-based for penetrating protection, water-based for film-forming and UV resistance). Read product instructions carefully.
- Stir the sealant thoroughly before and during application.
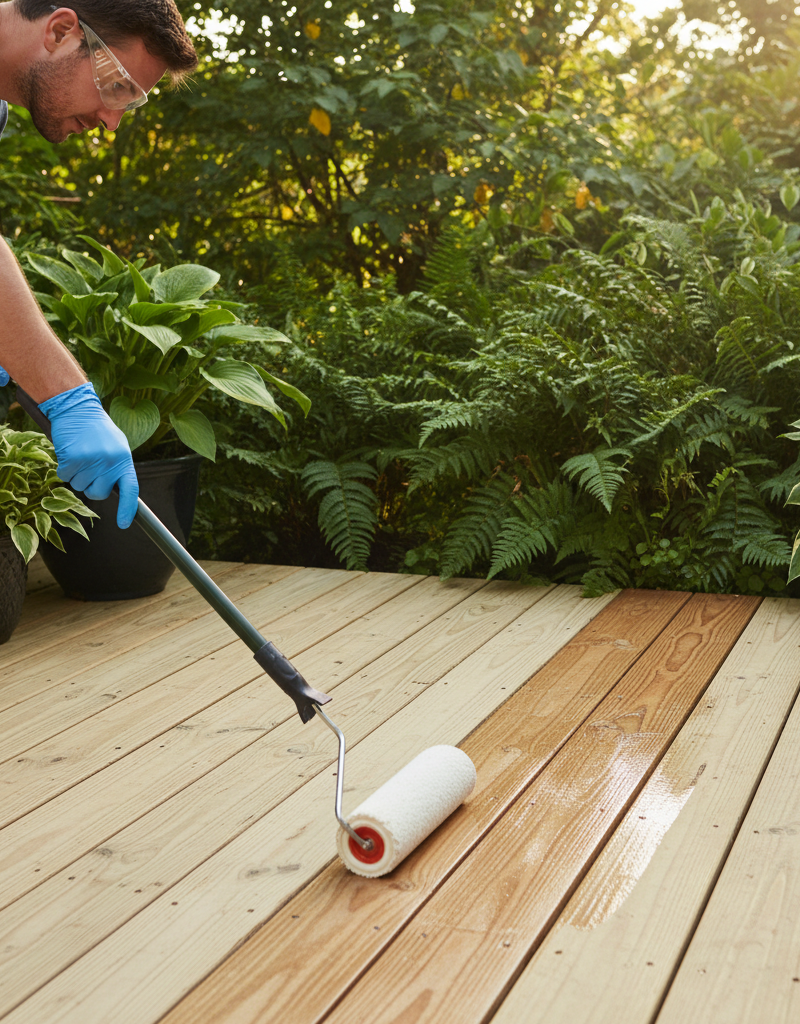
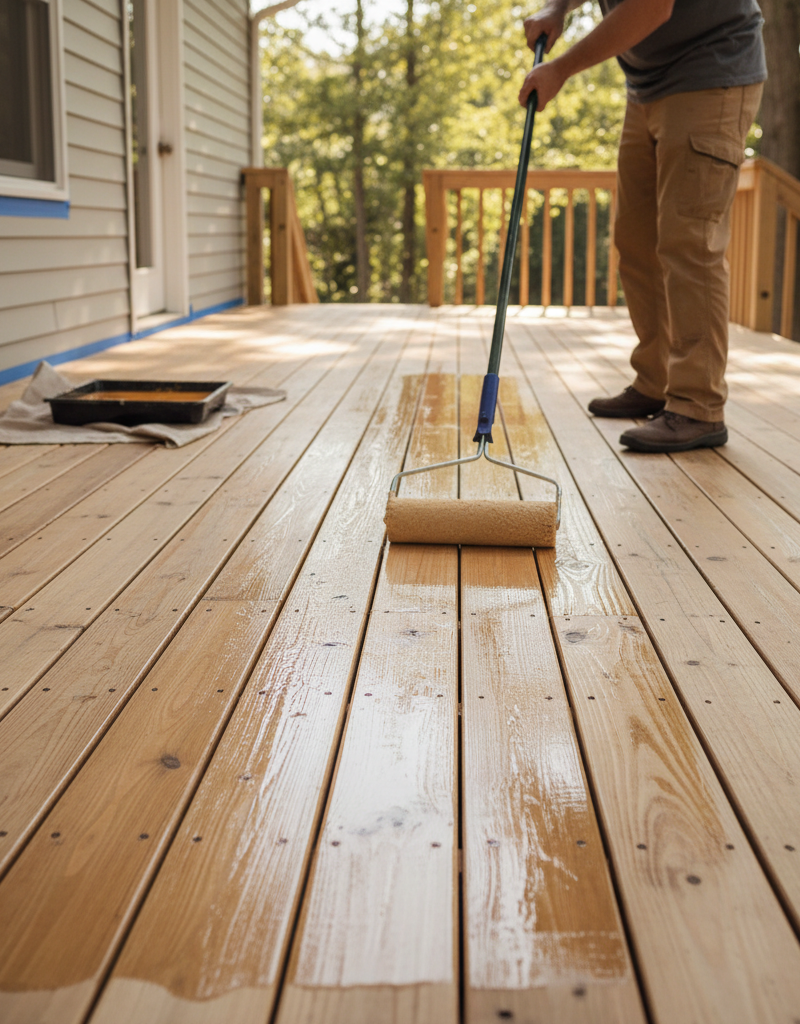
- Apply the sealant using a roller, pad applicator, or high-quality brush. Work along 2-3 boards at a time, moving from one end to the other.
- Follow the wood grain. Avoid applying too thickly, which can lead to pooling and uneven drying. Back-brush any puddles or drips.
- Pro Tip: For railings, vertical surfaces, and tight corners, use a brush. A pad applicator is often best for smooth, even coverage on deck boards.
- If you get sealant on unwanted surfaces: Clean immediately with the recommended solvent (water for water-based, mineral spirits for oil-based) before it dries.
- Allow Proper Drying Time Between Coats (If Applicable) — Consult product instructions.
- Some sealants require a second coat for optimal protection and durability.
- If a second coat is recommended, allow the first coat to dry according to the manufacturer's specified recoat window (usually 4-12 hours). Applying too soon can cause bubbling or poor adhesion.
- Apply the Second Coat (If Needed) — Repeat step 7.
- Apply the second coat thinly and evenly, just as with the first.
- Ensure full coverage, especially on end grain and areas that absorb sealant quickly.
- Allow Full Curing Time — Patience prevents problems.
- Do not place furniture back on the deck or allow heavy foot traffic for at least 24-48 hours, or as long as the product instructions specify.
- The sealant needs time to fully cure and achieve its maximum hardness and protective qualities. Premature use can damage the finish.
- Clean Up — Dispose of materials properly.
- Clean brushes and rollers with the appropriate solvent (water for water-based sealants, mineral spirits for oil-based).
- Dispose of rags soaked in oil-based sealants properly by laying them flat to dry on a non-combustible surface outdoors or immersing them in water in a sealed metal container to prevent spontaneous combustion.
Common Causes
The primary culprit behind a failing deck seal is simply weather exposure. UV radiation from the sun breaks down the chemical bonds in the sealant, causing it to fade, crack, and lose effectiveness. Rain and snow introduce moisture, which can penetrate compromised areas, leading to wood rot and mildew growth. Temperature fluctuations cause the wood to expand and contract, stressing the sealant and leading to micro-fissures.
Another significant factor is insufficient surface preparation during the previous application. If the deck wasn't thoroughly cleaned, stripped of old failing sealant, or adequately dried before sealing, the new sealant couldn't properly adhere, leading to premature peeling and flaking.
Improper sealant choice for the wood type or climate can also contribute. Some woods absorb sealants differently, and certain sealants are better suited for specific weather conditions (e.g., extreme sun or heavy precipitation). Finally, lack of regular maintenance, such as annual cleaning and inspecting for wear, means small issues aren't caught early, allowing the sealant to degrade further.
Common Mistakes
Here are common mistakes homeowners make when sealing a deck and how to avoid them:
- Not Cleaning Thoroughly Enough: Many DIYers underestimate the importance of deck cleaning. Simply sweeping or hosing down isn't enough. Old, embedded dirt, grime, mildew, and especially old failing sealant must be removed. Always use an appropriate deck cleaner and scrub vigorously.
- Sealing a Wet Deck: Applying sealant to damp wood traps moisture, which can lead to bubbles, peeling, and mildew growth underneath the new finish. Ensure the deck is bone dry, often needing 2-3 days of clear weather.
- Applying Too Much Sealant: Over-applying sealant, particularly penetrating oil-based products, can result in a sticky, uneven finish that doesn't cure properly and can even be a slip hazard. Excess sealant can also create a film that peels rather than penetrates. Apply thin, even coats, and wipe up any puddles or excess immediately.
- Ignoring Temperature and Humidity: Sealing on extremely hot, cold, or humid days can negatively impact drying and curing times, leading to poor results. Check product instructions for ideal temperature and humidity ranges, typically 50-90°F (10-32°C) with low humidity.
- Using the Wrong Applicator: Using a roller designed for paint on a rough deck, or a cheap, shedding brush, can lead to uneven coverage, streaks, and brush marks. Invest in a high-quality pad applicator or a natural bristle brush for oil-based sealants, synthetic for water-based.
- Skipping the Test Area: Different wood types and previous finishes can react differently to cleaners or sealants. Not testing in an inconspicuous spot means you won't know how it will look or perform until it's too late. Always test cleaners and sealants in a small, hidden area first.
Cost & Time Breakdown
| Task | DIY Cost | Pro Cost | Time |
|---|---|---|---|
| Deck Cleaner/Stripper | $20–$50 | Included | 1–3 hours |
| Deck Sealant (5-gallon pail) | $150–$300 | Included | 3–6 hours |
| Brushes, Rollers, Pads | $30–$75 | Included | — |
| Pressure Washer Rental | $50–$100 (daily) | Included | — |
| Total (DIY) | $250–$525 | $500–$1,500+ | 1–3 days |
Note: Pro cost depends heavily on deck size, condition, and local labor rates. DIY time doesn't include drying days.
Tips & Prevention
- Annual Cleaning: Even if your sealant is still good, clean your deck annually with a mild deck cleaner to remove dirt and mildew. This helps prolong the life of the sealant and keeps the deck looking fresh.
- Regular Inspection: Check your deck for signs of wear and tear, especially "water absorption" (dark spots where water soaks in) or graying, at least once a year. The "splash test" (sprinkle water, if it doesn't bead, it's time to reseal) is a great indicator.
- Reapply Every 2-3 Years: Most deck sealants last 2-3 years, depending on climate exposure and product quality. Don't wait until the wood is severely damaged to reapply.
- Protect Freshly Sealed Deck: Avoid heavy foot traffic or placing heavy furniture on your deck for the first 48-72 hours after sealing to allow the sealant to fully cure.
- Consider Shaded Areas: Areas of your deck exposed to constant sun will likely degrade faster. Consider a sealant with strong UV inhibitors, or even a semi-transparent stain that offers more pigment for UV protection.
- Trim Overhanging Branches: Reducing shade can help your deck dry faster after rain, minimizing mildew growth, but too much sun can also accelerate sealant breakdown. Seek a balance.
When to Call a Professional
While resealing a deck is a manageable DIY project, there are specific situations where calling a professional is highly recommended. If your deck has significant structural damage, such as widespread rot, severely warped boards that compromise stability, or damaged joists and ledger boards, a professional will be able to assess the extent of the damage and perform necessary repairs safely and effectively. Similarly, if your deck is exceptionally large (over 1,000 sq ft) or features complex multi-level designs, intricate railings, or integrated features that make cleaning and sealing challenging, a professional deck restoration company will have the specialized equipment and expertise to ensure a uniform, high-quality finish without streaking or missed spots. They can also advise on the best sealant types for your specific wood and climate conditions, ensuring a longer-lasting result.
FAQ
How often should I reseal my wood deck?
Generally, most wood decks need to be resealed every 2-3 years. However, this can vary based on your climate, the type of wood, the quality of the sealant used, and the amount of sun and rain exposure your deck receives. Perform a "splash test" annually: if water soaks into the wood instead of beading up, it's time to reseal.
What's the difference between deck stain and deck sealant?
Deck sealant primarily provides water repellency and UV protection, often allowing the natural wood grain to show through. Deck stain, on the other hand, contains pigment that colors the wood while also offering protection. Many products are now "stain and sealant in one," combining the benefits of both. Choose based on whether you want to change the wood's color or just protect its natural look.
How long does a newly sealed deck need to dry before I can use it?
Most deck sealants require at least 24-48 hours of drying time before light foot traffic and replacing furniture. However, the sealant typically needs a full 72 hours to a week to achieve its maximum hardness and protective qualities (known as "curing"). Always check the specific manufacturer's instructions for the product you are using.
Can I pressure wash my deck to clean it before sealing?
Yes, a pressure washer can be effective for cleaning a deck, but it must be used with caution. Use a wide-angle nozzle (25-40 degrees) and keep the wand at least 12-18 inches away from the wood surface. Use a low pressure setting (around 1000-1200 PSI) to avoid damaging, splintering, or etching the wood. Always move with the grain of the wood.
What should I do if my deck sealant is peeling after application?
Peeling sealant is almost always a sign of improper surface preparation, often due to applying sealant over old, failing finish, dirt, or damp wood. To fix it, you will need to strip away the peeling sealant, thoroughly clean and brighten the bare wood, allow it to dry completely, and then reapply a new coat of sealant. Skipping the preparation steps will likely lead to the same problem again.
Related Articles
Keep troubleshooting with these hand-picked guides from FixlyGuide:
- The #1 Mistake Homeowners Make When Sealing a Deck (and How to Fix It) — Prevent costly damage and extend your deck's life by avoiding common sealing errors and following a simple, effective resealing process.
- The 3 Hidden Mistakes That Make Your Deck Sealer Fail (And How to Fix Them) — Properly sealing your wood deck protects it from the elements, but common mistakes often lead to early failure. Learn how to reseal your de…
- The #1 Mistake Homeowners Make After Finding Missing Shingles (And How to Fix It Right) — Discover the crucial steps to take after a storm rips shingles from your roof, ensuring a proper, lasting repair and preventing costly futu…
- The 3 Hidden Mistakes That Make Your Deck Sealer Fail (And How to Fix Them) — Resealing your wood deck protects it from weather and extends its life. Learn how to avoid common mistakes for a long-lasting finish and vi…
- The #1 Gutter Mistake You're Making (And 3 Hidden Causes of Overflow) — Overflowing gutters in heavy rain are often a sign of a deeper issue than just debris, leading to potential foundation damage and costly re…
- The #1 Mistake Homeowners Make When Caulking a Bathroom Sink (And How to Fix It) — Discover the most common caulk mistake homeowners make around bathroom sinks and follow simple steps to achieve a lasting, watertight seal.
Get the print-ready PDF of this guide
A clean, ad-free, printable version you can keep on your phone or pin to the workshop wall. Free with a FixlyGuide account.
- Print-optimized layout
- Tools, materials & every step included
- Saved to your account
Frequently asked questions
How often should I reseal my wood deck?+
Generally, most wood decks need to be resealed every 2-3 years. However, this can vary based on your climate, the type of wood, the quality of the sealant used, and the amount of sun and rain exposure your deck receives. Perform a "splash test" annually: if water soaks into the wood instead of beading up, it's time to reseal.
What's the difference between deck stain and deck sealant?+
Deck sealant primarily provides water repellency and UV protection, often allowing the natural wood grain to show through. Deck stain, on the other hand, contains pigment that colors the wood while also offering protection. Many products are now "stain and sealant in one," combining the benefits of both. Choose based on whether you want to change the wood's color or just protect its natural look.
How long does a newly sealed deck need to dry before I can use it?+
Most deck sealants require at least 24-48 hours of drying time before light foot traffic and replacing furniture. However, the sealant typically needs a full 72 hours to a week to achieve its maximum hardness and protective qualities (known as "curing"). Always check the specific manufacturer's instructions for the product you are using.
Can I pressure wash my deck to clean it before sealing?+
Yes, a pressure washer can be effective for cleaning a deck, but it must be used with caution. Use a wide-angle nozzle (25-40 degrees) and keep the wand at least 12-18 inches away from the wood surface. Use a low pressure setting (around 1000-1200 PSI) to avoid damaging, splintering, or etching the wood. Always move with the grain of the wood.
What should I do if my deck sealant is peeling after application?+
Peeling sealant is almost always a sign of improper surface preparation, often due to applying sealant over old, failing finish, dirt, or damp wood. To fix it, you will need to strip away the peeling sealant, thoroughly clean and brighten the bare wood, allow it to dry completely, and then reapply a new coat of sealant. Skipping the preparation steps will likely lead to the same problem again.

Discussion
Loading comments…