
Tools & materials you'll need
Affiliate linksAs an Amazon Associate FixlyGuide earns from qualifying purchases — at no extra cost to you. Prices and availability are accurate as of publication and subject to change.
Quick Answer
Many homeowners rush the deck sealing process, especially skipping proper preparation, which is the undoing of most DIY deck projects. The critical step often missed is ensuring the deck surface is completely clean, dry, and free of old finishes, mold, or mildew. Failure to do so results in a poor bond, premature peeling, and inadequate protection. Fixing this involves a thorough cleaning, stripping and sanding, followed by careful application of a suitable sealant.
The Problem
Your once beautiful wood deck, a cherished outdoor living space, is showing signs of wear and tear. Perhaps the once vibrant stain has faded, water no longer beads on the surface, or worse, you're seeing alarming signs of peeling, flaking, and even rot. You might have tried sealing it yourself in the past, only to be disappointed when the finish didn't last, or it looked uneven and splotchy. The underlying issue is often a lack of understanding of wood's porous nature and the critical steps required for proper adhesion and long-term protection. This article will guide you through diagnosing the exact problem, preparing your deck like a pro, and applying a new finish that stands the test of time, saving you money and preserving your outdoor oasis.
How It Works
Wood is a hygroscopic material, meaning it readily absorbs and releases moisture from its environment. This constant expansion and contraction, combined with exposure to UV radiation from the sun, rain, snow, and foot traffic, causes wood to break down over time. A sealant, whether it's a stain-sealant combination or a clear sealer, works by penetrating the wood fibers or forming a protective film on the surface. This barrier prevents moisture from soaking in, thus reducing swelling and shrinking, and blocks harmful UV rays that lead to graying and deterioration.
For a sealant to work effectively, it needs a clean, dry, and sound surface to adhere to. If there's dirt, mildew, old flaking finish, or even invisible contaminants like pollen or sap, the new sealant won't bond properly. Instead of penetrating or encapsulating the wood, it will sit on top of the debris, leading to a weak, short-lived finish that peels, cracks, or wears away quickly. Modern deck sealants often contain UV inhibitors, fungicides, and water repellents designed to extend the life of your deck. Understanding the interaction between the wood and the sealant — a physical and chemical bond – is key to achieving a durable and aesthetically pleasing result. The goal is to create a breathable yet protective layer that allows the wood to naturally expand and contract while shielding it from the elements.
Step-by-Step Fix
1. Clear the Deck — Remove everything from your deck surface to prepare for cleaning and stripping.
Before you even think about cleaning, remove all furniture, planters, grills, and any other items from your deck. This provides a clear workspace and prevents damage to your belongings during the cleaning process. Store them somewhere safe, away from splashing water and chemicals.
2. Deep Clean and Degrease — Thoroughly wash your deck to remove dirt, grime, and mildew.
Mix a deck cleaner (oxygenated bleach-based is often effective for mildew) according to the manufacturer's instructions in a large bucket. Apply generously to a small section of your deck using a stiff bristle brush or a pump sprayer. Let it sit for 10-15 minutes, but do not let it dry. Scrub vigorously in the direction of the wood grain. Rinse thoroughly with a garden hose (a pressure washer on a low setting, no more than 1000-1200 PSI, can be used for rinsing but be careful not to damage the wood). Repeat this process for the entire deck.
- Safety Note: Always wear eye protection and gloves when handling deck cleaning chemicals. Follow all manufacturer warnings on product labels.
- If this doesn't work: For stubborn stains or deep-seated mildew, a stronger commercial deck wash may be necessary. Test in an inconspicuous area first.
3. Strip Away Old Finishes — Remove any peeling or failing existing stains or sealants.
If your deck has an old, failing finish that is peeling, flaking, or inconsistent, you'll need to strip it. Apply a chemical deck stripper following the product's instructions. These products typically work by dissolving or softening old finishes, allowing them to be scraped or power-washed off. Allow the stripper to dwell for the recommended time, then scrub and rinse thoroughly. Again, a pressure washer on a very low setting (fan tip, at least 12 inches from the surface) can assist, but be extremely careful not to gouge the wood. Neutralize the deck with a wood brightener after stripping, if recommended by the stripper manufacturer, to restore the wood's pH balance and open the pores. Rinse again with plenty of fresh water.
4. Sand for a Smooth Canvas — Lightly sand the deck to ensure a uniform surface for sealing.
After cleaning and stripping (and ensuring the deck is completely dry, which can take 2-3 days depending on humidity), lightly sand the deck surface. Use an orbital sander with 60-80 grit sandpaper. Sanding removes any remaining stubborn fibers, opens up the wood grain for better sealant penetration, and creates a smooth, even surface. Focus on areas where old finish might still cling or where the wood feels rough. Vacuum or blow off all sanding dust thoroughly before proceeding.
5. Inspect and Repair — Check for damaged boards and make necessary repairs before sealing.
Now is the time to carefully inspect your entire deck. Look for loose nails or screws (tighten or replace), splintered boards (sand smooth), or rotting wood (replace immediately). Pay close attention to joists and support beams if accessible. Addressing these issues now prevents more significant problems down the line and ensures a safe, sound surface for your new finish.
6. Choose Your Sealant Wisely — Select the right type of sealer for your deck and climate.
Deck sealants come in various forms: clear water repellents, semi-transparent stains, and solid stains. Clear sealants offer protection but no color. Semi-transparent stains add color while allowing the wood grain to show through. Solid stains provide opaque color like paint but still protect the wood. Consider your deck's condition, desired aesthetic, and local climate when making your choice. Oil-based sealants often offer deeper penetration, while water-based options are easier to clean up and typically dry faster. Read reviews and product specifications carefully.
7. Wait for Perfect Weather — Ensure optimal temperature and humidity for application.
Check the weather forecast before you start. The ideal conditions for applying deck sealant are consistent temperatures between 50-85°F (10-30°C), low humidity, and no rain expected for at least 24-48 hours. Avoid applying in direct, scorching sunlight, which can cause the sealant to dry too quickly and not penetrate properly. Always ensure the wood moisture content is below 15%—a simple moisture meter can confirm this.
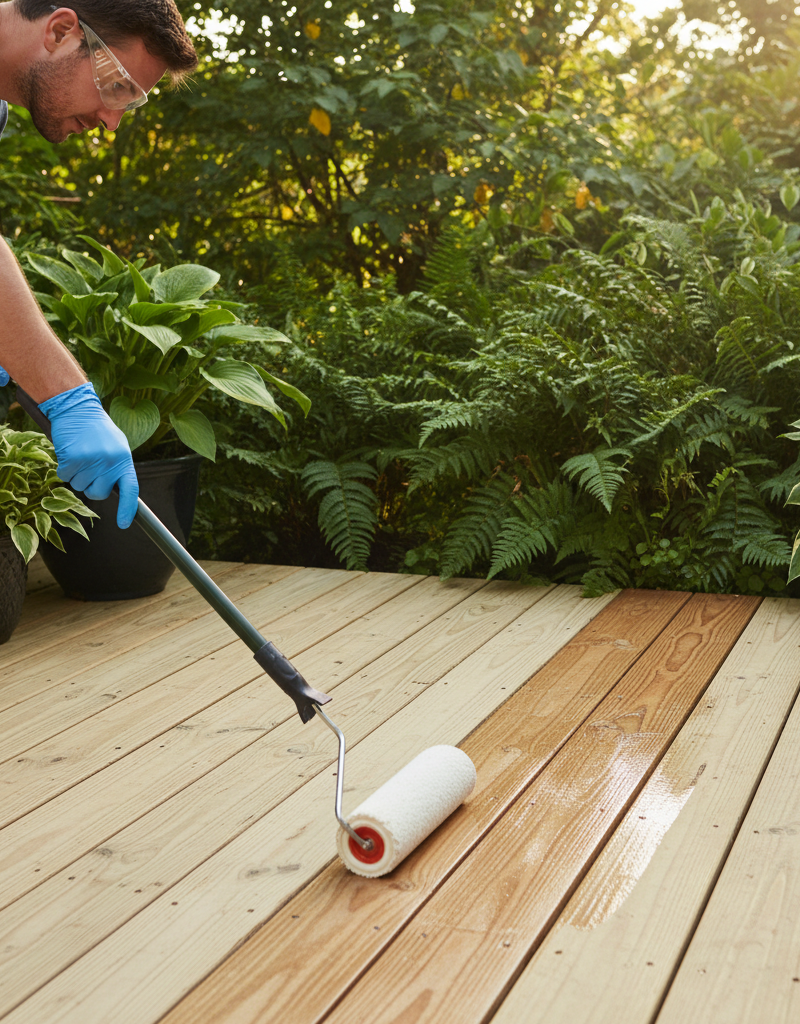
8. Apply the Sealant Evenly — Use a brush, roller, or sprayer for consistent coverage.
Stir your chosen sealant thoroughly. Work in small sections, applying the sealant along the length of 2-3 boards at a time. Use a quality natural bristle brush for oil-based products, or a synthetic brush for water-based. A roller (with an extension pole) or a pump sprayer can speed up the process on large, open areas. Maintain a wet edge to prevent lap marks. Avoid over-applying, which can lead to puddling or a sticky finish. If applying two coats, allow the first to dry completely according to manufacturer instructions before applying the second.
- Applying with a Sprayer: Mask off any adjacent areas (siding, trim, pavers) to protect them from overspray. Always back-brush immediately after spraying to ensure even penetration and prevent drips.
9. Allow Proper Curing Time — Let the sealant fully cure before heavy use.
Once applied, resist the urge to put furniture back or walk heavily on the deck. While many sealants are dry to the touch in hours, they often require several days, sometimes even a week, to fully cure and achieve maximum hardness and water repellency. Consult your product's label for specific curing times. Light foot traffic is usually acceptable after 24-48 hours, but wait longer for heavy furniture.
Common Causes
- Inadequate Surface Preparation: Applying new sealant over dirt, mildew, or failing old finishes is the single biggest culprit for premature failure. The new sealant can't bond to the wood.
- Wrong Product Choice: Using the wrong type of sealant for your wood species, climate, or desired aesthetic can lead to poor performance. For example, a heavy film-forming product on a high-traffic deck might peel faster.
- Improper Application: Applying sealant too thick, too thin, or in unsuitable weather conditions (too hot, too cold, too humid, or impending rain) can prevent proper drying and curing, resulting in an uneven or weak finish.
- Neglecting Repairs: Not addressing loose boards, protruding nails, or rotting spots before sealing leaves weak points that compromise the integrity and lifespan of the finish.
- Skipping Wood Brightener/Neutralizer: After stripping or heavy cleaning, the wood's pH can be off, or the grain might be closed. A brightener helps restore the natural color and opens the pores for better sealant absorption.
- Ignoring Manufacturer Instructions: Failing to follow specific guidelines for drying times, number of coats, or application methods can lead to poor results.
Common Mistakes
- Sealing a Wet Deck: Applying sealant to wood that is still damp will trap moisture, leading to bubbling, peeling, and mold growth beneath the finish. Always allow 2-3 dry days before sealing.
- Not Testing a Small Area: Different woods and previous finishes react differently. Always test your cleaner, stripper, and sealant in an inconspicuous area first to ensure desired results and compatibility.
- Using a Pressure Washer Incorrectly: High pressure (over 1500 PSI) or holding the nozzle too close to the deck surface can permanently damage wood fibers, creating an uneven, fuzzy texture that sealants won't adhere to efficiently.
- Forgetting to Back-Brush: When using a sprayer or roller, failure to back-brush immediately ensures the sealant is worked into the wood grain, preventing streaks, drips, and uneven penetration.
- Over-Applying Sealant: Applying too much sealant can lead to a thick, gummy, or sticky surface that takes forever to dry, attracts dirt, and eventually peels. Always apply thin, even coats.
- Ignoring the Deck's Horizontal Surfaces: The flat surfaces of a deck (the deck boards themselves) take the most abuse from sun and foot traffic, requiring more frequent maintenance than vertical surfaces like railings and balusters. Don't neglect them.
Cost & Time Breakdown
| Task | DIY Cost | Pro Cost | Time |
|---|---|---|---|
| Deck Cleaner/Stripper | $30–$80 | Included | 1–2 hours |
| Sandpaper/Sander Rental | $20–$50 (or $75/day) | Included | 2–4 hours |
| Wood Moisture Meter | $20–$40 | Included | 10 minutes |
| Deck Sealant/Stain | $50–$150/gallon | Included | 1–3 hours |
| Brushes/Rollers/Sprayer | $30–$100 | Included | 30 minutes |
| Total (DIY) | $150–$420 | $500–$1500+ | 1–3 days |
Tips & Prevention
- Annual Water Test: Pour a small amount of water on your deck annually. If it soaks in rather than beading up, it's time to reseal.
- Regular Cleaning: Sweep your deck frequently to remove leaves and debris. A gentle wash with mild soap and water annually can extend the life of your finish.
- Inspect for Damage: Quarterly, check for loose fasteners, splinters, or signs of rot, especially after harsh weather. Address small issues before they become big problems.
- Optimal Sealing Intervals: Depending on your climate, deck exposure, and product choice, plan to reseal clear finishes every 1-2 years, semi-transparent stains every 2-3 years, and solid stains every 3-5 years.
- Protect from Moisture: Consider covering high-traffic areas or areas prone to constant dampness with outdoor rugs (ensure they are breathable) during wet seasons.
- Proper Drainage: Ensure water drains away from your deck and house foundation. Clear gutters and downspouts to prevent water from splashing onto the deck repeatedly.
When to Call a Professional
While resealing a deck is a common DIY project, there are specific situations where calling a licensed professional is the smarter, safer, and ultimately more cost-effective choice. If your deck shows significant structural damage such as widespread rot in joists or support posts, major cracking or warping in multiple load-bearing boards, or if the deck feels unstable or bouncy, you need a professional. Dealing with extensive mildew or algae that resists standard cleaning, especially if it indicates deeper moisture problems, might also warrant expert intervention. Additionally, if your deck is exceptionally large, multi-tiered, or difficult to access, the time and effort involved may outweigh the DIY savings, making a professional service a worthwhile investment for a high-quality, long-lasting finish and ensuring the structural integrity of your outdoor living space.
Related Articles
Keep troubleshooting with these hand-picked guides from FixlyGuide:
- The 3 Hidden Mistakes That Make Your Deck Sealer Fail (And How to Fix Them) — Properly sealing your wood deck protects it from the elements, but common mistakes often lead to early failure. Learn how to reseal your de…
- The 3 Hidden Mistakes That Make Your Deck Sealer Fail (And How to Fix Them) — Resealing your wood deck protects it from weather and extends its life. Learn how to avoid common mistakes for a long-lasting finish and vi…
- The #1 Mistake Homeowners Make When Sealing a Deck (and How to Fix It) — Prevent costly damage and extend your deck's life by avoiding common sealing errors and following a simple, effective resealing process.
- The #1 Deck Sealing Mistake Most Homeowners Make (And How to Fix It) — Resealing your wood deck is crucial for longevity, but a common mistake can ruin your efforts and damage the wood. Learn how to do it right.
- Is Your Gutter Sagging After Every Storm? The Hidden Flaw Most Homeowners Miss — Discover the overlooked reason your gutters sag after every storm and learn the lasting fix that most homeowners miss.
- The #1 Mistake Homeowners Make When Caulking a Bathroom Sink (And How to Fix It) — Discover the most common caulk mistake homeowners make around bathroom sinks and follow simple steps to achieve a lasting, watertight seal.
Frequently asked questions
How do I know if my deck needs to be resealed?+
Perform a simple water test: pour a small amount of water on the deck surface. If the water beads up, your sealant is likely still effective. If it soaks into the wood, it's time to reseal.
Can I seal over an old deck stain?+
It depends. If the old stain is in good condition, not peeling or flaking, and compatible with the new product, you might be able to. However, for best results and longevity, it's usually recommended to strip any failing old finishes before applying a new one.
How long does a deck sealant last?+
The lifespan of a deck sealant varies widely depending on the product type, your climate, deck exposure to sun and foot traffic, and the quality of application. Clear sealants typically last 1-2 years, semi-transparent stains 2-3 years, and solid stains 3-5 years.
How long does the deck need to dry before sealing?+
After cleaning or stripping, your deck needs to be completely dry, which usually takes 2-3 dry, sunny days. Using a wood moisture meter to ensure the wood's moisture content is below 15% is the most accurate way to tell if it's ready.
What happens if I seal my deck when it's too hot or cold?+
Sealing in extreme temperatures can negatively affect the product's performance. Too hot and the sealant can dry too quickly, preventing proper penetration and adhesion. Too cold, and it may not cure properly, leading to a weak, sticky, or uneven finish. Always follow the manufacturer's recommended temperature ranges.


Discussion
Loading comments…