
- Poor Surface Preparation: This is the big one. If you seal over dirt, mildew, or a failing old finish, the new sealer won’t stick right or soak in like it should.
- Applying Sealer to Wet Wood: Trapped moisture under the finish leads to mildew, cracking, and peeling. Guaranteed headache.
- Using the Wrong Type of Sealer: Not every product fits every deck. A film-forming stain where a penetrating sealer should’ve gone, or the other way around, and you’re setting yourself up for failure.
- Over-Application: Too much sealer, especially oil-based stuff, can leave a sticky, glossy film that never really penetrates and often has to be stripped back off.
- Skipping Wood Brightener: After a harsh cleaner or stripper, the wood pH can be off and the pores can close down, which makes the sealer work a lot harder than it should.
Landscaping · Deck or fence project
| Project category | Landscaping |
|---|---|
| Problem type | Deck or fence project |
| Trade required | Landscaping |
| Urgency | Planned project |
| Safety risk | Moderate safety risk |
| DIY suitability | DIY for experienced homeowners |
| Cost category | High cost |
| Typical timeline | Most builds 3–10 days depending on size |
| Contractor type | Landscaping contractor |
Repair option
Replace failed boards, posts, and hardware; reseal the surface.
Replacement option
Rebuild when framing or the ledger connection is unsafe.
Common causes
- Rot at posts and ledger
- Storm damage
- Adding outdoor living space
Relevant tools:home improvement material pricesproject cost estimator
Published July 28, 2026Last updated August 17, 2026
Tools & materials you'll need
Affiliate linksAs an Amazon Associate FixlyGuide earns from qualifying purchases — at no extra cost to you. Prices and availability are accurate as of publication and subject to change.
Quick Answer
You’ll want to start by cleaning that deck like you mean it, usually with a real deck cleaner, so you can get all the dirt, mildew, and algae off the surface. If there’s an old sealer hanging on by a thread, you’ve got to strip that junk first so the new sealer can actually soak in. Then you let the wood dry all the way out—and I mean bone dry—before you put on a fresh coat of a good penetrating sealer. That’s the trick. No magic. Just prep, dry time, and the right product.
The Problem
I can’t tell you how many calls I get that start with, “My deck looks terrible, and I just sealed it last year!” Nine times out of ten, the sealer’s not the real problem. It’s the prep. Folks think they can blast the deck with a pressure washer and slap on a new coat like they’re painting a fence. Doesn’t work that way. Old failing sealer, hidden mildew, trapped moisture — that’s a bad base, plain and simple. You can’t build anything decent on garbage.
Your deck takes a beating every single day. Sun. Rain. Snow. Freeze-thaw cycles. All of it dries out the wood, opens up cracks, and gives mildew a place to move in. A good sealer is your deck’s raincoat and sunscreen rolled into one. But if it won’t stick because the surface is dirty or the old finish is still half-dead, you’re wasting time and money. I saw a cedar deck in Elmwood last spring that had been “sealed” three times in five years. The owner kept adding new coats right over the peeling mess. By the time I got there, it was gummy, blotchy, and water was sitting on top like nobody had ever heard of a sealer. We spent two days stripping it back to bare wood before we could even think about protecting it. That thing was toast.
How It Works
Wood outside is basically a giant sponge. Tiny pores, little fibers, always moving with moisture and temperature. When you seal a deck, you’re trying to either fill those pores or create a barrier that keeps water out.
Most deck sealers fall into two camps: penetrating oil-based or water-based. Oil-based products — the ones often built around tung oil or linseed oil — soak into the fibers and help condition the wood from the inside out. They repel water at the cellular level, bring out the grain, and wear down pretty naturally. Water-based acrylic or resin sealers usually sit more on top and form a film. They can hold up well and give solid UV and mildew resistance, but they’re picky. The surface has to be clean, dry, and prepped right. If there’s old sealer, dirt, or mildew in the way, that film can peel, flake, and let go.
Either way, the sealer’s job is the same: slow down moisture absorption so the wood doesn’t swell, crack, or rot, and block UV rays so the boards don’t turn gray and splintery. If the wood’s not clean and open enough, the sealer can’t do its job. Water sits there. Sun beats on the weak spots. Mildew grows under the mess. Why spend the money if you’re not giving the product a fair shot? Proper prep isn’t optional. It’s the whole ballgame.
Step-by-Step Fix
Here’s how I tackle a deck reseal so it lasts longer than one season:
-
Clear the Deck — Get everything off. Move the furniture, planters, grills, the whole works. Sweep it out so you’re not grinding dirt around while you work. Clean slate. That’s where you start.
-
Test the Old Sealer — See what’s still hanging on. Splash a few drops of water in a few different spots. If it beads up, the old sealer may still have some life in it, or you might just be seeing surface tension. If it soaks in within a minute or two, that finish is worn out and probably needs to come off. Watch the pattern — beading in some spots and soaking in others usually means uneven wear or a sloppy old application.
-
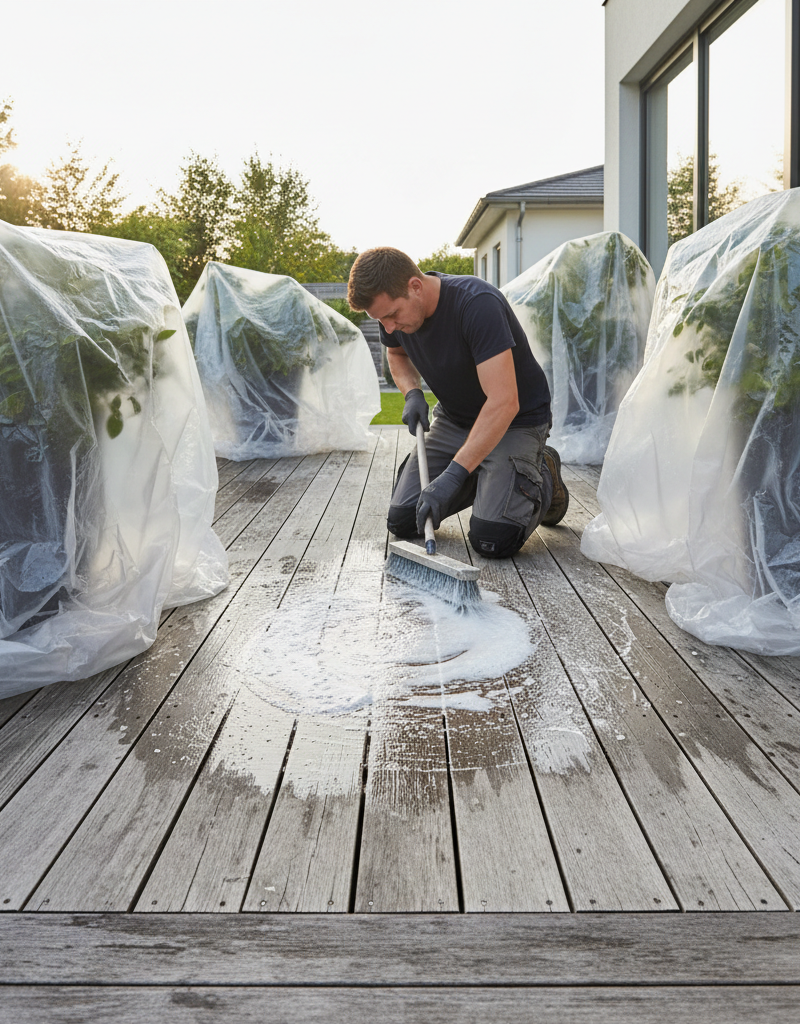
Apply Deck Stripper (If Needed) — Break down the old stuff. If the water test tells you the sealer isn’t really doing its job and you’ve got peeling, flaking, or blotchy areas, you’ll need a deck stripper. Follow the label exactly — these chemicals aren’t playing around. Apply it evenly with a pump sprayer or roller. Let it sit for the recommended time, usually 15-30 minutes, but don’t let it dry on the wood. If it’s a hot day, mist it a little so it stays active.
- Safety First: Wear eye protection, chemical-resistant gloves, and long sleeves. Cover plants, siding, and anything else you don’t want wrecked.
- Alternative: If it’s just a light, tired finish, a strong cleaning might do the trick — but if it’s really failing, I’d strip it and not waste the afternoon.
-
Clean the Deck Thoroughly — Wash the junk off. Stripped or not, you’ve still got to clean. Use a dedicated deck cleaner, or a wood brightener that doubles as a cleaner if that’s what the job calls for. Put it on per the directions. For stubborn spots or mildew, a stiff brush helps a lot. I’ve spent plenty of time on decks with a brush in one hand and a hose in the other — no shame in doing it right.
- Pressure Washer Note: If you use a pressure washer, keep it under control. Hold the nozzle at least 8-12 inches off the wood and use a fan tip (25-40 degrees). Get too close or too aggressive, and you’ll raise the grain, scar the boards, and leave yourself a fuzzy mess that won’t take sealer worth a darn. I’ve seen more than one pressure washer “pattern” that had to be sanded out by hand.
-
Rinse and Neutralize — Get the chemicals off. Rinse the deck well with clean water, starting at the high end and working down. You want every bit of stripper or cleaner gone. If you used a stripper or a strong cleaner, follow it with a wood brightener/neutralizer. Those usually use oxalic acid to bring the wood back to a better pH, brighten the color, and open the pores so the sealer can soak in. Put it on, let it sit, then rinse again.
-
Allow for COMPLETE Drying — Don’t rush this part. This is the step people blow off, and it’s the one that bites them later. The wood has to be bone dry before you seal it. Depending on humidity, temperature, and sun exposure, that can take 24 to 72 hours, and sometimes longer after a hard rain or a big wash-down. Seal damp wood and you’re trapping moisture under the finish, which sets you up for mildew and early peeling. If you’ve got a moisture meter, use it. Aim for below 12% moisture content. If you don’t have one, wait another day after you think it’s dry. I’d rather lose a day than redo the whole deck.
-
Light Sanding (Optional, but Recommended) — Knock it smooth. Once the deck’s dry, take a look. Got fuzzy spots from cleaning or pressure washing? Splinters? A light pass with 60-80 grit on an orbital sander can smooth things out and open the grain a bit more so the sealer can get in there. Vacuum or sweep all the dust off when you’re done.
-
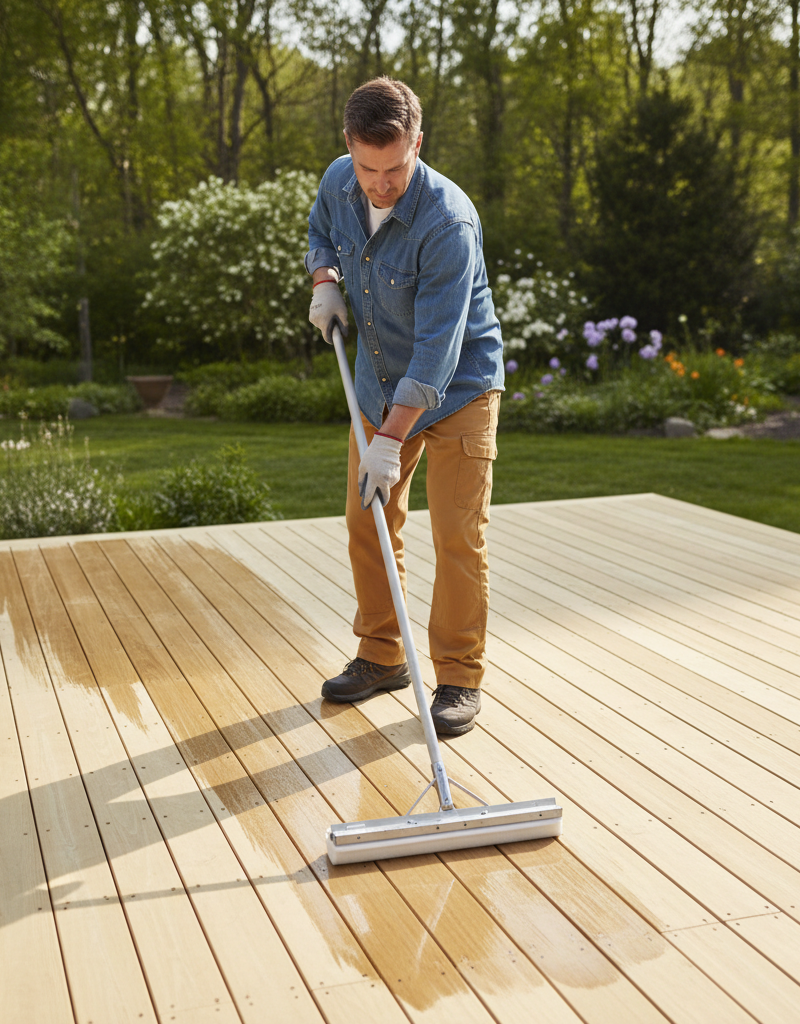
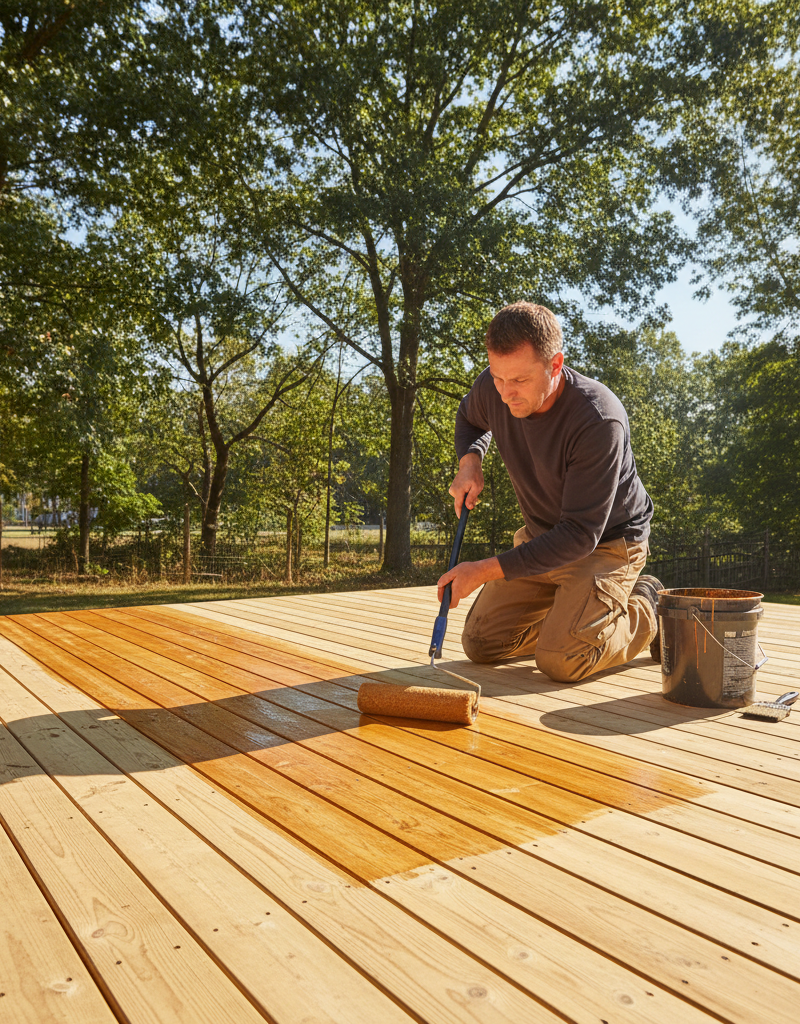
Apply Deck Sealer — Now you’re cooking. Pick a high-quality penetrating sealer that matches your wood. Read the label. Seriously. Apply it with a roller, brush, or pump sprayer, working in small sections and going with the grain. Don’t pile it on thick. Thick usually means puddles and shiny blotches, and nobody wants that. Go for a thin, even coat. If you’re using an oil-based sealer, wipe off the excess after 15-20 minutes so it doesn’t leave a sticky film.
- Working Edge: Keep a wet edge so one section doesn’t dry before the next one starts, or you’ll get lap marks.
- Number of Coats: Most penetrating sealers only need one good coat. Film-forming products might call for two thin coats.
-
Allow for Curing — Let it set up. Don’t move the furniture back or start tromping around on it too soon. Light traffic can take anywhere from 24 to 48 hours, and full cure can run 3-7 days, depending on the product and the weather. Check the can and follow that schedule.
Common Causes
- Poor Surface Preparation: This is the big one. If you seal over dirt, mildew, or a failing old finish, the new sealer won’t stick right or soak in like it should.
- Applying Sealer to Wet Wood: Trapped moisture under the finish leads to mildew, cracking, and peeling. Guaranteed headache.
- Using the Wrong Type of Sealer: Not every product fits every deck. A film-forming stain where a penetrating sealer should’ve gone, or the other way around, and you’re setting yourself up for failure.
- Over-Application: Too much sealer, especially oil-based stuff, can leave a sticky, glossy film that never really penetrates and often has to be stripped back off.
- Skipping Wood Brightener: After a harsh cleaner or stripper, the wood pH can be off and the pores can close down, which makes the sealer work a lot harder than it should.
- Lack of Maintenance: Even the best sealer doesn’t last forever. Decks need cleaning and re-sealing every 1-3 years depending on exposure and product.
Common Mistakes
- Power Washing Too Aggressively: Too much pressure or the wrong tip can shred the wood fibers and leave you with a fuzzy, ugly surface that won’t seal right.
- Sealing in Direct Midday Sun: The sealer can flash off too fast, which means lap marks, weak penetration, and an uneven finish. Go for cooler parts of the day or wait for cloud cover if you can.
- Ignoring the Weather Forecast: Sealing right before rain is a bad bet. You need a few dry days in a row — bare minimum 24 hours after application, but 48-72 hours is better.
- Not Testing the Old Sealer: If parts of the old finish are still holding on, stripping the whole deck might be more work than you need. Sometimes you can just clean and recoat the problem spots, feathering it in.
- Forgetting About Vertical Surfaces: A lot of DIYers only hit the deck boards. Railings, posts, balusters — they need cleaning and sealing too.
- Using a Universal Product: Some outdoor wood products are “stains” that don’t protect much, and some “sealers” are basically paint with a fancy label. Read the can and pick something made for deck sealing and protection.
Cost & Time Breakdown
| Task | DIY Cost | Pro Cost | Time |
|---|---|---|---|
| Materials (cleaner, sealer) | $75 – $200 | Included in bid | N/A |
| Stripping & Cleaning | $0 (your labor) | $200 – $500 | 4–8 hours active |
| Drying Time | N/A | N/A | 24 – 72 hours idle |
| Sanding (optional) | $0 (your labor) | $100 – $250 | 2–4 hours active |
| Sealer Application | $0 (your labor) | $150 – $400 | 3–6 hours active |
| Total (DIY) | $75 – $200+ | $450 – $1,150+ | 1-2 days active |
Tips & Prevention
- Annual Cleaning: Even if you don’t reseal, give the deck a solid scrub every spring to knock off grime and mildew. It’ll help the sealer last.
- Re-seal Every 1-3 Years: Most penetrating sealers need reapplication every 1-2 years. Film-forming products might stretch to 2-3 years. Check it yearly with the water bead test.
- Check for Damage: Look for loose boards, popped nails, or rot on a regular basis. Fix that stuff before you seal.
- Keep it Clear: Don’t leave planters, doormats, or anything else in one spot for months. They trap moisture and make a perfect little breeding ground for mildew and wood rot.
- Use Quality Products: This is not the place to pinch pennies. A good deck cleaner, brightener, and sealer make a real difference in how it goes on and how long it lasts.
- Trim Foliage: Keep bushes and tree limbs cut back so air can move and sunlight can get in. The deck dries faster after rain, and mildew’s got a harder time setting up shop.
When to Call a Professional
Resealing a deck is a solid DIY job, no question. But there are times when I’d tell you to bring in a pro. If the deck’s badly deteriorated with widespread rot, structural problems, or heavy splintering, a professional deck builder or restoration specialist may be the better call. They can check the structure, swap out damaged boards safely, and bring the heavy-duty equipment needed for stripping and cleaning big or neglected decks. If you’ve got a large multi-level deck, or you just don’t have the time, patience, or physical ability for all the prep work, hiring somebody can save you a pile of grief and get it done right. And if you’re staring at major structural wood repair without the experience to back it up, don’t wing it — that’s where safety goes sideways.
Related Articles
Keep troubleshooting with these hand-picked guides from FixlyGuide:
- The #1 Mistake Homeowners Make When Sealing a Deck (It Costs You Years) — Avoid the most common mistake in deck sealing to protect your investment and extend your deck's lifespan significantly.
- The 3 Hidden Mistakes That Make Your Deck Sealer Fail (And How to Fix Them) — Resealing your wood deck protects it from weather and extends its life. Learn how to avoid common mistakes for a long-lasting finish and vi…
- The #1 Mistake Homeowners Make When Sealing a Deck (and How to Fix It) — Prevent costly damage and extend your deck's life by avoiding common sealing errors and following a simple, effective resealing process.
- The One Mistake Homeowners Make When Shingles Blow Off (And How to Fix It Right) — After a storm, finding missing roof shingles can be alarming. Learn the critical mistake homeowners often make and how to properly assess a…
- The 3 Hidden Reasons Your Deck Boards Warp (and How to Fix Them Forever) — Uncover the surprising culprits behind warped deck boards and learn the actionable steps to straighten them, reinforcing your deck against…
- The #1 Bathtub Recaulking Mistake (And How to Flawlessly Seal Yours) — Discover the biggest mistake homeowners make when recaulking bathtubs and learn the proper steps to achieve a long-lasting, watertight seal.
Get deck & patio quotes from local pros
Tell us about your project and we'll match you with vetted contractors in your area. Free, no obligation, and we never sell your info.
Should you do this yourself?
Answer five quick questions before you start. Safety outranks savings every time.
Your experience with work like this
How high do you have to work?
Does the job involve any of these?
Will it need a permit?
Specialty tools
Free and instant. Educational guidance only — not a quote, inspection, or professional diagnosis.
What should this project cost?
Enter your project details for a realistic cost range before you call anyone.
Spot repairs commonly run $400–$1,800; full replacement typically $9,000–$18,000 for an average home.
- Regional adjustment
- National average
- Labor share (typical)
- ~$2,948
- Quotes to collect
- 3 written estimates
Educational estimate based on national averages — not a binding quote. Always confirm with written local estimates.
Decide what your roof needs
Two minutes of questions turns "something is wrong up there" into a clear next step.
- Repair or replace your roof?Answer 10 questions about age, leaks, and damage to get a clear next step.Open
- Compare contractor quotesScore up to four bids on price, warranty, licensing, and timeline.Open
- Get local estimatesSend one request and compare written estimates from vetted pros.Open
Free, no signup required. Estimates are educational guidance, not a quote or an inspection.
Get the print-ready PDF of this guide
A clean, ad-free, printable version you can keep on your phone or pin to the workshop wall. Free with a FixlyGuide account.
- Print-optimized layout
- Tools, materials & every step included
- Saved to your account
Frequently asked questions
How often should I reseal my wood deck?+
Most penetrating deck sealers need reapplication every 1-2 years. Film-forming sealers might last 2-3 years. Always perform a water bead test annually to check if the deck still repels water effectively.
What happens if I seal a wet deck?+
Sealing a wet deck traps moisture beneath the sealer. This can lead to mildew and mold growth, premature peeling, and cracking of the sealer, ultimately compromising the wood's protection and appearance.
Can I just apply new sealer over old sealer?+
Only if the old sealer is in excellent condition and simply worn thin. If the old sealer is peeling, flaking, or discolored, you must strip it off before applying new sealer to ensure proper adhesion and a uniform finish.
What's the best way to clean my deck before sealing?+
Start by sweeping. Then, use a dedicated deck cleaner, often followed by a wood brightener. For old, failing sealers, a deck stripper might be necessary before cleaning. Rinse thoroughly after each chemical application.
Is pressure washing bad for my deck?+
Pressure washing can be effective, but it must be done carefully. Use a wide fan tip (25-40 degrees) and keep the nozzle 8-12 inches away from the wood. Too much pressure or too close can permanently damage and 'fuzz' the wood.
How long does a deck need to dry before sealing?+
The deck needs to be bone dry. This usually takes 24-72 hours after cleaning or rain, depending on temperature, humidity, and sun exposure. A moisture meter can confirm if the wood's moisture content is below 12%.
Should I sand my deck before sealing?+
Light sanding with 60-80 grit sandpaper is often recommended after cleaning and drying. It helps smooth out any raised wood fibers and opens the wood grain for better sealer penetration and a smoother finish.
What type of sealer should I use?+
It depends on your preference and wood type. Penetrating oil-based sealers soak into the wood, while water-based acrylics form a surface film. Both offer protection, but oil-based often emphasize natural grain and wear gracefully, while acrylics can offer stronger UV resistance. Always choose a product specifically for decking.
Discussion
Loading comments…