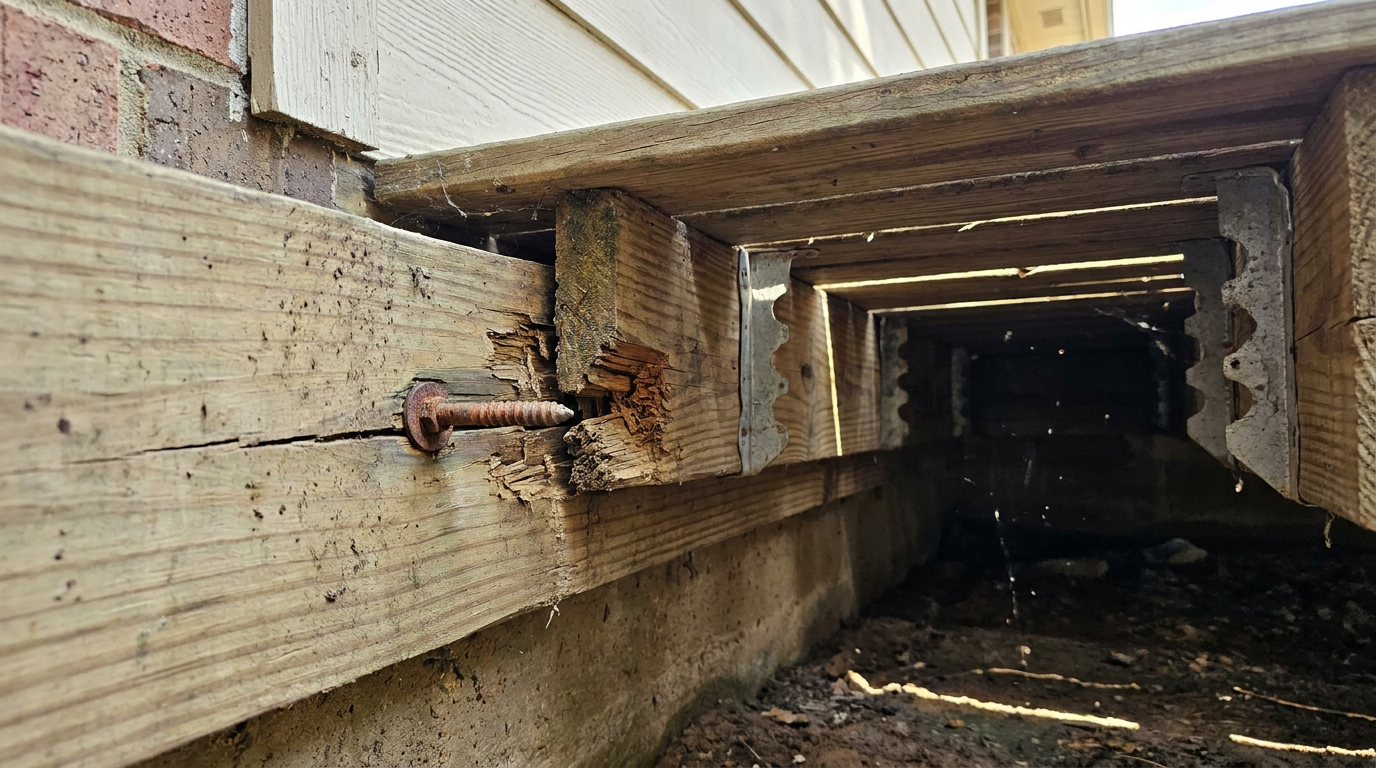
- Clear the Underdeck and Set Up Work Lighting — Remove storage bins, lattice skirting, and vegetation around the perimeter so you have an unobstructed view of the ledger board, joist bays, and post connections.
- Tools: Headlamp or 1,000-lumen work light, safety glasses.
- Safety: Watch for wasp nests and copperheads nesting under low clearances.
Landscaping · Deck or fence project
| Project category | Landscaping |
|---|---|
| Problem type | Deck or fence project |
| Trade required | Landscaping |
| Urgency | Planned project |
| Safety risk | Moderate safety risk |
| DIY suitability | DIY for experienced homeowners |
| Cost category | High cost |
| Typical timeline | Most builds 3–10 days depending on size |
| Contractor type | Landscaping contractor |
Repair option
Replace failed boards, posts, and hardware; reseal the surface.
Replacement option
Rebuild when framing or the ledger connection is unsafe.
Common causes
- Rot at posts and ledger
- Storm damage
- Adding outdoor living space
Relevant tools:home improvement material pricesproject cost estimator
Published October 22, 2026Last updated October 22, 2026
Tools & materials you'll need
Affiliate links- AmazonStructural wood screws (5/16-inch x 5-inch, code-listed)1 box (50 ct)
- AmazonHot-dip galvanized post-to-beam connectors4–6 brackets
- AmazonTreated 4x4 lumber for knee braces2–3 8-ft boards
- AmazonLateral tension tie kit (Simpson DTT2Z or similar)2 kits
- Amazon1/2-inch concrete wedge anchors4–8 anchors
As an Amazon Associate FixlyGuide earns from qualifying purchases — at no extra cost to you. Prices and availability are accurate as of publication and subject to change.
Quick Answer
A wobbly deck is almost always caused by loose ledger board fasteners, missing diagonal bracing, rotted post bases, or failing mechanical connection hardware. Tightening loose 1/2-inch lag screws or installing structural ledger bolts and heavy-gauge post-to-beam connectors often solves minor movement. However, if the ledger board has pulled more than 1/4 inch away from the house rim joist or support posts show soft, punky rot deeper than 1/2 inch, the deck is at immediate risk of collapse and requires a licensed structural carpenter.
The Problem
A deck should feel like an extension of your foundation—rock solid, immobile, and unyielding under foot. When you walk out with a tray of burgers and feel a lateral sway, or when the entire structure shudders as the dog jumps down the stairs, something structural has failed or was never installed correctly in the first place.
This movement is called dynamic racking or lateral deflection. Left alone, it doesn't get better. Every step acts like a micro-lever, slowly backing out structural nails, elongating screw holes in damp lumber, and fatiguing metal joist hangers. What starts as a mild bounce or slight horizontal shimmy can culminate in total structural separation from the house band board—a failure mode responsible for hundreds of severe balcony and deck collapses across North America every summer.
How It Works
A safe exterior deck relies on a continuous load path that transfers gravity loads (furniture, people, snow) straight down into the earth, and lateral loads (wind, seismic activity, moving foot traffic) back into your house's rigid framing or dedicated cross-braces.
At the house interface, the ledger board is bolted into the home's 1-1/2-inch nominal rim board. Code requires 1/2-inch hot-dip galvanized lag screws or structural thru-bolts spaced specifically (often 12 to 16 inches on center in a staggered pattern) to resist shear forces of roughly 1,500 to 2,000 lbs per fastener connection. Beneath the deck, posts sit atop concrete piers extending down past the regional frost line—or at least 12 to 18 inches deep in non-freezing zones like North Texas to hit load-bearing clay. When lateral forces push sideways against the deck surface, the rectangular geometry wants to distort into a parallelogram. Diagonal knee bracing (45-degree angle timber tying posts to beams) or tension-tie deck brackets prevent this distortion by forming rigid triangles, which cannot deform without snapping the wood fibers or crushing the fasteners. If fasteners corrode, brackets work loose, or water rots the contact points, that rigid geometry dissolves into a floating pendulum.
Step-by-Step Fix
Before you begin these diagnostic and reinforcement steps, keep all people and heavy loads off the structure. Inspect in dry daylight.
-
Clear the Underdeck and Set Up Work Lighting — Remove storage bins, lattice skirting, and vegetation around the perimeter so you have an unobstructed view of the ledger board, joist bays, and post connections.
- Tools: Headlamp or 1,000-lumen work light, safety glasses.
- Safety: Watch for wasp nests and copperheads nesting under low clearances.
-
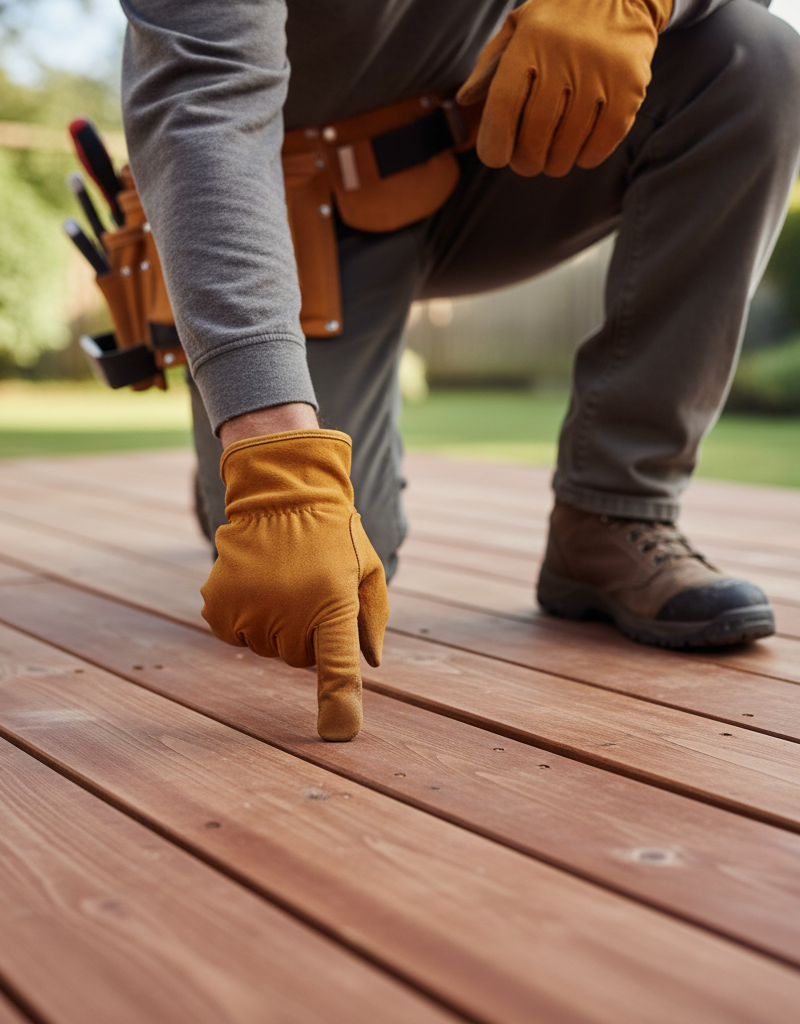
Conduct the Ice Pick Rot Probe — Take an awl or long flathead screwdriver and firmly press the tip into the bottom 6 inches of every support post where it meets concrete, as well as the length of the ledger board.
- Acceptable resistance: The tool stops after 1/16 to 1/8 inch into pressure-treated southern yellow pine or cedar.
- Failing condition: If the metal shaft sinks 1/2 inch or deeper with hand pressure, the timber core is degraded by brown rot fungal decay; stop DIY repairs and call a framer.
-
Check the Ledger-to-House Gap — Measure the seam between the back of your ledger board and the exterior wall sheathing or siding using a standard tape measure or feeler gauge.
- The ledger must sit tight against the wall framing or direct spacers; any gap wider than 1/8 inch indicates lag bolts are pulling out of the house rim joist.
- Check if proper Z-flashing or copper cap flashing sits over the top edge to shed bulk water.
-
Torque Existing Ledger Bolts — Using a 3/4-inch deep socket on a ratchet or breaker bar, test each existing 1/2-inch lag bolt along the ledger.
- If the bolt spins continuously without tightening, the internal wood grain of the home's rim joist is stripped or rotten.
- If the bolt tightens, snug it down to approximately 35 to 45 ft-lbs of torque until the washer embeds slightly into the wood grain. Do not over-torque to the point of crushing the timber cells.
-
Install Modern Structural Ledger Screws — Where old 1/2-inch lag bolts have worked loose or were spaced too sparsely (wider than 24 inches apart), add code-approved 5/16-inch structural wood screws (like Simpson Strong-Tie SDWS or FastenMaster LedgerLOK).
- Drive them using a high-torque impact driver equipped with the manufacturer's specific driver bit.
- Space them in pairs 12 to 16 inches apart in a staggered zigzag pattern: 2 inches down from the top edge and 2 inches up from the bottom edge.
-
Inspect and Retrofit Post-to-Beam Connectors — Check where the horizontal beam rests on top of the vertical 4x4 or 6x6 support posts.
- If beams are merely toe-nailed or bolted through the side of an un-notched post with two carriage bolts, the connection lacks code-approved bearing support.
- Retrofit heavy-duty post-to-beam galvanized metal caps (such as Simpson BCS or AC4/AC6) secured with 1-1/2-inch structural connector screws; never use drywall or standard decking screws.
-
Mount 45-Degree Diagonal Knee Bracing — Cut pieces of pressure-treated 4x4 lumber with 45-degree mitered ends, measuring roughly 24 to 36 inches in total length.
- Position the brace diagonally from the upper side of the support post to the underside of the main beam or outermost joists.
- Fasten each end with two 1/2-inch hot-dip galvanized thru-bolts or two structural timber screws, clamping the joint rock-tight before driving.
-
Anchor Post Bases to Footings — Inspect the base of each post where it touches the concrete footing.
- If posts are buried raw in soil or set directly in wet concrete without a standoff base, anchor an external retrofit bracket into the concrete pad using a 1/2-inch concrete wedge anchor driven 3 inches into the masonry.
- Fasten the bracket flange into the post side using hot-dip galvanized HDG nails or structural connector screws.
-
Install Lateral Tension Hardware (Code Tiebacks) — For second-story or high-elevation decks, install two lateral load tension ties (such as Simpson DTT2Z) near each end of the deck frame.
- Bolt the metal bracket to the inside face of a deck joist and extend a 1/2-inch threaded rod through the ledger and exterior wall sheathing directly into the interior house floor joist.
- Secure the rod inside the crawlspace or basement with a matching bracket and heavy hex nut tightened securely against a 3-inch steel plate washer to physically lock the deck against lateral outward pull.
-
Perform the Dynamic Sway Verification Test — Step onto the center of the deck span and deliberately push your weight side to side against the outer rim rail.
- The framing should resist deflection with virtually zero perceptible travel or audible creaking.
- Re-check all bracket screws after this dynamic test to make sure none popped loose or backed out under the initial load.
Common Causes
Deck instability stems from a few specific mechanical shortcomings:
- Lack of Diagonal Bracing: Tall decks (posts over 6 feet high) built without diagonal braces naturally hinge at the connection points under modest lateral force.
- Corroded or Undersized Fasteners: Smooth-shank electro-galvanized framing nails corrode when exposed to rain and modern ACQ or copper-azole treated lumber, losing their grip and letting joist hangers pull free.
- Ledger Pull-Off: If bolts were screwed into house overhangs, brick veneer, or hollow OSB without solid rim joist engagement, the entire deck hinges away from the home.
- Sub-Surface Post Base Rot: Posts set directly into damp ground trap ground moisture, rotting the post core from the bottom up while the exterior shell looks pristine.
- Improper Beam Support: Beams fastened solely to the side of a post with two bolts ("side-hung beams") rely entirely on the bolt's shear strength; as holes elongate over time, the beam drops and sways.
Common Mistakes
- Swapping Structural Hardware for Drywall Screws: Hardened bugle-head drywall or standard deck screws are brittle. Under the lateral sheer stress of an oscillating deck, their heads snap clean off. Only use code-listed structural wood screws or 1/2-inch through-bolts.
- Bolting into Brick Veneer: Masonry veneer is a decorative skin anchored to house framing by flimsy metal corrugated ties. Fastening a ledger board directly to exterior brick is an explicit code violation that causes catastrophic sudden peel-off.
- Ignoring the Flashing: Adding more bolts to a rotting ledger without installing stainless or copper flashing overhead won't fix the issue; water will simply rot out your new fastener holes in 24 to 36 months.
- Bracing to Railing Posts Instead of Frame Posts: Homeowners frequently attempt to stiffen a wobbly deck by screwing triangular blocks onto decorative rail spindles. Railing components are designed for edge protection, not structural diaphragm stiffening; braces must tie posts directly to carrying beams.
- Overlooking Soil Heave and Frost Jacking: In areas with expansive clay soil or deep winter freezes, shallow concrete deck footings shift unevenly, causing one post to float an inch off its pad. This unloads the footing and destabilizes the entire frame.
Cost & Time Breakdown
| Task | DIY Cost | Pro Cost | Time |
|---|---|---|---|
| Structural Ledger Screw Retrofit | $40–$75 | $350–$600 | 1–2 hours |
| Knee Bracing Installation (4 Posts) | $60–$120 | $400–$800 | 2–3 hours |
| Lateral Tension Tieback Hardware (Pair) | $90–$160 | $500–$900 | 2–4 hours |
| Post-to-Beam Connector Bracket Upgrades | $50–$110 | $300–$550 | 1–2 hours |
| Complete Pier & Post Replacement (Per Post) | $120–$250 | $750–$1,500 | 4–6 hours |
Tips & Prevention
- Check Fastener Metal Compatibility: Always use hot-dip galvanized (G185 minimum) or 304/316 stainless steel connectors with modern pressure-treated wood. Standard zinc finishes corrode rapidly against high chemical copper concentrations.
- Schedule an Annual Underdeck Audit: Crawl underneath every spring before outdoor entertaining starts. Take a socket wrench to test five random ledger bolts, and look for white fuzzy mycelium or black mold lines on horizontal joist tops.
- Maintain 1/2-Inch Air Gaps on Siding Spacers: If retrofitting a ledger, use engineered structural spacers to leave a 1/2-inch drainage gap between the ledger board and wall wrap so rainwater and leaves don't sit trapped.
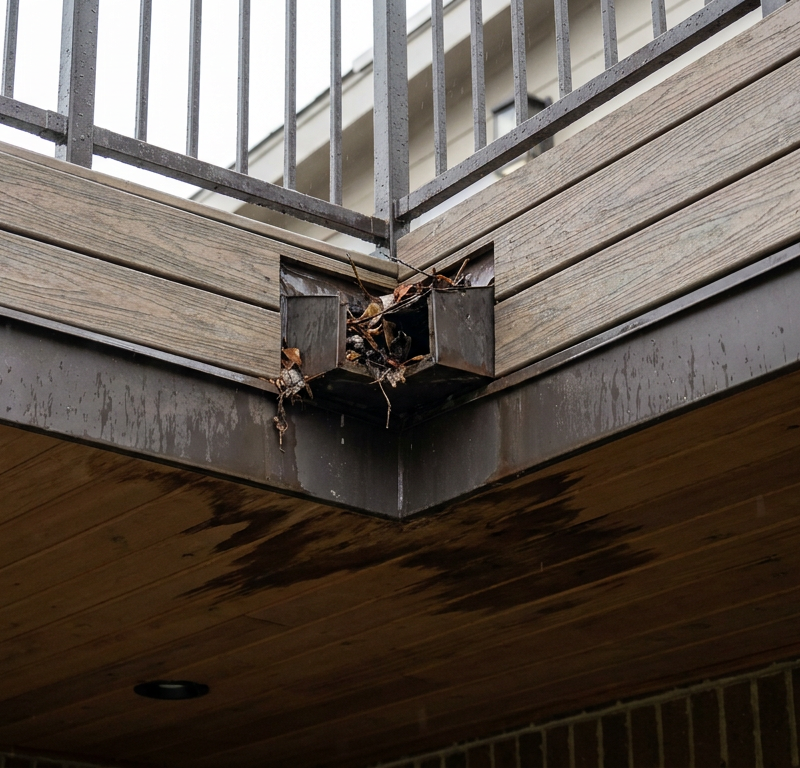
- Keep Downspout Terminations Clear: Never let a gutter downspout discharge within 5 feet of an exterior deck post footing. Concentrated roof runoff scours base soil and creates perpetual moisture that accelerates post-bottom rot.
- Trim Shrubbery for Underdeck Ventilation: Keep at least 18 inches of clear airflow between ground plantings and deck framing. Poor air circulation traps ground moisture and doubles the rate of structural fungal development.
When to Call a Professional
Some wobbly deck conditions are flat-out dangerous to tackle as a weekend DIY project. If you notice any of the following signs, clear the deck immediately, secure the sliding back door, and call a licensed residential general contractor or structural engineer:
First, if the ledger board has detached visibly by more than 1/4 inch along its span, the bolts have likely pulled past their holding capacity and are in imminent shear failure. Second, if your main carrying beam is sagging noticeably between posts or shows horizontal checking cracks that travel entirely through the timber thickness, it has suffered catastrophic structural load failure. Third, call an expert if your deck relies on multi-story support posts taller than 10 to 12 feet that wobble at the mid-span; these require engineered lateral bracing systems and potentially temporary hydraulic shoring to realign safely. Finally, if the framing is attached to cantilevered floor systems (where the second floor hangs out past the lower wall), retrofitting requires complex engineering calculations to prevent tearing your house's exterior wall frame apart.
Related Articles
Keep troubleshooting with these hand-picked guides from FixlyGuide:
- Roof Deck Leaking Into House? 7 Causes and the Fix for Each — A roof deck leaking into your house is a serious problem. We’ll walk through the 7 most common causes, from failed flashing to clogged drai…
- The Unseen Danger After a Storm: What to Do About a Sagging Roof Deck — A sagging roof deck after a storm isn't just an eyesore; it's a serious structural problem that demands immediate attention to prevent coll…
- The #1 Gutter Mistake That Causes Overflow (It's Not Clogs!) — Discover the often-overlooked culprit behind overflowing gutters during heavy rain and learn the surprising, easy fix most homeowners miss.
- The #1 Mistake Homeowners Make When Sealing a Deck (And How to Fix It) — Discover the crucial, often-missed step in deck sealing that prevents premature wear and water damage, ensuring your wood deck lasts for ye…
- The Mystery of the Loose Siding Panel: Why It Flaps and How to Fix It Right — Loose siding panels aren't just an eyesore; they can lead to serious water damage if not addressed quickly. Learn why your siding is flappi…
- The Surprising Culprit Behind Your Wobbling Ceiling Fan (It's Not Always Loose Screws) — A wobbling ceiling fan is annoying and potentially dangerous. Learn how to diagnose and fix the most common causes, from imbalanced blades…
Get deck & patio quotes from local pros
Tell us about your project and we'll match you with vetted contractors in your area. Free, no obligation, and we never sell your info.
Should you do this yourself?
Answer five quick questions before you start. Safety outranks savings every time.
Your experience with work like this
How high do you have to work?
Does the job involve any of these?
Will it need a permit?
Specialty tools
Free and instant. Educational guidance only — not a quote, inspection, or professional diagnosis.
What should this project cost?
Enter your project details for a realistic cost range before you call anyone.
Spot repairs commonly run $400–$1,800; full replacement typically $9,000–$18,000 for an average home.
- Regional adjustment
- National average
- Labor share (typical)
- ~$2,948
- Quotes to collect
- 3 written estimates
Educational estimate based on national averages — not a binding quote. Always confirm with written local estimates.
Decide what your roof needs
Two minutes of questions turns "something is wrong up there" into a clear next step.
- Repair or replace your roof?Answer 10 questions about age, leaks, and damage to get a clear next step.Open
- Compare contractor quotesScore up to four bids on price, warranty, licensing, and timeline.Open
- Get local estimatesSend one request and compare written estimates from vetted pros.Open
Free, no signup required. Estimates are educational guidance, not a quote or an inspection.
Get the print-ready PDF of this guide
A clean, ad-free, printable version you can keep on your phone or pin to the workshop wall. Free with a FixlyGuide account.
- Print-optimized layout
- Tools, materials & every step included
- Saved to your account
Frequently asked questions
Is it normal for a wood deck to have some sway or bounce?},{answer:+
A tiny, barely perceptible vibration when someone jumps can happen on long spans (joists over 12 to 14 feet), but lateral sway—where the deck rocks side-to-side away from or parallel to the house—is never normal. Movement indicates loose framing connections, absence of diagonal bracing, or weak ledger attachments that must be reinforced.
Discussion
Loading comments…