- For railings and balusters, use a brush or smaller pad applicator. Work from top to bottom.
- Apply sealant in the shade or on an overcast day if possible. Direct sun can cause the sealant to dry too quickly, leading to lap marks.
- Back-brushing is crucial. After applying with a sprayer or roller, lightly go over the wet sealant with a brush to ensure even distribution and push the product into the wood grain.
Landscaping · Deck or fence project
| Project category | Landscaping |
|---|---|
| Problem type | Deck or fence project |
| Trade required | Landscaping |
| Urgency | Planned project |
| Safety risk | Moderate safety risk |
| DIY suitability | DIY for experienced homeowners |
| Cost category | High cost |
| Typical timeline | Most builds 3–10 days depending on size |
| Contractor type | Landscaping contractor |
Repair option
Replace failed boards, posts, and hardware; reseal the surface.
Replacement option
Rebuild when framing or the ledger connection is unsafe.
Common causes
- Rot at posts and ledger
- Storm damage
- Adding outdoor living space
Relevant tools:home improvement material pricesproject cost estimator
Published July 21, 2026Last updated August 17, 2026
Tools & materials you'll need
Affiliate linksAs an Amazon Associate FixlyGuide earns from qualifying purchases — at no extra cost to you. Prices and availability are accurate as of publication and subject to change.
Quick Answer
The most common mistake homeowners make when resealing a wood deck is failing to adequately clean and prepare the surface, leading to poor sealant adhesion and premature peeling. To properly reseal, thoroughly clean the deck using a dedicated deck cleaner, allow it to dry completely for at least 48-72 hours, and then apply a high-quality sealant in thin, even coats, ensuring deep penetration and a durable finish. Skipping or rushing the cleaning and drying phases is the primary culprit behind short-lived deck protection.
The Problem
You spent time and money sealing your beautiful wood deck, yet barely a year later, the finish is peeling, flaking, or looking dull and worn. Rain soaks into the wood instead of beading up, and the once vibrant color is fading. This common scenario isn't usually due to a 'bad' sealant, but rather a critical misstep in the application process: inadequate surface preparation. Many homeowners rush through cleaning, or underestimate the importance of allowing the wood to thoroughly dry, before applying a new layer of protection. Without a clean, dry, and properly prepped surface, even the best sealants cannot penetrate and bond effectively with the wood fibers. The result is a superficial layer that quickly succumbs to foot traffic, UV rays, and moisture, leaving your valuable deck vulnerable to rot, mildew, and costly damage.
How It Works
Wood, being a natural, porous material, constantly expands and contracts with changes in temperature and humidity. When you apply a sealant, you're essentially creating a barrier that penetrates the wood's pores, encasing the fibers and preventing moisture absorption while allowing the wood to 'breathe' to some extent. This barrier also protects against UV degradation, which causes fading and graying. However, for a sealant to work effectively, it needs a clean slate. Dirt, grime, mildew, old failing sealant, and even microscopic wood fibers (known as 'mill glaze' on new wood) act as contaminants that prevent proper adhesion. Imagine trying to glue two surfaces together with a layer of dust in between – it won't hold. The same principle applies here.
Before sealing, the wood must be immaculately clean, free of loose debris, and crucially, completely dry. Moisture trapped within the wood will try to escape, pushing the freshly applied sealant away from the surface, creating bubbles, and ultimately leading to premature peeling. Deck cleaners, often containing mild acids or alkaline solutions, work by breaking down organic matter, dirt, and old sealant, allowing them to be rinsed away. Brighteners, sometimes used after cleaning, neutralize the cleaner and restore the wood's natural pH, opening up the pores slightly to allow for better sealant penetration. Once cleaned and brightened, the wood must dry out completely. This isn't just surface dry; it's about the moisture content deep within the wood. Depending on humidity, temperature, and sun exposure, this can take anywhere from 48 hours to several days. Only when the wood is truly ready can a sealant bond effectively, providing the long-lasting protection your deck needs.
Step-by-Step Fix
1. Clear the Deck — Remove all furniture, planters, grills, and any other items from your deck. Sweep away loose debris with a stiff-bristled broom. This ensures you have clear access to the entire deck surface. * If your deck has stairs or railings, clear those too. Ensure no small items are left behind that could interfere with cleaning or sealing.
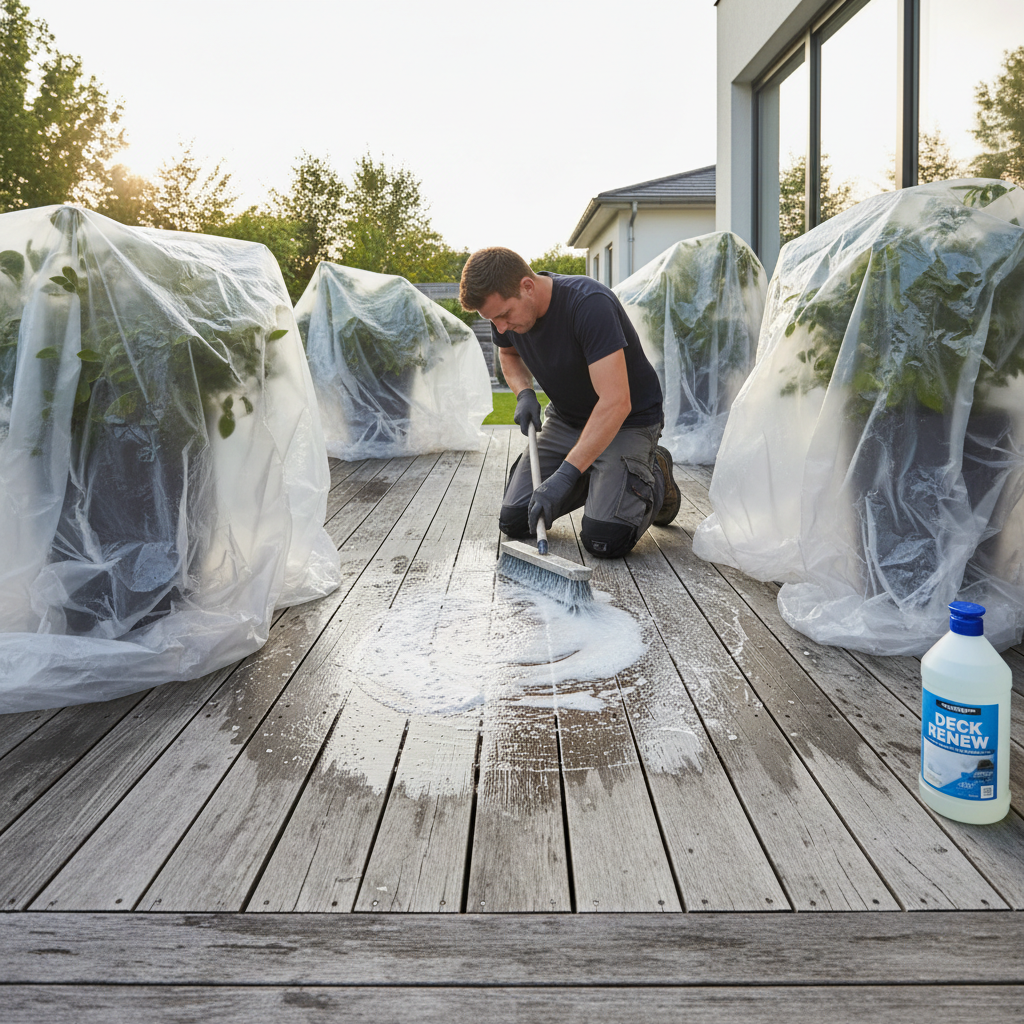
2. Protect Surrounding Areas — Before applying any cleaners, cover nearby plants, shrubs, house siding, and any vulnerable surfaces with plastic sheeting or tarps. Deck cleaners can be harsh and may damage vegetation or stain other materials. * Use painter’s tape to secure plastic sheeting to house siding or railings. This prevents overspray. * Dampen plants and shrubs with water before covering them. This can offer a slight additional layer of protection.
3. Pre-Wet the Deck — Using a garden hose with a spray nozzle, lightly wet the entire deck surface. This helps activate the deck cleaner and prevents it from drying too quickly, which can lead to streaks or uneven cleaning. * Do not saturate the wood; just a light, even wetting. Avoid pooling water.
4. Apply Deck Cleaner — Follow the manufacturer's instructions for your chosen deck cleaner. Typically, you'll mix the concentrated cleaner with water in a pump sprayer. Apply the cleaner liberally and evenly to a small section of the deck (about 100 square feet) at a time, working with the wood grain. * Wear appropriate personal protective equipment (PPE). This includes eye protection, gloves, and long sleeves. * Let the cleaner dwell for the recommended time. Do not let it dry on the wood.
5. Scrub the Surface — While the cleaner is still wet, use a stiff-bristled brush or a dedicated deck brush attached to a pole to scrub the treated section. Apply firm, consistent pressure, working with the wood grain to dislodge dirt, mildew, and old sealant. * For stubborn spots, a smaller hand brush may be necessary. Pay extra attention to high-traffic areas or shaded spots prone to mildew.
6. Rinse Thoroughly — After scrubbing, rinse the cleaned section thoroughly with a garden hose or a pressure washer set to a low-pressure fan tip (1000-1200 PSI max, held at least 12 inches from the surface). Ensure all traces of cleaner and loosened debris are removed. Work from highest to lowest points on the deck. * If using a pressure washer, keep the nozzle moving constantly. Lingering in one spot can damage the wood. * Check for any residue from the cleaner. A milky or foamy appearance indicates more rinsing is needed.
7. Apply Wood Brightener (Optional Yet Recommended) — If your deck looks dingy or you've used an aggressive cleaner, a wood brightener can restore its natural color and neutralize pH. Follow product instructions, typically applying with a sprayer and rinsing after a short dwell time. * This step is especially helpful if your deck has grayed significantly due to UV exposure or previous weathering. It also opens the wood grain for better sealant penetration.
8. Allow for EXTENSIVE Drying — This is the most critical step often overlooked. The deck MUST be completely dry – not just surface dry, but deep into the wood fibers. This usually takes a minimum of 48-72 hours, potentially longer in humid conditions or cooler temperatures. Test by sprinkling water on the wood; if it beads up, it's not ready. If it soaks in immediately, it's a good sign. * Use a moisture meter for precise readings. Target a moisture content below 12% for best results. * Avoid sealing if rain is expected within 24-48 hours of application. Check the weather forecast carefully.
9. Lightly Sand (If Needed) — If the cleaning process raised the wood grain, creating a slightly fuzzy texture, a light sanding with 80-100 grit sandpaper can smooth the surface. Use an orbital sander for large areas, following the wood grain. * This step improves the feel of the deck and promotes more even sealant application. Always sweep or vacuum sanding dust afterward.
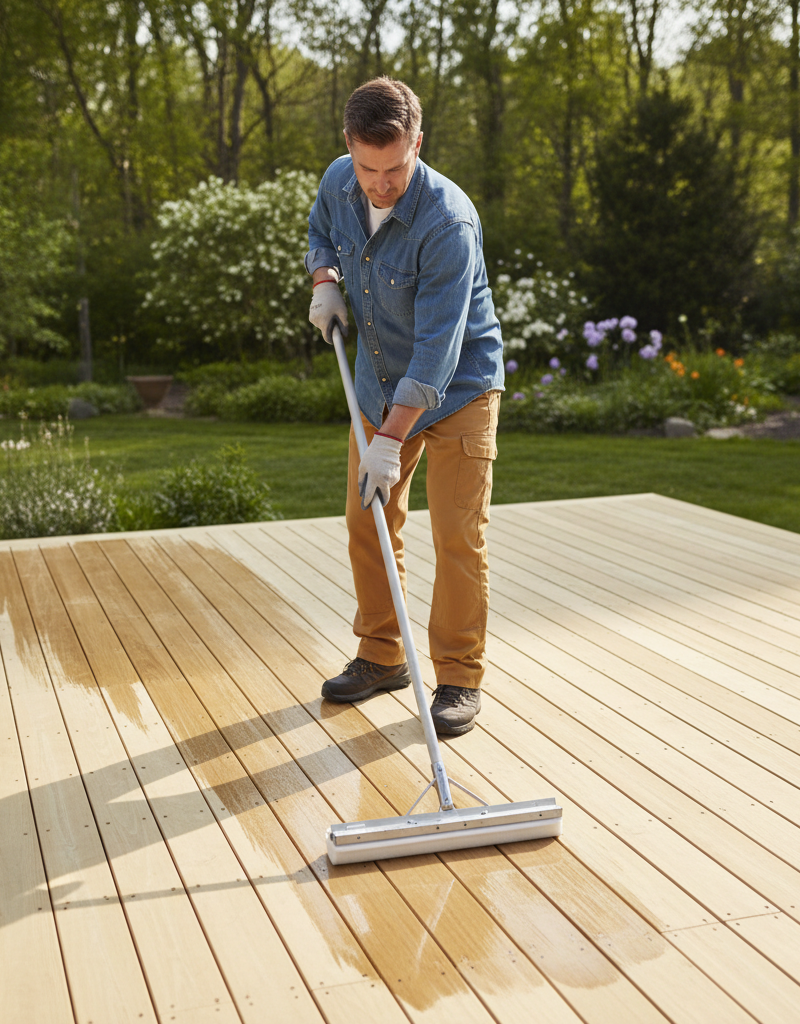
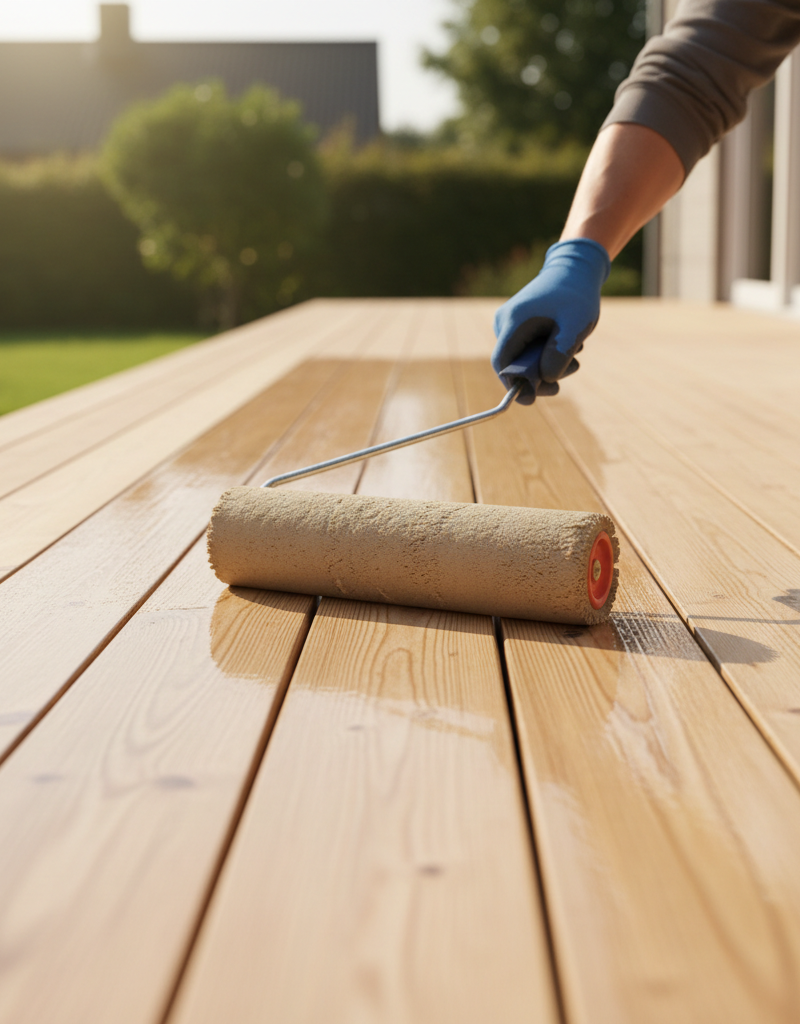
10. Apply Deck Sealant — Stir the sealant thoroughly before and during application. Using a quality roller with a long nap, a large pad applicator, or a pump sprayer (ensure it's compatible with your sealant), apply a thin, even coat of sealant to a small section of the deck, working with the wood grain. Do not overapply; aim for penetration, not a thick film. * For railings and balusters, use a brush or smaller pad applicator. Work from top to bottom. * Apply sealant in the shade or on an overcast day if possible. Direct sun can cause the sealant to dry too quickly, leading to lap marks. * Back-brushing is crucial. After applying with a sprayer or roller, lightly go over the wet sealant with a brush to ensure even distribution and push the product into the wood grain.
11. Apply Second Coat (If Recommended) — Some sealants recommend a second, equally thin coat after the first has dried to the touch (check manufacturer instructions). Ensure the first coat has had enough time to cure slightly, usually 2-4 hours, before applying the second. * Walk lightly on the deck during the curing process. Avoid heavy foot traffic or placing furniture back for several days.
12. Allow Full Cure Time — The sealant will need several days to fully cure before heavy use or placing furniture back on the deck. Consult your product's instructions for specific cure times, which can range from 24 hours to a week or more.
Common Causes
- Insufficient Cleaning: The most common culprit. Old, failing sealant, dirt, grime, mildew, and alge inhibit new sealant from adhering properly, causing it to peel or flake prematurely. Simply washing with water isn't enough; a dedicated deck cleaner is essential.
- Incomplete Drying: Applying sealant to wood that still contains moisture is a recipe for disaster. Trapped moisture attempts to escape, pushing the sealant away from the wood fibers and leading to bubbling, peeling, and a short-lived finish. This is especially true after washing.
- Over-Application of Sealant: Applying too much sealant in a single layer creates a thick film on the surface rather than allowing it to penetrate the wood. This film is prone to cracking, peeling, and becoming slick when wet.
- Wrong Product Choice: Using a varnish, paint, or an interior wood finish on an exterior deck will not provide adequate protection against UV rays, moisture, and temperature fluctuations. Deck-specific sealants and stains are formulated to withstand outdoor conditions.
- Lack of Porosity in New Wood: New deck lumber often has a condition called
Related Articles
Keep troubleshooting with these hand-picked guides from FixlyGuide:
- The #1 Deck Sealing Mistake Most Homeowners Make (And How to Fix It) — Many homeowners make a critical error when sealing their decks, leading to premature wear and damage. Learn how to properly reseal your woo…
- The #1 Deck Sealing Mistake Most Homeowners Make (And How to Fix It) — Discover the most common error in deck sealing that leads to premature wear and how to correct it for lasting protection.
- The #1 Mistake Homeowners Make When Sealing a Deck (It Costs You Years) — Avoid the most common mistake in deck sealing to protect your investment and extend your deck's lifespan significantly.
- The #1 Deck Sealing Mistake Most Homeowners Make (And How to Fix It) — Resealing your wood deck is crucial for longevity, but a common mistake can ruin your efforts and damage the wood. Learn how to do it right.
- The #1 Mistake Homeowners Make When Sealing a Deck (and How to Fix It) — Prevent costly damage and extend your deck's life by avoiding common sealing errors and following a simple, effective resealing process.
- The #1 Mistake Homeowners Make Installing Floating Shelves (and How to Fix It) — Discover the crucial error most homeowners make when mounting floating shelves into drywall, leading to sagging or collapse, and learn the…
Get deck & patio quotes from local pros
Tell us about your project and we'll match you with vetted contractors in your area. Free, no obligation, and we never sell your info.
Should you do this yourself?
Answer five quick questions before you start. Safety outranks savings every time.
Your experience with work like this
How high do you have to work?
Does the job involve any of these?
Will it need a permit?
Specialty tools
Free and instant. Educational guidance only — not a quote, inspection, or professional diagnosis.
What should this project cost?
Enter your project details for a realistic cost range before you call anyone.
Spot repairs commonly run $400–$1,800; full replacement typically $9,000–$18,000 for an average home.
- Regional adjustment
- National average
- Labor share (typical)
- ~$2,948
- Quotes to collect
- 3 written estimates
Educational estimate based on national averages — not a binding quote. Always confirm with written local estimates.
Decide what your roof needs
Two minutes of questions turns "something is wrong up there" into a clear next step.
- Repair or replace your roof?Answer 10 questions about age, leaks, and damage to get a clear next step.Open
- Compare contractor quotesScore up to four bids on price, warranty, licensing, and timeline.Open
- Get local estimatesSend one request and compare written estimates from vetted pros.Open
Free, no signup required. Estimates are educational guidance, not a quote or an inspection.
Frequently asked questions
How often should I reseal my wood deck?+
The frequency depends on your climate, deck exposure to sun and rain, and the type of sealant used. Generally, a clear sealant or toner might need reapplication every 1-2 years, while semi-transparent stains can last 2-4 years. Perform a water bead test annually: if water soaks into the wood instead of beading up, it's time to reseal.
Can I use a pressure washer to clean my deck before sealing?+
Yes, but with extreme caution. Use a pressure washer with a wide fan tip (40-degree minimum) set to a low pressure (1000-1200 PSI maximum) and keep the nozzle at least 12 inches from the wood surface. Using too much pressure or a concentrated tip can damage the wood fibers, leading to a fuzzy surface and premature sealant failure. A garden hose with a scrub brush is often safer and sufficient.
How long does deck sealant take to dry and cure?+
Deck sealant typically dries to the touch within 2-4 hours, but it needs significantly longer to fully cure. Most manufacturers recommend waiting 24-48 hours before allowing light foot traffic and 3-7 days before placing furniture back on the deck or resuming heavy use. Always check the specific product instructions for accurate drying and curing times.
What happens if I seal a wet deck?+
Sealing a wet deck is one of the biggest mistakes. Trapped moisture within the wood will try to evaporate, causing the sealant to bubble, peel, and lift prematurely. It also prevents the sealant from penetrating the wood fibers properly, resulting in a superficial, short-lived finish that won't protect your deck effectively against water damage or UV rays.
Why does my deck sealant peel every year?+
Frequent peeling almost always points to improper surface preparation. The most common reasons are inadequate cleaning (leaving behind dirt, mildew, or old sealant) and insufficient drying time before application. Over-application of sealant, creating a thick film instead of allowing penetration, can also lead to peeling. Ensure a pristine, bone-dry surface for optimal adhesion.

Discussion
Loading comments…