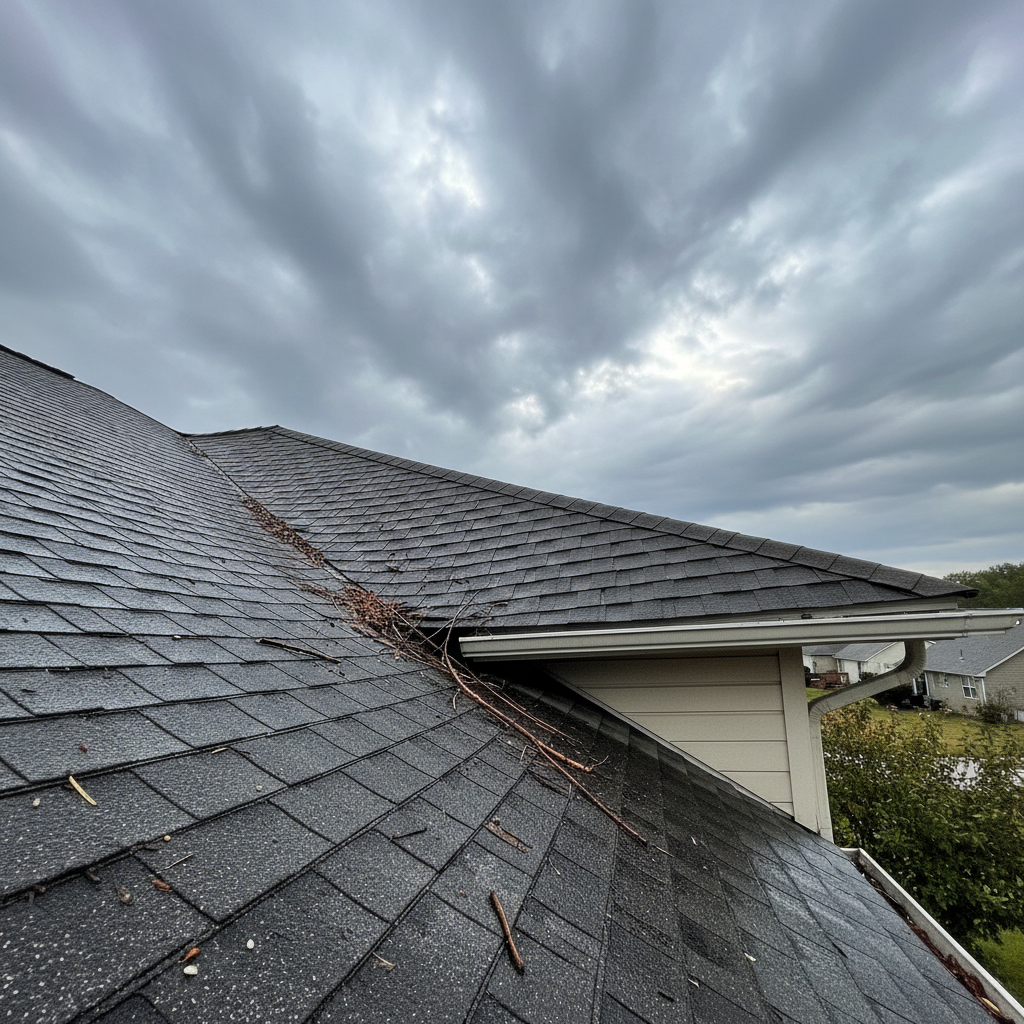
- Ignoring the Sag: This is the worst one, hands down. A small sag can turn into a big, dangerous problem before you know it. Don't talk yourself into calling it "just cosmetic." It isn't.
- Walking on a Sagging Roof: Never, ever do this. You could fall through, get hurt bad, and make the damage worse at the same time. Period.
- Trying a DIY "Patch" Job: Throwing plywood over the top or trying to push the deck back up from inside the attic won't fix the real problem. At best, it's a band-aid. At worst, it makes things sketchier.
- Delaying Inspection: The longer you wait, the more water gets in, and then you're dealing with rot, mold, damaged insulation, and maybe ceiling damage below. Get a pro out there ASAP.
- Not Checking the Attic: A lot of homeowners only look outside. You have to check the attic for water stains, mold, or daylight coming through, especially if you're suspicious about a sag.
Roofing · Structural sagging
| Project category | Roofing |
|---|---|
| Problem type | Structural sagging |
| Trade required | Roofing |
| Urgency | Emergency — act now |
| Safety risk | High safety risk |
| DIY suitability | Licensed pro only |
| Cost category | Major investment |
| Typical timeline | Inspection immediately; work scheduled after a structural assessment |
| Contractor type | Roofing contractor with a structural engineer assessment |
Repair option
Structural repair of decking and framing before any new roofing goes on.
Replacement option
Tear-off, framing repair, and full replacement — sagging is not a cosmetic issue.
Common causes
- Rotted decking from a long-running leak
- Undersized or damaged rafters and trusses
- Too many layers of roofing overloading the structure
Relevant tools:emergency checklistrepair or replace roof
Published September 17, 2026Last updated September 17, 2026
Tools & materials you'll need
Affiliate links- Amazon4x4 Lumber8-12 ft · For shoring
- AmazonPlywood or OSB SheathingAs needed (e.g., 4x8 sheets) · 1/2-inch or 5/8-inch CDX grade
- Amazon8d Ring-Shank Nails1 lb box · For decking
- AmazonRoofing Felt or Synthetic Underlayment1 roll (for patching)
- AmazonRoofing Shingles1-2 bundles · Matching existing if possible
- AmazonRoofing Nails (1-1/4 inch)1 lb box
As an Amazon Associate FixlyGuide earns from qualifying purchases — at no extra cost to you. Prices and availability are accurate as of publication and subject to change.
Quick Answer
See a sag in your roof line after a storm? Don't sit on it. That's usually your roof deck — the plywood or OSB sheathing under the shingles — telling you it's been compromised. Most of the time, it's because insulation got soaked or something slammed into the roof hard enough to do damage. It isn't just an ugly line in the roof. It's a structural problem, and if you leave it alone, you can wind up with a partial or even total collapse. You'll need a pro to check it out, shore it up if needed, and rebuild the bad section. Stay off it, and don't try to muscle through it yourself.
The Problem
Alright, let's get down to brass tacks. You've just ridden out a nasty storm — high winds, maybe some hail, buckets of rain. You do the usual walk-around, check for missing shingles, busted gutters, all the standard trouble spots. Then you look up at the roofline and there it is: a dip, a curve, a section that just doesn't look right. It’s not a tiny wave. It’s a real sag in your roof deck. That’s not some little cosmetic flaw; that’s a big red flag waving at you.
That sag means the sheathing, the structural layer beneath your shingles and felt, has weakened. Maybe water got past damaged shingles, soaked into the wood, and softened it up. Or a heavy limb came down. Or a big hailstone hit a weak spot just right. Whatever kicked it off, that section of roof isn't carrying load the way it should anymore. It's stressed, and it's flirting with collapse. I've seen houses where folks put off dealing with it, and then a normal winter snow load was enough to drop part of the roof right into the attic. No fun. No dice. And the bill sure isn't small once it gets that bad.
How It Works
Your roof is more than just shingles; it's a system. From the top down, you've got shingles or another roofing material doing the first job as a weather barrier. Under that sits the underlayment — tar paper or synthetic felt — and that gives you a second layer of protection. Below that is the roof deck itself, usually plywood or oriented strand board (OSB), typically 1/2-inch to 3/4-inch thick. That decking gets nailed to rafters or trusses, which are the main structural members running from the outside walls up to the ridge.
The roof deck's got a few jobs to do. First, it gives the shingles something solid to bite into. Second, and this is the big one, it ties the rafters together and helps the roof resist racking from wind or seismic movement. Third, it carries the weight of the roofing, snow, ice, and whatever else ends up up there — like me, crawling around with a pry bar when I'm fixing the thing. When water gets past the shingle layer, maybe from wind-driven rain under a lifted tab or through an impact hole, it soaks the underlayment and then the deck itself. Wood, especially OSB, hates staying wet. It breaks down fast, gets soft and spongy, and starts sagging under its own weight, never mind the shingles and snow load. High winds can pry sections loose too, even if water isn't the main culprit. Once the deck isn't fastened properly to the rafters, or the wood itself gives out, that's when you get that telltale dip.
Step-by-Step Fix
Alright, here's the deal: A sagging roof deck is not a DIY repair. I've been at this for over 25 years, and this is the kind of job where you call in the cavalry. The steps below are what a professional will usually do, but I'm spelling it out so you can see why this isn't a crack-it-open-and-go project.
-
Assess the Damage (Pro Only) — A licensed roofing contractor will inspect both the outside and the attic to figure out how far the sag goes. They'll look for active leaks, mold, wet insulation, and any trouble with the rafters or trusses. This can mean crawling into hot, cramped attic spaces, so don't go poking around up there yourself. They know what to look for, including the little signs that point to structural trouble.
- Safety First: Never, ever climb on a roof with a visible sag. That deck can let go under you.
-
Emergency Shoring (Pro Only) — If the sag looks serious or seems to be getting worse, the first job is to keep it from collapsing any farther. That usually means shoring up the area from inside the attic with 2x4s or 4x4s and adjustable posts, the same kind of jack posts you'd see in a basement. They're set up to support the bad section from below and take the load off the weakened deck.
- Tools: Temporary support posts (adjustable jacks), 4x4 lumber, sturdy bases.
- If this doesn't work: If the sag keeps dropping even after temporary support goes in, you're looking at a much bigger structural issue and you need a structural engineer fast.
-
Remove Existing Roofing Materials (Pro Only) — Once the area is stable, the contractor strips off the shingles, underlayment, and anything else sitting right over the sagging section. That exposes the bad deck and lets them see if the rafters underneath took a hit too. They'll usually pull materials back about 2 feet beyond the visible sag.
- Tools: Shingle remover, pry bar, utility knife.
-
Inspect and Remove Damaged Decking (Pro Only) — With the roofing off, the damage usually tells the truth pretty quick. The contractor cuts out and removes every compromised section of plywood or OSB. They're looking for anything soft, spongy, stained, or rotted out. Sometimes that's a full 4x8 sheet. Sometimes it's an odd-shaped patch.
- Criteria: Any decking that yields to pressure or shows signs of rot must be replaced.
-
Inspect and Repair Rafters/Trusses (Pro Only) — This step matters a lot. Before new decking goes down, the rafters or trusses underneath need a close look. If they're cracked, warped, or rotted, they need repair or reinforcement. That might mean sistering new lumber alongside the damaged member or using metal connectors to stiffen weak spots. If the damage is major, a structural engineer may need to weigh in.
- Typical Reinforcement: Sistering with 2x6 or 2x8 lumber, often 8-10 feet long, secured with 3-inch structural screws.
-
Install New Roof Decking (Pro Only) — New plywood or OSB sheets, typically 1/2-inch or 5/8-inch CDX grade, get cut to fit and nailed tight to the rafters. Standard practice calls for nails every 6 inches on the edges and every 12 inches in the field, using 8d ring-shank nails. The new decking has to sit flush with the undamaged sections around it.
- Gap Spacing: A 1/8-inch expansion gap is left between panels to allow for movement due to temperature and humidity.
-
Install New Underlayment and Flashing (Pro Only) — A fresh layer of roofing felt or synthetic underlayment goes over the new decking, overlapping the existing underlayment by at least 6 inches. Any flashing needed around vents, chimneys, or valleys gets re-installed or replaced so the roof seals up tight.
- Ice and Water Shield: Often applied in critical areas like eaves and valleys for extra protection.
-
Re-install or Replace Shingles (Pro Only) — Finally, new shingles go back on, woven into the old pattern if it's just a section repair, or the whole roof gets replaced if the damage is widespread. Color match matters here unless you want the repair sticking out like a sore thumb. They'll use roofing nails, typically 1-1/4 inches long, and make sure they bite into the new decking by at least 3/4 inch.
- Sealant: Roofing cement is often used around penetrations and along edges for added weatherproofing.
Common Causes
- Water Saturation: This is the big one. If water gets under your shingles and soaks the roof deck for a long stretch, the wood loses strength and starts to sag. This usually shows up on older roofs, roofs with weak underlayment, or bad flashing around chimneys and vents. I pulled a roof apart in Frisco last month where the homeowners had been blaming a "little stain" near a skylight for two years. By the time we got there, a 4x6 foot section of OSB was soft as cardboard, and the sag was plain as day.
- Impact Damage: Heavy limbs, debris from a windstorm, or big hail can smack the sheathing hard enough to crack it or depress it. If the hit's strong enough, it can break the connection between the deck and the rafter, and then you've got a localized sag.
- Insufficient Decking Thickness: Sometimes, especially on older homes or jobs where somebody cut corners, the original decking is too thin — think 3/8-inch plywood — for the span between rafters. That makes it prone to sagging even under normal load, and storm stress just makes things worse.
- Rafter or Truss Damage: Less common than deck damage, but if a rafter or truss is cracked, broken, or installed wrong, it won't support the deck the way it should. That usually means a more involved structural repair.
- Improper Ventilation: Poor attic ventilation can absolutely contribute. Trapped heat and moisture wear the roof deck down over time and make it easier for storm damage to finish the job.
Common Mistakes
- Ignoring the Sag: This is the worst one, hands down. A small sag can turn into a big, dangerous problem before you know it. Don't talk yourself into calling it "just cosmetic." It isn't.
- Walking on a Sagging Roof: Never, ever do this. You could fall through, get hurt bad, and make the damage worse at the same time. Period.
- Trying a DIY "Patch" Job: Throwing plywood over the top or trying to push the deck back up from inside the attic won't fix the real problem. At best, it's a band-aid. At worst, it makes things sketchier.
- Delaying Inspection: The longer you wait, the more water gets in, and then you're dealing with rot, mold, damaged insulation, and maybe ceiling damage below. Get a pro out there ASAP.
- Not Checking the Attic: A lot of homeowners only look outside. You have to check the attic for water stains, mold, or daylight coming through, especially if you're suspicious about a sag.
Cost & Time Breakdown
When you're dealing with a sagging roof deck, you're looking at a pretty serious repair. Here's a ballpark idea of what you can expect.
| Task | DIY cost | Pro cost | Time |
|---|---|---|---|
| Emergency Shoring (if needed) | --- | $300 – $800 | 2-4 hours |
| Remove Roofing & Decking (per 4x8 sheet) | --- | $100 – $250 | 1-2 hours |
| Replace Damaged Rafter/Truss (minor) | --- | $500 – $1,500 | 4-8 hours |
| Install New Roof Decking (per 4x8 sheet) | --- | $150 – $300 | 1-2 hours |
| Install Underlayment & Flashing (per sq ft) | --- | $0.50 – $1.50 | --- |
| Install New Shingles (per square) | --- | $300 – $600 | 4-8 hours |
| Total Repair (small section) | Not Rec. | $1,500 – $5,000+ | 1-3 days |
Note: "Square" refers to 100 square feet of roof area. Costs can vary significantly based on location, roof pitch, material choice, and accessibility. For a larger section of deck replacement or serious rafter repair, you could easily be looking at costs above $5,000, and sometimes you're creeping toward $10,000 if structural engineering gets involved.
Tips & Prevention
- Regular Roof Inspections: Have your roof checked by a pro every 3-5 years, and definitely after a major storm. A good roofer can spot loose flashing or damaged shingles before they turn into a sag.
- Maintain Gutters: Keep those gutters clean and flowing. Overflowing gutters can dump water against fascia boards and work moisture into the roof structure until the deck starts to soften.
- Trim Overhanging Branches: Cut back any branches hanging over the roof. That lowers the chance of impact damage in a storm and cuts down on debris piling up up there.
- Ensure Proper Attic Ventilation: Good attic ventilation helps move heat and moisture out, which helps your roof deck last longer and keeps the wood from breaking down. Make sure soffit vents are open and the ridge or static vent system's working right.
- Address Leaks Immediately: Don't put off small leaks. What seems minor can turn into major hidden damage to the roof deck and the structure underneath. Even a slow drip for a few months can do a lot of harm.
When to Call a Professional
Let me be crystal clear: if you see a sag in your roof deck, you need to call a licensed, insured roofing contractor, and potentially a structural engineer, immediately. This isn't a weekend warrior job. The risks are too high — getting hurt falling through the roof, a major structural failure, and way higher repair costs if it isn't handled right and fast. A pro's got the right gear to inspect it safely, the experience to tell how bad it really is, and the crew to make a structural repair that passes local code. Don't even think about climbing up there yourself; this is one of those jobs I'd tell any homeowner to leave alone. Your safety and your home's bones are worth paying for the right help.
Related Articles
Keep troubleshooting with these hand-picked guides from FixlyGuide:
- Missing Shingles? The Real Trouble Is Under Your Roof — After a storm, missing shingles seem like a simple fix. But the high winds that tore them off likely broke the seals on surrounding shingle…
- The Mystery of the Loose Siding Panel: Why It Flaps and How to Fix It Right — Loose siding panels aren't just an eyesore; they can lead to serious water damage if not addressed quickly. Learn why your siding is flappi…
- Wind Tore Off Your Shingles? The 7 Critical Steps Most Homeowners Miss — Discover the essential steps to take when roof shingles go missing after a storm, from immediate safety checks to temporary repairs and ins…
- The $50 Storm Damage Secret Your Insurance Adjuster Won't Tell You — High winds snatched your shingles? Don't panic. I'll show you how to quickly and safely assess the damage and make a temporary repair to pr…
- Your Insulation Isn't the Problem: Why Your Attic Still Bakes — Even with thick insulation, a hot attic signals a critical ventilation failure that could be silently damaging your roof and driving up you…
- The Mystery of the Spongy Floor: Is Your Subfloor Failing? — A spongy or bouncy floor can be more than just annoying; it often signals a hidden problem with your subfloor or joists that needs immediat…
Get deck & patio quotes from local pros
Tell us about your project and we'll match you with vetted contractors in your area. Free, no obligation, and we never sell your info.
Should you do this yourself?
Answer five quick questions before you start. Safety outranks savings every time.
Your experience with work like this
How high do you have to work?
Does the job involve any of these?
Will it need a permit?
Specialty tools
Free and instant. Educational guidance only — not a quote, inspection, or professional diagnosis.
Questions to ask before you sign
Ask every contractor the same questions and the cheapest bid stops looking cheapest. Check them off as you go — your progress is saved on this device.
Free, no signup. Bring this to every walkthrough so you compare bids on the same terms.
What should this project cost?
Enter your project details for a realistic cost range before you call anyone.
Spot repairs commonly run $400–$1,800; full replacement typically $9,000–$18,000 for an average home.
- Regional adjustment
- National average
- Labor share (typical)
- ~$2,948
- Quotes to collect
- 3 written estimates
Educational estimate based on national averages — not a binding quote. Always confirm with written local estimates.
Fixly Project Decision Box
- DIY difficulty
- Professional Recommended
- Estimated time
- Inspection 1–2 hours · repairs 1–3 days
- Cost level
- High
Main tools / materials
- Binoculars for a ground-level look
- Flashlight for attic checks
- Moisture meter
- Roofing cement (temporary patch only)
When to stop and call a pro
- Active leak near lights, fans, or any wiring
- Sagging, bulging, or water-filled ceiling
- Steep, wet, or two-story roof — do not climb it
- Storm or hail damage you plan to claim on insurance
Need professional help?
Free roof assessment first — no phone calls until you ask for them.
Get Local Roofing HelpGet help with your roof now
Stay off the roof. These free tools help you protect the house and reach the right professional fast.
- Emergency repair checklistThe first steps that limit damage before a pro arrives.Open
- Repair or replace your roof?Answer 10 questions about age, leaks, and damage to get a clear next step.Open
- Get local estimatesSend one request and compare written estimates from vetted pros.Open
Free, no signup required. Estimates are educational guidance, not a quote or an inspection.
Get the print-ready PDF of this guide
A clean, ad-free, printable version you can keep on your phone or pin to the workshop wall. Free with a FixlyGuide account.
- Print-optimized layout
- Tools, materials & every step included
- Saved to your account
Frequently asked questions
What does a sagging roof deck look like?+
A sagging roof deck appears as a noticeable dip, curve, or uneven section along your roofline. From the inside of your attic, you might see a downward bow in the plywood or OSB sheathing, often accompanied by water stains or mold.
Is a sagging roof deck dangerous?+
Yes, absolutely. A sagging roof deck indicates compromised structural integrity. It can lead to partial or complete roof collapse, especially under additional weight from snow, ice, or people walking on it, posing a significant safety risk.
How quickly does a sagging roof deck need to be fixed?+
Immediately. Once you notice a sag, it's critical to contact a professional roofing contractor for an assessment as soon as possible. Delaying repairs can lead to further damage, increased repair costs, and a higher risk of structural failure.
Can I repair a sagging roof deck myself?+
No, a sagging roof deck is not a DIY repair. It requires specialized knowledge of structural carpentry, proper shoring techniques, and adherence to building codes. Attempting to fix it yourself is dangerous and likely to result in an ineffective or unsafe repair.
What causes a roof deck to sag after a storm?+
The most common causes are prolonged water saturation from leaks that compromise the wood's integrity, or direct impact damage from heavy debris like tree branches. Insufficient decking thickness or underlying rafter/truss damage can also contribute.
Will insurance cover a sagging roof deck due to storm damage?+
Generally, yes. Most homeowner's insurance policies cover sudden and accidental damage caused by perils like wind, hail, or falling objects from a storm. Document the damage thoroughly and contact your insurer promptly.
How long does it take to repair a sagging roof deck?+
The active repair time can range from 1 to 3 days for a moderately sized section, but this doesn't include the initial assessment and any necessary material ordering. The complexity of rafter damage or size of the sag can extend this timeframe.
What's the difference between roof sheathing and roof decking?+
The terms are often used interchangeably. 'Roof decking' or 'roof sheathing' refers to the flat panels (usually plywood or OSB) that are nailed to the rafters and form the structural base for your roofing materials. It's the layer right under your felt and shingles.
What if my rafters are damaged along with the roof deck?+
If rafters or trusses are damaged, the repair becomes more complex and critical. They will need to be reinforced (often by 'sistering' new lumber alongside the damaged sections) or completely replaced. This reinforces the structural integrity of the entire roof system.
Can proper attic ventilation prevent roof deck sag?+
Proper attic ventilation helps prevent moisture buildup and excessive heat, which can degrade the roof decking over time and make it more susceptible to sagging from water intrusion or other storm damage. It's a preventative measure, not a cure for existing sag.


Discussion
Loading comments…