- Pest Infestation: Termites, carpenter ants, and other wood-boring insects can chew through and compromise the floor framing. Sneaky little devils — they can do a lot of damage before anybody notices.
- Under-sized Joists: Sometimes, especially in older additions or poorly planned remodels, the joists just aren’t beefy enough for the span they’re carrying. That gives you a bouncy floor even when nothing’s rotted.
- Loose Fasteners: Over time, screws loosen or nails pop, and the subfloor separates a bit from the joists. That movement makes the floor feel spongy and usually squeaky too.
General remodeling · Renovation planning
| Project category | General remodeling |
|---|---|
| Problem type | Renovation planning |
| Trade required | General contracting |
| Urgency | Planned project |
| Safety risk | Low safety risk |
| DIY suitability | Pro recommended |
| Cost category | Major investment |
| Typical timeline | Design and permitting often 2–4 months before work starts |
| Contractor type | General contractor |
Repair option
Phase the work and fix the building envelope first.
Replacement option
Full renovation with permits, design, and a general contractor.
Common causes
- Space no longer fits how the household lives
- Resale preparation
- Deferred maintenance stacking up
Relevant tools:project cost estimatorcompare quoteshome improvement material prices
Published September 7, 2026Last updated September 7, 2026
Tools & materials you'll need
Affiliate linksNo materials required.
As an Amazon Associate FixlyGuide earns from qualifying purchases — at no extra cost to you. Prices and availability are accurate as of publication and subject to change.
Quick Answer
When your floor feels like a trampoline or sags underfoot, your house is telling you something’s wrong underneath. Most times, it’s the subfloor itself — maybe it got wet and rotted out, or it’s just old and finally gave up. Could be loose fasteners. Worst case, you’ve got damaged floor joists. Either way, you’ve got to find the source and fix it before a little dip turns into a real mess, or worse, a safety issue. That usually means getting underneath, checking the damage, and replacing the bad sections so the floor firms back up.
The Problem
I’ve seen it a hundred times: a homeowner calls and says, “My floor feels weird, like it’s gonna give out!” And yeah, that’s usually a spongy, bouncy, or sagging spot. It’s not just annoying. That squishy feel under your feet, the way the room seems to jiggle when you walk across it — that’s your subfloor crying uncle.
This isn’t some little cosmetic thing. It’s structural. Let it ride, and you can end up with cracked tile, warped hardwood, major floor deflection, and in rough cases, a floor system that’s no longer doing its job. Don’t kick this can down the road; it’s one of those repairs that costs a lot more if you wait. I’ve had folks ignore a bathroom floor too long, and next thing you know, the toilet’s leaning and the tub’s sagging toward the ceiling below. No thanks.
How It Works
Alright, here’s how the floor is put together. Most homes built in the last 70 years or so have a layered system. On top, you’ve got the finished floor — hardwood, laminate, tile, carpet, whatever. Under that sits the subfloor. That’s usually plywood or OSB (Oriented Strand Board), commonly 5/8-inch to 3/4-inch thick, fastened right to the floor joists. The subfloor gives you a flat, solid base and helps spread the load across the framing.
Now the joists — that’s the real muscle. Those are the big structural members, usually 2x8s, 2x10s, or 2x12s, spaced 16 inches or 24 inches on center. They run side by side and carry the floor load down to the foundation walls or support beams. Sometimes there’s blocking or bridging between them to stiffen things up and keep them from twisting. It all works together: joists carry the weight, subfloor ties it together, finished flooring gives you something nice to walk on. When one piece fails, like wet subfloor that turns soft or a joist that gets damaged, you get that springy floor nobody asked for.
Water is the big enemy here. It gets into plywood or OSB, makes it swell, delaminate, and rot. Then it loses strength fast. Older homes may have plank subfloors too, and those can loosen up or get damaged over time, especially if moisture’s been in the mix or the original install wasn’t all that great.
Step-by-Step Fix
Finding that spongy spot? You’ve got to get to the bottom of it. Literally. This isn’t a quick patch, and it takes some grunt work, but a solid floor’s worth it. Safety first — wear your safety glasses and gloves when you’re cutting or tearing into anything.
-
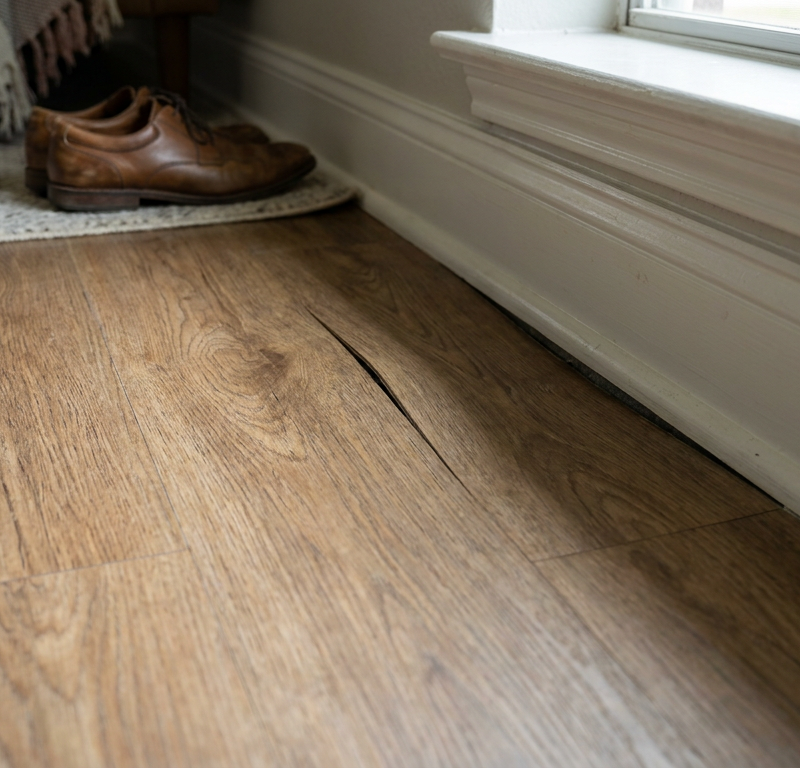
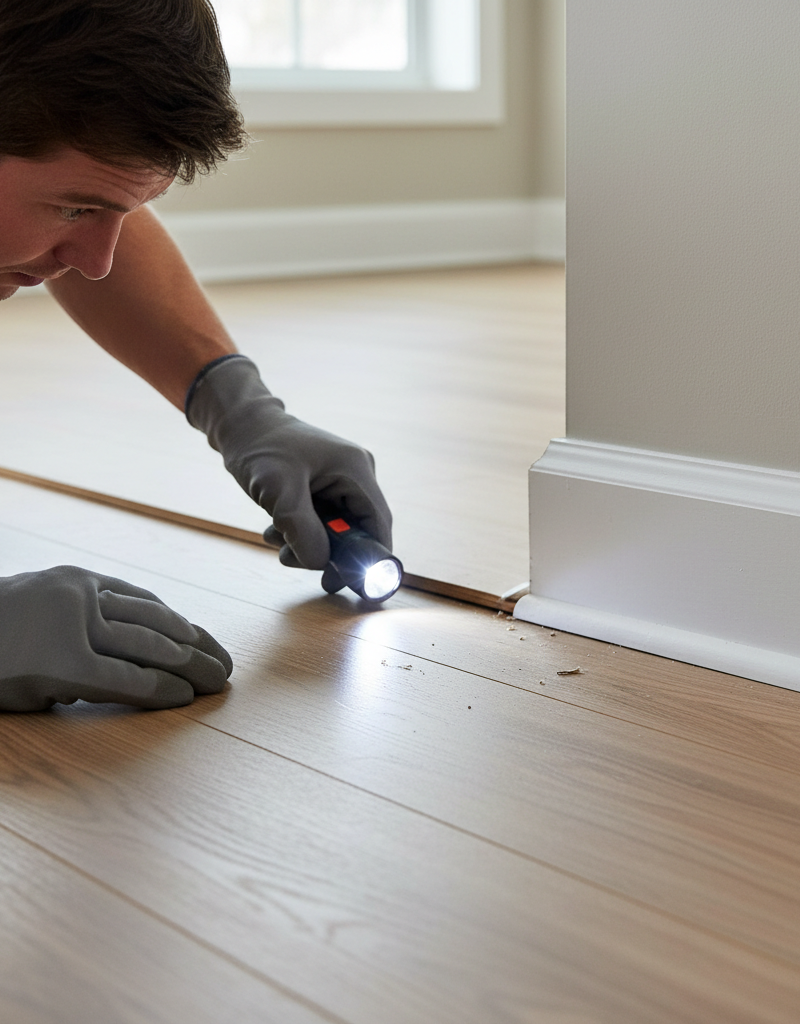
Locate the Problem Area — Pinpoint the exact spongy spot. Walk it, feel for the dip, the bounce, the soft patch. If it’s under carpet, you might feel it through the pad. Hardwood or tile? Look for cracks, loose grout, or finish lines that’ve opened up. Give it a stomp. Sometimes you’ll hear a creak or crunch that tells you there’s loose or rotten material under there.
- Safety: If you suspect water damage, make sure the area’s dry before you start. Fix any leak first.
-
Access the Subfloor — This is usually the heavy lift. You’ll need to pull up the finished flooring above the damaged subfloor. Carpet? Pull it back. Laminate? Usually you’ve gotta take it apart back to the bad area. Hardwood and tile are tougher; sometimes you can remove individual boards or tiles, and sometimes you just have to sacrifice a section. Start by defining the repair area — it usually needs to be bigger than the soft spot itself, reaching to the nearest solid joist on all sides.
- Tools: Utility knife, pry bar, hammer, maybe a circular saw for wood flooring or a grinder for tile grout.
-
Inspect from Below (If Possible) — If you’ve got a basement or crawl space, get down there. That’s where you can often see the damage plain as day. Look for stained wood, mold, rot, or insect activity on the underside of the subfloor and joists. Poke suspicious spots with a screwdriver — if it sinks in easy, you found rot. I pulled a floor in Frisco last month that had exactly this kind of bounce, and the homeowner was sure it was just “old house stuff.” Nope. The underside told the whole story in five minutes flat.
- If you can't access from below: You’ll have to work off what you find once the finished floor’s up. Assume the worst until you prove otherwise.
-
Identify the Cause — Water leak? Termites? Old, loose, worn-out subfloor? You’ve got to find the why. If it’s a leak, fix it before you replace anything, or you’ll be back in here next year doing the same dance.
- Pro Tip: Check plumbing lines, toilet seals, shower pan seams, and appliance hoses near the soft area.
-
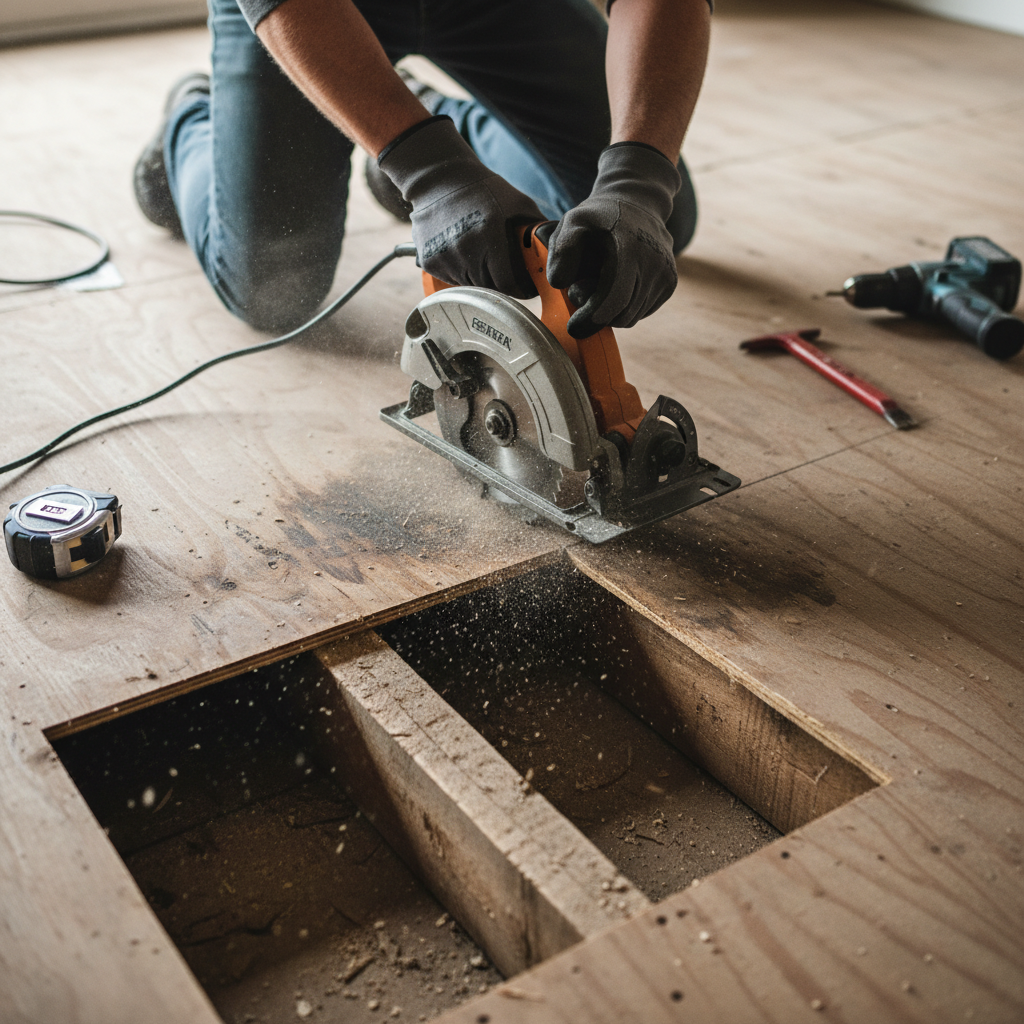
Mark and Cut Out Damaged Subfloor — Grab a straightedge and pencil and mark a square or rectangle around the damaged spot. Try to land your cuts on solid joists where you can. If you can’t, you’ll need blocking later. Set your circular saw depth to just barely cut through the subfloor thickness (e.g., 3/4 inch for standard plywood). Cut it out carefully. Watch for pipes and wires below. A reciprocating saw helps with corners or tight spots.
- Safety: Wear hearing protection and safety glasses with power tools. Keep track of where that blade is at all times.
-
Check Joists and Add Blocking — Once the old subfloor is out, inspect the joists you’ve exposed. Rotten? Split? If so, you may need to sister new joists alongside the old ones, or call in a structural engineer if the damage is serious. If your cut lines don’t land on joists, add blocking — short pieces of lumber cut to fit snugly between joists at the ends of the opening. Fasten them with construction screws, driving at least two 3-inch screws into each end.
- Measurements: Blocking should be cut tight, usually within 1/8 inch tolerance.
-
Install New Subfloor — Cut a new piece of plywood or OSB to fit the opening snug. Use the same thickness as the existing subfloor. Run a bead of construction adhesive on the top edges of the joists and blocking where the new sheet will sit. Set it in place and fasten it with 1 1/2-inch to 2-inch subfloor screws, spaced every 6 inches along the joists and blocking. Don’t use nails — they can loosen and bring the squeaks right back.
- Material: Use exterior-grade plywood or OSB (rated Exposure 1 or Marine Grade) if there’s any chance moisture shows up again.
-
Seal Gaps and Prepare for Finishing — Check the edges of the new section. Fill small gaps (less than 1/8 inch) with wood filler or subfloor caulk. Make sure the surface is clean and level. Then you’re ready to put the finished flooring back, and it needs to be fastened the way that flooring wants it done.
- Leveling: If there’s a slight height difference, use leveling compound so the transition disappears before the finish floor goes back down.
Common Causes
- Water Damage: Leaks from plumbing, appliances, or even roof leaks can soak subfloor materials, leading to rot and weakness. This is probably the number one culprit I run into. Slow drip under a sink? Toilet seal that’s gone bad? Water finds its way.
- Pest Infestation: Termites, carpenter ants, and other wood-boring insects can chew through and compromise the floor framing. Sneaky little devils — they can do a lot of damage before anybody notices.
- Improper Installation or Spacing: If the subfloor wasn’t fastened well to the joists, or the joists are spaced too far apart (e.g., 24 inches on center without thick enough subfloor), you’ll get bounce and deflection. That’s common in older homes and DIY jobs where somebody cut corners.
- Under-sized Joists: Sometimes, especially in older additions or poorly planned remodels, the joists just aren’t beefy enough for the span they’re carrying. That gives you a bouncy floor even when nothing’s rotted.
- Loose Fasteners: Over time, screws loosen or nails pop, and the subfloor separates a bit from the joists. That movement makes the floor feel spongy and usually squeaky too.
Common Mistakes
- Ignoring the Root Cause: Replacing the subfloor without fixing the leak that caused the rot is like slapping a bandage on a busted pipe. You’ll be back at it soon.
- Using the Wrong Materials: Don’t cheap out on subfloor material. Thinner plywood than the original, or particleboard — which is lousy around moisture — will just land you in the same spot again, usually faster.
- Not Extending the Repair Far Enough: Fixing only the obvious soft spot usually leaves damaged material or loose edges in place. You need to cut back to solid, sound material and secure the joists.
- Nailing Instead of Screwing: Nails work loose over time. Then you get squeaks and that soft feeling again. Use subfloor screws; they hold way better.
- Not Adding Blocking: If the new subfloor doesn’t land on joists at every edge, you’ve got to add blocking for support. Skip it and you’ve built yourself a weak spot.
- Going Too Shallow with the Saw: If the circular saw blade isn’t set deep enough, you’ll be fighting the last bit of subfloor and may end up messing up the joists below. Go just a hair deeper than the subfloor thickness, but always check for obstructions.
Cost & Time Breakdown
| Task | DIY Cost | Pro Cost | Time |
|---|---|---|---|
| Investigation & Prep | $0–$20 | $100–$250 | 1–2 hours |
| Subfloor Materials (4x8 sheet) | $40–$80 | Included | N/A |
| Blocking Lumber | $10–$30 | Included | N/A |
| Adhesive & Screws | $15–$30 | Included | N/A |
| Finished Flooring Repair (Approx) | $50–$300 | $200–$800 | 2–8 hours |
| Labor (DIY vs. Pro) | Your sweat | $500–$1,500+ | N/A |
| Total Estimated Cost | $115–$460 | $800–$2,500+ | 4–12 hours |
Note: Pro cost for finished flooring repair can vary wildly depending on material type and availability. This table assumes repairing a moderate 4x4 ft section of subfloor.
Tips & Prevention
- Regular Leak Checks: Check the usual trouble spots every so often — under sinks, around toilets, behind refrigerators, dishwashers, and washing machines. Look for drips, water stains, or that musty smell that tells on moisture.
- Proper Ventilation: Keep bathrooms and basements ventilated so moisture doesn’t build up and start hurting the subfloor. Run exhaust fans during and after showers.
- Seal Gaps and Cracks: Watch the caulk and seals around windows, doors, and the foundation so water doesn’t sneak into the structure.
- Address Spills Immediately: Don’t let standing water sit on your floor, especially wood or laminate. Wipe it up right away so it doesn’t work into the seams.
- Monitor for Pests: Keep an eye out for termites or other wood-destroying insects, especially in crawl spaces or basements. A yearly pest inspection can catch trouble early.
- Consider Subfloor Rating: When you replace or install new subfloor, choose the right thickness (at least 3/4 inch for 16-inch on-center joists, 7/8 inch for 24-inch) and think about exterior-grade plywood in moisture-prone areas.
When to Call a Professional
Look, I’m all for DIY, but there are times you need to hang up the tools and call in the cavalry. If the spongy floor covers a big area (more than, say, a 4x4 foot section), or you find widespread rot in the joists or support beams, you’re out of DIY land. Any sign of structural damage — like major sagging across multiple joists, big cracks in the foundation, or proof of a long-term leak that’s chewed up the frame — means you need a licensed general contractor or a structural engineer. Fooling around with structural parts without the right know-how can put your home’s safety and value at risk, so don’t gamble on it. And if you uncover an active plumbing leak and you’re not comfortable fixing plumbing, get a licensed plumber in there first.
Related Articles
Keep troubleshooting with these hand-picked guides from FixlyGuide:
- The Surprising Reason Your Interior Door Sticks (It's Not Always Humidity) — Discover why your interior door sticks, often due to more than just humidity, and learn simple DIY fixes to restore smooth operation.
- That Corner Crack Is Back? It's Not the Drywall's Fault — Discover the real reasons that annoying drywall crack in the corner keeps returning. It's often a sign of deeper issues than just bad mud o…
- The Unseen Culprit Behind Hardwood Floor Gaps (It’s Not Always Age) — Discover why your hardwood floors are gapping and what to do about it, often due to hidden moisture issues, not just normal wear and tear.
- The Hidden Cause of Squeaky Hardwood Floors & The Real Fix — That persistent squeak from your hardwood floors isn't just an annoyance; it's a sign of movement. We'll uncover the hidden causes, from hu…
- The 3 Hidden Reasons Your Doorbell Rings for No One — Phantom doorbell rings are frustrating, but often point to common, easily fixable issues with your chime, transformer, or push button.
- The Buzzing Microwave: Is It a Symptom or a Fire Hazard? — A buzzing microwave can be more than just annoying; it might signal a serious issue that needs immediate attention, from a faulty magnetron…
Should you do this yourself?
Answer five quick questions before you start. Safety outranks savings every time.
Your experience with work like this
How high do you have to work?
Does the job involve any of these?
Will it need a permit?
Specialty tools
Free and instant. Educational guidance only — not a quote, inspection, or professional diagnosis.
Estimate your own project cost
National averages are a starting point. Enter your details for a range that fits your house.
Flooring cost estimator
- Material$498 – $1,095
- Installation labor$360 – $720
Tile installs and stairs increase labor cost. Get 2–3 quotes for jobs over 200 sq ft.
Educational estimate only — always confirm with written local bids.
What should this project cost?
Enter your project details for a realistic cost range before you call anyone.
Cost depends heavily on which system turns out to be the source.
- Regional adjustment
- National average
- Labor share (typical)
- ~$1,620
- Quotes to collect
- 3 written estimates
Educational estimate based on national averages — not a binding quote. Always confirm with written local estimates.
Before you start
Check the difficulty, permits, and safety risk — then decide whether to call a pro.
Free, no signup required. Estimates are educational guidance, not a quote or an inspection.
Get the print-ready PDF of this guide
A clean, ad-free, printable version you can keep on your phone or pin to the workshop wall. Free with a FixlyGuide account.
- Print-optimized layout
- Tools, materials & every step included
- Saved to your account
Recommended for DIYers & woodworkers
Sponsored
The Top 20 Tools for Workshops of Any Budget
No stationary machines or power tools required — plus 3 fundamental tools that can't be bought at any price.
Get the free guide
Ted's Woodworking — The #1 Woodworking Resource
Detailed instructions, dimensioned drawings, materials & cutting lists, and 3D schematics for every skill level.
See the plansSponsored: links above are affiliate links. FixlyGuide may earn a commission on qualifying purchases — at no extra cost to you.
Frequently asked questions
What causes a spongy floor?+
A spongy floor is typically caused by water damage leading to subfloor rot, pest infestations weakening the wood, loose fasteners connecting the subfloor to joists, or improperly spaced or undersized floor joists that allow too much deflection.
Can I ignore a spongy floor?+
Ignoring a spongy floor is a bad idea. It's a sign of a structural issue that will only worsen over time, leading to more extensive damage, potential safety hazards, and significantly higher repair costs down the road.
How do I know if my subfloor is rotten?+
You can identify rotten subfloor by its soft, crumbly texture when poked with a screwdriver, a musty odor, or visible discoloration and mold growth. In severe cases, the subfloor might even sag visibly.
What tools do I need to fix a spongy subfloor?+
You'll need basic demolition tools like a pry bar and hammer, a circular saw, safety glasses, hearing protection, a tape measure, a drill, and subfloor screws. A reciprocating saw can also be helpful for tight cuts.
Should I use nails or screws for subfloor repair?+
Always use screws, specifically subfloor screws, for subfloor repair. Nails can work loose over time, leading to future squeaks and a reoccurrence of the spongy feeling. Screws provide a much stronger, more secure hold.
How do I prevent future subfloor damage?+
Prevent future damage by promptly addressing any water leaks, ensuring good ventilation in moisture-prone areas, sealing exterior gaps, wiping up spills immediately, and periodically checking for signs of pests or leaks.
When is a spongy floor too big of a DIY job?+
If the spongy area is very large (e.g., over a 4x4 ft section), if you find significant damage to multiple floor joists or structural beams, or if you're dealing with an active, uncontrolled leak, it's time to call a licensed professional.
Can I replace a subfloor without removing all the finished flooring?+
Sometimes, yes, especially if the spongy spot is small and located in an area where the finished flooring can be carefully removed and reinstalled without widespread damage (e.g., a few tongue-and-groove hardwood planks). However, often, you'll need to remove a larger section of finished flooring to adequately access and repair the subfloor and joists underneath.
What kind of wood should I use for subfloor replacement?+
For subfloor replacement, use plywood or OSB that is the same thickness as your existing subfloor, typically 5/8-inch or 3/4-inch. If moisture is a concern, consider using exterior-grade plywood (Exposure 1 or Marine Grade) for better resistance.

Discussion
Loading comments…