
Tools & materials you'll need
Affiliate linksAs an Amazon Associate FixlyGuide earns from qualifying purchases — at no extra cost to you. Prices and availability are accurate as of publication and subject to change.
Quick Answer
An interior door that sticks is a common household annoyance, often attributed to changes in humidity causing the wood to swell. While humidity is a frequent culprit, other factors like loose hinge screws, paint buildup, or even slight shifts in your home's foundation can be the real reason. Most of these issues are straightforward to diagnose and fix with basic tools and a bit of patience, allowing you to restore your door to smooth, silent operation.
The Problem
There's nothing quite as frustrating as a door that refuses to close smoothly, scrapes against the frame, or requires a forceful shove to open. This isn't just an inconvenience; a sticking door can damage the door and frame over time, wear down finishes, and even impact energy efficiency if it prevents a tight seal. Homowners often assume the problem is simply humidity, leading them to delay action or attempt ineffective solutions. However, a systematic approach to troubleshooting can pinpoint the true cause and lead to a lasting repair, saving you frustration and potential repair costs down the line.
How It Works
To understand why a door sticks, it helps to know how a door assembly functions. A typical interior door hangs by two or three hinges secured to both the door slab and the door frame (jamb). The door swings freely within the rectangular opening of the frame, with a small, consistent gap — typically 1/8 inch — around all four sides (top, bottom, and both vertical sides). This gap, known as the 'reveal,' is crucial for proper operation. The hinges, usually made of steel, feature a pivot pin that allows the door to rotate in and out of the opening. The door latch and strike plate on the frame work together to hold the door closed. The frame itself is secured to the wall studs, which are part of your home's overall structure. Over time, various forces can act upon this delicate balance. Wood, being hygroscopic, readily absorbs and releases moisture from the air, causing it to expand and contract. This expansion is often most noticeable in older, solid wood doors. Loose or stripped hinge screws allow the door to sag or bind at the corners, changing the reveal. Excessive paint layers can gradually build up along the edges of the door or frame, reducing the critical reveal until the door scrapes. Even minor structural settling in your home can slightly twist the door frame, throwing the entire alignment off. Understanding these interconnected components and potential failure points is the first step to a successful repair.
Step-by-Step Fix
Before you begin, identify exactly where the door is sticking. Look for scrapes, rub marks, or areas of resistance. This will guide your repair efforts.
-
Check Hinge Screws — Tighten any loose hinge screws.
- Open the door fully. Inspect both hinges on the door slab side and the jamb side. Use a screwdriver (Phillips or flathead, depending on the screw type) to firmly tighten all visible screws. Be careful not to overtighten, which can strip the wood.
- If a screw spins freely (stripped hole): Remove the screw. Break off a few wooden toothpicks or a wooden golf tee, dab them with wood glue, insert them into the stripped screw hole, and let the glue dry for 30 minutes. Trim the excess flush with a utility knife, then reinsert and tighten the screw. This provides new material for the screw threads to grip.
- Open the door fully. Inspect both hinges on the door slab side and the jamb side. Use a screwdriver (Phillips or flathead, depending on the screw type) to firmly tighten all visible screws. Be careful not to overtighten, which can strip the wood.
-
Examine for Paint Buildup — Scrape away excess paint from door edges and frame.
- Inspect the top, bottom, and vertical edges of the door, as well as the corresponding parts of the door frame. Multiple layers of paint can accumulate, effectively widening the door or narrowing the frame reveal. Use a putty knife or a paint scraper to carefully remove any thick lines or blobs of paint, focusing on areas where paint has bridged the door and frame.
- Safety Note: Wear gloves and eye protection when scraping paint.
- Inspect the top, bottom, and vertical edges of the door, as well as the corresponding parts of the door frame. Multiple layers of paint can accumulate, effectively widening the door or narrowing the frame reveal. Use a putty knife or a paint scraper to carefully remove any thick lines or blobs of paint, focusing on areas where paint has bridged the door and frame.
-
Address a Sagging Door (Shim Hinges) — Use shims to reposition the door.
- If the door is catching on the bottom or latch-side jamb, the top hinge might be loose or the frame slightly out of square. To raise the door or pull it closer to the hinge side, remove the top hinge from the jamb (you may need a helper to support the door). Cut thin cardboard (from a cereal box or business card) into a hinge-sized shim. Place one or two shims behind the hinge flap on the jamb side, then reattach the hinge. This pushes the hinge barrel out slightly, lifting the door's outer edge.
- If the door binds on the hinge side: Experiment with shimming the bottom hinge instead to pull the door away from the jamb at the top.
- If the door is catching on the bottom or latch-side jamb, the top hinge might be loose or the frame slightly out of square. To raise the door or pull it closer to the hinge side, remove the top hinge from the jamb (you may need a helper to support the door). Cut thin cardboard (from a cereal box or business card) into a hinge-sized shim. Place one or two shims behind the hinge flap on the jamb side, then reattach the hinge. This pushes the hinge barrel out slightly, lifting the door's outer edge.
-
Plane the Door (If Wood Swelling is the Cause) — Carefully remove wood from the sticking edge.
- If tightening hinges and removing paint don't work, and rub marks indicate consistent contact on a specific edge, the door may have swollen or the frame shifted. Remove the door from its hinges. Lay it flat on sawhorses. Identify the sticking area using a straightedge and sandpaper (rubbing the edge with sandpaper reveals contact points). Use a block plane to shave off small amounts of wood, working slowly and checking your progress frequently. Maintain a consistent bevel if the door originally had one. Rehang the door and recheck. Repeat as necessary. Start with the top or sides, only planing the bottom as a last resort.
- Safety Note: Always plane with the grain to avoid splintering. Wear work gloves and eye protection.
- If you're unsure or uncomfortable planing: Consider calling a professional carpenter to avoid permanently damaging the door.
- If tightening hinges and removing paint don't work, and rub marks indicate consistent contact on a specific edge, the door may have swollen or the frame shifted. Remove the door from its hinges. Lay it flat on sawhorses. Identify the sticking area using a straightedge and sandpaper (rubbing the edge with sandpaper reveals contact points). Use a block plane to shave off small amounts of wood, working slowly and checking your progress frequently. Maintain a consistent bevel if the door originally had one. Rehang the door and recheck. Repeat as necessary. Start with the top or sides, only planing the bottom as a last resort.
-
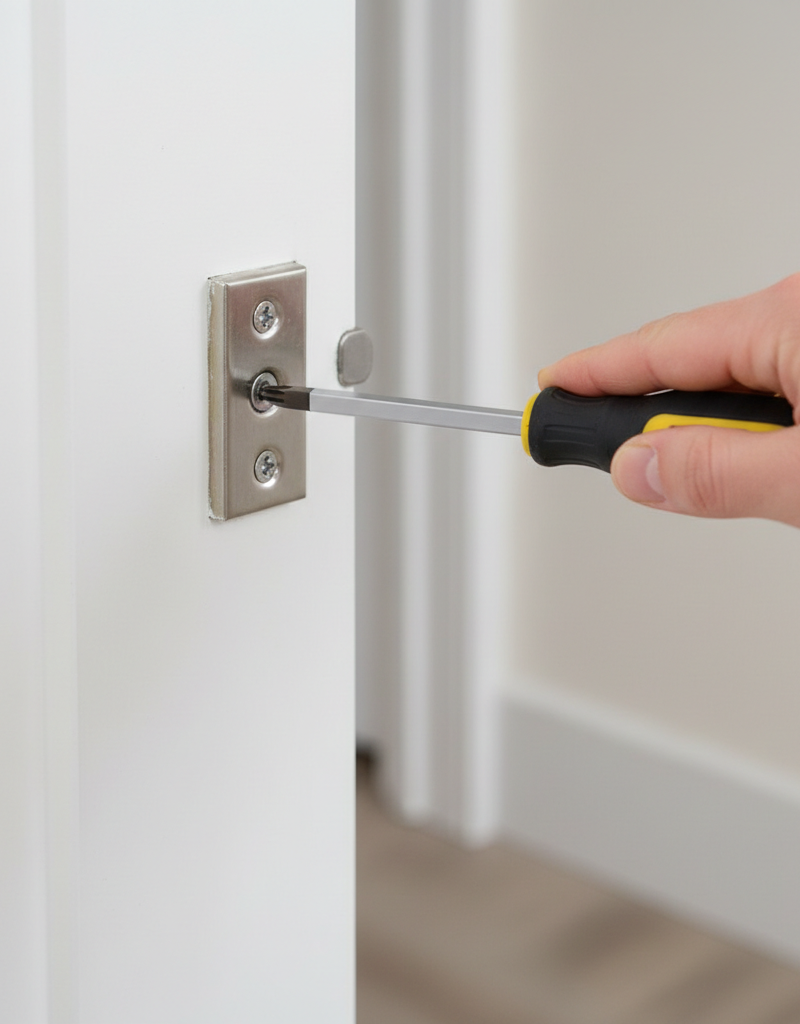
Adjust the Strike Plate — Enlarge or reposition the strike plate opening.
- If the door closes but the latch bolt doesn't fully engage or it's difficult to latch, the strike plate might be misaligned. Look for rub marks on the strike plate’s opening indicating where the latch bolt is hitting. Use a small metal file to slightly enlarge the opening in the direction needed. If the misalignment is significant, unscrew the strike plate, use a chisel to slightly enlarge the mortise (recess) in the jamb, and then move the strike plate. Fill old screw holes with wood filler or toothpicks if necessary before resecuring.
Common Causes
- Humidity and Moisture Absorption: Wood doors readily absorb moisture from the air, especially during humid seasons, causing the wood fibers to swell and the door to expand, leading it to bind against the frame.
- Loose Hinge Screws: Over time, the screws holding hinges to the door or frame can loosen, allowing the door to sag out of alignment and rub against the jamb or floor.
- Excessive Paint Buildup: Multiple layers of paint on the door edges or inside the door frame can gradually reduce the critical gap (reveal) needed for smooth operation, causing the door to stick.
- House Settling or Foundation Shifts: Minor shifts in your home's foundation or building structure can cause door frames to twist or rack, leading to misalignment and sticking doors.
- Worn Hinges: Old or heavily used hinges can become bent or worn, especially the hinge pin, leading to inconsistent door swing and binding.
- Improper Installation: If a door or its frame was not installed plumb and square from the start, it will always be prone to sticking issues.
Common Mistakes
- Ignoring Loose Hinges First: Many homeowners jump straight to planing the door, when often, simply tightening hinge screws can solve the problem. Always check hinges as your first diagnostic step.
- Planing Too Much Wood: Removing too much material from the door is irreversible. Always take small amounts, rehang the door, and check. It's better to repeat the process a few times than to remove too much.
- Planing Without Identifying the Exact Stick Point: Guessing where to plane can lead to an uneven door or still-sticking problems. Use a straightedge and look for rub marks to accurately pinpoint the contact area.
- Forgetting to Check for Paint Buildup: Paint accumulation is a deceptively common culprit. Overlooking it means other fixes might be temporary or ineffective.
- Using the Wrong Tools: Trying to force screws with the wrong size screwdriver or hacking at wood with an inappropriate tool can strip screws, damage the door, or injure yourself. Use the right tools for the job.
- Not Considering Seasonal Changes: If your door only sticks at certain times of the year, humidity is a strong indicator. Account for this before making permanent adjustments like planing.
Cost & Time Breakdown
| Task | DIY cost | Pro cost | Time |
|---|---|---|---|
| Tighten Hinge Screws | $0–$5 | N/A | 5–10 minutes |
| Remove Paint Buildup | $0–$10 | N/A | 10–20 minutes |
| Shim Hinges | $0–$5 | N/A | 15–30 minutes |
| Plane Door (DIY) | $0–$30 | $75–$150 | 30–90 minutes |
| Adjust Strike Plate | $0–$5 | N/A | 10–20 minutes |
| Replace Worn Hinges (DIY) | $10–$25 | $75–$150 + parts | 30–60 minutes |
Tips & Prevention
- Regular Hinge Checks: Periodically check and tighten all hinge screws on your interior doors, especially those in high-traffic areas. This prevents sagging before it becomes a problem.
- Proper Painting Technique: When painting doors, avoid thick coats on the edges. If necessary, lightly sand the door's edges before painting to prevent paint buildup in the reveal.
- Control Indoor Humidity: Using dehumidifiers in humid climates or during peak humidity seasons can help prevent wood doors from absorbing excess moisture and swelling.
- Inspect for Wear: Every few years, inspect your hinges for signs of wear, bending, or excessive play. Worn hinges can be replaced relatively inexpensively.
- Maintain Consistent Gaps: When installing new doors or frames, ensure consistent 1/8-inch gaps around all sides to allow for minor expansion and contraction.
- Lubricate Hinges: A small amount of lubricant (like spray silicone or a few drops of 3-in-1 oil) on hinge pins can ensure smooth operation and prevent minor sticking due to friction, though it won't solve structural problems.
When to Call a Professional
While most sticking door issues are good DIY projects, there are times when calling a professional carpenter or handyman is the wisest course of action. If, after attempting the basic fixes, your door continues to stick severely, or if you suspect the problem stems from a significant structural issue with your home's foundation or framing, it's time to get a professional evaluation. If you're uncomfortable using a plane or chisels, or if the door is an expensive, custom, or antique piece where damage would be costly, a pro can make precise adjustments. Additionally, if multiple doors in your home suddenly start sticking, it could indicate a more widespread issue like significant house settling, which warrants investigation by a structural engineer or experienced contractor, not just a door repair. A professional can quickly diagnose complex problems and perform repairs that maintain the door's integrity and aesthetics.
Related Articles
Keep troubleshooting with these hand-picked guides from FixlyGuide:
- The Surprising Reason Your Interior Door Sticks (It's Not Always Humidity) — Before you blame humidity, learn the common culprits behind a sticking interior door and how to fix them with simple DIY steps.
- The Secret Reason Your Interior Door Sticks (It's Not Always Humidity) — Before you grab a planer, discover the real culprits behind a sticking interior door and learn simple, effective fixes.
- The Secret Reason Your Interior Door Sticks (It's Not Always Humidity) — Before you blame humidity, learn the less obvious culprits behind a sticking interior door and how to fix it with simple steps.
- The Secret Reason Your Interior Door Sticks (It's Not Always Humidity) — Before you blame humidity, learn the true culprits behind a sticky interior door and how to fix them with simple DIY steps.
- The Secret Reason Your Interior Door Sticks (It's Not Always Humidity) — Discover the real reasons your interior door is sticking and how to implement simple, lasting fixes with common household tools.
- That Heavy Mirror? It Needs More Than Just a Nail — Stop guessing with drywall anchors; the physics of shear force and toggle bolt ratings are the secret to keeping your heavy mirror securely…
Get the print-ready PDF of this guide
A clean, ad-free, printable version you can keep on your phone or pin to the workshop wall. We'll also send occasional weekly tips matched to your home situation.
- Print-optimized layout
- Tools, materials & every step included
- Unsubscribe anytime
Recommended for DIYers & woodworkers
Sponsored
The Top 20 Tools for Workshops of Any Budget
No stationary machines or power tools required — plus 3 fundamental tools that can't be bought at any price.
Get the free guide
Ted's Woodworking — The #1 Woodworking Resource
Detailed instructions, dimensioned drawings, materials & cutting lists, and 3D schematics for every skill level.
See the plansSponsored: links above are affiliate links. FixlyGuide may earn a commission on qualifying purchases — at no extra cost to you.
Frequently asked questions
Why does my door sometimes only stick in summer?+
Doors often stick more in the summer due to increased humidity. Wood is hygroscopic, meaning it absorbs moisture from the air and swells. This expansion can cause the door to bind against the frame, especially if the reveals (gaps) are already tight.
Can new paint make a door stick?+
Yes, absolutely! While wet paint itself can cause temporary sticking, multiple layers of old paint on the door edges or inside the door frame can gradually reduce the crucial gap between the door and the frame, making the door physically wider or the opening narrower, leading to sticking.
How do I know if my house settling is causing the door to stick?+
If multiple doors in your home (especially on different floors or sides of the house) start sticking around the same time, or if you notice other signs like cracks in drywall or uneven floors, house settling might be the culprit. For minor shifts, door adjustments can help, but significant structural issues require a professional foundation inspection.
Is it better to plane the door or sand the door frame?+
Generally, it's better to plane or sand the door itself. The door is easier to remove and work on, and the frame is a structural part of your home. However, for minor paint buildup or very small adjustments, light sanding on the frame can be an option if the door itself is perfectly fine and not swelling.
What's the ideal gap around an interior door?+
The ideal gap, or reveal, around an interior door is typically about 1/8 inch (approximately the thickness of two quarters) on the top, hinge side, and latch side. There's usually a slightly larger gap at the bottom for clearance over flooring.


Discussion
Loading comments…